NZ - CoreXY Openbeam Build
Posted by RepRot
|
NZ - CoreXY Openbeam Build September 29, 2014 11:27PM |
Registered: 14 years ago Posts: 128 |
Hi,
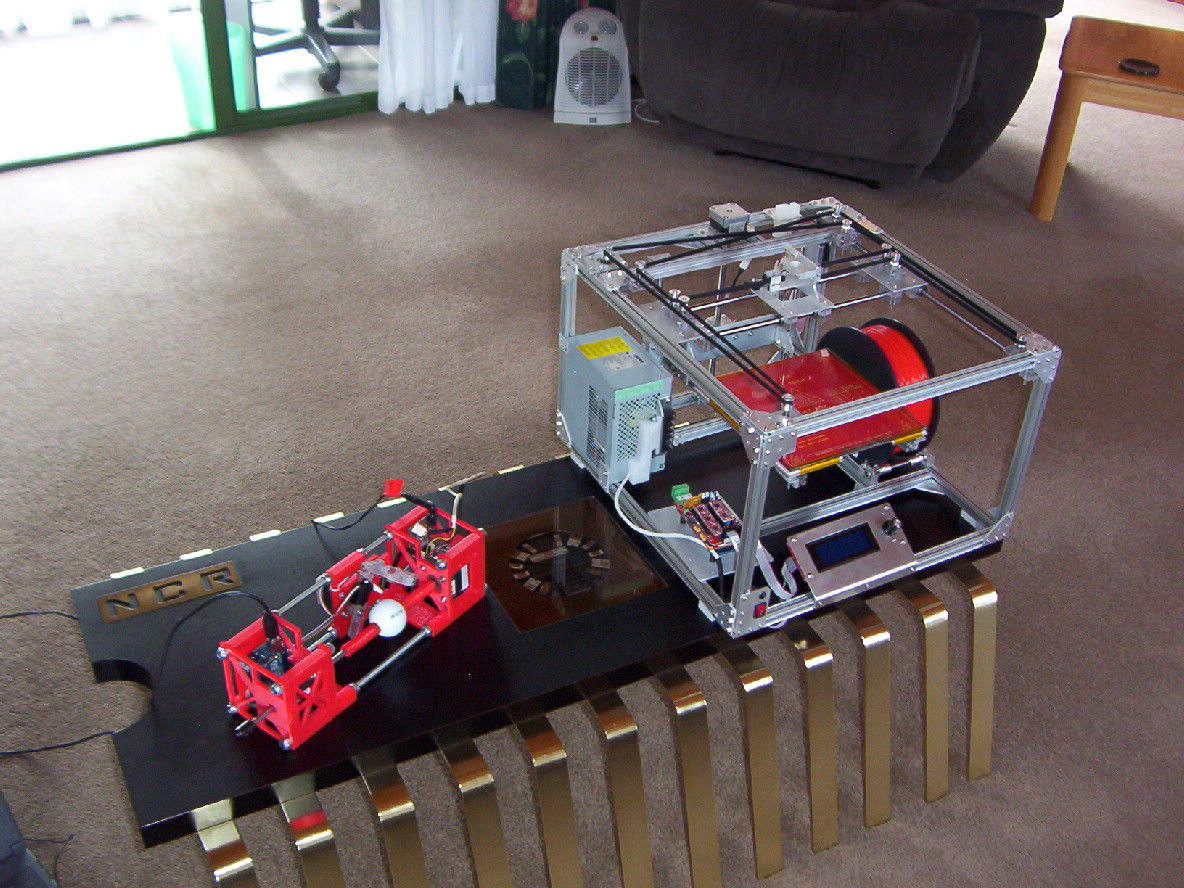
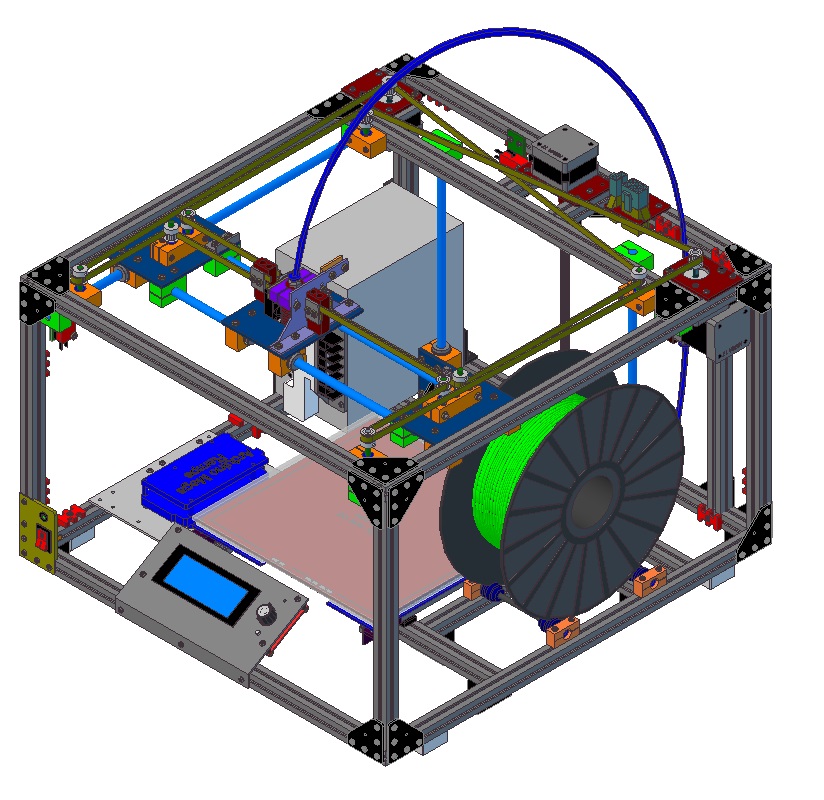
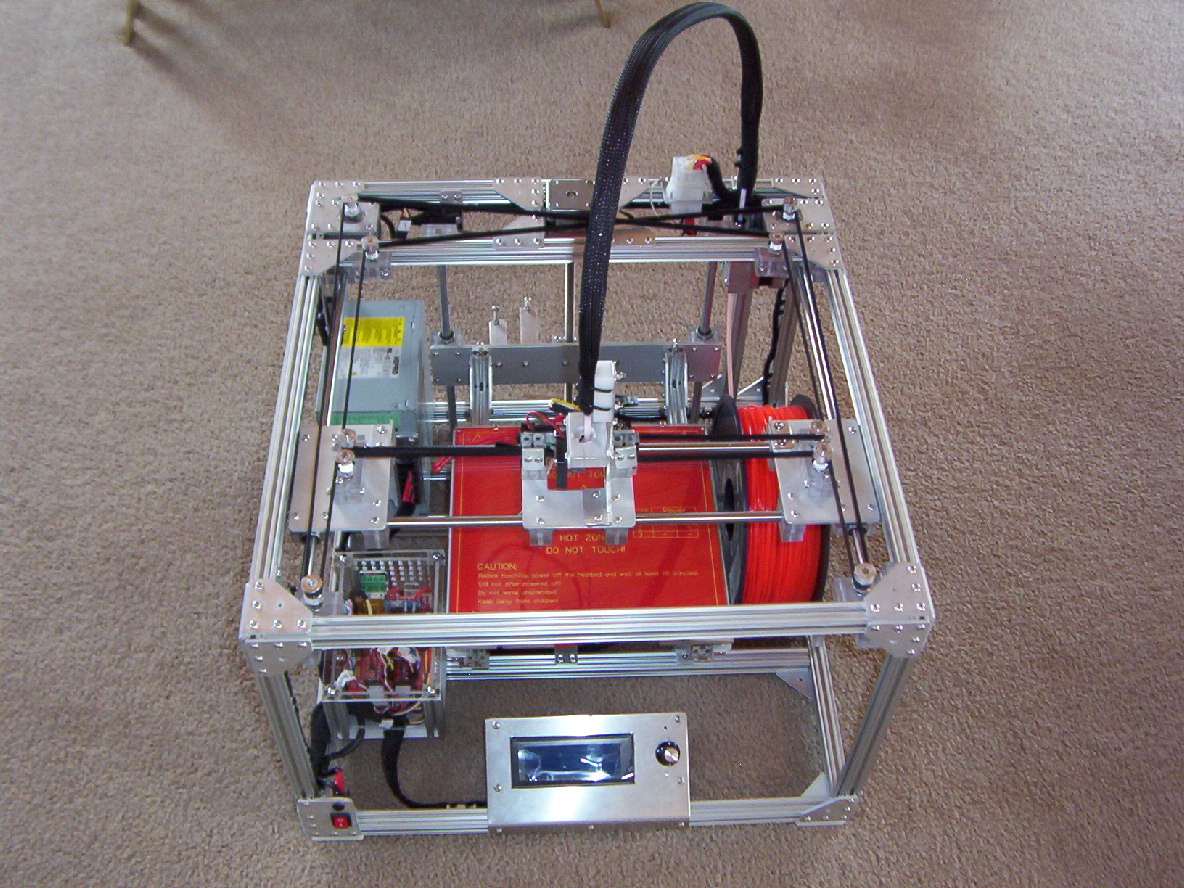
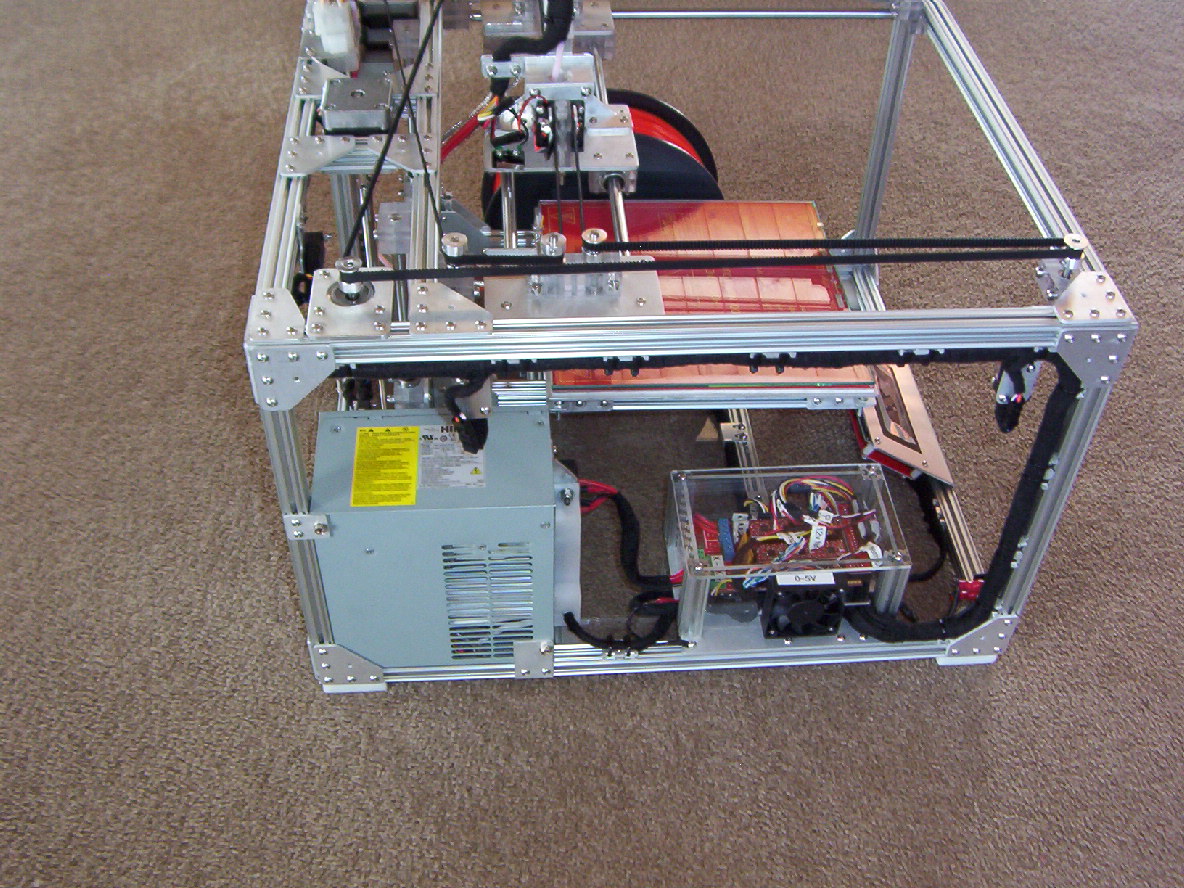
Some pictures of a CoreXY Openbeam I have designed and currently building in Rotorua, New Zealand.. A good few hours on the CAD program....
Still got to source a bulk lot of screws and nuts and a Bowden extruder head assembly. Then I will do the final assembly. (Currently using temporary screws and nuts. The nuts I had don't fit the Openbeam extrusions).
Still finishing the extruder motor assembly, need to drill and thread a couple of holes for the filament (1.75mm) . Will properly need to source a larger Nema17 motor than what I currently have.
Used my golf ball printer (eggbot) to test that the Z drive as the print platform is quite heavy. Using Nema17 (32mm long) Ex ATM money machine, seems to work good and doesn't slip.
Had the Openbeam corner brackets with a water jet cut out of 2mm Aluminium. I did a home anodising job to all the corner brackets and other Aluminium parts by using car battery sulphuric with a bench power supply.
All Pulleys are mounted with two small bearings 5x10x4 mm. Uses 11 standard 8mm linear bearings. All bearings blocks, linear shafts have been machined out of Polycarbonate.
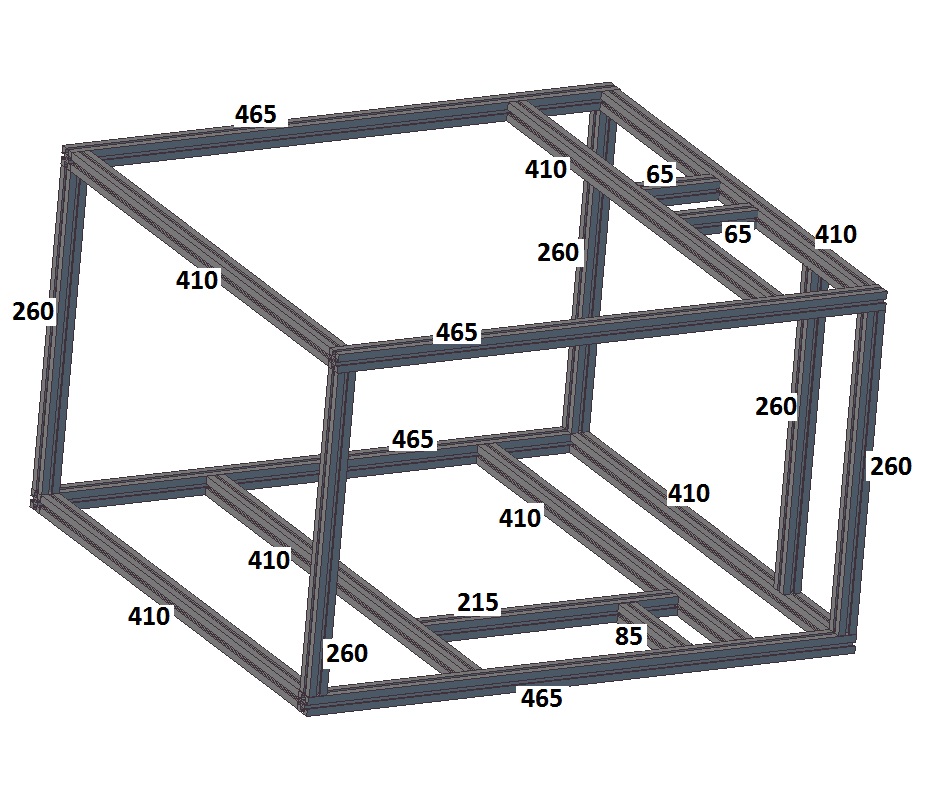
Using Openbeam extrusions makes alignment of the whole frame and pulley position very easy.
Using a standard modified ATX PC power supply. Have also allowed a +5volt output for a cooling fan as I am planning to have a cover over the Mega/ramps PCB's.
For the heated bed, I have used a aluminium plate with a 3mm ceramic pad and MK2 heater with a harden 4mm glass plate.. I would have liked 3mm but could only get 4mm. May make some changes to this design.
My main aim was to try and keep everything in the Openbeam box area except for the top area.
Have made some Aluminium pieces that can be screwed onto the Openbeam to enable cable ties to be used to keep the wiring tidy.
While it is sitting on a large IC, the print area should be 200mm x 200mm x 200mm. Print height may change subject to the head assembly I end up using.
Cheers
Some pictures of a CoreXY Openbeam I have designed and currently building in Rotorua, New Zealand.. A good few hours on the CAD program....
Still got to source a bulk lot of screws and nuts and a Bowden extruder head assembly. Then I will do the final assembly. (Currently using temporary screws and nuts. The nuts I had don't fit the Openbeam extrusions).
Still finishing the extruder motor assembly, need to drill and thread a couple of holes for the filament (1.75mm) . Will properly need to source a larger Nema17 motor than what I currently have.
Used my golf ball printer (eggbot) to test that the Z drive as the print platform is quite heavy. Using Nema17 (32mm long) Ex ATM money machine, seems to work good and doesn't slip.
Had the Openbeam corner brackets with a water jet cut out of 2mm Aluminium. I did a home anodising job to all the corner brackets and other Aluminium parts by using car battery sulphuric with a bench power supply.
All Pulleys are mounted with two small bearings 5x10x4 mm. Uses 11 standard 8mm linear bearings. All bearings blocks, linear shafts have been machined out of Polycarbonate.
Using Openbeam extrusions makes alignment of the whole frame and pulley position very easy.
Using a standard modified ATX PC power supply. Have also allowed a +5volt output for a cooling fan as I am planning to have a cover over the Mega/ramps PCB's.
For the heated bed, I have used a aluminium plate with a 3mm ceramic pad and MK2 heater with a harden 4mm glass plate.. I would have liked 3mm but could only get 4mm. May make some changes to this design.
My main aim was to try and keep everything in the Openbeam box area except for the top area.
Have made some Aluminium pieces that can be screwed onto the Openbeam to enable cable ties to be used to keep the wiring tidy.
While it is sitting on a large IC, the print area should be 200mm x 200mm x 200mm. Print height may change subject to the head assembly I end up using.
Cheers
Attachments:
open | download - CoreXY Openbeam-1.JPG (339.8 KB)
open | download - CoreXY Openbeam-2.JPG (323.6 KB)
open | download - CoreXY Openbeam-3.JPG (344.6 KB)
open | download - CoreXY Openbeam-4.JPG (319.2 KB)
open | download - Openbeam CoreXY Printer-.jpg (206.6 KB)
open | download - Frame.jpg (168.7 KB)
|
Re: NZ - CoreXY Openbeam Build October 01, 2014 05:10AM |
Registered: 11 years ago Posts: 72 |
|
Re: NZ - CoreXY Openbeam Build October 02, 2014 12:52AM |
Registered: 10 years ago Posts: 33 |
|
NZ - CoreXY Openbeam Build December 01, 2014 11:22PM |
Registered: 14 years ago Posts: 128 |
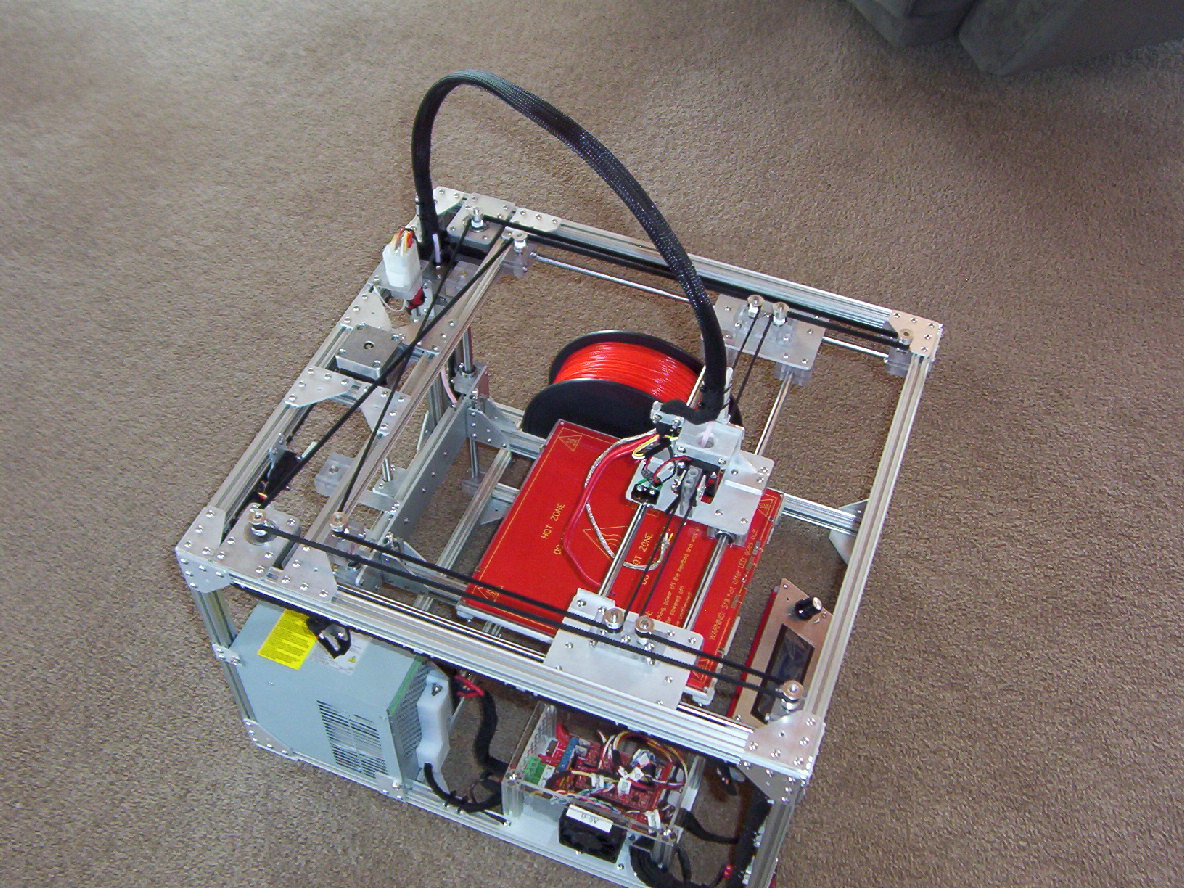
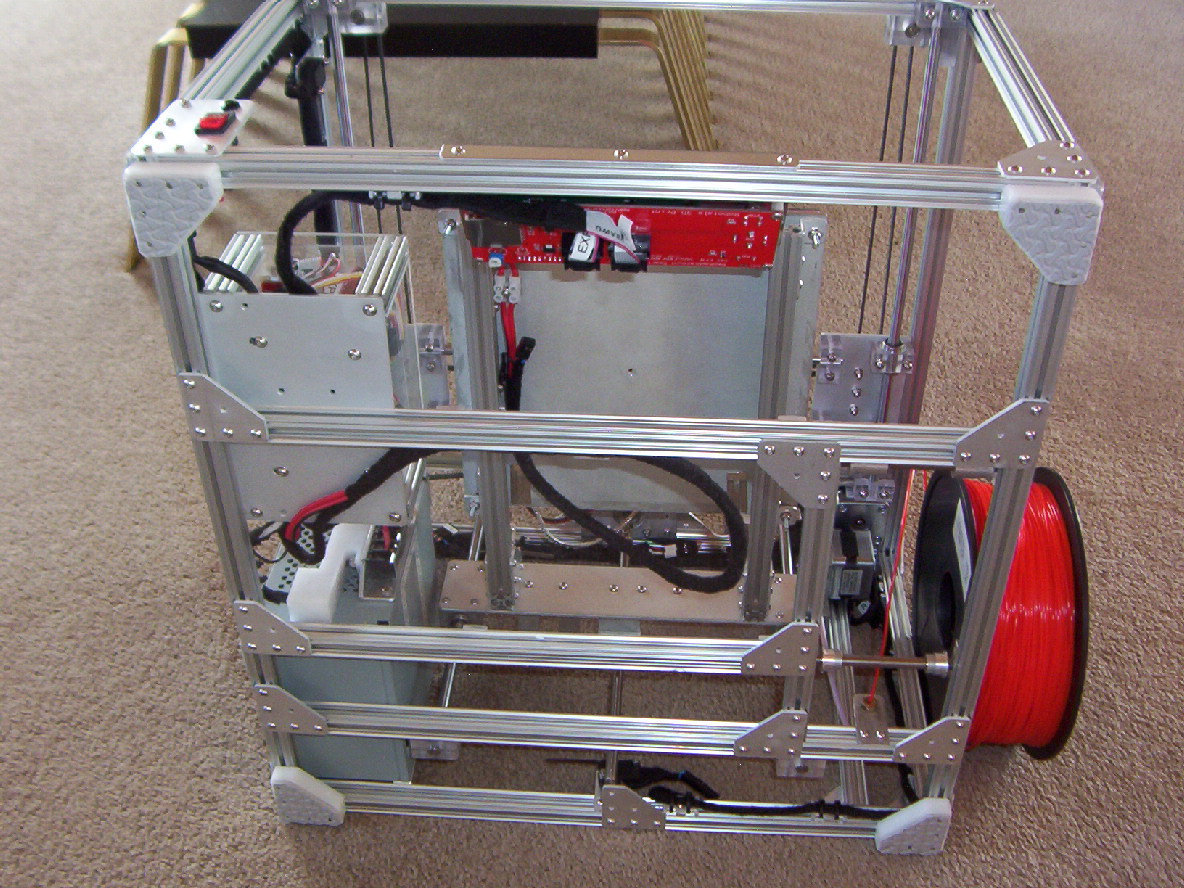
Some more pictures of my Openbeam CoreXY build..
Wiring now added with Min and Max switches on all axis. Still awaiting my hot head and bed thermistor to arrive.
I made a couple of changes with the mounting of the Z motor to allow the wiring harness to be better attached. Also it makes it easier to adjust the Z motor for better alignment.
Added two mechanical end stops on the Y axis, X axis doesn't need them, Z axis has a couple of screws that are end stops for Min position.
Mega and ramps have been housed in a box. Openbeam was used for the corner brackets and 2mm perspex sheets for the covers.
About to start testing that the ramps will work.
Cheers.
Edited 1 time(s). Last edit at 12/01/2014 11:26PM by RepRot.
Sorry, only registered users may post in this forum.