RepRap Guru i3 Printer Kit (Official Thread)
Posted by REPRAPGURU
|
RepRap Guru i3 Printer Kit (Official Thread) April 30, 2016 01:49PM |
Registered: 8 years ago Posts: 6 |
Hey Guys,
Nick from RepRapGuru here I wanted to setup an official thread for everyone to post all questions, tips, tricks, and suggestions about the printer kits we offer.
Stay tuned for new updates as we are about to release several new printers...
Nick
RepRapGuru, LLC
RepRapGuru.Com
Nick from RepRapGuru here I wanted to setup an official thread for everyone to post all questions, tips, tricks, and suggestions about the printer kits we offer.
Stay tuned for new updates as we are about to release several new printers...
Nick
RepRapGuru, LLC
RepRapGuru.Com
|
Re: RepRap Guru i3 Printer Kit (Official Thread) May 03, 2016 10:58PM |
Registered: 7 years ago Posts: 12 |
|
Re: RepRap Guru i3 Printer Kit (Official Thread) May 03, 2016 11:15PM |
Registered: 8 years ago Posts: 6 |
Try lowering your temp a few degrees in the slicer. It's pretty normal to have some plastic start to come out once at temp but alot of leakage is no good.
Some lift the Z axis and heat the hot end in manual mode to find the best melt temp of their roll by adjusting the temps watching for leakage then testing the extruder to make sure it will extrude at the desired temp.
Hope this helps.
Nick
Some lift the Z axis and heat the hot end in manual mode to find the best melt temp of their roll by adjusting the temps watching for leakage then testing the extruder to make sure it will extrude at the desired temp.
Hope this helps.
Nick
|
Re: RepRap Guru i3 Printer Kit (Official Thread) May 04, 2016 10:55AM |
Registered: 7 years ago Posts: 12 |
|
Re: RepRap Guru i3 Printer Kit (Official Thread) May 18, 2016 12:12AM |
Registered: 7 years ago Posts: 12 |
Alright one more thing that I need help with. I print no problem. Im encountering an issue when printing larger objects. The printer will roll the y axis to far back and will start grinding.
I adjusted the end stop and that did not fix the issue.
Figured it out! On the x-carriage one of the bolts was catching on the acrylic frame installed a shorter screw and problem solved!
Edited 4 time(s). Last edit at 05/19/2016 09:38AM by deadpool66.
I adjusted the end stop and that did not fix the issue.
Figured it out! On the x-carriage one of the bolts was catching on the acrylic frame installed a shorter screw and problem solved!
Edited 4 time(s). Last edit at 05/19/2016 09:38AM by deadpool66.
|
Re: RepRap Guru i3 Printer Kit (Official Thread) June 02, 2016 04:13PM |
Registered: 7 years ago Posts: 2 |
|
Re: RepRap Guru i3 Printer Kit (Official Thread) June 07, 2016 01:55PM |
Registered: 7 years ago Posts: 2 |
|
Re: RepRap Guru i3 Printer Kit (Official Thread) June 08, 2016 09:14AM |
Registered: 7 years ago Posts: 12 |
|
Re: RepRap Guru i3 Printer Kit (Official Thread) June 08, 2016 10:15PM |
Registered: 7 years ago Posts: 8 |
I was wondering if you could post a picture or a better description of how the Y-axis endstop is supposed to work. It can't go where pictured in the instructions, it hits the thumbscrew before the bearing holder. The assembly document says
A couple other comments for this thread:
1. I found that the X-axis smooth rods were too long, or the holes for them too shallow, to get the entire assembly to fit together square (Z threaded rods had to bow out). I cut off about 3/8" from each rod and now it works great.
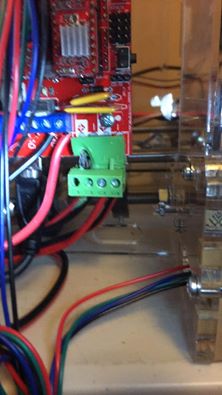
2. One of the soldered leads on the back of the RAMPS board (for the 12V plug) stabs the power connector on the arduino mega. I had to clip it closer to the board to make it fit.
I haven't finished assembly yet, but other than these minor issues everything has been going together great. Thanks!
But I can't figure out which way round to make it work. For now I've just moved it to the left side.Quote
Tip: You can flip the end stop over and and attach it on the other side of the end stop holder and put it under the hot plate to avoid potential
clashing of the leveling knob.
A couple other comments for this thread:
1. I found that the X-axis smooth rods were too long, or the holes for them too shallow, to get the entire assembly to fit together square (Z threaded rods had to bow out). I cut off about 3/8" from each rod and now it works great.
2. One of the soldered leads on the back of the RAMPS board (for the 12V plug) stabs the power connector on the arduino mega. I had to clip it closer to the board to make it fit.
I haven't finished assembly yet, but other than these minor issues everything has been going together great. Thanks!
|
Re: RepRap Guru i3 Printer Kit (Official Thread) June 09, 2016 09:11AM |
Registered: 8 years ago Posts: 6 |
the only real change in the firmware should be the value of the termistor.
Alot of customers change over using these files:
Carriage and Clamp for extruder
http://www.thingiverse.com/thing:547706
x-carriage file from here:
http://www.thingiverse.com/thing:119616
Compact Bowden for MK7 gear here:
http://www.thingiverse.com/thing:767951
Alot of customers change over using these files:
Carriage and Clamp for extruder
http://www.thingiverse.com/thing:547706
x-carriage file from here:
http://www.thingiverse.com/thing:119616
Compact Bowden for MK7 gear here:
http://www.thingiverse.com/thing:767951
|
Re: RepRap Guru i3 Printer Kit (Official Thread) June 09, 2016 09:12AM |
Registered: 8 years ago Posts: 6 |
Quote
deadpool66
Hey guys going to upgrade to an e3d v6 what changes need to made to the firmware?
the only real change in the firmware should be the value of the termistor.
Alot of customers change over using these files:
Carriage and Clamp for extruder
[www.thingiverse.com]
x-carriage file from here:
[www.thingiverse.com]
Compact Bowden for MK7 gear here:
[www.thingiverse.com]
|
Re: RepRap Guru i3 Printer Kit (Official Thread) June 11, 2016 11:48PM |
Registered: 7 years ago Posts: 2 |
|
Re: RepRap Guru i3 Printer Kit (Official Thread) June 12, 2016 08:39AM |
Registered: 7 years ago Posts: 8 |
Quote
ayryq
A couple other comments for this thread:
1. I found that the X-axis smooth rods were too long, or the holes for them too shallow, to get the entire assembly to fit together square (Z threaded rods had to bow out). I cut off about 3/8" from each rod and now it works great.
2. One of the soldered leads on the back of the RAMPS board (for the 12V plug) stabs the power connector on the arduino mega. I had to clip it closer to the board to make it fit.
Some more comments about this build:
-Following the instructions resulted in the stepper motors working backwards. There was a note in the instructions warning about this so it wasn't a problem.
-The screws on the hot-bed linear bearing holders (Y-axis) are too long and contact the acrylic, preventing full range of motion. Had to take apart and swap a shorter screw for the side with two bearings. Alternatively I could have notched the acrylic cross-piece to allow the screw to pass by.
-The power cord is way under-spec. When heating the extruder the whole length of the power cord gets hot. Every ATX cord in my bin is 18AWG. The included wire was 0.5mm² stranded, which is slightly smaller than 20AWG.
Eric
|
Re: RepRap Guru i3 Printer Kit (Official Thread) June 12, 2016 08:41AM |
Registered: 7 years ago Posts: 8 |
Quote
goaltend357
HELP!!!!!
My machine keeps crashing into the endstops and tries to continue movement. It is possible I missed something, but I believe I set everything up correctly in the configuration. This is my first electrionics project.
Probably your stepper motors are plugged in backwards. Or, less likely, you have repetier-host set to "MAX" instead of "MIN" in table dimensions so it's looking for the end-stop on the wrong side.
|
Re: RepRap Guru i3 Printer Kit (Official Thread) June 15, 2016 02:46PM |
Registered: 7 years ago Posts: 8 |
Quote
[email protected]
Ok, I just bought the RepRapDiscount Full Graphic Smart Controller. I have added
The U8glib library and added the following line to Configuration.h
#define REPRAP_DISCOUNT_FULL_GRAPHIC_SMART_CONTROLLER.
Still not working. Any ideas?
I have an idea. The copy of Marlin supplied by RepRapGuru is so old it does not support this LCD controller (even though RepRapGuru now sells the controller through their website). I bet if you got a current build of Marlin, then went through line-by-line to set it up the same as the REPRAP_GURU_MARLIN version, that it would work. I think just adding the line won't do it - you have to have a version of Marlin that already has the line, so you can uncomment it.
|
Re: RepRap Guru i3 Printer Kit (Official Thread) June 15, 2016 02:50PM |
Registered: 8 years ago Posts: 6 |
Quote
ayryq
Quote
[email protected]
Ok, I just bought the RepRapDiscount Full Graphic Smart Controller. I have added
The U8glib library and added the following line to Configuration.h
#define REPRAP_DISCOUNT_FULL_GRAPHIC_SMART_CONTROLLER.
Still not working. Any ideas?
I have an idea. The copy of Marlin supplied by RepRapGuru is so old it does not support this LCD controller (even though RepRapGuru now sells the controller through their website). I bet if you got a current build of Marlin, then went through line-by-line to set it up the same as the REPRAP_GURU_MARLIN version, that it would work. I think just adding the line won't do it - you have to have a version of Marlin that already has the line, so you can uncomment it.
This is true... we do have the new firmware please email service@reprapguru.com for it. we will be adding it to the website soon aswell
|
Re: RepRap Guru i3 Printer Kit (Official Thread) June 20, 2016 09:45AM |
Registered: 7 years ago Posts: 2 |
Quote
ayryq
Quote
goaltend357
HELP!!!!!
My machine keeps crashing into the endstops and tries to continue movement. It is possible I missed something, but I believe I set everything up correctly in the configuration. This is my first electrionics project.
Probably your stepper motors are plugged in backwards. Or, less likely, you have repetier-host set to "MAX" instead of "MIN" in table dimensions so it's looking for the end-stop on the wrong side.
Thanks, it was builder/user error.
|
Re: RepRap Guru i3 Printer Kit (Official Thread) July 19, 2016 12:47PM |
Registered: 7 years ago Posts: 4 |
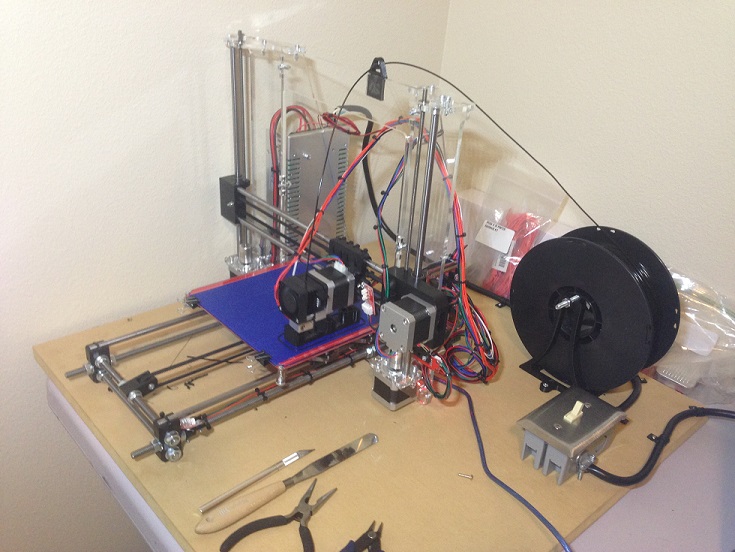
I recently purchased the REPRAP Guru Prusa i3 with MK8 head from Amazon. My son-in-law and I were finally able to get time to put this together this last weekend. We loaded both versions of the MARLIN that is on the website, but were not able to get any functions from the printer. We did download a test program and everything worked: all axis motors rotated (both directions), all LEDs cycled on and off, etc. When we retried the print program - nothing. The only thing that happened was the amber LED on the board came on for a moment then went off.
Any assistance with this would be appreciated. I did email customer service on Sunday and gave the address for the test program that we used.
Any assistance with this would be appreciated. I did email customer service on Sunday and gave the address for the test program that we used.
|
Re: RepRap Guru i3 Printer Kit (Official Thread) July 25, 2016 04:17PM |
Registered: 7 years ago Posts: 12 |
Hi guys,
Been having some anomalies with my printer the last few days reprap guru . It all started when I added a second fan and wired the e3d fan directly to the psu. I powered the fan down and I'm still having problems.
Now I'm having issue hitting target temp and now today I keep have sd card reading problems on my discount lcd.
Where should I start?
|
Re: RepRap Guru i3 Printer Kit (Official Thread) August 14, 2016 03:29PM |
Registered: 7 years ago Posts: 1 |
Finished building the printer! Is there Mac instructions to set up software for the printer? I was able to get firmware completed and looks like Repetier is connecting to the printer, but setup appears to be somewhat different. Windows should find driver automatically, but not sure what I should expect on the Mac.
|
Re: RepRap Guru i3 Printer Kit (Official Thread) August 19, 2016 08:45AM |
Registered: 7 years ago Posts: 5 |
Hello,
I purchased a reprapguru via amazon. Having lots of issue with this thing. Heatbed looks to be broken, it wont power up anymore, it did at one point. One of the step motors on the Z-Axis doesn't work constantly and seems to move backwards and forwards randomly and stalls randomly. The nuts that fit into the Xaxis housings often back out of the housing. The X-Axis Housing didn't allow for the chrome bars to fit all the way in. This originally caused the entire frame to bend and bow. I called REPRAPGURU and the individual told me to drill out the holes. I have done this, but it seems to still have issues. I did however get the chrome bars to slip in slightly better, but there is still and issue. Additionally all of this stress on the unit has caused the Z-Axis bearings to brake and the ball bearings have come out. I have used a magnet to collect the super tiny bearing parts up. The thermostat was broken on arrival, this was replaced. Also the power plug that came with it didn't match the American standard of color coding. Also the black corners on the frame that hold the y-axis base are not clean, and this causes issues with trying to level the heat bed. This REPRAPGURU is crap. I'm about to ask for my money back. I'm hoping I can get some help with this before I request my money back and go with a different company. I know there is a level of understanding and craftmenship that is needed to assemble these units, but the parts are junk to start with. Really need some help solving this issues. I was hoping to get this thing in some working order so I could at least print up upgrade and replacement parts. Although this is not possible with the printer in its current none working order. Specially with how the Z-Axis motor is behaving. I can post pictures and videos if needed. I'm willing to work with the company I purchased this from.
Update
1.) I fixed the heatbed. I pulled out the wires from the Adrino restriped the wires, then reconnected. I also soldered the wire better to the heat plate. So I'm considering that issue resolved. Still need to figure out the rest. I will post more if I get further resolution here.
2.) For the plug that went into the power supply and the wrong color coding on the wires. What I did to resolve is that I checked the conductivity using a multimeter on each prong to find the correct wire. I also looked up a schematice of a stand USA power socket. This allowed me to deduce which wire went to where. My colors on my wiring was Dark Blue, Red, and Light Blue.
3.) Wasn't listed here, but for others having issues with the LCD, I had to turn the Contrast Screw on the back to see the LCD. I didn't know about that when I set it up. It wasn't in the directions. So if anybody else is having issues with the RepRapGuru LCD screen adjustment. That is what I did. This wasn't broken, just couldn't find any resources for this, I just sort of figured it out watching this youtube video [www.youtube.com]
4.) Video of what I suspect to be a broken step motor out of the box. [www.youtube.com]
5.) Extra Bearings where provided. I was pleased to have the back ups. I swapped them out along the Z-Axis. RepRapGuru gives extra parts. So a big plus there.
Update 8/19/2016 8pm PST
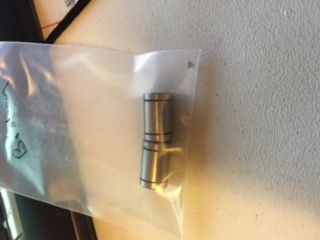
6.) Well, I spoke to somebody over at RRG, super nice guy, helped me to check the coils on my motor. Looked to be okay. We discussed some other options. I made adjustment, they where mechanical adjustments. I started to print a 20mm cube to see who it would go. It was going okay. And then the system turned off. It took me a few minutes to figure out what happened. Looks like a melt down. See burn_out picture. Back to step 1.
Update 8/20/2016 3pm PST
6.a)Ordering replacement Adrino. Thank you to "Ayryq" recommendation of using ferrules. I will absolutely being using these everywhere I can. See Burn_Out Picture and why it is a great idea. I'm going to have to wait for the new parts to come in to move forward. I'm really hoping that the Motors, Controllers, LCD and other electronic parts are okay. This was a hard less to learn. Well worth learning the less, will cost me the price of a nice meal at a store. Adrino is like $10. Hopefully that is the extent of money I need to spent on replacement parts.
6.b)Also installed Flange Bearings. They came with the kit. I wasn't aware of what these where until I spoke to RRG. The construction manual doesn't show these in the pictures. It only mentions that they are not included in with their kit. I'm hoping this will resolve the issue I'm having with the Motor shown in the youtube video.
Edited 8 time(s). Last edit at 08/20/2016 06:02PM by radwizard.
I purchased a reprapguru via amazon. Having lots of issue with this thing. Heatbed looks to be broken, it wont power up anymore, it did at one point. One of the step motors on the Z-Axis doesn't work constantly and seems to move backwards and forwards randomly and stalls randomly. The nuts that fit into the Xaxis housings often back out of the housing. The X-Axis Housing didn't allow for the chrome bars to fit all the way in. This originally caused the entire frame to bend and bow. I called REPRAPGURU and the individual told me to drill out the holes. I have done this, but it seems to still have issues. I did however get the chrome bars to slip in slightly better, but there is still and issue. Additionally all of this stress on the unit has caused the Z-Axis bearings to brake and the ball bearings have come out. I have used a magnet to collect the super tiny bearing parts up. The thermostat was broken on arrival, this was replaced. Also the power plug that came with it didn't match the American standard of color coding. Also the black corners on the frame that hold the y-axis base are not clean, and this causes issues with trying to level the heat bed. This REPRAPGURU is crap. I'm about to ask for my money back. I'm hoping I can get some help with this before I request my money back and go with a different company. I know there is a level of understanding and craftmenship that is needed to assemble these units, but the parts are junk to start with. Really need some help solving this issues. I was hoping to get this thing in some working order so I could at least print up upgrade and replacement parts. Although this is not possible with the printer in its current none working order. Specially with how the Z-Axis motor is behaving. I can post pictures and videos if needed. I'm willing to work with the company I purchased this from.
Update
1.) I fixed the heatbed. I pulled out the wires from the Adrino restriped the wires, then reconnected. I also soldered the wire better to the heat plate. So I'm considering that issue resolved. Still need to figure out the rest. I will post more if I get further resolution here.
2.) For the plug that went into the power supply and the wrong color coding on the wires. What I did to resolve is that I checked the conductivity using a multimeter on each prong to find the correct wire. I also looked up a schematice of a stand USA power socket. This allowed me to deduce which wire went to where. My colors on my wiring was Dark Blue, Red, and Light Blue.
3.) Wasn't listed here, but for others having issues with the LCD, I had to turn the Contrast Screw on the back to see the LCD. I didn't know about that when I set it up. It wasn't in the directions. So if anybody else is having issues with the RepRapGuru LCD screen adjustment. That is what I did. This wasn't broken, just couldn't find any resources for this, I just sort of figured it out watching this youtube video [www.youtube.com]
4.) Video of what I suspect to be a broken step motor out of the box. [www.youtube.com]
5.) Extra Bearings where provided. I was pleased to have the back ups. I swapped them out along the Z-Axis. RepRapGuru gives extra parts. So a big plus there.
Update 8/19/2016 8pm PST
6.) Well, I spoke to somebody over at RRG, super nice guy, helped me to check the coils on my motor. Looked to be okay. We discussed some other options. I made adjustment, they where mechanical adjustments. I started to print a 20mm cube to see who it would go. It was going okay. And then the system turned off. It took me a few minutes to figure out what happened. Looks like a melt down. See burn_out picture. Back to step 1.
Update 8/20/2016 3pm PST
6.a)Ordering replacement Adrino. Thank you to "Ayryq" recommendation of using ferrules. I will absolutely being using these everywhere I can. See Burn_Out Picture and why it is a great idea. I'm going to have to wait for the new parts to come in to move forward. I'm really hoping that the Motors, Controllers, LCD and other electronic parts are okay. This was a hard less to learn. Well worth learning the less, will cost me the price of a nice meal at a store. Adrino is like $10. Hopefully that is the extent of money I need to spent on replacement parts.
6.b)Also installed Flange Bearings. They came with the kit. I wasn't aware of what these where until I spoke to RRG. The construction manual doesn't show these in the pictures. It only mentions that they are not included in with their kit. I'm hoping this will resolve the issue I'm having with the Motor shown in the youtube video.
Edited 8 time(s). Last edit at 08/20/2016 06:02PM by radwizard.
|
Re: RepRap Guru i3 Printer Kit (Official Thread) August 19, 2016 08:46AM |
Registered: 7 years ago Posts: 5 |
|
Re: RepRap Guru i3 Printer Kit (Official Thread) August 19, 2016 08:46AM |
Registered: 7 years ago Posts: 5 |
Quote
deadpool66
Hi guys,
Been having some anomalies with my printer the last few days reprap guru . It all started when I added a second fan and wired the e3d fan directly to the psu. I powered the fan down and I'm still having problems.
Now I'm having issue hitting target temp and now today I keep have sd card reading problems on my discount lcd.
Where should I start?
May I have that address for testing? I'm have all sorts of issues with a Z-Axis motor.
|
Re: RepRap Guru i3 Printer Kit (Official Thread) August 19, 2016 09:51AM |
Registered: 7 years ago Posts: 8 |
I had the same problem. I solved it by cutting down the rods - probably better than drilling out the plastic parts. As shipped they were definitely too long, and I spent longer than I should have attempting to force the frame together before getting out the angle grinder.Quote
radwizard
The X-Axis Housing didn't allow for the chrome bars to fit all the way in. This originally caused the entire frame to bend and bow. I called REPRAPGURU and the individual told me to drill out the holes. I have done this, but it seems to still have issues. I did however get the chrome bars to slip in slightly better, but there is still and issue.
Me too. RRG quickly shipped me a few extra bearings, but I have to say I don't think there's too much wrong if a few of the tiny balls fall out. I think the problem is caused by twisting the rod in the bearing. The bearing is designed for ONLY linear motion.Quote
radwizard
Additionally all of this stress on the unit has caused the Z-Axis bearings to brake and the ball bearings have come out. I have used a magnet to collect the super tiny bearing parts up.
I bought some ferrules that definitely helped with the terminal hookups. Would recommend looking for "bootlace ferrules" for a lot of these connections. I've found a lot of other uses for them too, so it wasn't a complete waste of money. There are "things" on thingiverse, for various printers, that act as a strain relief for the heatbed wires. The constant motion in the Y axis causes that connection to fail. It might be possible to adapt one of them to the RRG kit. See here or here for exampleQuote
radwizard
1.) I fixed the heatbed. I pulled out the wires from the Adrino restriped the wires, then reconnected. I also soldered the wire better to the heat plate. So I'm considering that issue resolved. Still need to figure out the rest. I will post more if I get further resolution here.
Me too. For future reference, the "big" side of a polarized USA outlet is the negative, the smaller hole is the positive. The included cord is not polarized but you can see which prong goes where. BUT... the included cord is way undersized for the application. When using the heatbed my power cord got HOT. Throw it away, don't have a house fire, and buy a thicker cord from a hardware store. Included cord was smaller than 20AWG, I replaced with 16AWG.Quote
radwizard
2.) For the plug that went into the power supply and the wrong color coding on the wires. What I did to resolve is that I checked the conductivity using a multimeter on each prong to find the correct wire. I also looked up a schematice of a stand USA power socket. This allowed me to deduce which wire went to where. My colors on my wiring was Dark Blue, Red, and Light Blue.
You may be interested to read my review at amazon. I gave it four stars. I would definitely be frustrated with the motor problems you mentioned; I didn't have any of those. Did you adjust the stepper trim properly?
|
Re: RepRap Guru i3 Printer Kit (Official Thread) August 19, 2016 11:37AM |
Registered: 7 years ago Posts: 5 |
I don't have a grinder. That would be an investment. What did you cut your lengths to?Quote
ayryq
I had the same problem. I solved it by cutting down the rods - probably better than drilling out the plastic parts. As shipped they were definitely too long, and I spent longer than I should have attempting to force the frame together before getting
out the angle grinder.
I had 1 extra pair. My thermastor on the hot end was broken. They shipped a replacement out. I appreciated that.Quote
ayrq
Me too. RRG quickly shipped me a few extra bearings, but I have to say I don't think there's too much wrong if a few of the tiny balls fall out. I think the problem is caused by twisting the rod in the bearing. The bearing is designed for ONLY linear motion.
Quote
ayrq
I bought some ferrules that definitely helped with the terminal hookups. Would recommend looking for "bootlace ferrules" for a lot of these connections. I've found a lot of other uses for them too, so it wasn't a complete waste of money. There are "things" on thingiverse, for various printers, that act as a strain relief for the heatbed wires. The constant motion in the Y axis causes that connection to fail. It might be possible to adapt one of them to the RRG kit. See here or here for example
This is a great idea, I will do the same.
Quote
ayrq
You may be interested to read my review at amazon. I gave it four stars. I would definitely be frustrated with the motor problems you mentioned; I didn't have any of those. Did you adjust the stepper trim properly?
I'll read it shortly. I'm waiting to post to amazon... I respect what RRG is trying to do, so I'm hoping to get this thing up and running before I post. My Vref is set to .550 as required for the five controllers. I will say that in their favor, their response has been positive. So that is a HUGE plus and makes all the difference. The biggest issues is the Motor and the X-Axis housing. I really would rather get this thing working than ask for a refund. I really really want a 3D printer for some engineer projects coming up in my college.
Thank you for the response and ideas.
|
Re: RepRap Guru i3 Printer Kit (Official Thread) August 19, 2016 11:47AM |
Registered: 7 years ago Posts: 8 |
Quote
radwizard
I don't have a grinder. That would be an investment. What did you cut your lengths to?
Hacksaw would work equally well, maybe better (though slower), as would a dremel cut-off tool. Don't do it now that you've drilled out the plastic; I posted more for the benefit of future readers. I didn't measure too carefully—probably took 3/8" off each rod. They fit tightly enough that there's no "slop" even if they're a little short, and even if there was (i.e. bars sliding back and forth as the x-carriage moves) it shouldn't matter as the position is defined by the belt, not the rods.
I linked to the particular ferrules and tool I bought in my amazon review, and posted a picture of the finished product.
I agree that it makes all the difference that this is an American company that stands behind the product, and is reachable and helpful. That and the price

|
Re: RepRap Guru i3 Printer Kit (Official Thread) September 09, 2016 05:31PM |
Registered: 7 years ago Posts: 5 |
Quote
radwizard
Hello,
I purchased a reprapguru via amazon. Having lots of issue with this thing. Heatbed looks to be broken, it wont power up anymore, it did at one point. One of the step motors on the Z-Axis doesn't work constantly and seems to move backwards and forwards randomly and stalls randomly. The nuts that fit into the Xaxis housings often back out of the housing. The X-Axis Housing didn't allow for the chrome bars to fit all the way in. This originally caused the entire frame to bend and bow. I called REPRAPGURU and the individual told me to drill out the holes. I have done this, but it seems to still have issues. I did however get the chrome bars to slip in slightly better, but there is still and issue. Additionally all of this stress on the unit has caused the Z-Axis bearings to brake and the ball bearings have come out. I have used a magnet to collect the super tiny bearing parts up. The thermostat was broken on arrival, this was replaced. Also the power plug that came with it didn't match the American standard of color coding. Also the black corners on the frame that hold the y-axis base are not clean, and this causes issues with trying to level the heat bed. This REPRAPGURU is crap. I'm about to ask for my money back. I'm hoping I can get some help with this before I request my money back and go with a different company. I know there is a level of understanding and craftmenship that is needed to assemble these units, but the parts are junk to start with. Really need some help solving this issues. I was hoping to get this thing in some working order so I could at least print up upgrade and replacement parts. Although this is not possible with the printer in its current none working order. Specially with how the Z-Axis motor is behaving. I can post pictures and videos if needed. I'm willing to work with the company I purchased this from.
Update
1.) I fixed the heatbed. I pulled out the wires from the Adrino restriped the wires, then reconnected. I also soldered the wire better to the heat plate. So I'm considering that issue resolved. Still need to figure out the rest. I will post more if I get further resolution here.
2.) For the plug that went into the power supply and the wrong color coding on the wires. What I did to resolve is that I checked the conductivity using a multimeter on each prong to find the correct wire. I also looked up a schematice of a stand USA power socket. This allowed me to deduce which wire went to where. My colors on my wiring was Dark Blue, Red, and Light Blue.
3.) Wasn't listed here, but for others having issues with the LCD, I had to turn the Contrast Screw on the back to see the LCD. I didn't know about that when I set it up. It wasn't in the directions. So if anybody else is having issues with the RepRapGuru LCD screen adjustment. That is what I did. This wasn't broken, just couldn't find any resources for this, I just sort of figured it out watching this youtube video [www.youtube.com]
4.) Video of what I suspect to be a broken step motor out of the box. [www.youtube.com]
5.) Extra Bearings where provided. I was pleased to have the back ups. I swapped them out along the Z-Axis. RepRapGuru gives extra parts. So a big plus there.
Update 8/19/2016 8pm PST
6.) Well, I spoke to somebody over at RRG, super nice guy, helped me to check the coils on my motor. Looked to be okay. We discussed some other options. I made adjustment, they where mechanical adjustments. I started to print a 20mm cube to see who it would go. It was going okay. And then the system turned off. It took me a few minutes to figure out what happened. Looks like a melt down. See burn_out picture. Back to step 1.
Update 8/20/2016 3pm PST
6.a)Ordering replacement Adrino. Thank you to "Ayryq" recommendation of using ferrules. I will absolutely being using these everywhere I can. See Burn_Out Picture and why it is a great idea. I'm going to have to wait for the new parts to come in to move forward. I'm really hoping that the Motors, Controllers, LCD and other electronic parts are okay. This was a hard less to learn. Well worth learning the less, will cost me the price of a nice meal at a store. Adrino is like $10. Hopefully that is the extent of money I need to spent on replacement parts.
6.b)Also installed Flange Bearings. They came with the kit. I wasn't aware of what these where until I spoke to RRG. The construction manual doesn't show these in the pictures. It only mentions that they are not included in with their kit. I'm hoping this will resolve the issue I'm having with the Motor shown in the youtube video.
Update 9/9/2016 2:31PM PST
I have received and used the bootlace Ayryq recommended. This indeed helps to disconnect and reconnect the wires. That has been a huge help. Mostly because I'm having to replace parts.
I reordered a ramps board after the melt down, and this did not solve my issue. In fact the Adruino can no longer communicate with my PC. So I turned around and reordered another kit for 3D printing, but the Adruino Mega 2560 is a generic unit. So now I have a replacement RAMPS Board, (this is my 3rd) all new controllers (5 in total), and the generic Adruino 2560.
Will post more updates soon as I can. I'm trying hard to keep cool and get this printer up and running. I think honestly at this point, I could have purchased from Amazon or Ebay a pre-made unit for cheaper. On the other hand, I would not have learned as much as I have already. Not fully sure how this knowledge will help me in the future, but I guess I will have to wait and see. Fingers Crossed, here goes.
Update 9/9/2016 4:19PM PST
Was able to update the Generic Adruino and used the software to communicate with the new system.
Was able to print a 20mmx20mmx20mm test cube.
Next issue to over come is the heating/printing plate. The screws are too long and often hit the frame and the stop switch. There is one way to get the screws not to hit the frame or the end stop, although this is not a permanent solution. The bottom 4 corners of the y-axis frame has issues on one of the corners. The chrome bars fit oddly into at least one of the corner feet. My guess is that I can maybe switch/trade places with a front corner.
I think for sure I need to find shorter screws for the heat/plate spring adjustment. This back screw is the one that keeps hitting the frame and the stop switch. Also because of this ongoing issue, my printing plate is not level, and causes terrible prints. More calibration is needed. I will continue to post until I get my Printer up and running correctly, if possible.
Edited 1 time(s). Last edit at 09/09/2016 07:26PM by radwizard.
|
Re: RepRap Guru i3 Printer Kit (Official Thread) September 09, 2016 05:50PM |
Registered: 7 years ago Posts: 8 |
I should have updated that I have installed the SevenSwitch I purchased from [www.reprap-diy.com] (and shipped from Germany). If you're handy you could make one. It basically offloads the high-current switching of the heatbed to a separate board instead of through the RAMPS. It was easy to install with some old computer hookup wires. I had to change one number in the firmware so that one of the "servo" pins would control the heated bed. And now my overheating problems have completely disappeared. I had been using a 10" desk fan pointed directly at the RAMPS to keep it from melting; now I don't even need so much as a small PC fan.
Also I designed a mount for the SevenSwitch to attach it to the threaded rod in back of the heated bed, it's found at http://www.thingiverse.com/thing:1677840 - there's some pictures there as well that show where I put it.
If things are working but you're having overheating problems I would suggest trying some prints on a cold bed with painter's tape, using PLA. The heated bed is helpful but not necessary for PLA.
All the extras keep adding to the price of this thing, though it started lower than most.
|
Re: RepRap Guru i3 Printer Kit (Official Thread) October 05, 2016 06:57PM |
Registered: 7 years ago Posts: 1 |
I've been happy with mine, so far. I hit many of the same snags during assembly as the rest of the posters here but none were very difficult to sort out. I did upgrade the power cord to a 16 AWG as suggested here, and wired in a switch.
|
Re: RepRap Guru i3 Printer Kit (Official Thread) October 11, 2016 06:18PM |
Registered: 7 years ago Posts: 1 |
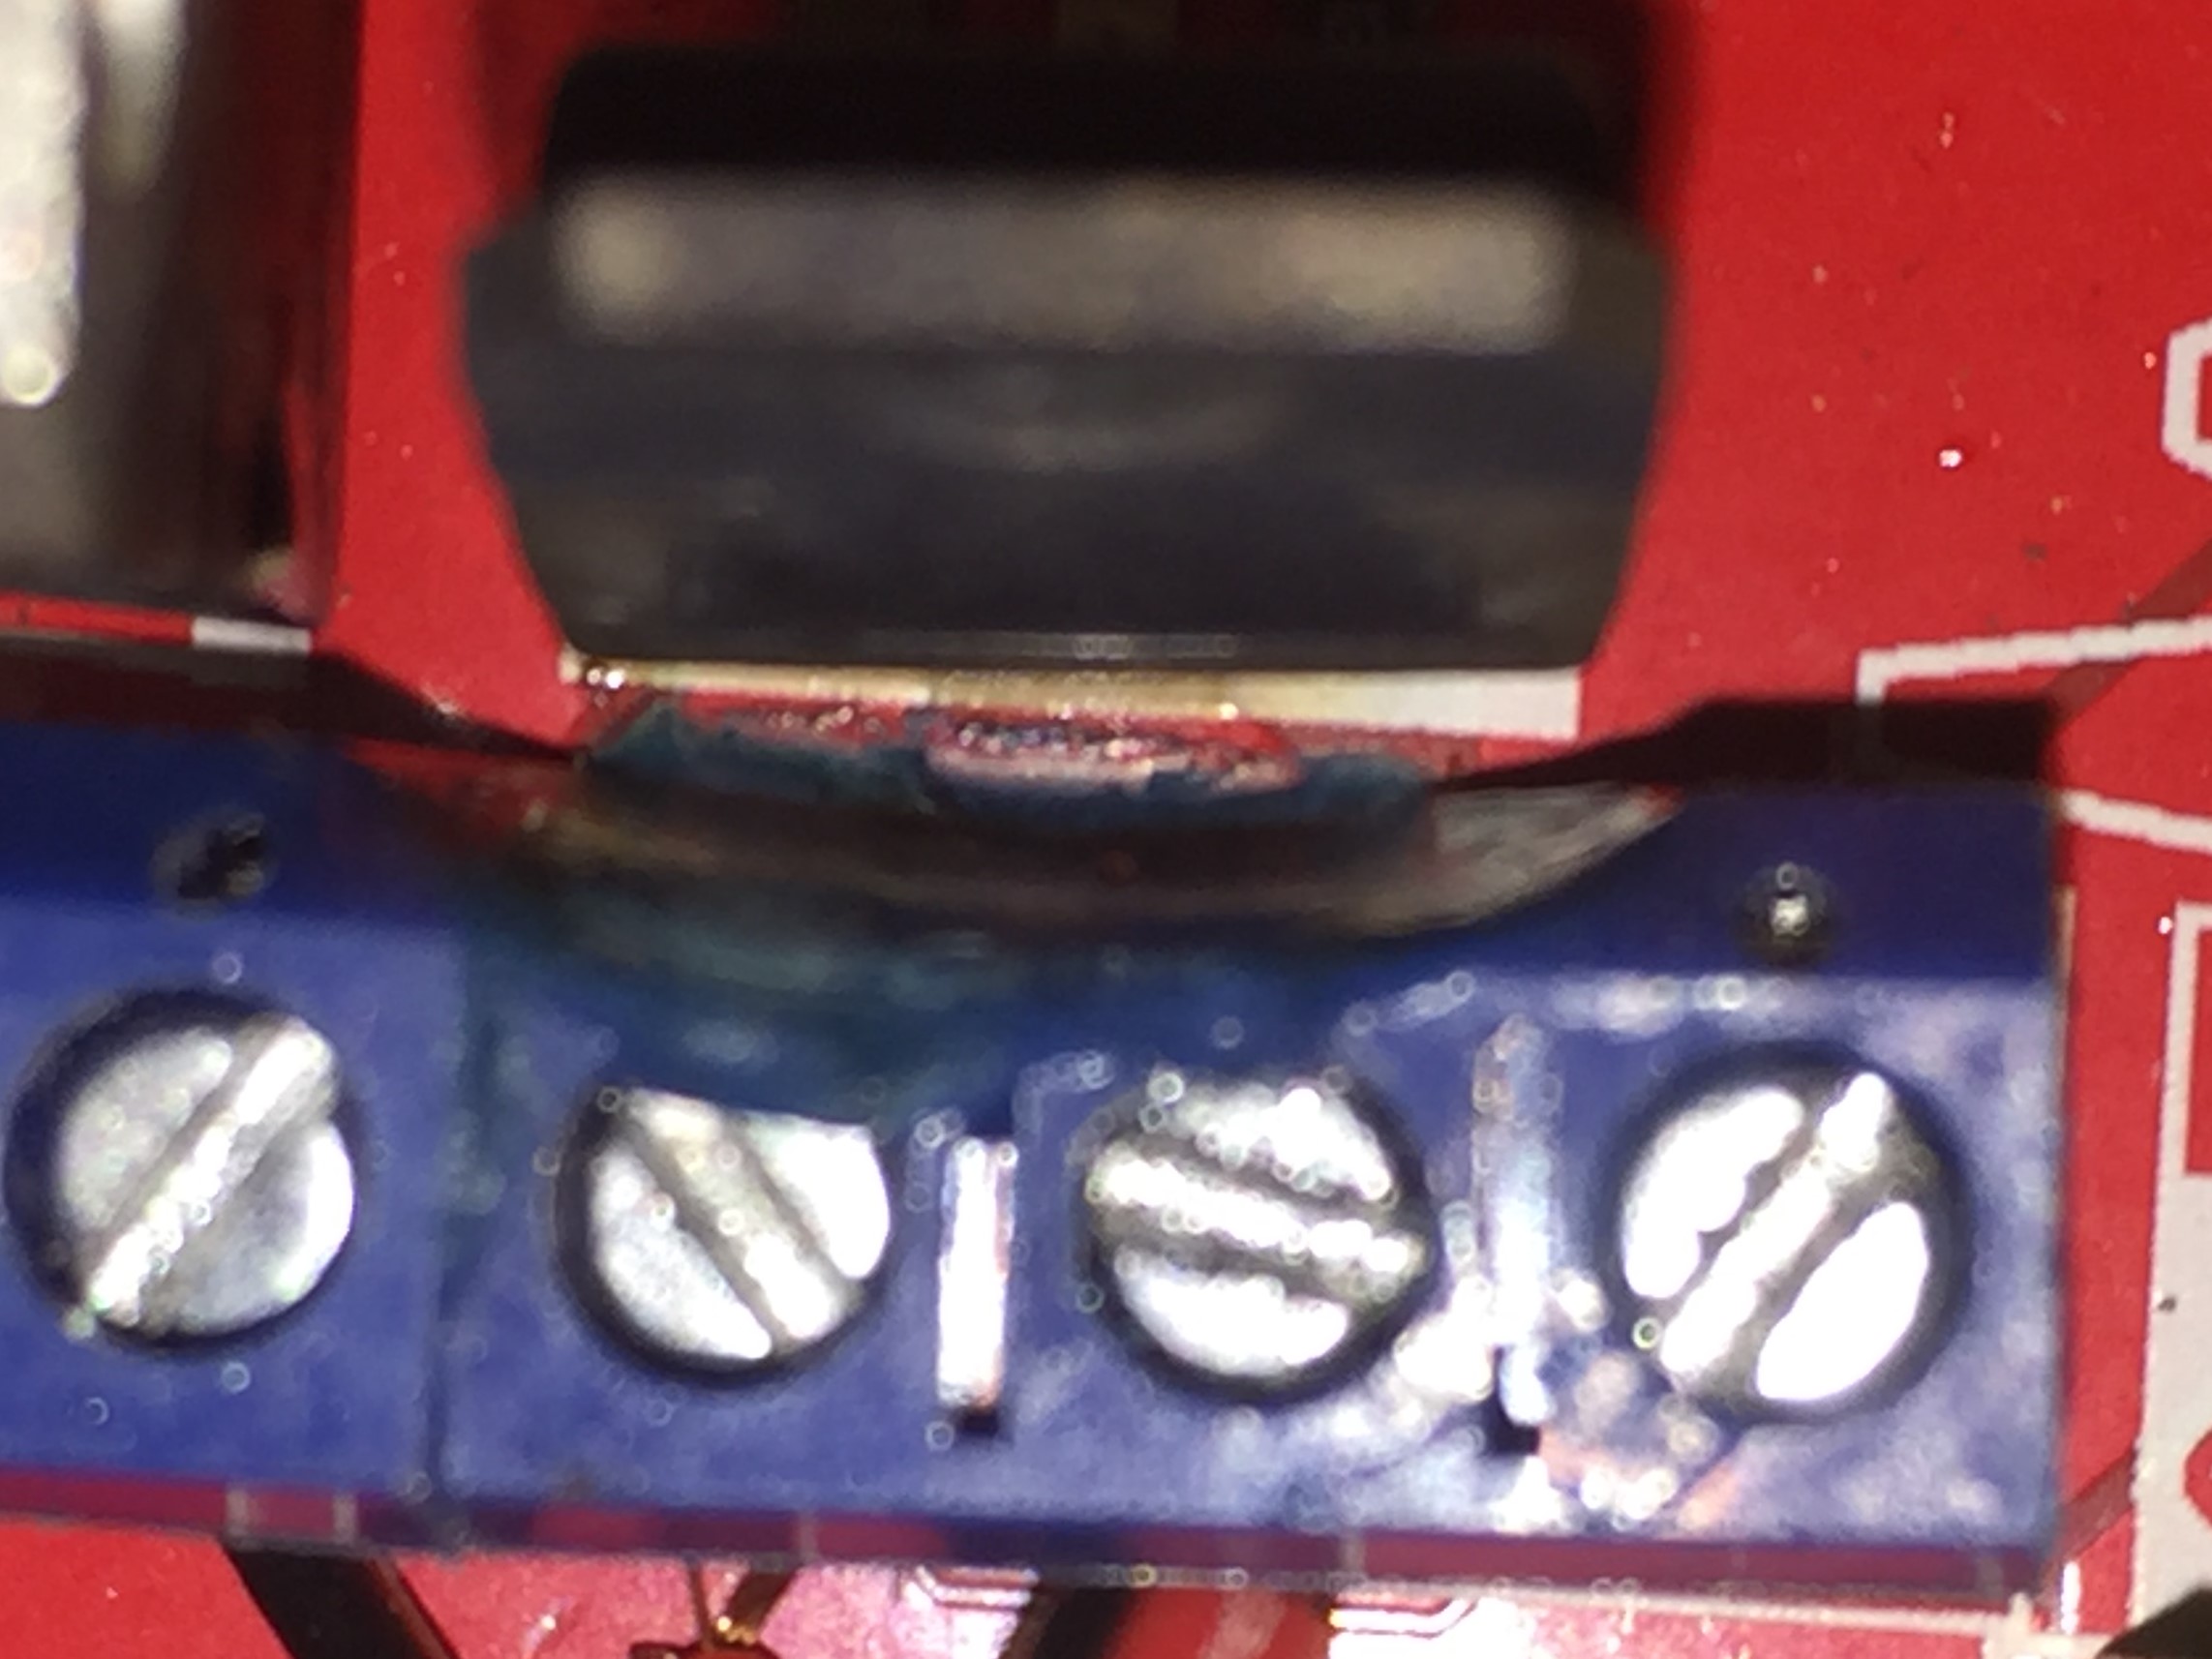
My heated bed has been overheating-- as soon as I plug in the printer it starts heating up and doesn't stop until I unplug it. I had it for a few weeks before this started. Any ideas what it could be?
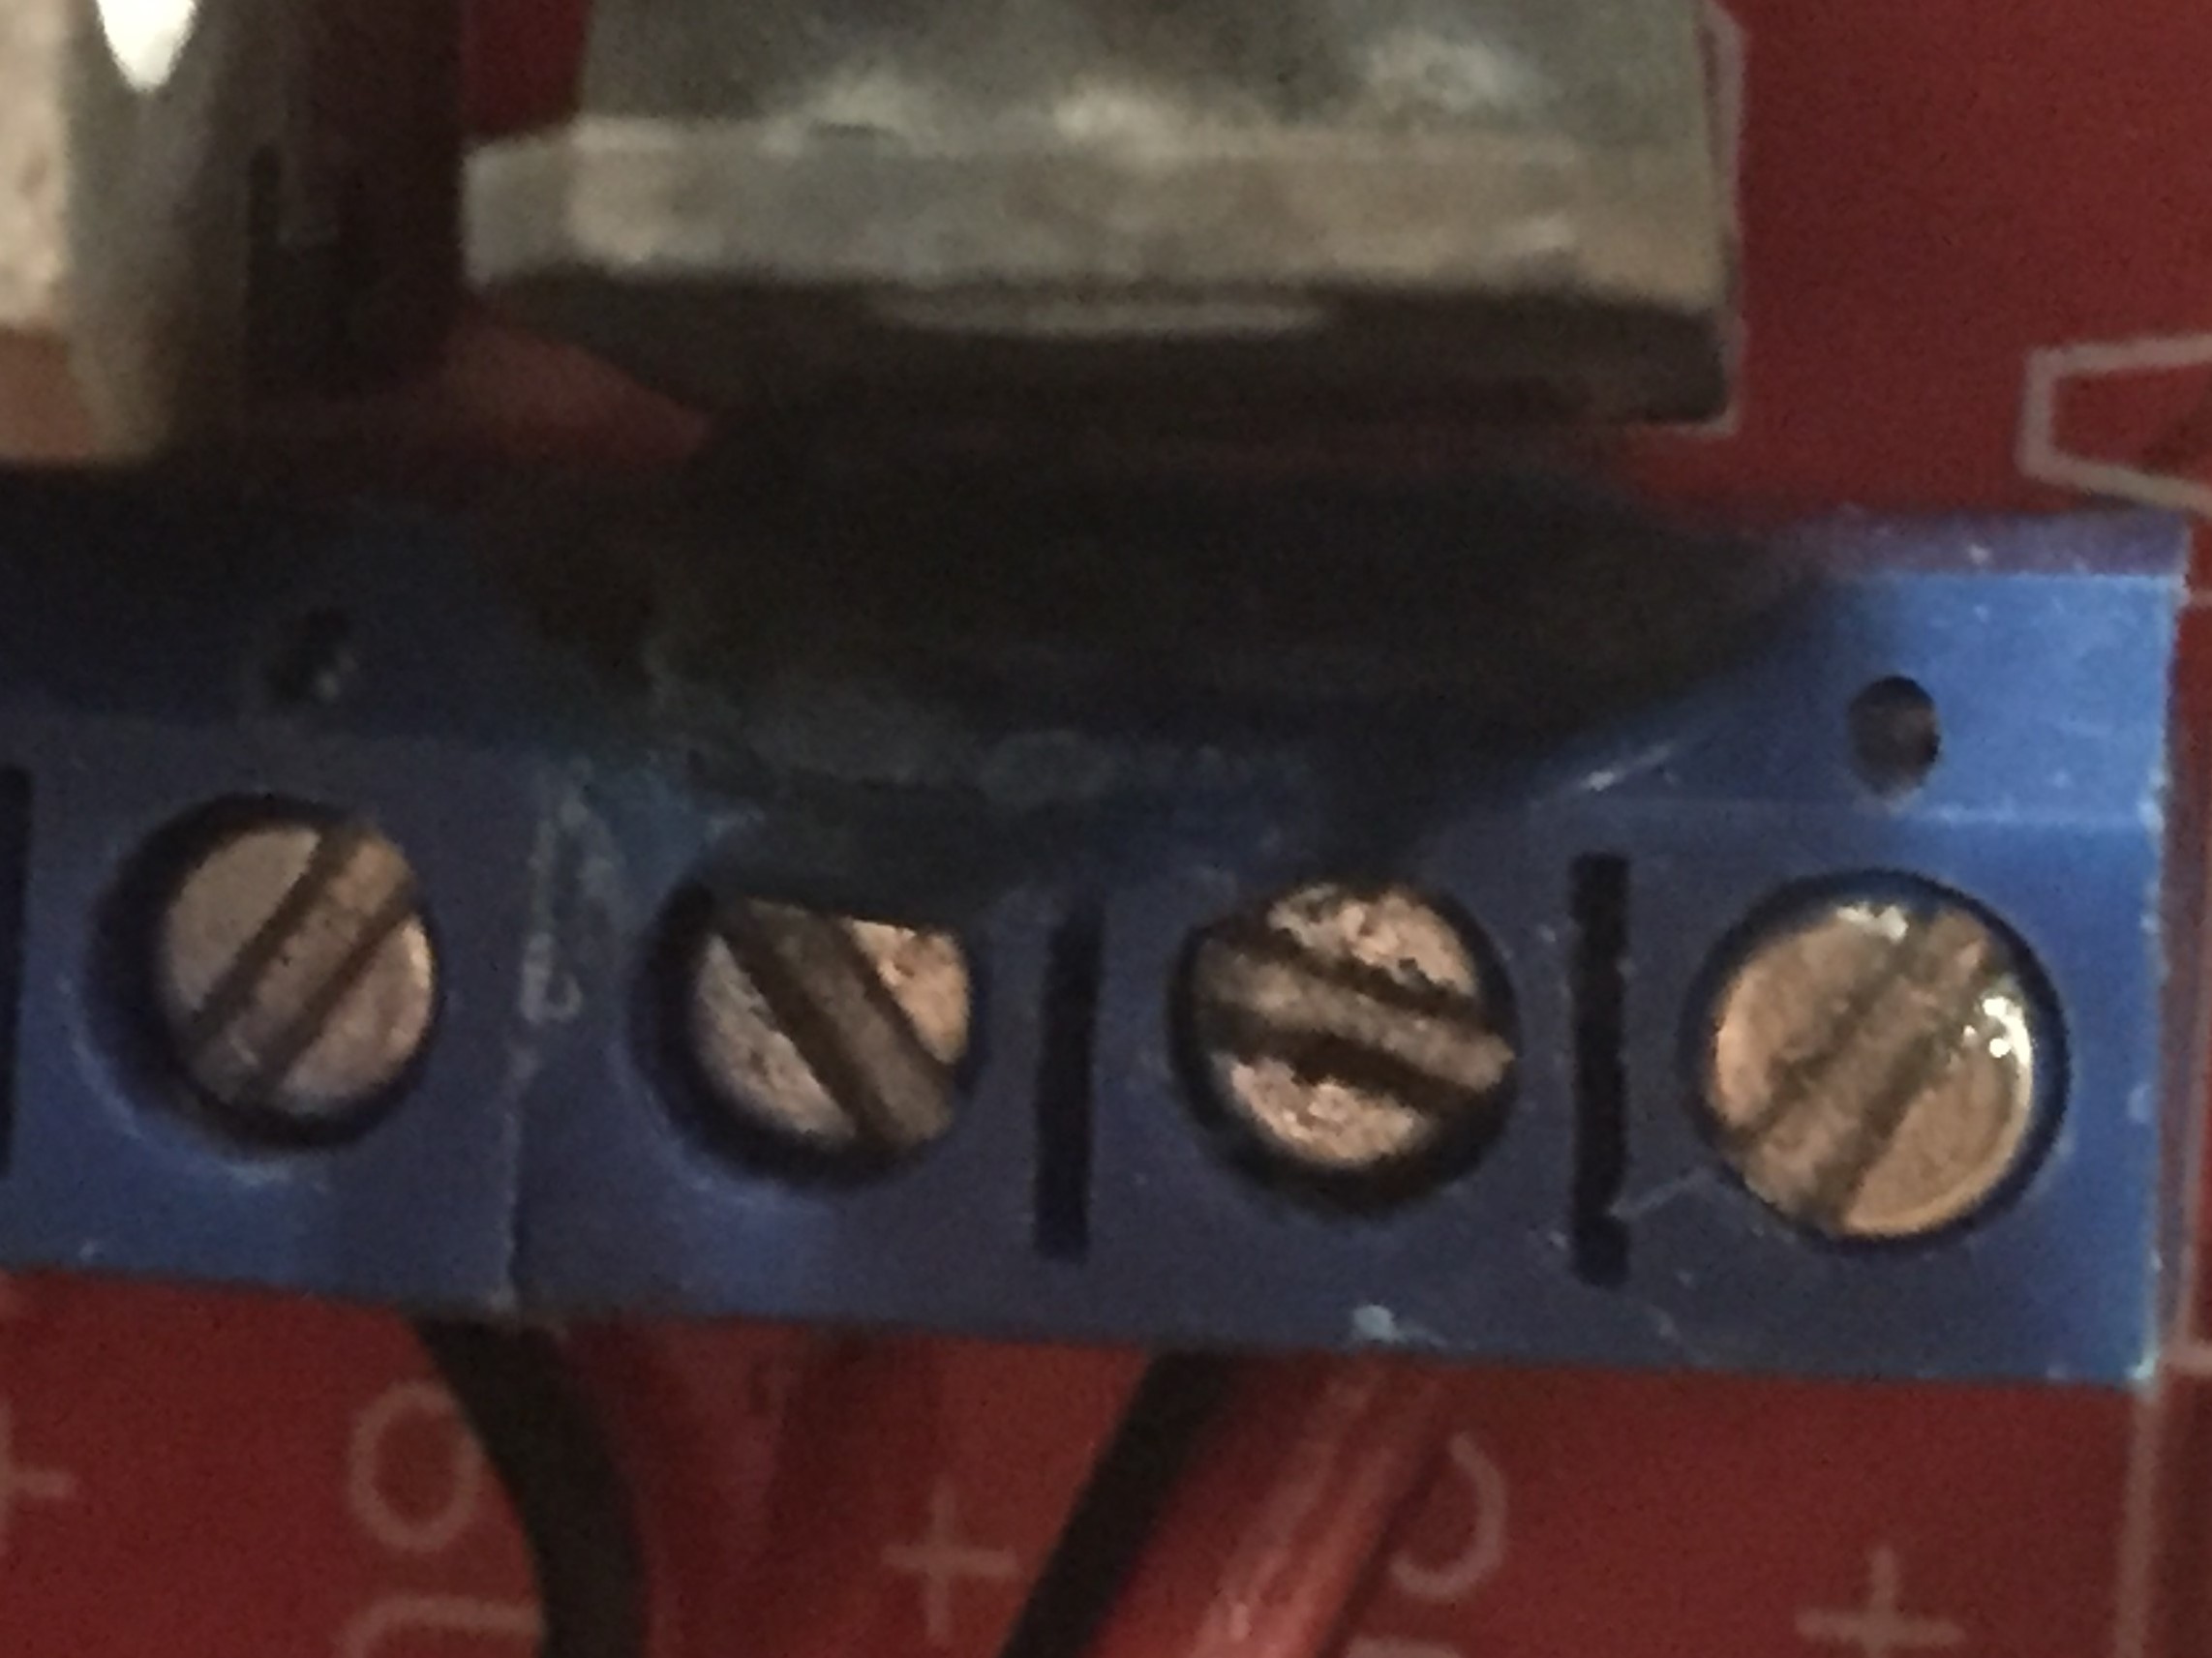
Possibly related: the transistor above the row of six connectors on the control board seems to have overheated and melted the connectors a tiny bit (see pictures).
Possibly related: the transistor above the row of six connectors on the control board seems to have overheated and melted the connectors a tiny bit (see pictures).

Sorry, only registered users may post in this forum.