My Replikeo Prusa i3 Rework Build
Posted by Trike
|
My Replikeo Prusa i3 Rework Build April 24, 2014 02:20AM |
Registered: 10 years ago Posts: 49 |
I just got my Replikeo Aluminum i3 kit. Not bad. SAL shipping took two weeks to get to Washington state. The package looked it went through hell and back. I started taking inventory to see if anything got damaged. Admittedly I was a little apprehensive from ordering, because there are no reviews of this vendor. Since the design is based off the BOM listed on reprap and not a modified i3 design, I felt I could get support through here with the large user base. My first initial impressions of the kit are very good. There were only 4 parts damaged. The glass bed, X end idler, y idler, and fan duct. I have already contacted Replikeo about the received package condition and damaged parts. They responded right away and will be sending me replacement parts today. They also said they're going to beef up the packaging for future orders. Instead of a glass bed, they're going to send me a 1mm carbon plate. They said they're having good luck with it. So far, after sales support has been excellent. It'll probably take another two weeks to get it. Once I get some time, I'll start the build. I already purchased a E3D hotend as a first upgrade and I'll use the J-head as a backup or use it as a second head later on.
This is my first 3D printer, and I researched the reworked i3 with alum. frame and priced parts by myself. Even after the shipping cost, I just couldn't beat Replikeo's price. I waffled between this and the i3xl from diytechshop. I ended preferring this.
Since this is my first printer, I'm not sure what a "good" print looks like. I noticed some slight separation on some parts, but nothing a little CA can't fix.
Here are some pics:


|
Re: My Replikeo Prusa i3 Rework Build April 24, 2014 03:37PM |
Registered: 10 years ago Posts: 122 |
|
Re: My Replikeo Prusa i3 Rework Build April 24, 2014 09:17PM |
Registered: 10 years ago Posts: 34 |
|
Re: My Replikeo Prusa i3 Rework Build April 25, 2014 04:46PM |
Registered: 10 years ago Posts: 49 |
Got a little bit done yesterday and finished the Y axis assembly. I used some ABS cement on the Y-Idler to fix some separation due to shipping damage. It seems to be holding up ok. The bearing did fit a little tight in the Y-idler, I decided against sanding down the idler to make the bearing fit perfectly. I don't think it'll become an issue. I also cleaned the smooth rods. They didn't feel very "smooth" to the touch. I used Never Dull to clean/polish them. Lots of gunk came off. It's night and day difference in terms of smoothness.
Now that i'm onto the X-axis assembly, I have to see if I can repair the X-End Idler. At least until the replacement shows up. I will try CA on the very small damaged pieces, and ABS cement on the larger ones.
Overall, parts are fitting and haven't ran into anything major yet. I only have one minor complaint, the screws are all countersink. If not careful when tightening a screw into a printed part without a washer, I can see the part splitting. If you use a washer, then the screw head sits slightly elevated because of the countersink.
I was going to post pics. But I was trying to fix my gallery software this morning, and while running a maintenance task, it corrupted the database. I was going to attempt to reinstall it, but once I renamed the folder with an extension on it, the folder disappeared. I have a ticket open with them right now. I'm hoping I didn't lose all my pictures.
I'll get some pics up once I figure out what happened.
|
Re: My Replikeo Prusa i3 Rework Build April 25, 2014 09:38PM |
Registered: 10 years ago Posts: 34 |
|
Re: My Replikeo Prusa i3 Rework Build April 28, 2014 03:59AM |
Registered: 11 years ago Posts: 548 |
|
Re: My Replikeo Prusa i3 Rework Build April 28, 2014 05:51AM |
Registered: 10 years ago Posts: 19 |
Specifications about stepper motors are available here :
http://www.replikeo.com/en/3d-printer/stepper-motor-nema-17
Kind regards
Replikeo Team
www.replikeo.com
http://www.replikeo.com/en/3d-printer/stepper-motor-nema-17
Kind regards
Replikeo Team
www.replikeo.com
|
Re: My Replikeo Prusa i3 Rework Build April 28, 2014 12:44PM |
Registered: 10 years ago Posts: 49 |
I have most of the printer completed now. The build went really smooth until I got to the electronics. I followed precautions to reduce the current of the drivers. Out of the 3 drivers, only 1 had a stop when I turned the pot counter clockwise. I "guessed" on the other 3.
I had issues with too much power, weird random stutterings, and sporadically moving in the opposite direction when told to move. Adjusting the pots weren't making a difference. After having the printer bang around a few times and thinking a few of the drivers fried. I took a break and went to bed. I started troubleshooting it again last night. I had only managed to get the Y axis to move nice and smooth. I took that driver and started moving it to the other axis'es. Once I confirmed that all axis'es moved smoothly without binding. I added each driver back one by one testing and adjusting each till they worked. I haven't tested the extruder driver yet, since I ran into another problem. I was testing the homing on the z axis, and the end stop switch isn't tall enough. The E3D nozzle can slam into the printbed before the end stops are hit. I would need to make the end stop taller to solve it. For the time being, I think i'm going to take the E3D hotend back off and put on the Jhead that came with the kit. I haven't looked yet, but the Jhead is probably shorter and will allow the end stop to work. The E3D hotend didn't fit into the extruder very securely either. Even with the bolts installed, the hotend has play in it and can wobble if the wires are tugged. I'm hoping to have it printing soon. Only have a few more things left to install and check.
So far, everything has fit great and i'm surprised that some of the plastic pieces survived from the carriages banging at the end. Once I figured out the reset switch, the banging stopped happening until I got the direction and end stop directions set correctly in Marlin. The problems I've encountered so far, is mostly user error. Though the pots on the drivers can be finicky to get right.
Here's some pics.
Repaired X end idler:


|
Re: My Replikeo Prusa i3 Rework Build April 28, 2014 02:31PM |
Registered: 10 years ago Posts: 49 |
One thing I forgot about. I noticed most people have the hobbed bolt installed with the threaded end exiting opposite of the gear. If I installed it that way, the grooves doesn't line up with the hole at all. I had to install the bolt back backwards to have the groove line up. Is this ok?
This is with the bolt installed like it should be. Notice the groove and hole:
I had to install it backwards and add washers to make it line up:
This is with the bolt installed like it should be. Notice the groove and hole:

I had to install it backwards and add washers to make it line up:

|
Re: My Replikeo Prusa i3 Rework Build April 29, 2014 11:40AM |
Registered: 10 years ago Posts: 49 |
I installed the J-head, and got the Z axis homing correctly. I started testing the driver for the extruder and its dead. Once a command is sent, it just twitches back and forth, no amount of pot turning fixes it. I inserted a known good driver into the extruder slot and the motor turned fine. I also leveled the bed as good as I can. The corners are good, but the center can get bowed. I could be using the wrong springs too. I wasn't sure which springs went with the extruder and which springs went with the bed. I ended taking the softer black springs and cutting that up for the bed. I tried 3 springs at first, and just couldn't get it close enough, I had to add the 4th spring. Now, the corners all have a slight drag with a piece of paper under it. Under the center of the bed, the bed is sitting a little lower. The piece of paper slides smoothly, but I can't see a gap between the paper and the nozzle. I plan on printing the bed calibration model and see how it looks first. How are people making sure the bed is completely leveled? Maybe the plate glass from lowes is too thin (2.5mm)?
|
Re: My Replikeo Prusa i3 Rework Build May 01, 2014 10:57AM |
Registered: 10 years ago Posts: 49 |
Just an update. Been trying to calibrate the printer the past couple days. Once I calibrated the E steps, It appeared to be printing good, real good in the beginning, about 4 hours later, I noticed that it wasn't infilling right and failing the bridging cube test. After completely failing a precision block test, I went to bed.
This morning, I looked over the printer and noticed the hob bolt was slipping and the pinion gear on the extruder stepper wasn't tight. It was still on the flat spot, but there was still quite a bit of play. It must of worked itself loose after printing for a couple hours. Actually I think it's from the retracts. The motor is changing directions really fast. I've been working on this till pretty late into the night/morning and haven't had time to upload some pics. I'll get some up soon.
So far I've passed all the calibration prints up to the bridging. This is when it started printing bad. I also noticed some side to side play where the jhead is mounted to the extruder body. I first noticed this with the E3d head, but it's slightly better with the Jhead. But there's enough movement in there where i'm concerned about accuracy. During the precision block print, The X carriage is changing directions soo quickly and violently, where i'm sure the head can get jostled. I had one failed print with Infill calibration/perimeter width test. After 5mm or so, the entire print started sloping one direction. But the next print worked great. I need to find a way to secure the head better, or I don't think I'll be able to get consistent results.
|
Re: My Replikeo Prusa i3 Rework Build May 05, 2014 04:46AM |
Registered: 9 years ago Posts: 5 |
I have just started building a Replikeo kit and so far so good - about half way there. I ended up receiving a broken fan duct, glass bed and X-axis endstop. I'll be contacting Replikeo shortly to organise a replacement.
I've glued the fan duct and X-axis endstop together again, but otherwise, it seems like a decent kit. I can't wait to finish it!
I've glued the fan duct and X-axis endstop together again, but otherwise, it seems like a decent kit. I can't wait to finish it!
|
Re: My Replikeo Prusa i3 Rework Build May 05, 2014 11:05AM |
Registered: 9 years ago Posts: 197 |
I ordered the steel variant yesterday. An email from them says it'll ship in 1-4 days and I'll get a tracking notification when it ships.
Also, I emailed them twice yesterday and the got back to me within a couple hours each time, on a Sunday no less.
I'M psyched!
Greg
PS, what color ABS shipped with your kits?
Also, I emailed them twice yesterday and the got back to me within a couple hours each time, on a Sunday no less.
I'M psyched!
Greg
PS, what color ABS shipped with your kits?
|
Re: My Replikeo Prusa i3 Rework Build May 05, 2014 01:54PM |
Registered: 10 years ago Posts: 49 |
Another weekend update. I could not get the bed to stay leveled consistently with the springs, I could visibly see the bed move when doing really fast/abrupt Y axis direction changes. If I tightened the bed more, the center would start bowing. I needed another solution. I printed out a servo mount to try out the auto bed leveling. That way, I can hard mount the bed and not worry about it changing directions during a print.
When I got it all working correctly, My prints were still off, one side of the bed would leave a good bead, then once it got to the other side, the head wasn't close enough to the bed, leaving a really weak first layer. I think it's because the hotend is shifting inside the extruder. When a retract occurs, the hot end moves a good 5mm to the rear, then resets back to the front. I think this movement is screwing up the prints since the head might not be going back to the same position after the retract. I think i'm going to drill out the extruder body holes to M4 and hope that will keep the hot end secured.
One other note, the m3 screws that holds the extruder idler is too long. They need to be shortened to provide enough pressure on the hob bolt. Otherwise, you'll bottom out the left screw and the right screw will bottom out on the extruder stepper motor, forcing it into the gear. However, that could be a good way to eliminate any backlash in the gears. There isn't enough adjustment to move the stepper motor into the gear to reduce all the backlash. I left that bolt a little longer for this purpose.
Greg,
The roll of ABS I got from Replikeo is black.
|
Re: My Replikeo Prusa i3 Rework Build May 05, 2014 02:57PM |
Registered: 9 years ago Posts: 197 |
|
Re: My Replikeo Prusa i3 Rework Build May 10, 2014 11:16AM |
Registered: 9 years ago Posts: 67 |
Hey, Thanks sharing! I'm looking forward to updates! I'm considering buying the aluminium kit from Replikeo. It would ship to Canada. Did you have to pay extra fees over shipping? My other option is to source the components myself which would add up to about CAD $600 ( Including the 1 kg ABS spool). I'm just scared I'll end up paying taxes and import taxes and it would amount to the same thing for a kit seemingly a little gimmicky. After thoughts, would you have rather getting a kit from a US based manufacturer or sourcing the components yourself?
Have you managed leveling the bed and getting the J-head to stop wobbling around?
Good luck with the build!
TheHackerArtist
Have you managed leveling the bed and getting the J-head to stop wobbling around?
Good luck with the build!
TheHackerArtist
|
Re: My Replikeo Prusa i3 Rework Build May 10, 2014 11:56PM |
Registered: 9 years ago Posts: 197 |
I paid $349 +$94 for shipping but because the kit ships complete with a power supply, electronics, and a spool of ABS it's probably better than trying to source myself plus it sounds like the company is pretty responsive and responsible. They certainly respond quickly to emails. My kit shipped two days ago, now the waiting begins...
|
Re: My Replikeo Prusa i3 Rework Build May 11, 2014 12:33AM |
Registered: 9 years ago Posts: 67 |
Hey Gadget_Greg, thanks for you input.
It was a hard decision but I decided to source all the peices myself. I really wanted the aluminum model for various reasons. After shipping and conversion to Canadian dollars the kit would have been C $520 and that's not considering import charges... I got all I needed except the filament spool for C $550 and decided to opt for a design using fishing line rather then the belts because I've heard that's what the cool kids do now.( No but seriously braided fishing line is better in many ways but that's a whole other thread!) Also I went for an all metal Jhead and got an LCD which I believe is not included in the replikeo Kit. Everything I got from eBay. So ya, it was a tough one and many hours of research but that was the better option for me!
I guess me rambling about my decision is somewhat unrelated to the topic of this thread so anyone reading this don't reply on this post I don't want to start polluting this.
Now, I'm still interested to hear if you finally got the machine running alright Trike!?
TheHackerArtist
|
Re: My Replikeo Prusa i3 Rework Build May 11, 2014 10:46PM |
Registered: 9 years ago Posts: 197 |
|
Re: My Replikeo Prusa i3 Rework Build May 11, 2014 10:49PM |
Registered: 9 years ago Posts: 197 |
|
Re: My Replikeo Prusa i3 Rework Build May 11, 2014 11:05PM |
Registered: 9 years ago Posts: 67 |
Ya I get why you'de want to just dive in with a premade kit. I didn't source everything individually. I got like 6 bundles on ebay that added up to all I needed. Also, I went for the Wilson TS variant of the prusa i3 in the end and cut the price down to bellow CAD $500 ! and it's sturdier! Best starter option in my opinion ( which isn't worth much..)
TheHackerArtist
TheHackerArtist
|
Re: My Replikeo Prusa i3 Rework Build May 11, 2014 11:33PM |
Registered: 9 years ago Posts: 197 |
I could print a Wilson as my SECOND unit! 
BTW, I checked out the source for extruded aluminum that's suggested in the MendelMax2 BOM and their priced are phenomenal! To configure custom cut lengths you have to create a login but the prices are, like, HALF of what I was seeing on eBay! [us.misumi-ec.com]
Edited 1 time(s). Last edit at 05/11/2014 11:34PM by gadget_greg.
|
Re: My Replikeo Prusa i3 Rework Build May 12, 2014 01:13AM |
Registered: 9 years ago Posts: 67 |
Ya, that's where I'll be sourcing my extruded parts and rods. I guess I'll get 7 bundles then,  one of witch is from misumi! I still haven't quite figured our how to get them to cut to specific length. Their website isn't super user friendly but once I'll have ordered that then it's just a question of time and I'll have the Wilson up and running.
one of witch is from misumi! I still haven't quite figured our how to get them to cut to specific length. Their website isn't super user friendly but once I'll have ordered that then it's just a question of time and I'll have the Wilson up and running.
|
Re: My Replikeo Prusa i3 Rework Build May 12, 2014 11:30AM |
Registered: 10 years ago Posts: 49 |
Hey guys,
I'm sorry for the lack of updates and pictures. Been having issues with my webserver and been busy with work.
But the printer has been working pretty good. I did 2 11.5hr prints of a rosebud for mothers day and they turned out great.
I ran into a few issues during some prints where the heated bed would shut off. I tracked it down to a overheating mosfet. This all started when I added a 40mm fan to cool the filament coming out of the nozzle. It was cooling the bed too much. I had to blow a fan over the mosfets, to prevent it from overheating/shutting down. I'll have to install a heatsink onto the mosfet and probably print out a fan duct that directs air around the nozzle. The fan ducts on thingiverse doesn't allow enough room for the auto bed level switch, So I might have to create one.
Also, there were two times when I left the printer unattended during a print, and had the filament tangle in the spool. I have a black spool of PushPlastic PLA. It was working great in the beginning on top of the spool holder. I think when I removed it to change colors, the spool unwound a bit. It pushed the z axis off the nuts and made its way to the top of the frame sitting there pulling on the filament while moving back in forth. luckily no damage has occurred that i'm aware of. It has happened twice already. It looks like I need to re-spool it.
I've already printed a bunch of parts with it already, A spool holder, auto bed level mount, full graphics LCD case, and other various stuff.
All in all, i'm very satisfied with the kit. There's no way I could've sourced all the parts individually in the US for cheaper. I was coming out $150-200 over replikeo's price for individually sourcing the parts. I had a bad driver, and some shipping damage, but Replikeo has been responsive with my questions.
I'm going to start playing with ABS now with the roll I got from replikeo. I figure after the last couple incidents of the Y axis being pulled off the nuts to the top of the frame. I better have some spare parts handy in case something breaks.
I promise to get some pics up soon.
|
Re: My Replikeo Prusa i3 Rework Build May 12, 2014 11:35AM |
Registered: 10 years ago Posts: 49 |
Quote
TheHackerArtist
Ya I get why you'de want to just dive in with a premade kit. I didn't source everything individually. I got like 6 bundles on ebay that added up to all I needed. Also, I went for the Wilson TS variant of the prusa i3 in the end and cut the price down to bellow CAD $500 ! and it's sturdier! Best starter option in my opinion ( which isn't worth much..)
TheHackerArtist
The wilson variant seems interesting indeed. I never saw that variant before. I actually have a bunch of spare 2020 from misumi. Although they ship fast, their accessories (t-nuts, blind joints, etc) are on the higher side. Maybe I'll build another machine for the office.
After building this printer, I realized how violent the printer shakes when changing directions. The printer just doesn't have enough mass and rigidity. Maybe with the extrusion, It'll be a more stable machine and speeds can be cranked up.
Edited 1 time(s). Last edit at 05/12/2014 11:40AM by Trike.
|
Re: My Replikeo Prusa i3 Rework Build May 12, 2014 12:45PM |
Registered: 9 years ago Posts: 67 |
Quote
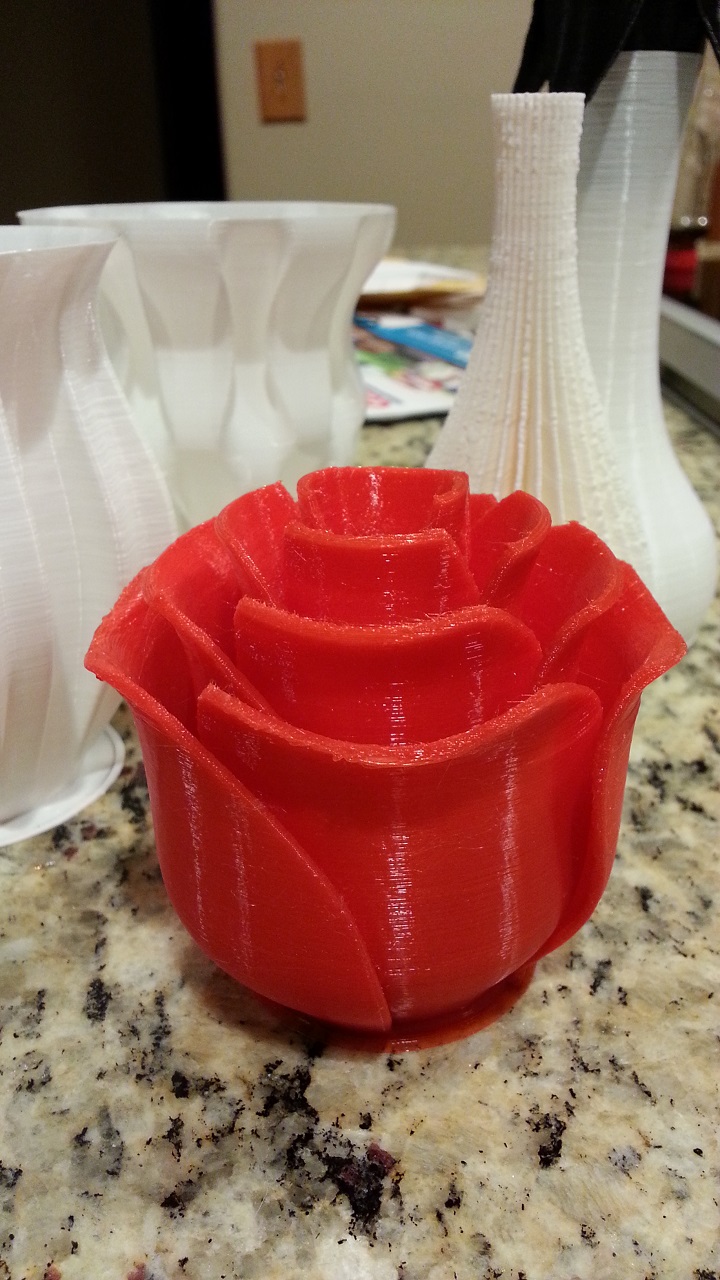
But the printer has been working pretty good. I did 2 11.5hr prints of a rosebud for mothers day and they turned out great.
Ha! nice. Was she impressed with the gift? ( i'm assuming you intended to give the rosebud to your mother!)
Thanks for posting. Good to know it ended up working well. It's pretty incredible replikeo could source everything for so little and still have the quality to be up and running. Although the Chinese government subsidizes business heavily so that could explain! Buuut that's a whole other thread haha.
Could changing the angle at which the air blows on the extruder alleviate the problem of bed cooling =P ?
I'll probably post a thread with all the components I sourced and a build log as I get everything and start building the Wilson. I'll let you know! Let me know when (if?) you start building your Wilson.
Good luck with getting the last issues out of the way with your replikeo i3!
|
Re: My Replikeo Prusa i3 Rework Build May 12, 2014 02:40PM |
Registered: 10 years ago Posts: 49 |
Yes, Both mothers were impressed that I "printed" it and that it is even possible to do this sort of thing.
I printed this one out: http://www.thingiverse.com/thing:316812 I attached a pic from my phone. This was done at .2mm layer height.
It probably would've printed faster if I disabled the auto cooling, but not sure how the finish quality would turn out with the faster print speeds.
It's possible that if i angle the 40mm fan more, it might help. But the problem with that, is the hotend will get more of the air flow vs the filament. I'm going to add a heatsink to the mosfet first and see if I can get away without cooling it with a fan. Ideally I need a fan duct with a tipped outlet to focus the air over the print only.
|
Re: My Replikeo Prusa i3 Rework Build May 12, 2014 04:28PM |
Registered: 9 years ago Posts: 197 |
Misumi's site IS a little tricky but once you're logged in and you pick the extrusion you want you can configure it on the left and you want to change the "L Dimension Fixed, Configurable" to "Configurable", then enter the length you want in millimeters.
I REALLY want to track my printer but it STILL hasn't showed up on track-chinapost.com
I REALLY want to track my printer but it STILL hasn't showed up on track-chinapost.com
|
Re: My Replikeo Prusa i3 Rework Build May 12, 2014 06:22PM |
Registered: 10 years ago Posts: 49 |
|
Re: My Replikeo Prusa i3 Rework Build May 13, 2014 11:13AM |
Registered: 10 years ago Posts: 49 |
I attempted to print ABS last night and failed. The print bed wont reach 130C. If I put a cardboard over the bed, it'll take 30mins to get to 130C. When I remove the card board for the auto bed level calibration to start, the temps drop down to 80C fast. The print wont stick at all.
I gave up and reloaded a spool of PLA to do a print. Now, the heated bed is stuck on and wont turn off. Once you plug it in, it starts heating immediately. The led light on the Ramps board is also lit up. From the issues I been having with the bed shutting down during a print, I'm curious if I cooked the mosfet from trying to heat the bed for ABS that long. I had a table fan blowing directly at the ramps board during the ABS preheat, in attempt to prevent the mosfet from overheating. Any ideas?
I ordered a few IRLB8743PBF to replace the current mosfet so I don't have to blow a fan at the board.


Sorry, only registered users may post in this forum.