Home
>
Reprappers
>
Topic
Setting home position...
Posted by Beer4Brew
|
Setting home position... January 23, 2016 03:10AM |
Registered: 8 years ago Posts: 41 |
Hey guys finnaly I manage to work almost everything, I made auto bed leveling, hook up silicone heatbed with automotive relay g.cartier 12V 50A works like a charm no heating issues anymore, the only problem that i left with is homing position, I want my home position to be in a corner but when I hit home all axis he moves X to the right Y way back as it should cause I have X and Y endstops on max and when it come to Z axis he move it almost to center of the build plate moving all my axes out of position...
Help
Proud owner of CTC and my newly made from scratch Prusa i3
Beer, 3D Print, Sleep and again...
Help
Proud owner of CTC and my newly made from scratch Prusa i3
Beer, 3D Print, Sleep and again...
|
Re: Setting home position... January 23, 2016 03:32AM |
Admin Registered: 13 years ago Posts: 7,002 |
Huh?
This is a Cartesian printer, ie I3 type??
unless its a delta or coreXY etc all axis are independent... including homing.. Ie homing Z should not move X or Y
Can you provide more images? more details?
Maybe a video?
FYI on a I3 the Y end stop at the back is a min end stop not a max. (its reversed as bed moves not the head in that axis)
|
Re: Setting home position... January 23, 2016 03:45AM |
Registered: 8 years ago Posts: 41 |
Here is a video of homing
[www.youtube.com]
Proud owner of CTC and my newly made from scratch Prusa i3
Beer, 3D Print, Sleep and again...
[www.youtube.com]
Proud owner of CTC and my newly made from scratch Prusa i3
Beer, 3D Print, Sleep and again...
|
Re: Setting home position... January 23, 2016 06:34AM |
Admin Registered: 13 years ago Posts: 7,002 |
ok... I see what you mean
Since X is a max endstop the controller needs to know the length of your X axis to get back to zero.
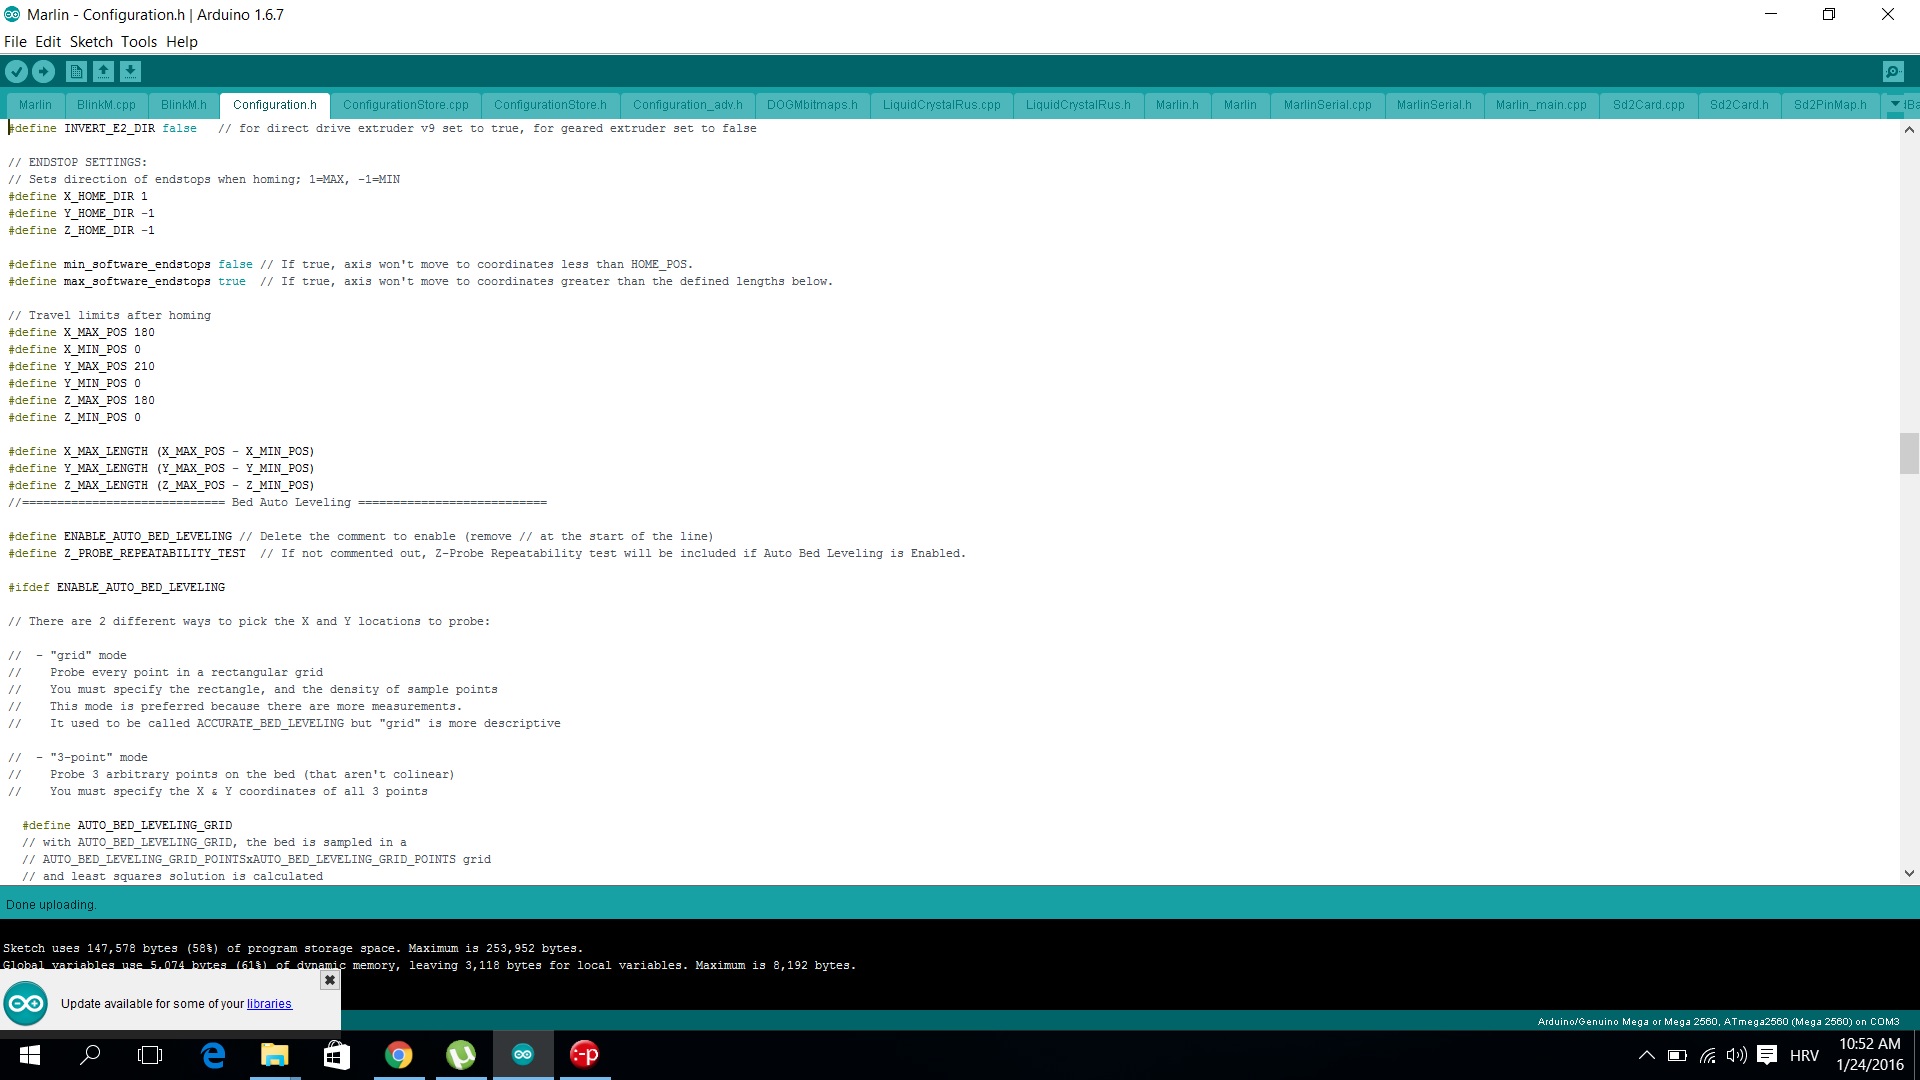
Find your setting #define X_MAX_POS in configuration.h
move your X carriage to it max position, measure in MM the distance from the nozzle hole to where X0 is
Change this value to the new measurement
For Y, as I have already said, you have this backwards. This is min endstop. you need to move the endstop plug on the controller to the Y min endstop position (presuming a ramps type controller) and set #define Y_HOME_DIR to -1 (ie home to min endstop) If this this already -1, then you need to invert the Y axis of travel, find #define INVERT_Y_DIR if this is set to true change it to false, its it is set to false change it to true.
At home position the Build platform should be at the back of the Y axis so the nozzle is at the front of the build platform
Edited 2 time(s). Last edit at 01/23/2016 06:40AM by Dust.
Since X is a max endstop the controller needs to know the length of your X axis to get back to zero.
Find your setting #define X_MAX_POS in configuration.h
move your X carriage to it max position, measure in MM the distance from the nozzle hole to where X0 is
Change this value to the new measurement
For Y, as I have already said, you have this backwards. This is min endstop. you need to move the endstop plug on the controller to the Y min endstop position (presuming a ramps type controller) and set #define Y_HOME_DIR to -1 (ie home to min endstop) If this this already -1, then you need to invert the Y axis of travel, find #define INVERT_Y_DIR if this is set to true change it to false, its it is set to false change it to true.
At home position the Build platform should be at the back of the Y axis so the nozzle is at the front of the build platform
Edited 2 time(s). Last edit at 01/23/2016 06:40AM by Dust.
|
Re: Setting home position... January 23, 2016 01:04PM |
Registered: 8 years ago Posts: 200 |
|
Re: Setting home position... January 23, 2016 07:32PM |
Admin Registered: 13 years ago Posts: 7,002 |
|
Re: Setting home position... January 23, 2016 09:13PM |
Registered: 8 years ago Posts: 200 |
That would normally be the case. I had to reverse my y axis to put the y min stop at the back of the machine. And then I reversed the y axis firmware.Quote
Dust
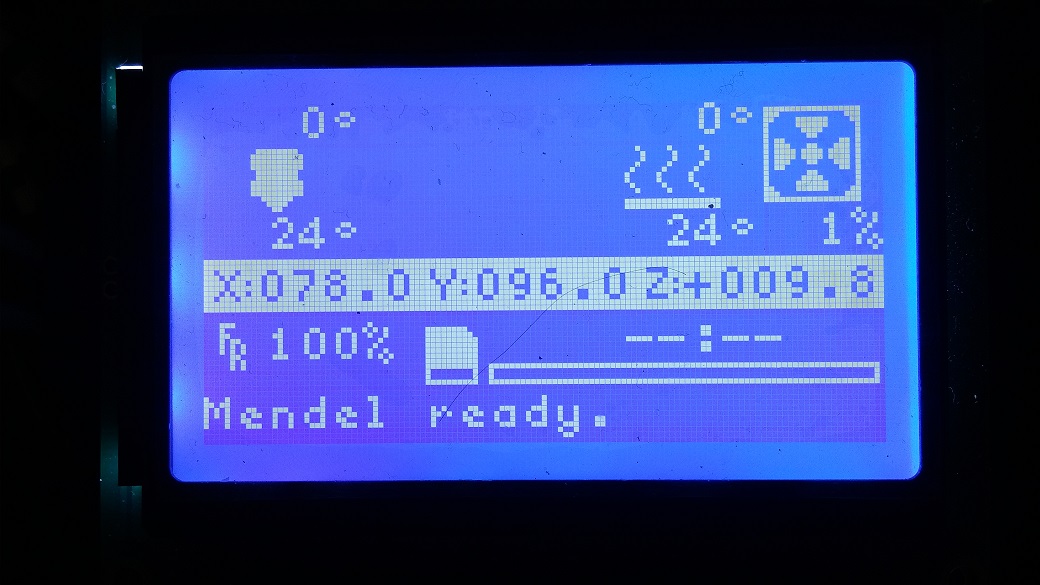
Yes in this case, but remember that this machine homes to X=200 (or what ever the X length is), Y=0, Z=0
(some people have the mind set that home is always X=0,Y=0,Z=0)
|
Re: Setting home position... January 24, 2016 04:51AM |
Registered: 8 years ago Posts: 41 |
I tryed Your method and change on ramps Y endstop but I still get home position as in video....
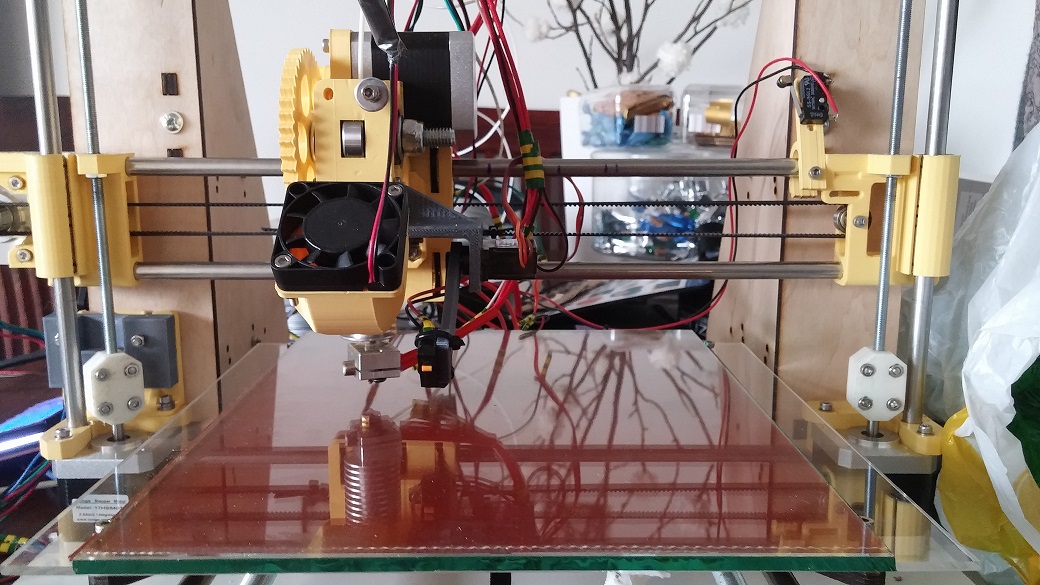
Setup photo is in att
Edited 1 time(s). Last edit at 01/24/2016 04:55AM by Beer4Brew.
Proud owner of CTC and my newly made from scratch Prusa i3
Beer, 3D Print, Sleep and again...
Setup photo is in att
Edited 1 time(s). Last edit at 01/24/2016 04:55AM by Beer4Brew.
Proud owner of CTC and my newly made from scratch Prusa i3
Beer, 3D Print, Sleep and again...
|
Re: Setting home position... January 24, 2016 05:25AM |
Admin Registered: 13 years ago Posts: 7,002 |
Well i suggest you get a new ruler!
A standard reprap pcb heater is 200x200 and that between the lines, its actually a bit larger than that, 210ish?
Now from your video it looks like when the X axis is on the end stop the nozzle is past the print area line, so its over 200mm to get back to 0
You have set X_MAX_POS 180...
I would try 210 to start with.
Secondly, this relies on the movement being accurate, ie when you tell it to move 10mm, it needs to move 10mm, have you checked this? Just measure it with a ruler
|
Re: Setting home position... January 24, 2016 05:37AM |
Registered: 8 years ago Posts: 41 |
|
Re: Setting home position... January 24, 2016 05:50AM |
Admin Registered: 13 years ago Posts: 7,002 |
I don’t use LCD.. so limiting...
In fact try this
Plug in a computer, install pronterface, get it talking to the printer.
send a "G28 X" the head should move to the X endstop
send a "G90" set Absolute Positioning
send a "G1 X0" move X to zero.
Does it end up where at X=0 as expected? if it does your issue is something lcd related...
If not... well will have to think on that..
|
Re: Setting home position... January 24, 2016 05:59AM |
Registered: 8 years ago Posts: 41 |
|
Re: Setting home position... January 24, 2016 06:03AM |
Registered: 8 years ago Posts: 41 |
|
Re: Setting home position... January 25, 2016 04:33PM |
Registered: 8 years ago Posts: 41 |
|
Re: Setting Print start position February 08, 2016 02:30AM |
Registered: 8 years ago Posts: 9 |
|
Re: Setting home position... February 12, 2016 07:59PM |
Registered: 8 years ago Posts: 541 |
What's been lost in this discussion is the fact that he said he is using Auto Bed Leveling. In that case, X zeros (albeit to MAX), and Y zeros (again forward) as normal. With auto bed leveling, the head moves (supposed to) into the center of the bed to home Z. You can see it drop the microswitch. Because he has the zero points all FUBAR, it won't auto level correctly. I believe WHERE Z homes is defined in the config.h file. But X endstop needs to be on left and Y in the back along with changes with stop positions on the RAMPS and in the config.h file.
Folger Tech 2020 i3 and FT-5 as well as modified JGAurora A5 with direct drive E3D/Titan. All running the BLTOUCH.
Great kits. Having fun and running the heck out of them.
Running Marlin 1.1.0 RC8 on the i3 and FT5. Custom firmware on A5.
Folger Tech Wiki board >[folgertech.wikia.com]
Folger Tech 2020 i3 and FT-5 as well as modified JGAurora A5 with direct drive E3D/Titan. All running the BLTOUCH.
Great kits. Having fun and running the heck out of them.
Running Marlin 1.1.0 RC8 on the i3 and FT5. Custom firmware on A5.
Folger Tech Wiki board >[folgertech.wikia.com]
|
Re: Setting home position... January 14, 2017 08:07PM |
Registered: 7 years ago Posts: 2 |
I've been having the same problem, but I don' use auto bed level. When I go to the LCD screen and hit home offset, it makes a really loud beep noise and goes back to the home screen. I used the Arduino serial monitor and got this back:
thanks
But I really need this fixed as I can't print a bigger file that I need.Quote
start
echo:Marlin1.0.0
echo: Last Updated: Oct 31 2016 14:49:22 | Author: Zviper89, Migbot Stndrdauto lvl
Compiled: Oct 31 2016
echo: Free Memory: 3813 PlannerBufferBytes: 1232
echo:Hardcoded Default Settings Loaded
echoteps per unit:
echo: M92 X80.00 Y80.00 Z1600.00 E100.00
echo:Maximum feedrates (mm/s):
echo: M203 X225.00 Y225.00 Z3.00 E25.00
echo:Maximum Acceleration (mm/s2):
echo: M201 X2650 Y2650 Z100 E10000
echo:Acceleration: S=acceleration, T=retract acceleration
echo: M204 S2650.00 T3000.00
echo:Advanced variables: S=Min feedrate (mm/s), T=Min travel feedrate (mm/s), B=minimum segment time (ms), X=maximum XY jerk (mm/s), Z=maximum Z jerk (mm/s), E=maximum E jerk (mm/s)
echo: M205 S0.00 T0.00 B20000 X15.00 Z0.40 E5.00
echo:Home offset (mm):
echo: M206 X0.00 Y0.00 Z0.00
echoID settings:
echo: M301 P22.20 I1.08 D114.00
echo
thanks
|
Re: Setting home position... April 19, 2017 08:25PM |
Registered: 7 years ago Posts: 1 |
i dont know if any one was able to help you but i had the same problem and came here to see if i could find the fix but noticed no one knew the answer so i had to sit down for an hour and read the entire script to find the problem. Long story short the reason it wont home the way you want it to is because the "#define Z_SAFE_HOMING" wont let you because you didnt set your prob position in the firmware
"#define X_PROBE_OFFSET_FROM_EXTRUDER (set the porb position relative to the extruder in the x-axis)
#define Y_PROBE_OFFSET_FROM_EXTRUDER (set the porb position relative to the extruder in the y-axis)
#define Z_PROBE_OFFSET_FROM_EXTRUDER 0"
if your porbe is to the right of the extruder it is a positive number if it is to the left of the extruder it is a negative number
if your porbe is infront of the extruder it is a positive number if it is behind extruder it is a negative number
for example my probe is 17mm to the right of my extruder and 5mm behind my extruder so mine is set to-
" // these are the offsets to the probe relative to the extruder tip (Hotend - Probe)
#define X_PROBE_OFFSET_FROM_EXTRUDER 17
#define Y_PROBE_OFFSET_FROM_EXTRUDER -5
#define Z_PROBE_OFFSET_FROM_EXTRUDER 0"
and just leave your z offset at zero
let me know if this helped!!
Sorry, only registered users may post in this forum.