Home
>
Reprappers
>
Topic
3D printer build from scratch, tips and hints welcome
Posted by Exinferis
|
3D printer build from scratch, tips and hints welcome January 14, 2016 03:15PM |
Registered: 8 years ago Posts: 17 |
Hi,
so as a way of teaching myself solidworks, and being that 3d printing is very cool. Me and a friend has started plans on building one of our own.
We work at a electronics factory, and one the machines were gonna be thrown out. There was loads of good hardware in it.
Amongst other things, THK ball screws, and really solid guide rods. So we are going for that in our design.
As you can see from the pictures, you can get a rough idea of what we are thinking.
Its going to be all aluminum, with parts being milled out on a cnc machine.
Motors are gonna be 280 Oz nema23, might go for a 500 Oz one for the x axis, as it has some weight too it.
Motor Drivers are gonna be KL4040
RAMPS 1.4 Premium as controller card
e3d v6 3mm Direct feed as the extruder
I read somewhere that i can use the RAMPS card with these controllers, ill just hotwire in the drivers into the signal input on RAMPS
So my question is really, am i on the right track, or is there some really critical things that will make this not work?
Edited 1 time(s). Last edit at 01/14/2016 03:15PM by Exinferis.
|
Re: 3D printer build from scratch, tips and hints welcome January 15, 2016 10:10AM |
Registered: 9 years ago Posts: 329 |
Hi!
Your 3D work looks great. One useful recommendation for you: don't use threaded rods to move the X and Y axes. Doing so will make the printer much too slow. When these axes are fitted with proper bearings there is very little resistance to movement. That being said, it is also important to minimize the weight of your X-carriage.
-David
-David
Find me online at:
Thingiverse
Instructables.com
LinkedIn
Facebook
Check out my FolgerTech Prusa i3 (plexi) at MindRealm.net
Your 3D work looks great. One useful recommendation for you: don't use threaded rods to move the X and Y axes. Doing so will make the printer much too slow. When these axes are fitted with proper bearings there is very little resistance to movement. That being said, it is also important to minimize the weight of your X-carriage.
-David
-David
Find me online at:
Thingiverse
Instructables.com
Check out my FolgerTech Prusa i3 (plexi) at MindRealm.net
|
Re: 3D printer build from scratch, tips and hints welcome January 15, 2016 11:20AM |
Registered: 11 years ago Posts: 5,780 |
How big will it be? Do you intend to print with ABS on this machine? If so, the frame design could use a rethink. In order to successfully print medium to large objects in ABS, you need to print inside a warm chamber (45-50C at least, Stratasys uses 70C in their machines). To have a warm chamber, you need to enclose the machine, and your frame design requires a relatively large box. Another consideration is placement of the controller board and control panel (if using one). You don't want to keep the electronics in a 45-70C enclosure because it will cause early failure of the board.
In further regards to the frame design, it doesn't look like it will be very rigid. The top of the Z axis is pretty high above the base of the machine and the weight of the extruder carriage jerking back and forth up there will cause the upper half of the machine to wobble like an inverted pendulum and that will affect print quality, especially near the top of tall prints.
I started on 3D printing about 3 years ago, exactly the way you are now. I had a ready supply of surplus machine parts and a metal shop where I could fabricate parts. I designed my machine to be able to print full size human skulls from CT scan data. At the time the largest build envelope for affordably priced printers was a little bigger than my fist. I saw a Makerbot Cupcake at the Milwaukee Makerspace and after critical examination of it, decided I could make something much better myself. My printer, linked in my sig, below, is the second generation. You can see my original project, complete with bad design (and improvements), fabrication errors, etc., here: [mark.rehorst.com]
Ultra MegaMax Dominator 3D printer: [drmrehorst.blogspot.com]
|
Re: 3D printer build from scratch, tips and hints welcome January 15, 2016 02:40PM |
Registered: 8 years ago Posts: 1,671 |
I wonder if the bearing blocks for the bed should be in a triangle rather than L arrangement,
maybe one Z motor would be ok, been playing with ideas on that myself,
hotend looks tiny, is that correct scale, I assume its because the parts you salvaged are very large, the motors are huge.
Also the bearing blocks on the Z might not be the final ones you need, I believe they would be better with the force pushing down on them, you might need a fully round one.
For the design above I'm wondering if the Z rods would be better 90 degrees round the leadscrew, depends where the carriage weight is, but not so easy to place there, would have to bring the sides in closer and move the supports.
Edited 3 time(s). Last edit at 01/15/2016 08:54PM by MechaBits.
maybe one Z motor would be ok, been playing with ideas on that myself,

hotend looks tiny, is that correct scale, I assume its because the parts you salvaged are very large, the motors are huge.
Also the bearing blocks on the Z might not be the final ones you need, I believe they would be better with the force pushing down on them, you might need a fully round one.
For the design above I'm wondering if the Z rods would be better 90 degrees round the leadscrew, depends where the carriage weight is, but not so easy to place there, would have to bring the sides in closer and move the supports.
Edited 3 time(s). Last edit at 01/15/2016 08:54PM by MechaBits.
|
Re: 3D printer build from scratch, tips and hints welcome January 15, 2016 05:33PM |
Registered: 9 years ago Posts: 100 |
|
Re: 3D printer build from scratch, tips and hints welcome January 16, 2016 05:24AM |
Registered: 8 years ago Posts: 17 |
Thanks for all the input!
Ok, so i should proberly have started with saying how big this thing is. The outer dimensions are about 110cm x 60cm, so the size of the extruder is correct
We had hoped to print in ABS for sure, and an insulated box around this is allready planned. I just forgot to mention it. No problem with electronics outside of the printing chamber, that was allready planned
This is not the completed printer for sure. The plan was to have a frame around with 35x35mm alu supporting the Z/Y axis, but i think im gonna redesign it abit, and create a form of triangle to support it properly
In regards to the screw vs belt discussion. Ive have tried finding documentation on this debate. And i find both pro and con of both types. Speed might be the big one for screw of course.
But, if i use nema 23 motors, and even a 500Oz one for the x-axis. Wont the increase in torque give me the control/speed? It wont give me 400mm/s as ive read some ppl have, but it will go pretty fast i think.
|
Re: 3D printer build from scratch, tips and hints welcome January 16, 2016 10:24AM |
Registered: 11 years ago Posts: 5,780 |
I have a precision ground ball screw drive in the Y axis of my printer. It is a 10mm pitch screw and the bed/undercarriage ride on a pair of linear guides. It provides extremely precise control of the motion, but it's not very fast. The large moving mass (305 x 317x6.35 mm aluminum bed, the screw itself, and the undercarriage and heater) requires a lot of torque for precise control, so I use a DSP based driver and 32V power supply to drive a 425 oz-in NEMA-23 stepper. I generally limit my print speed to 50mm/sec, which is the designed target for that system.
One thing you will find out is that screw drive is noisy. Screws are very efficient at coupling motor vibrations to the printer frame and other parts, and NEMA-23 motors tend to vibrate a lot more than NEMA-17 motors. I've tried vibration damping motor mounts, centrifugal dampers on the motor shaft, playing with different microstepping ratios, motor current, etc., all to no avail. I have learned to live with it, but my wife is still adapting.
Ultra MegaMax Dominator 3D printer: [drmrehorst.blogspot.com]
|
Re: 3D printer build from scratch, tips and hints welcome January 16, 2016 01:06PM |
Registered: 8 years ago Posts: 17 |

|
Re: 3D printer build from scratch, tips and hints welcome January 16, 2016 03:03PM |
Registered: 11 years ago Posts: 5,780 |
I think there's excessive emphasis on speed in the 3D printing community. I see videos of machines printing at 200mm/sec on Youtube and the print quality is usually awful. What's the point of going fast if the quality is poor? I don't recall ever printing anything where the speed was more important that the print quality. A lot of people talk about using glass plates on their print beds so they can switch them out and get back to printing quickly. Really? Do you still print that busily after the first week of having a printer?
After you've been printing for a while, you stop being impressed by an object simply because it is 3D printed and start looking critically at prints and ask things like "what caused that little void there, or that little blob, there?" At that point you start appreciating quality prints instead of just the fact that an object is 3D printed. When someone hands you two printed parts, one printed at 30mm/sec and another printed at 200 mm/sec, you don't know anything about the print speeds, but you can immediately appreciate the quality difference. If someone tells you "this one was printed at 200mm/sec", you don't think "wow! that's great quality", you think "wow! That's great quality for something that was printed at 200mm/sec". Meh.
Ultra MegaMax Dominator 3D printer: [drmrehorst.blogspot.com]
|
Re: 3D printer build from scratch, tips and hints welcome January 16, 2016 04:09PM |
Registered: 8 years ago Posts: 17 |
Yah, that sort off what I'm thinking. This isn't really a business thing, where every second counts. This is a hobby thing ☺ I think this thing will be fast enough for our needs. And it can just chug away down in the basement. If it uses 1 or 3 hours doesn't really matter.
This thing will be very rigid and hopefully dead accurate in its printing.
This thing will be very rigid and hopefully dead accurate in its printing.
|
Re: 3D printer build from scratch, tips and hints welcome January 17, 2016 01:29PM |
Registered: 9 years ago Posts: 1,873 |
The speed question is interesting. My (simple, prusa-like) printer can travel XY at 250 mm/s without any issues, but I find that most of the interesting filaments need to be printed in the 30mm/s region or less. My original urge to build a core-XY for extra speed is much reduced now. The caveat is that you don't want the travel speed to be so slow that ooze becomes a real problem, which matters more for some filaments than others. Nylon, TPU/TPE and PETG are pretty bad oozers, PLA and ABS are generally not an issue. For my uses, which are primarly functional, dimensionally accurate parts, I'd rate accuracy far higher than more speed.
Congrats on lucking into those linear parts, you've saved yourself a fortune and you're on the way to a fantastic printer. RAMPs is brilliant value, but given the quality of your mechanicals (and the possibly high step rates you might need to move those axes), it may be worth considering a 32 bit board instead.
Congrats on lucking into those linear parts, you've saved yourself a fortune and you're on the way to a fantastic printer. RAMPs is brilliant value, but given the quality of your mechanicals (and the possibly high step rates you might need to move those axes), it may be worth considering a 32 bit board instead.
|
Re: 3D printer build from scratch, tips and hints welcome January 17, 2016 03:06PM |
Registered: 8 years ago Posts: 17 |
oh, that is a good point. I might need higher microstepping than a 8bit can do.
I think this is what im looking for with a 32bit arduino?
[ooznest.co.uk]
Edited 2 time(s). Last edit at 01/17/2016 03:28PM by Exinferis.
I think this is what im looking for with a 32bit arduino?
[ooznest.co.uk]
Edited 2 time(s). Last edit at 01/17/2016 03:28PM by Exinferis.
|
Re: 3D printer build from scratch, tips and hints welcome January 17, 2016 03:17PM |
Registered: 11 years ago Posts: 5,780 |
My printer uses NEMA-23 motors in X, Y, and Z, which I was operating from the Smoothieboard drivers for a while. When I converted the Y axis to screw drive and got a much higher torque motor, I had to switch to an external driver. I wanted to increase the supply voltage, too. So now my X and Y axis are driven by DSP driver modules connected to the step/direction/enable/gnd pins on the Smoothieboard and powered by 32V supplies. The Z axis uses a NEMA-23 motor and the extruder a NEMA-14(?) motor, both driven by the Smoothieboard drivers. So you can run smaller NEMA-23 motors with the drivers on the Smoothieboard.
I'd avoid using host software to run the printer. Adding a computer to the process decreases reliability. Get an LCD/encoder/SD card reader module and use SD cards.
Ultra MegaMax Dominator 3D printer: [drmrehorst.blogspot.com]
I'd avoid using host software to run the printer. Adding a computer to the process decreases reliability. Get an LCD/encoder/SD card reader module and use SD cards.
Ultra MegaMax Dominator 3D printer: [drmrehorst.blogspot.com]
|
Re: 3D printer build from scratch, tips and hints welcome January 17, 2016 03:23PM |
Registered: 9 years ago Posts: 1,873 |
I've not looked into driving directly from the PC, but it sure is nice to have the printer able to print stand alone. I wouldn't give up on that if I were you. You can buy a Due (very cheaply on AliExpress) and easily do your own breakout board for the thermistors and mosfets. There's not a lot of extra value in ramps once you are using the bigger stepper drivers, although there is a ramps equivalent for Due if you want it, e.g. [www.aliexpress.com]
I should say that I haven't tried the Due + ramps-fd approach yet, I'm still on 8-bit.
I should say that I haven't tried the Due + ramps-fd approach yet, I'm still on 8-bit.
|
Re: 3D printer build from scratch, tips and hints welcome January 17, 2016 03:30PM |
Registered: 8 years ago Posts: 17 |
|
Re: 3D printer build from scratch, tips and hints welcome January 17, 2016 03:34PM |
Registered: 9 years ago Posts: 1,873 |
|
Re: 3D printer build from scratch, tips and hints welcome January 18, 2016 11:20AM |
Registered: 11 years ago Posts: 1,807 |
RADDS v1.5 has an eeprom and a sd card slot and works stable.
Mein Club: [hackerspace-ffm.de]
RADDS-Shield -> Commercial [max3dshop.org]
Mein Club: [hackerspace-ffm.de]
RADDS-Shield -> Commercial [max3dshop.org]
|
Re: 3D printer build from scratch, tips and hints welcome January 20, 2016 05:52PM |
Registered: 8 years ago Posts: 17 |


|
Re: 3D printer build from scratch, tips and hints welcome January 20, 2016 06:27PM |
Registered: 11 years ago Posts: 5,780 |
I would avoid using two motors to lift the X axis. Use one motor with a belt to turn both screws so they can't lose sync.
Ultra MegaMax Dominator 3D printer: [drmrehorst.blogspot.com]
Ultra MegaMax Dominator 3D printer: [drmrehorst.blogspot.com]
|
Re: 3D printer build from scratch, tips and hints welcome January 21, 2016 10:59PM |
Registered: 8 years ago Posts: 7 |
Hi,
Everybody I am new to this forum so if this is not the right place to ask my question let me know and I will try to find the right place.
I upgraded my printer bed to something more robust. It works very well as far as holding leveling without having to worry about it once set. The bed slides on bearing wheels on v-grouve slots on 1" extruded aluminum square blocks. The motion is done with a T2 belt, a GT2 20 teeth Pulley, a Nema 17, 1.8 degrees, and a bearing pulley attached on the other end of the belt so that it can roll. It all works great and I can print pretty well up to 0.06 layer thickness. The problem that I am having is that my dimensions are not consistent and off from the drawn dimensions.
So after designing 4 intersecting rotating axis lines every 45 degrees (0,45,90,135, 180, 225, 270, 315, 360) I printed a structure 10mm tall, and 2mm thick. Measuring the thickness on each arm, showed that depending the position of the leg on the print, the measurements were from 1.86mm to 2.21mm. The designed dimensions were supposed to be 2.0 mm.
Here is a video of what I printed with some of the mesurments. You should get the idea.
[www.youtube.com]
So I know that something needs to be calibrated in the X and Y axis. You should know that I changed diameter of the rolling belt bearing from 22mm diameter to 15mm diameter. I had no choice as the new setup did not allow for using the same pulley diameter bearing. So I have a suspision that I have to adjust for the smaller radius somewhere in the Marlin firmware.
Can anyone help me with this?
Thank you
|
Re: 3D printer build from scratch, tips and hints welcome January 21, 2016 11:24PM |
Registered: 11 years ago Posts: 5,780 |
The X,Y, and Z axes are defined by the guide rails. The bed needs to be leveled in the XY plane (and it needs to be pretty flat) so that the first layer of the prints will stick. You seem to have sticking OK, at least near the center of the bed. Do you have any means of leveling the bed?
I saw 1.87 and 2.21, a difference of 0.34 mm. Unless you are using really thick layers, those numbers don't seem likely to keep a print stuck to the bed, so I suspect your measurement method may be flawed. How big is the nozzle and what layer thickness were you using?
Ultra MegaMax Dominator 3D printer: [drmrehorst.blogspot.com]
|
Re: 3D printer build from scratch, tips and hints welcome January 22, 2016 12:47AM |
Registered: 8 years ago Posts: 7 |
Thank you for the reply the_digital_dentist .
The print I had to pry of the bead with a razor knife in order to measure with calipers. On the video and picture I had already removed the print from the bed. I have three different calipers including vernier around my workshop.My measurements should be ok. The bed I had leveled with a feeler gauge to a 0.152 mm on four points around the bed. My first layer was 0.28 mm and the next were set to 0.10 mm, which is where I typically print. I tried the print with Cura and then with Slic3r. On the X and Y the dimensions come up relatively ok and straight lines appear straight. The problem happens on the diagonals. The dimensions deviate more on upper left and upper right movements of the print head where it also print straight lines with waives on the sides.
Any thoughts?
Thank you
Edited 1 time(s). Last edit at 01/22/2016 12:49AM by Pianori.
|
Re: 3D printer build from scratch, tips and hints welcome January 22, 2016 02:15AM |
Registered: 9 years ago Posts: 100 |
If you've changed the number of teeth on your drive pulley then you'll need to change the steps per millimetre in Marlin for that axis.
And to answer your other question, it's normal to start a new thread (unless your question is directly related to the discussion in this thread, which it doesn't seem to be).
And to answer your other question, it's normal to start a new thread (unless your question is directly related to the discussion in this thread, which it doesn't seem to be).
|
Re: 3D printer build from scratch, tips and hints welcome January 22, 2016 06:58AM |
Registered: 11 years ago Posts: 5,780 |
If the thickness of the print is varying across the model's surface there are many possibilities. Maybe the bed wasn't level, or isn't flat, or doesn't move linearly, or the mechanism that moves the extruder is not working properly or is unstable. Grab the extruder and try to wiggle it. Does the nozzle move up/down when you apply a small amount of force? Does the bed glide smoothly from one end of its axis to the other? The extruder carriage?
The wiggly line on the print indicates either over-extrusion or, more likely, an increase in the space between the extruder and the model. You have more variation in print height (.34mm) than the first layer thickness (.28 mm), yet the print still manages to stick to the bed - a miracle! If the Y axis rails are not parallel, the bed may "twist" as it moves changing the spacing between the extruder and the print. If the X axis rails are not parallel the extruder may behave the same way. How is the bed leveled in your machine, and how are the guide rails arranged and kept parallel to each other on each axis and orthogonal to each axis on the machine's frame?
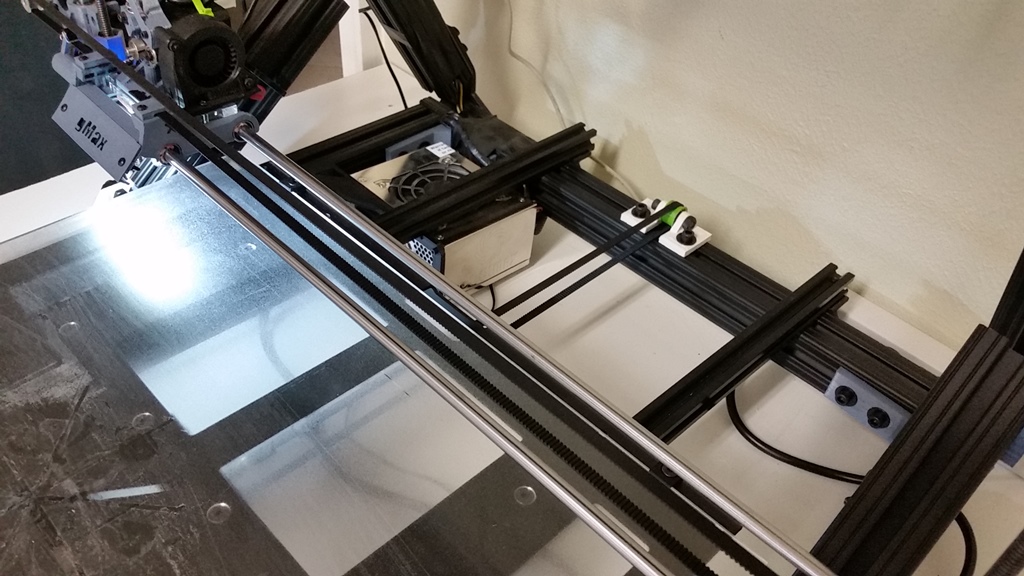
A couple pics of the machine may help here.
Edited 1 time(s). Last edit at 01/22/2016 07:01AM by the_digital_dentist.
Ultra MegaMax Dominator 3D printer: [drmrehorst.blogspot.com]
The wiggly line on the print indicates either over-extrusion or, more likely, an increase in the space between the extruder and the model. You have more variation in print height (.34mm) than the first layer thickness (.28 mm), yet the print still manages to stick to the bed - a miracle! If the Y axis rails are not parallel, the bed may "twist" as it moves changing the spacing between the extruder and the print. If the X axis rails are not parallel the extruder may behave the same way. How is the bed leveled in your machine, and how are the guide rails arranged and kept parallel to each other on each axis and orthogonal to each axis on the machine's frame?
A couple pics of the machine may help here.
Edited 1 time(s). Last edit at 01/22/2016 07:01AM by the_digital_dentist.
Ultra MegaMax Dominator 3D printer: [drmrehorst.blogspot.com]
|
Re: 3D printer build from scratch, tips and hints welcome January 22, 2016 07:00AM |
Registered: 9 years ago Posts: 1,873 |
So you're measuring the thickness of walls in the XY plane with the walls arranged at different angles around the Z axis. I suspect all that you are seeing is the limits of how the slicer approaches thin walls where dX or dY != 0. If you want to check XY calibration just print a series of linear elements in X and Y, e.g. hollow cubes of different sizes or a stepped shape designed specifically for the purpose. Measure several sizes and plot - don't rely on a single size or you won't be able to separate the XY scale from any constant offset. Once plotted on a graph (expected size vs measured) the scale is the slope and any non-zero intercept is the constant offset due most likely to over or under extrusion, but also potentially to any systematic measurement error. If you use a plastic with noticeable shrinkage such as abs you also have to consider whether you want to correct for that in the printer calibration. I prefer not to as I use a lot of different plastics, so I keep the printer calibration at 'nominal' and allow for any shrinkage at the design stage.
|
Re: 3D printer build from scratch, tips and hints welcome January 22, 2016 02:18PM |
Registered: 8 years ago Posts: 7 |
Thank you for all of your responses.
Well I measured the bed again and it seems to be dead on. The Print measures consistently on the height (look at the drawing " Wiggles" for the H dimension). The problem seems to happen on the diagonal direction as the straight X and Y motions seem to produce consistent results with no wiggly lines.
It seems that when both steppers have to work together to produce a line is when the problem appears. How do I make sure that they are sincronized to work well toghether? I guess on the pots on the stepper controllers how do I know how to set the right voltage for the stepper motors, other than making sure that the stepper is not hot or noisy?
I did check the XYZ alignment and squareness of the extruder to the XY plane and it seems fine. The only thing that seemed odd was a small drag on the table. It seemed that one of the V rollers was too tight and it was slightly catching on the v-rails. I fixed that and now the bed is sliding smooth. Not sure if that could cause what I am experiencing, but I addressed it just in case. I will reprint another star to see if anything changes.
I'm open to any other suggestions.
Thanks
Edited 3 time(s). Last edit at 01/22/2016 02:41PM by Pianori.
|
Re: 3D printer build from scratch, tips and hints welcome January 22, 2016 02:40PM |
Registered: 9 years ago Posts: 1,873 |
Hmm, the wiggles are interesting. That makes my orginal commetn seem a bit off. Wiggles should not be there. If there's any backlash in either axis that often shows up as straight sections on circles, so maybe a few circles of different diameters would be an interesting test.
Setting the stepper drivers to deliver ~80% of the rated motor current is a fairly good starting point, provided you actually know what sense resistors are fitted to your drivers which isn't necessarily easy with all the variations around. Failing that, increasing the drive until the motors get warm but not hot is probably a fairly safe bet.
Setting the stepper drivers to deliver ~80% of the rated motor current is a fairly good starting point, provided you actually know what sense resistors are fitted to your drivers which isn't necessarily easy with all the variations around. Failing that, increasing the drive until the motors get warm but not hot is probably a fairly safe bet.
|
Re: 3D printer build from scratch, tips and hints welcome January 22, 2016 02:59PM |
Registered: 8 years ago Posts: 7 |
|
Re: 3D printer build from scratch, tips and hints welcome January 22, 2016 03:03PM |
Registered: 9 years ago Posts: 1,873 |
|
Re: 3D printer build from scratch, tips and hints welcome January 22, 2016 03:29PM |
Registered: 11 years ago Posts: 5,780 |
Disregard my previous comments- the problem is the width of the lines, not the height of the print.
Ultra MegaMax Dominator 3D printer: [drmrehorst.blogspot.com]
Ultra MegaMax Dominator 3D printer: [drmrehorst.blogspot.com]

Sorry, only registered users may post in this forum.