Home
>
Reprappers
>
Topic
Hardening your Prusa i3 3D Printer
Posted by thetazzbot
|
Hardening your Prusa i3 3D Printer May 30, 2015 02:55PM |
Registered: 9 years ago Posts: 396 |
I documented my approach to hardening the Prusa i3 in an article on my site. For any Prusa builders out there, this is good info. If you have any suggestions for additions please post them here!
In summary:
Constrain the X axis bearings in their printed-part sleeves
Constrain the Z axis captured nut that rides in the X axis motor and idler parts
Replace the linear bearings with tighter fitting hard plastic bushings. Preferably nylon, delrin, PLA or HIPS. Not ABS.
Replace Y bed linear bearings with printed bearing blocks.
Throw away the cheap chines steel linear bearings.
Ensure the Z axis threaded rods are not constrained at the top. If you constrain them, they will force the X carriage to wobble.
Reduce X axis carriage bearing count from four to three, situated in a triangle.
Mount the entire printer to a piece of solid wood base.
I'll add this one as an overall goal that I'm not achieved yet:
Eliminate zip ties.
[www.thetazzbot.com]
Edited 1 time(s). Last edit at 05/30/2015 02:57PM by thetazzbot.
|
Re: Hardening your Prusa i3 3D Printer May 30, 2015 06:29PM |
Registered: 8 years ago Posts: 66 |
|
Re: Hardening your Prusa i3 3D Printer May 30, 2015 07:41PM |
Registered: 9 years ago Posts: 156 |
Quote
thetazzbot
I documented my approach to hardening the Prusa i3 in an article on my site. For any Prusa builders out there, this is good info. If you have any suggestions for additions please post them here!
In summary:
Constrain the X axis bearings in their printed-part sleeves
Constrain the Z axis captured nut that rides in the X axis motor and idler parts
Replace the linear bearings with tighter fitting hard plastic bushings. Preferably nylon, delrin, PLA or HIPS. Not ABS.
Replace Y bed linear bearings with printed bearing blocks.
Throw away the cheap chines steel linear bearings.
Ensure the Z axis threaded rods are not constrained at the top. If you constrain them, they will force the X carriage to wobble.
Reduce X axis carriage bearing count from four to three, situated in a triangle.
Mount the entire printer to a piece of solid wood base.
I'll add this one as an overall goal that I'm not achieved yet:
Eliminate zip ties.
[www.thetazzbot.com]
Why is three linear bearings better than four? I've seen this said before...something about alignment?
|
Re: Hardening your Prusa i3 3D Printer May 31, 2015 01:47AM |
Registered: 9 years ago Posts: 705 |
Here is my approach. 4 bearings in all three parts. Set screws to clamp x rods instead of hammer assembly. Solid 1 piece x carraige. Rock solid.

|
Re: Hardening your Prusa i3 3D Printer June 01, 2015 12:46AM |
Registered: 9 years ago Posts: 396 |
Quote
Vanbot
Why is three linear bearings better than four? I've seen this said before...something about alignment?
4 vs 3 bearings
|
Re: Hardening your Prusa i3 3D Printer June 01, 2015 04:06AM |
Registered: 8 years ago Posts: 5,232 |
|
Re: Hardening your Prusa i3 3D Printer June 01, 2015 03:20PM |
Registered: 9 years ago Posts: 156 |
Quote
thetazzbot
Quote
Vanbot
Why is three linear bearings better than four? I've seen this said before...something about alignment?
4 vs 3 bearings
So from that thread, some people aren't convinced three is superior. But for those who are convinced, it seem it's because it's easier to align three bearings?
|
Re: Hardening your Prusa i3 3D Printer June 01, 2015 04:13PM |
Registered: 9 years ago Posts: 396 |
Well,
If you had a machine with tight tolerances, solid construction, etc, you would go for three.
[the below is constrained to the Prusa i3 design or basic cartesian printers]
If you have a reprap built from scrap metal, loose bearings and such, I agree, four is better. I'm experiencing this now with my bed and the three bearing slots it has.
But this goes to actual proper mechanical design as well. For example, the Prusa i3 bed arrangement is as bad as it can be.
The way the motor and belt is centered between a triangle of bearings causes cocking and twisting of the bed. In a three bearing arrangement, two bearings are the "leaders" and the single is the follower. The motor and belt is supposed to be arranged close to the leaders. This way the force is linear against the supported rail, and not applied to the rail with the single supporting bearing.
With a centered belt design, it really should have had four bearings.
[I'm experimenting with the following arrangement]
The same goes for the X axis. You have two belt end points that are attached to the carriage. These should be aligned on the side of the two bearings, with a single follower on the opposite rail. Four here are technically fine tool, but truly unnecessary.
I'd go as far to say that the Z bearings could be reduced to one on each side. But I digress
Edited 1 time(s). Last edit at 06/01/2015 04:15PM by thetazzbot.
|
Re: Hardening your Prusa i3 3D Printer June 02, 2015 01:02AM |
Registered: 8 years ago Posts: 82 |
Quote
thetazzbot
Constrain the Z axis captured nut that rides in the X axis motor and idler parts
Constrain how?
Quote
thetazzbot
Replace Y bed linear bearings with printed bearing blocks.
You mean put the bearings in printed bearing blocks instead of zip-tieing them to the carriage? How about plastic bushings here?
Quote
thetazzbot
Ensure the Z axis threaded rods are not constrained at the top.
How about replacing the threaded rods with leadscrews? (Much straighter, stronger, and less wobble)
Quote
thetazzbot
Reduce X axis carriage bearing count from four to three, situated in a triangle.
You mean Y axis I think.
I'm not an engineer, although they call me one (software), but even I can see several poorly-thought-out things about the I3. I wonder how it got so popular, other than by Saint Josef being a shameless self-promoter?

|
Re: Hardening your Prusa i3 3D Printer June 02, 2015 01:20PM |
Registered: 9 years ago Posts: 396 |
Quote
CraigMoberg
Quote
thetazzbot
Constrain the Z axis captured nut that rides in the X axis motor and idler parts
Constrain how?

Quote
CraigMoberg
Quote
thetazzbot
Replace Y bed linear bearings with printed bearing blocks.
You mean put the bearings in printed bearing blocks instead of zip-tieing them to the carriage? How about plastic bushings here?
Yes, but there is a caveat here. Need to print with 30% or better infill. My early tests with 15% showed that the blocks flex when tighted down and grip the rods too hard, preventing smooth movements.
Quote
CraigMoberg
Quote
thetazzbot
Ensure the Z axis threaded rods are not constrained at the top.
How about replacing the threaded rods with leadscrews? (Much straighter, stronger, and less wobble)
Yeah, that's a good approach. I checked Misumi and they are about $40 each plus the nut.
Quote
CraigMoberg
Quote
thetazzbot
Reduce X axis carriage bearing count from four to three, situated in a triangle.
You mean Y axis I think.
No, X. Y is already three on mine (and original design). But I've since switched back to four after some dis-sastified testing.
Quote
CraigMoberg
I'm not an engineer, although they call me one (software), but even I can see several poorly-thought-out things about the I3. I wonder how it got so popular, other than by Saint Josef being a shameless self-promoter?
Yeah, same here. Maybe it's just the hunger of it all, a hungry man will eat anything and think it's the best.
You know, I hate to sound like I'm attacking the design. I really like to watch it print, and everyone who's seen it thinks I'm a fricken genius because I built it
But like all things, there is room for improvement.
Edited 1 time(s). Last edit at 06/02/2015 01:20PM by thetazzbot.
|
Re: Hardening your Prusa i3 3D Printer June 02, 2015 05:22PM |
Registered: 8 years ago Posts: 82 |
Quote
thetazzbot
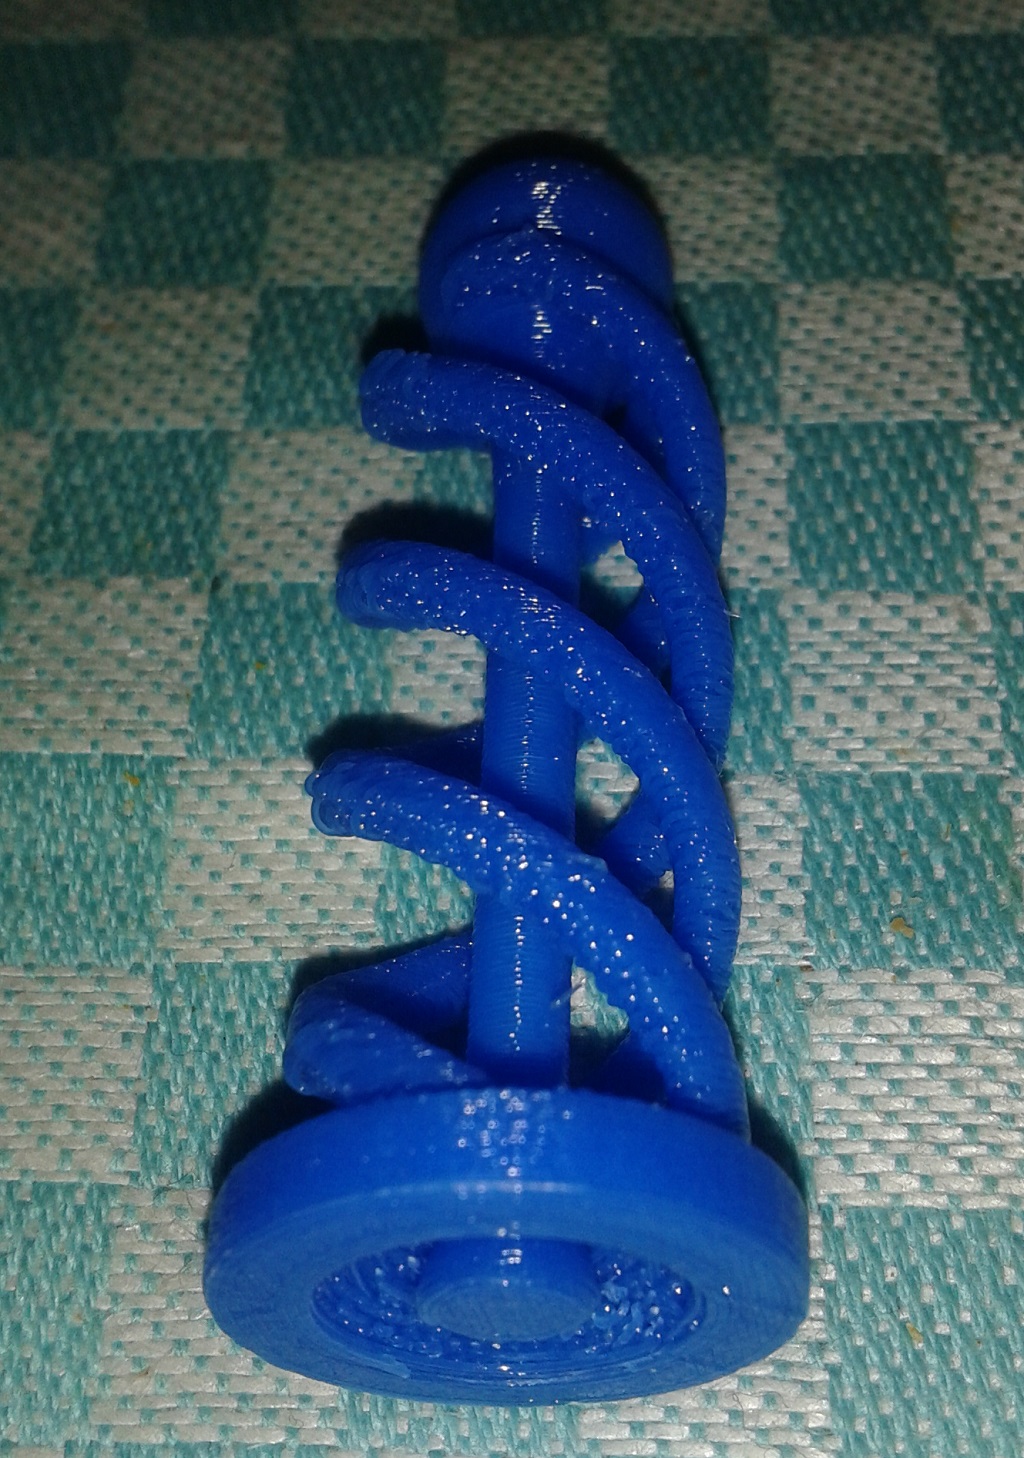
Constrain the Z axis captured nut .. [picture]
Simple and effective. I've been wondering what happens when that nut escapes from its recess. Actually I think it did once.
Quote
thetazzbot
No, X.
Ok, right, I misread. I thought you were talking about the bed leveling screws - digital_dentist and I'm sure others have said there should only be 3 of those. (Add it to the list!) I think my X carriage came with only 3 bearings, so that's good. (Not very good bearings, of course...)
I guess the design philosophy was to make an affordable printer for the masses, so compromises had to be made. But now that I'm getting closer to mastering all the settings and tweaks, I'm getting prints that look far better than I ever expected from a $289 printer. I just printed a Koch tealight holder that came out pretty darn good.
|
Re: Hardening your Prusa i3 3D Printer June 02, 2015 09:00PM |
Registered: 9 years ago Posts: 705 |
|
Re: Hardening your Prusa i3 3D Printer June 02, 2015 09:33PM |
Registered: 8 years ago Posts: 82 |
Quote
elwood127
Nice print Craig. These machines are a perfect learning tool.
Oh, that link isn't to my print -- that's the maker on Thingiverse. This is mine: (almost as good
)
|
Re: Hardening your Prusa i3 3D Printer June 03, 2015 11:28AM |
Registered: 8 years ago Posts: 5,232 |
Quote
CraigMoberg
Quote
elwood127
Nice print Craig. These machines are a perfect learning tool.
Oh, that link isn't to my print -- that's the maker on Thingiverse. This is mine: (almost as good
[attachment 55834 IMG_0916.JPG]
Challenge accepted

I printed mine with 0.4mm wall and manual filament change. The wall is almost transparent but still sturdy!
Beat this!
-Olaf
I have a 0.2mm nozzle, getting curious if 0.2mm wall could be done.
|
Re: Hardening your Prusa i3 3D Printer June 03, 2015 03:03PM |
Registered: 8 years ago Posts: 82 |
Quote
o_lampe
Challenge accepted
If I'd known we were going to have dueling printers, I'd have brought my A game.
I think you win just for using 2 colors, and a nicer color choice at that. I have some holes in the walls even at ~1mm. (Notice I took my picture from the opposite side..
 ) The nozzle took a shortcut around some corners, especially at the seam. What speed did you print at?
If you want another challenge -- these guys have thrown down the gauntlet after slapping RepRappers in the face with it. I've tried once and failed. (They've deviously kept the bottom surface area to a minimum, so make sure you have good bed adhesion.)
Edited 1 time(s). Last edit at 06/03/2015 03:03PM by CraigMoberg.
|
Re: Hardening your Prusa i3 3D Printer June 03, 2015 05:38PM |
Registered: 8 years ago Posts: 66 |
Quote
CraigMoberg
Quote
o_lampe
Challenge accepted
If I'd known we were going to have dueling printers, I'd have brought my A game.
I think you win just for using 2 colors, and a nicer color choice at that. I have some holes in the walls even at ~1mm. (Notice I took my picture from the opposite side..
If you want another challenge -- these guys have thrown down the gauntlet after slapping RepRappers in the face with it. I've tried once and failed. (They've deviously kept the bottom surface area to a minimum, so make sure you have good bed adhesion.)
I'm going to give that a try once I get my printer back together, tore it down to see how painful maintenance is going to be.
|
Re: Hardening your Prusa i3 3D Printer June 04, 2015 02:03AM |
Registered: 9 years ago Posts: 396 |
|
Re: Hardening your Prusa i3 3D Printer June 04, 2015 06:40PM |
Registered: 9 years ago Posts: 705 |
Using my cheesy, modified Z605 I found that challenge print pretty easy. I wish my camera would focus closer. A little ridgey but pretty clean. I'm going to try it upside down.


|
Re: Hardening your Prusa i3 3D Printer June 04, 2015 09:46PM |
Registered: 9 years ago Posts: 705 |
A few strands under the top (bottom) but came out good. I need to try the vase. Is that a Thingiverse file? If not where can I get it. Thanks.

|
Re: Hardening your Prusa i3 3D Printer June 04, 2015 11:37PM |
Registered: 8 years ago Posts: 66 |
Quote
CraigMoberg
Quote
thetazzbot
Constrain the Z axis captured nut .. [picture]
Simple and effective. I've been wondering what happens when that nut escapes from its recess. Actually I think it did once.
Quote
thetazzbot
No, X.
Ok, right, I misread. I thought you were talking about the bed leveling screws - digital_dentist and I'm sure others have said there should only be 3 of those. (Add it to the list!) I think my X carriage came with only 3 bearings, so that's good. (Not very good bearings, of course...)
I guess the design philosophy was to make an affordable printer for the masses, so compromises had to be made. But now that I'm getting closer to mastering all the settings and tweaks, I'm getting prints that look far better than I ever expected from a $289 printer. I just printed a Koch tealight holder that came out pretty darn good.
The link for the tea light holder is in this post.

|
Re: Hardening your Prusa i3 3D Printer June 05, 2015 04:40AM |
Registered: 8 years ago Posts: 5,232 |
I printed both, the glorius and the ultimate troll. I had a little fuzz beween them and the ultimate didn´t look too good on the underside.
It was like "around the world in 80 days-challenge", but with a modern supersonic jet
-Olaf
It was like "around the world in 80 days-challenge", but with a modern supersonic jet
-Olaf
|
Re: Hardening your Prusa i3 3D Printer June 05, 2015 06:03AM |
Registered: 9 years ago Posts: 705 |
|
Re: Hardening your Prusa i3 3D Printer June 05, 2015 01:40PM |
Registered: 9 years ago Posts: 396 |
Ok, I printed the epic thing. it didn't fail. It shows a lot of interesting artifacts that i want to try to understand and resolve. But, hey, its not too terrible
Yes, that is green duct tape on my Y rod ends.
Edited 1 time(s). Last edit at 06/05/2015 01:41PM by thetazzbot.

Yes, that is green duct tape on my Y rod ends.
Edited 1 time(s). Last edit at 06/05/2015 01:41PM by thetazzbot.
|
Re: Hardening your Prusa i3 3D Printer June 05, 2015 01:50PM |
Registered: 9 years ago Posts: 396 |
Try the Star Vase Configurator
I printed this with pretty thick shells.
[www.thingiverse.com]
12 points, 50mm base, 120 mm top, 160 mm tall i think
Maybe we should make a weekly print challenge
[www.thingiverse.com]
I'm going to have a go at the tealight holder in tye died nylon.
Edited 1 time(s). Last edit at 06/05/2015 01:52PM by thetazzbot.
I printed this with pretty thick shells.
[www.thingiverse.com]
12 points, 50mm base, 120 mm top, 160 mm tall i think

Maybe we should make a weekly print challenge
[www.thingiverse.com]
I'm going to have a go at the tealight holder in tye died nylon.
Edited 1 time(s). Last edit at 06/05/2015 01:52PM by thetazzbot.
|
Re: Hardening your Prusa i3 3D Printer June 09, 2015 12:38AM |
Registered: 9 years ago Posts: 705 |
Sorry, only registered users may post in this forum.