Home
>
Reprappers
>
Topic
i3 (Z-605) Build Plate Upgrade
Posted by elwood127
|
i3 (Z-605) Build Plate Upgrade April 18, 2015 09:34PM |
Registered: 9 years ago Posts: 705 |
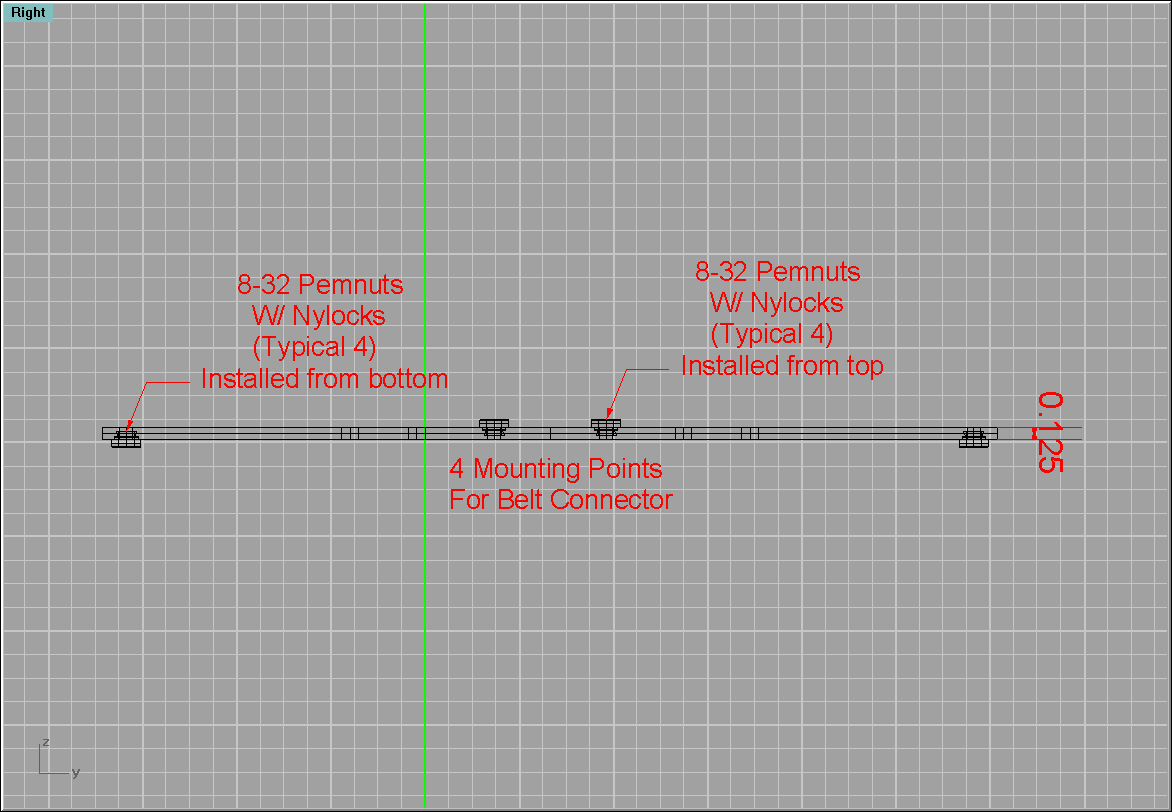
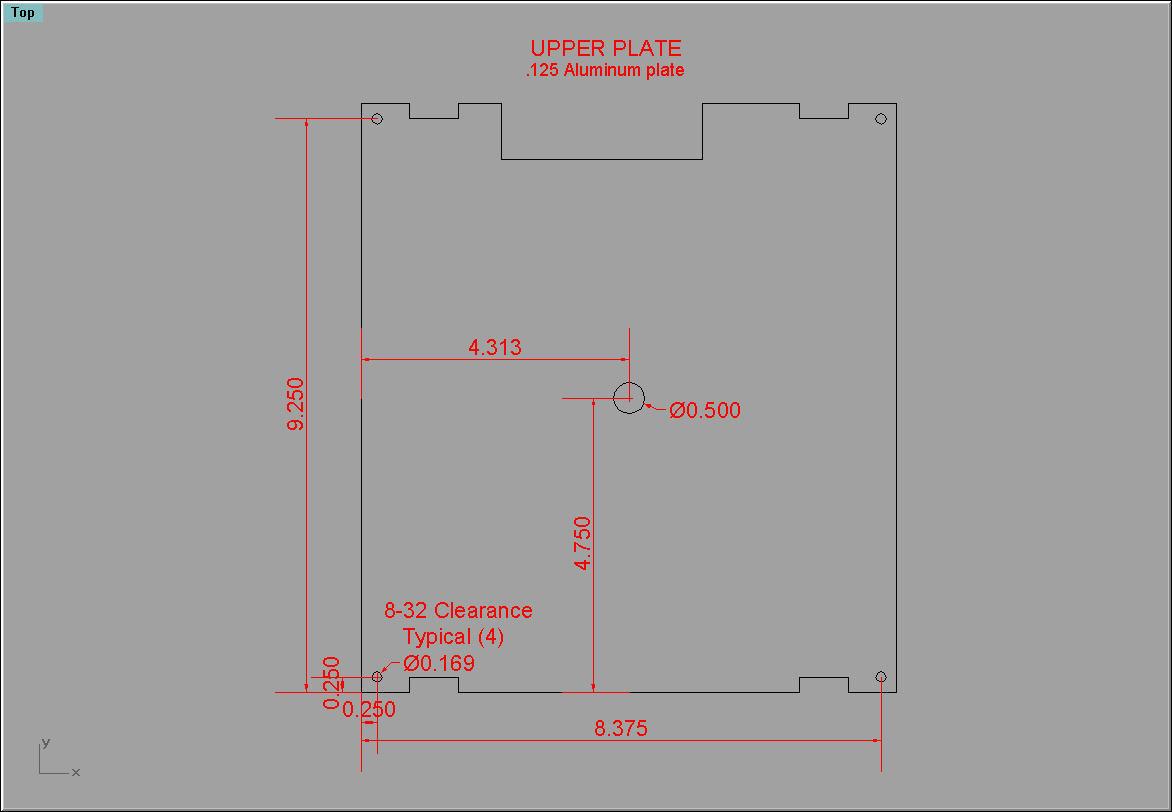
Hey all, if you have one of these plexiglass framed printers you know what a lousy piece of design the build plate is and how difficult it is to keep things level. I redesigned the whole affair enlarged to utilize PEM-NUTS with nylon inserts for the leveling screws and belt attachment bracket. Attached are JPEGS of the 3d top and bottom view along with dimensioned drawings for the (2) plates. In this design the Hot Plate goes on top of the aluminum and under the glass instead of under it. The Lower Plate has notched areas for spring clips to hold down the glass and hot plate and a clearance notch for the hot plate solder pads. The plates are .125 Aluminum 8 5/8 x 9 1/2 to add enough metal for PEM-NUT installation. Being a stubborn old fart I am using 8-32 screws. Obviously you can have your sheet metal shop install metric nuts. Make sure you specify Nylon insert nuts so leveling adjustments stay adjusted. Also you must find a shop that can cut metal with a Flowjet or Laser to keep plates perfectly flat. My shop in Salt Lake quoted me $164.00. A bit pricey but for engineering and labor not to bad. They wanted PDF files for the cad work but I can't export that so they took DXF files along with dimensioned drawings instead. If you would like a particular file format (IE: Solidworks, Catia, IGES, Step etc) I would be happy to send you the 3d drawings if you send me your email address. Also, this bottom plate adds a forth linear bearing mount. Three was to floppy for me. The last JPEG shows the type of printer I'm using. I hope this comes in handy for some of you. Brian.
Attachments:
open | download - Buildplate Top view.jpg (165 KB)
open | download - Buildplate Bottom view.jpg (147.6 KB)
open | download - Lower Plate Dim.jpg (181.7 KB)
open | download - Lower Plate Pem-nut Layout.jpg (305.4 KB)
open | download - Upper Plate Hole Dim.jpg (115.3 KB)
open | download - Upper Plate Shape Dim.jpg (120.9 KB)
open | download - DSC00395.jpg (194.3 KB)
|
Re: i3 (Z-605) Build Plate Upgrade April 18, 2015 09:42PM |
Registered: 9 years ago Posts: 705 |
|
Re: i3 (Z-605) Build Plate Upgrade May 10, 2015 07:01PM |
Registered: 9 years ago Posts: 705 |
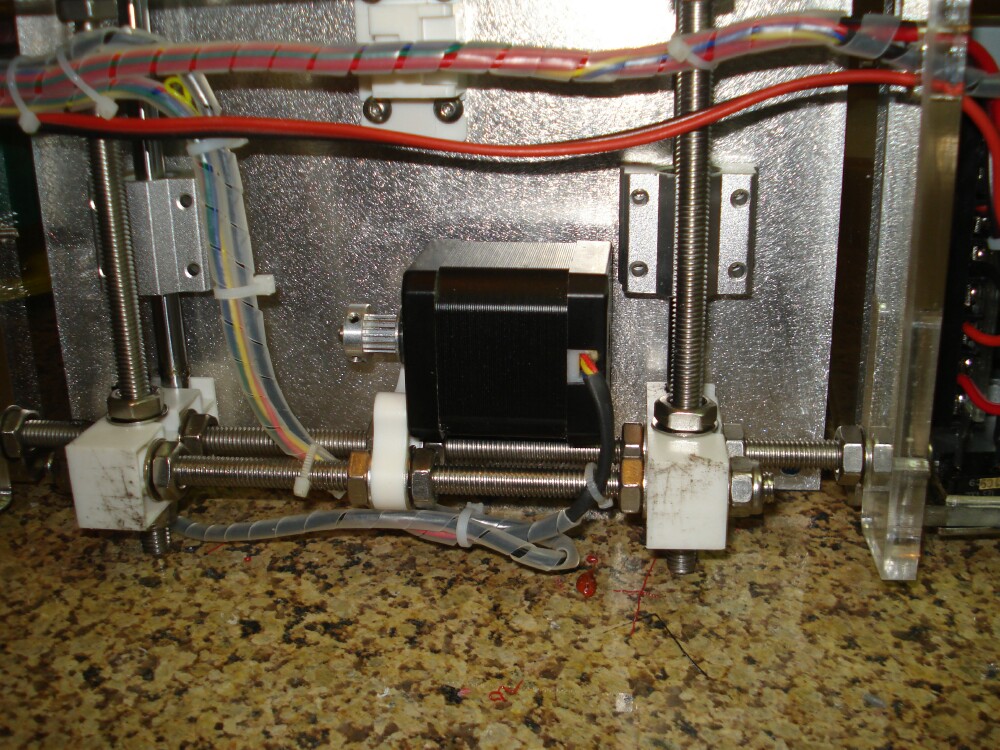
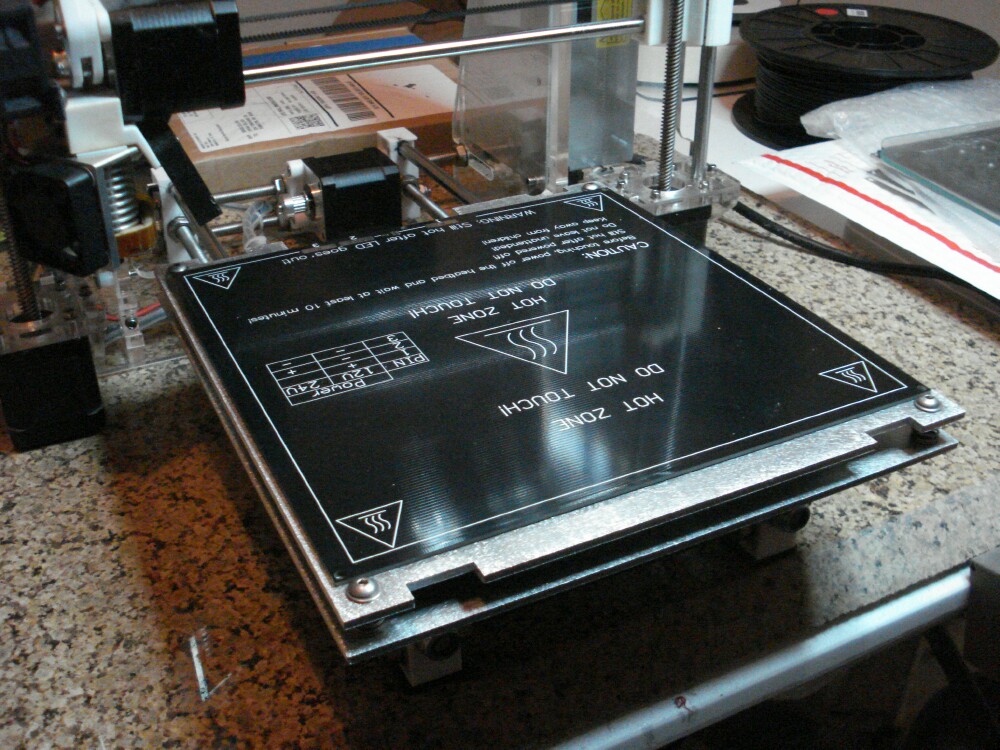
I got my Upper and Lower build plates back from a Salt Lake sheet metal shop. Cut beautifully from 6061 T6 aluminum @ .125 thick. Final surface of 8.5 x 9.0 inches. Increased build area to 210 x 220 mm. The nylock self clinching nuts for the adjusters and belt clip work perfectly. Leveling screws stay completely tight opposed to the cheesy wingnuts that came with the kit. The (4th) linear bearing easily clears the Y motor. Can't imagine why they only used (3). Solid as a rock now and leveling seems to be holding. Time will tell. Not sure why but purchasing the Pemnuts was like pulling teeth. Finally got (2) companies to send me 24 "samples". The nylon insert makes them a specialty item. Rivnuts might be another option. The laser cutting ran $175.00. Not sure if that's a good or bad price. Definately worth it to me to eliminate the problems with the original design. I've since created a PDF of the design that the shop required. Hopefully some of you will take advantage of the drawing.
Attachments:
open | download - DSC00418.JPG (219.1 KB)
open | download - DSC00422.JPG (195 KB)
open | download - DSC00424.JPG (247 KB)
open | download - DSC00425.JPG (71.4 KB)
open | download - DSC00427.JPG (217.5 KB)
open | download - DSC00428.JPG (225.2 KB)
open | download - DSC00429.JPG (211.9 KB)
open | download - lower[1].pdf (7.9 KB)
open | download - upper[1].pdf (5.3 KB)
|
Re: i3 (Z-605) Build Plate Upgrade May 20, 2015 02:57PM |
Registered: 9 years ago Posts: 396 |
|
Re: i3 (Z-605) Build Plate Upgrade May 21, 2015 02:03AM |
Registered: 8 years ago Posts: 5,232 |
|
Re: i3 (Z-605) Build Plate Upgrade May 21, 2015 10:04PM |
Registered: 9 years ago Posts: 705 |
Hey O lampe,good question. The original setup used screws and wing nuts. Very cheesy. Using Slic3r the honeycomb infill beat the hell out of the printer and leveling settings. I've since switched to Cura. The grid infill is a much smoother operation. The nylon nuts have been a great improvement. I do like your idea of using countersink screws. Hey Tazzbot, I'm waiting for a cork sheet delivery. The new MK2B bed has a resistance of 1.3 ohms and is taking about a half an hour to reach temp. Initially it would reach 100c but now won't go above 86c. Not sure whats up with that. Am planning on reinstalling the old bed that is 1.1 ohm. With the larger aluminum plates I no longer have the luxury of mounting under the plate because the screws are outside of the heatbed screw holes. The old setup had screws running through the heatbed screw holes and the springs held it up tight to the plate. The rtv i used to hold the heatbed in place worked well so maybe I'll try using the same underneath the aluminum. Thanks for the input.
Sorry, only registered users may post in this forum.