difference ABS & PLA
Posted by Swengson
|
difference ABS & PLA January 26, 2016 09:33AM |
Registered: 8 years ago Posts: 29 |
Hello all,
I print with PLA and ABS.
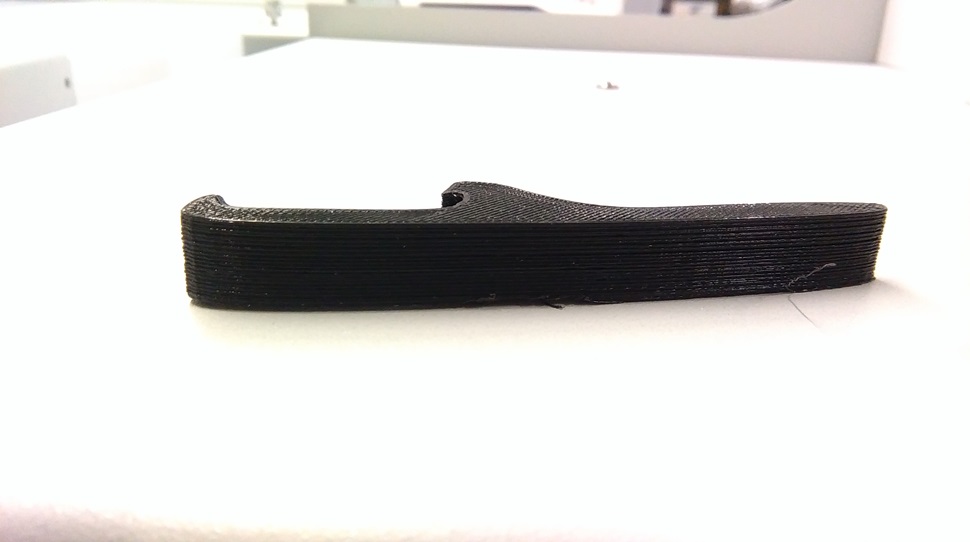
ABS looks very great but when I print PLA it looks bad.
See the pictures for more information.
The bed was damage so the top of the print is not fine. But you can see the different in the layers.
Maybe someone knows why my printer ABS have good pressure and PLA not ?
Thank you!
Edited 1 time(s). Last edit at 01/26/2016 09:35AM by Swengson.
I print with PLA and ABS.
ABS looks very great but when I print PLA it looks bad.
See the pictures for more information.
The bed was damage so the top of the print is not fine. But you can see the different in the layers.
Maybe someone knows why my printer ABS have good pressure and PLA not ?
Thank you!
Edited 1 time(s). Last edit at 01/26/2016 09:35AM by Swengson.
|
Re: difference ABS & PLA January 26, 2016 01:26PM |
Registered: 8 years ago Posts: 778 |

|
Re: difference ABS & PLA January 31, 2016 08:45AM |
Registered: 8 years ago Posts: 29 |
|
Re: difference ABS & PLA January 31, 2016 09:47AM |
Registered: 11 years ago Posts: 5,780 |
see [reprap.org]
Before trying to calibrate the extruder, you need to know the diameter of your filament. The manufacturer's number is a nominal value and if you use that value your calibration will not be optimal. You need to measure the filament at several places and average the values to get the true diameter. I usually measure 20-30 places over 5 or 6 meters of filament.
Pay particular attention to the "fine E steps" calibration, and calibrate at the thinnest layer size you anticipate using.
Once the extruder is calibrated, there are three ways to ensure optimum print quality (at least as far as extrusion goes):
1) print a single walled object at a specific wall thickness- use Slic3r's spiral vase mode. If you have a 0.4mm nozzle, try printing a 0.5mm wall thickness. Measure the thickness of the print's wall and use the extrusion multiplier to correct for over or underextrusion. Example: if you told it to print 0.5mm wall and it printed a 0.45mm wall, you need to set the multiplier to 1.11. Mark that value of extrusion multiplier on the filament spool because you will need to use it every time you print with that spool of filament.
2) measure the filament diameter at 20-30 places, average the value and use that value when you slice. That should give a good result if the extruder is calibrated accurately. Mark the filament diameter on the spool because you will need to use it every time you slice for that spool of filament.
3) Use volumetric extrusion when you slice- set the filament diameter in the slicer to 1.128379mm (see the calibration guide above for the rationale) and then enter the measured average filament diameter (as in #2, above) when you print. Smoothieware allows the filament diameter to be entered from the LCD control panel if you're using a smoothieboard. You can also enter the filament diameter using M200 command via pronterface or whatever host software you use.
Of the three methods described above, I think #3 is best. It does not require you to print a test part to measure the wall thickness, but most importantly, it does not require you to reslice when you change filament spools/diameter. That means you can print the same part in different colors or from different sized spools of filament without having to reslice. All you do is enter the new filament diameter at print time. You can even use the same gcode to switch between 3mm and 1.75mm filament, should the need arise.
There are three things to do every time you get a new spool of filament.
1) after unwrapping the spool and setting the desiccant aside, weigh the spool. If you bought a 1 kg spool of filament and it weighs 1.324g, the empty spool weighs 324 g. Mark that empty spool weight on the spool. In the future, when you're getting ready to start a big print, you can weigh the spool and know if you have enough filament to finish the print before you start.
2) measure the filament diameter in 20-30 places and calculate the average diameter. Mark that diameter on the spool. You will need it when you slice or when you print from that spool.
3) Mark the filament material on the spool. As hard to believe as it is, some manufacturers ship filament on unmarked spools. If it's a weird material that you don't use a lot, it's a good idea to mark the recommended extruder and bed temperatures as well.
In theory, if you set the extruder and bed temperatures to "0" and set the filament diameter to 1.128379 mm when you slice, the resulting gcode can be used for any filament material and any diameter (assuming speed and retraction settings are the same). That means you can switch between PLA, ABS, TPU, etc., even if the filaments are different diameters. You just enter the temperatures and filament diameter at print time. The reality is that for different materials you may need different speed, retraction, and print cooling settings, so you'll probably need to reslice for different materials any way.
You will need a caliper that can measure filament diameter down to 0.01 mm and a kitchen scale that can read at least 2 kg in 1-5 gram increments. Both are $10 items and are great investments that you will not regret.
Ultra MegaMax Dominator 3D printer: [drmrehorst.blogspot.com]
Sorry, only registered users may post in this forum.