Tips for micro layer height
Posted by mydogjustice
|
Tips for micro layer height March 28, 2012 07:07PM |
Registered: 12 years ago Posts: 54 |
I've played around before trying to make the printer print as fast as it will possibly manage to still turn out a print correctly, but I'm now playing with the other "limits" and right now just started to get into super thin layers. I'm completely tickeled with the first print, but I need some advice moving forward and some insight from this print.
Settings from this print:
.05 layer height
3 perimiter
3 solid layers
10% fill
1mm retraction
cooling enabled
.35 nozzle
185C first layer
195C subsequent (I jsut realized in typing this thread that I had these backwards in the slicing, but its how it was printed. Normally I would have these two values reversed)
Bed temp 60C
80mms perimeters
80mms infill
Bottom layer @ 30%
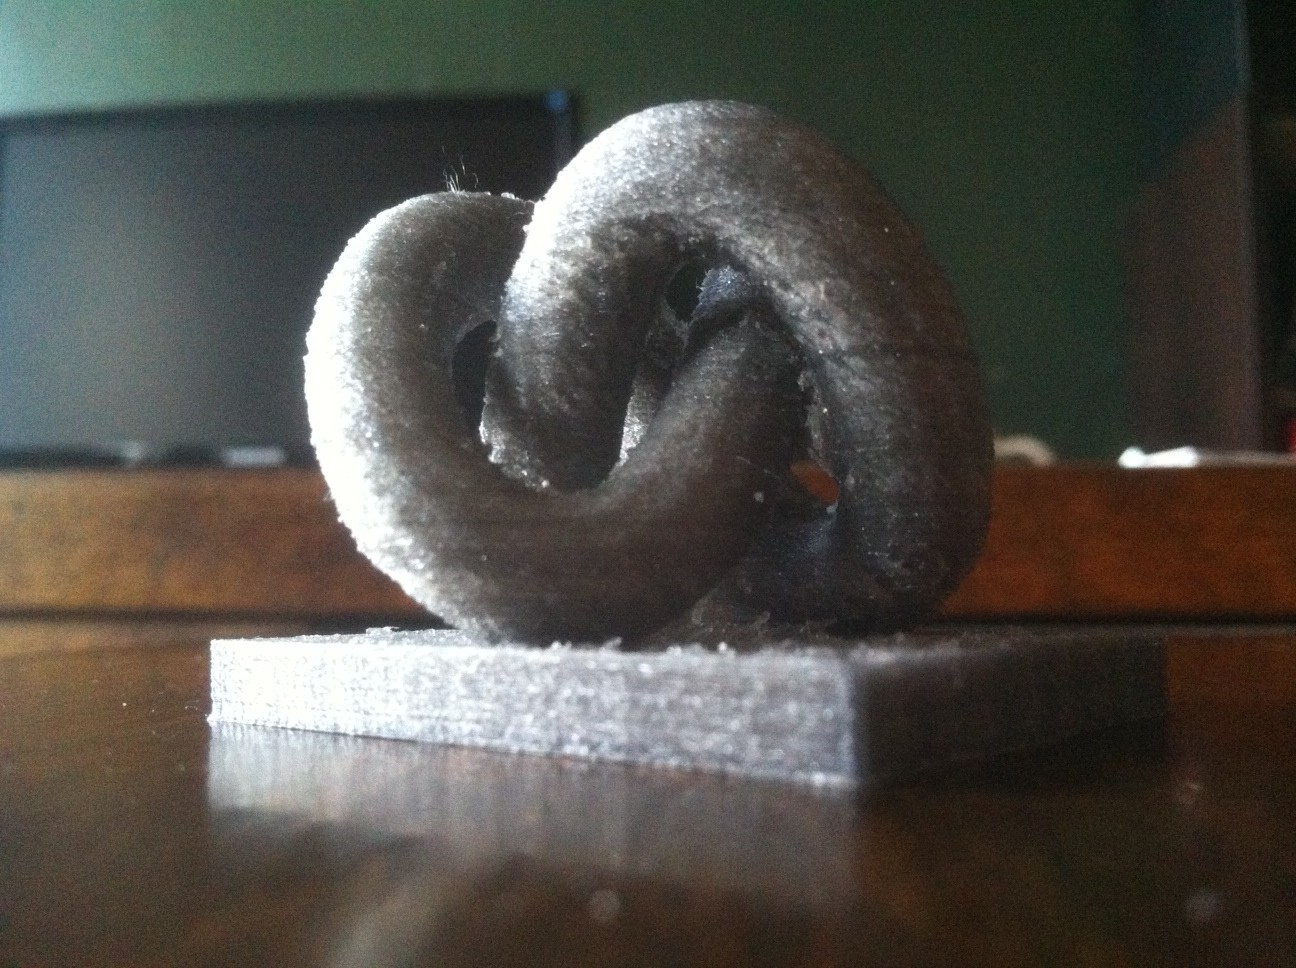
Bed adhesion was perfect and in the first layer, the filament is almost completely indistinguishable. Layers are almost indistinguishable as well. There's a bit of coarse feeling to the walls, but I understand that this is kinda normal when running the layer height that small. I believe I read this on nophead's blog? My biggest fails came when closing in the top layer of the base. It was extruding, just not enough to really fill in the top 3 layers. Obvious answers is more solid layers, but at what cost elsewhere in the print? Thought about filling solid layers at 90 and infill at 45. Since infill is only 10%, its pretty far to go both fill layers are both set at 45. Make sense? I also had quite a few boogers streaming between the chords that I had to clean up later. Would like to eliminate alot of that if possible. But, as I noticed earlier, I was prob printing a bit hotter than needed and maybe thats an answer to most of my problems.
Any of the pro boys have a good tips for getting better prints at super small layer heights?
Thanks for any feedback!
Josh
//++++++++++++++++++++++++++++++++++++++++++++++++++++++++++++++++++++++
//Prusa / RAMPS_1.4 & ATMega_2560 / Slic3r > Pronterface > Marlin / Luck
//++++++++++++++++++++++++++++++++++++++++++++++++++++++++++++++++++++++
Settings from this print:
.05 layer height
3 perimiter
3 solid layers
10% fill
1mm retraction
cooling enabled
.35 nozzle
185C first layer
195C subsequent (I jsut realized in typing this thread that I had these backwards in the slicing, but its how it was printed. Normally I would have these two values reversed)
Bed temp 60C
80mms perimeters
80mms infill
Bottom layer @ 30%
Bed adhesion was perfect and in the first layer, the filament is almost completely indistinguishable. Layers are almost indistinguishable as well. There's a bit of coarse feeling to the walls, but I understand that this is kinda normal when running the layer height that small. I believe I read this on nophead's blog? My biggest fails came when closing in the top layer of the base. It was extruding, just not enough to really fill in the top 3 layers. Obvious answers is more solid layers, but at what cost elsewhere in the print? Thought about filling solid layers at 90 and infill at 45. Since infill is only 10%, its pretty far to go both fill layers are both set at 45. Make sense? I also had quite a few boogers streaming between the chords that I had to clean up later. Would like to eliminate alot of that if possible. But, as I noticed earlier, I was prob printing a bit hotter than needed and maybe thats an answer to most of my problems.
Any of the pro boys have a good tips for getting better prints at super small layer heights?
Thanks for any feedback!
Josh
//++++++++++++++++++++++++++++++++++++++++++++++++++++++++++++++++++++++
//Prusa / RAMPS_1.4 & ATMega_2560 / Slic3r > Pronterface > Marlin / Luck
//++++++++++++++++++++++++++++++++++++++++++++++++++++++++++++++++++++++
|
Re: Tips for micro layer height March 28, 2012 07:33PM |
Registered: 12 years ago Posts: 52 |
|
Re: Tips for micro layer height March 28, 2012 08:55PM |
Registered: 13 years ago Posts: 123 |
Richrap's blog, I think it was his 3rd installment on Slic3r, talks a lot about very fine layers. Check it out. In general, SLOW DOWN, reduce temperature (a lot), and add lots more solid layers. If you can, get a smaller nozzle. I think you've already come those same conclusions, tho. I too played around with ultra fine layers, but decided I was too impatient to wait for even tiny objects to print unless I really wanted to impress someone. The smallest layer height I go nowadays is around .15mm, and usually print at .20mm to .28mm (with a 0.35mm nozzle) depending on the object.
With that layer height, if I remember right I had to go to 6 solid layers to get decent results, was printing at about a third of my normal speed, and had the temperature down as low as I could get and still extrude (around 160 degrees indicated) to minimize stringing and pushing molten plastic around in blobs.
With that layer height, if I remember right I had to go to 6 solid layers to get decent results, was printing at about a third of my normal speed, and had the temperature down as low as I could get and still extrude (around 160 degrees indicated) to minimize stringing and pushing molten plastic around in blobs.
|
Re: Tips for micro layer height March 29, 2012 08:18AM |
Registered: 12 years ago Posts: 54 |
Bingo! Thats the post I was thinking about. Couldnt find it in my bookmarks. Here's the link for anyone else RichRap I need to go back and re-read that article. I'm also terribly impatient (probablly the reason I tried to break my speed records first), but it seems to be an inherent drive that I find the limitations at all ends of the spectrum on anything I play with.
Its odd, but when I look at the screen and I'm making slicing decisions, everything looks good. But as I typed the thread, I began to question alot of my own settings as well. Obviously the temp setting, although I cant say I considered setting it quite that low. Do you still get good midlevel adhesion at 160ish? Which also dictates slower print speeds. That was another one that I questioned as I typed it up. While the speeds dont seem that fast on their own (prob 70% of where I would normally try to print), maybe I do need to halve the value again. I'd normally be in the same height settings .2-.3 and never really have any problems. I dont know if I'll get a smaller nozzle. From what I've read they can be a real bugger with clogging. But maybe. If (more likely when) I build another printer.
I'll bump layer counts up, speed and temp down, and see what I come up with. Might also double check e steps as I believe at the time I went with the "pretty close" approach. The other problem with impatience is normal procedure would dictate only changing one value at a time and testing results, buuuuuuuutttt......I cant wait that long! We have a saying at work, "Dont do sh!t, while other sh!t is going on." Words to live by. Makes tracing problems a whole lot simpler.
Any thoughts on increasing retraction and maybe throwing in some extra at restart? Prob not since I'm not moving terribly far between stop and starts. Maybe I'll play with lower temps and see if its just an oozing problem.
And is that true about ABS at smaller layers? Harder to make it happen? I almost work exclusively with PLA, but I do have a spool of ABS thats been nagging at me.
Josh
//++++++++++++++++++++++++++++++++++++++++++++++++++++++++++++++++++++++
//Prusa / RAMPS_1.4 & ATMega_2560 / Slic3r > Pronterface > Marlin / Luck
//++++++++++++++++++++++++++++++++++++++++++++++++++++++++++++++++++++++
|
Re: Tips for micro layer height March 31, 2012 11:22PM |
Registered: 13 years ago Posts: 123 |
Seems like we think a lot alike and have been traveling the same paths! I'm printing another printer right now so I will have one to experiment with now that I'm happy with my old Sells Mendel.
Yes, I get good adhesion at that low of a temperature, but I have my thermistor taped to the nozzle instead of the heater block like a lot of people do. I want to know what temperature it's coming out at, not farther back up the tube.
Definitely make sure your e steps are spot on, and if you're using recent Marlin firmware switch to PID temperature control instead of bang-bang on/off. Using bang/bang I get temperature swings of about 3 degrees +/- my target while printing, friends who have switched to PID with the new Marlin auto-setting tell me they don't see any temp swings at all. I want to finish this printer first before I upgrade to the new Marlin and switch.
Set your retraction as fast as the extruder will go, but I wouldn't increase the distance beyond 1mm, especially if you are going with lower temperatures. The extra length on restart setting is really intended for Bowden tube extruders, leave it at zero.
Sorry, I don't have enough experience with ABS to speak intelligibly, I too use PLA almost exclusively.
|
Re: Tips for micro layer height April 01, 2012 03:26AM |
Admin Registered: 17 years ago Posts: 7,879 |
Quote
Yes, I get good adhesion at that low of a temperature, but I have my thermistor taped to the nozzle instead of the heater block like a lot of people do. I want to know what temperature it's coming out at, not farther back up the tube.
As the plastic spends most of its time in the heater block, then passes through the nozzle quickly, is a poor conductor and has a high specific heat capacity, I think the temperature inside the heater block is probably more relevant.
Edited 1 time(s). Last edit at 04/01/2012 06:25PM by nophead.
[www.hydraraptor.blogspot.com]
|
Re: Tips for micro layer height April 01, 2012 09:45AM |
Registered: 12 years ago Posts: 54 |
Awesome points! I've been using the PID temp settings since I switched to Marlin, BUT, you're post prompted me to go check GitHub and there is a new release of the firmware (within the last 5 days). It was a very minor revision compared to what I was already running, but I try and stay with the most current release. It looks like Erik did make some changes with regards to the PID calculations. Also some changes with arc offsets. Very exciting news!
Oddly enough, I've always had my therm on the end of the nozzle. I"ve got a makergear ceramic heater core, so it was really the only option. I would assume that as long as you've calibrated teh printer/plastic combo for wherever you're reading the temps from, it shouldnt really matter (within reason).
Well, during the course of this post, I started another print with some adjusted settings. Was looking fantastic (for the little that had gotten printed, but it started curling so I killed the print. Adhesion/extruded amount seemed to be a little light on the first layer, but I let it play out. Might bump up the skirt a few more loops and get teh nozzle primed a little more. Layers definetly showed a smoother outside texture (not glassy, but smoother) so I think we're on the right track.
I'll post results when it finishes. Anticipated time (9.5 hours -_- )
JW
Josh
//++++++++++++++++++++++++++++++++++++++++++++++++++++++++++++++++++++++
//Prusa / RAMPS_1.4 & ATMega_2560 / Slic3r > Pronterface > Marlin / Luck
//++++++++++++++++++++++++++++++++++++++++++++++++++++++++++++++++++++++
|
Re: Tips for micro layer height April 01, 2012 10:19AM |
Registered: 12 years ago Posts: 54 |
Already off to a better start at the first layer. Rechecked level on the bed. Actually have it tight enough that I cant get paper underneath the nozzle at Z home. But not so tight it appears to be compressing the table.
Ran into a problem with the latest version of Marlin I referred to in the previous post. No time right now to get it narrowed down, but the temp wouldnt meet criteria to start printing. I've set first layer to run at 195, but the nozzle wasnt increasing that hot. Really seemed to hover at 185 as much as possible. I gave it a good 20 minutes, but 185 seemed to be the temp it was seeking. Swapped out for the previous version of Marlin I was running and it came right up and started. I"ve got the settings the same with regards to residency time and hysteresis. (defaults work for me) Although I question whether or not the hysteresis works on the under side of target temp. Best I can tell, it has to reach target actual number before its starts looking at the +- difference. But maybe thats intentional design. All for another post when I have more time to investigate!
Print number two on its way!
JW
Josh
//++++++++++++++++++++++++++++++++++++++++++++++++++++++++++++++++++++++
//Prusa / RAMPS_1.4 & ATMega_2560 / Slic3r > Pronterface > Marlin / Luck
//++++++++++++++++++++++++++++++++++++++++++++++++++++++++++++++++++++++
|
Re: Tips for micro layer height April 01, 2012 03:53PM |
Registered: 13 years ago Posts: 123 |
Nophead,
Any time I see you contradict something I've said or believe, I have to go back and rethink my position. Like Josh, I don't have a lot of choice with my Makergear hot-ends, but on the J-head hot ends where the nozzle and heater block are one, I've worried about the disparity in size between my thermistors and the cavities they're supposed to be inserted into. Would you recommend a thermal paste like for heat sinks, do you think I'm messing up by taping the thermistor to the surface? Or should I find physically larger thermistors that fit tightly?
Any time I see you contradict something I've said or believe, I have to go back and rethink my position. Like Josh, I don't have a lot of choice with my Makergear hot-ends, but on the J-head hot ends where the nozzle and heater block are one, I've worried about the disparity in size between my thermistors and the cavities they're supposed to be inserted into. Would you recommend a thermal paste like for heat sinks, do you think I'm messing up by taping the thermistor to the surface? Or should I find physically larger thermistors that fit tightly?
|
Re: Tips for micro layer height April 01, 2012 05:13PM |
Registered: 12 years ago Posts: 54 |
Great success! Kinda.
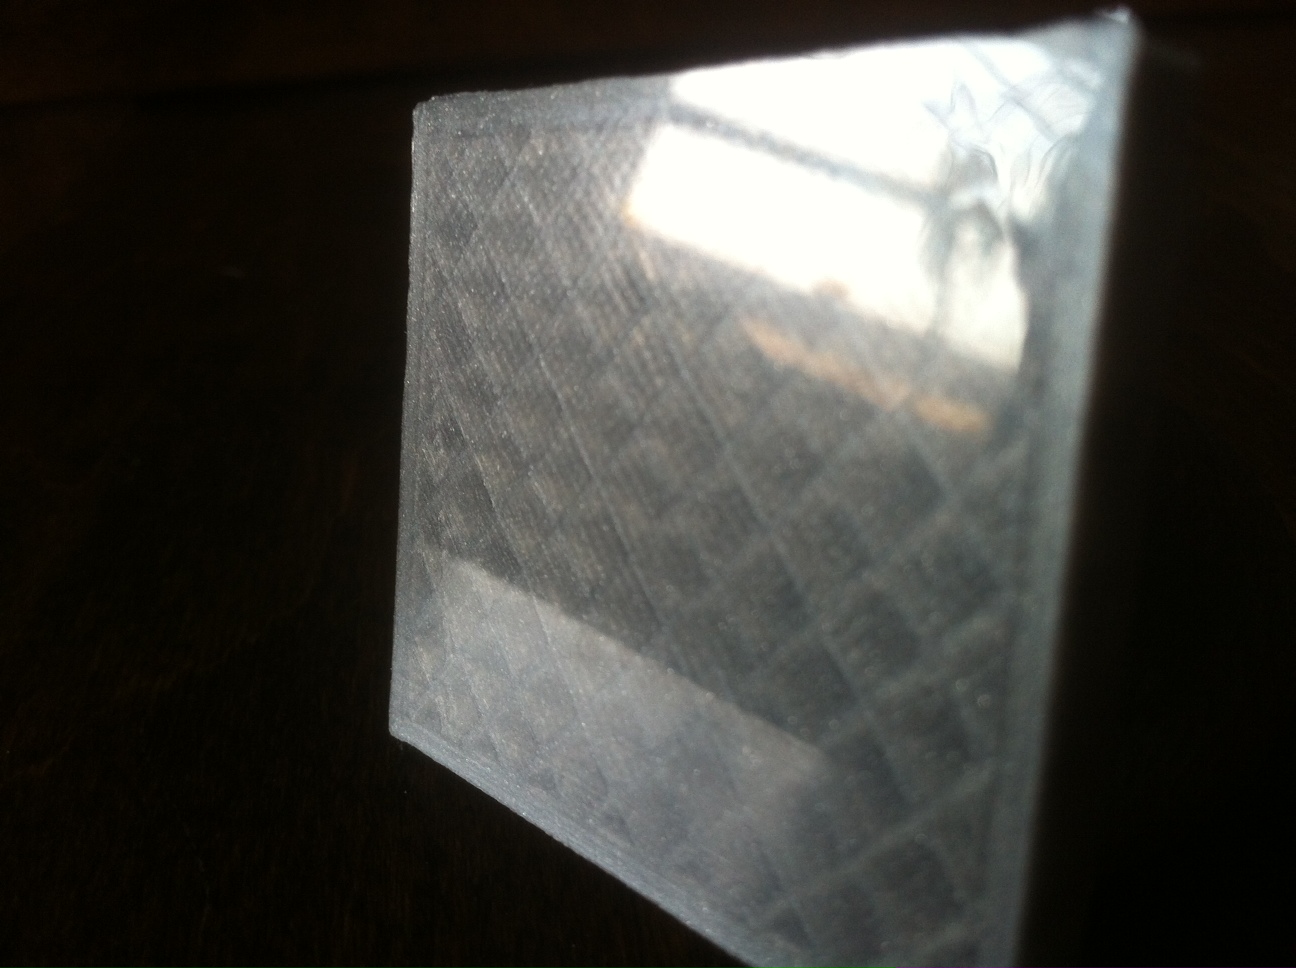
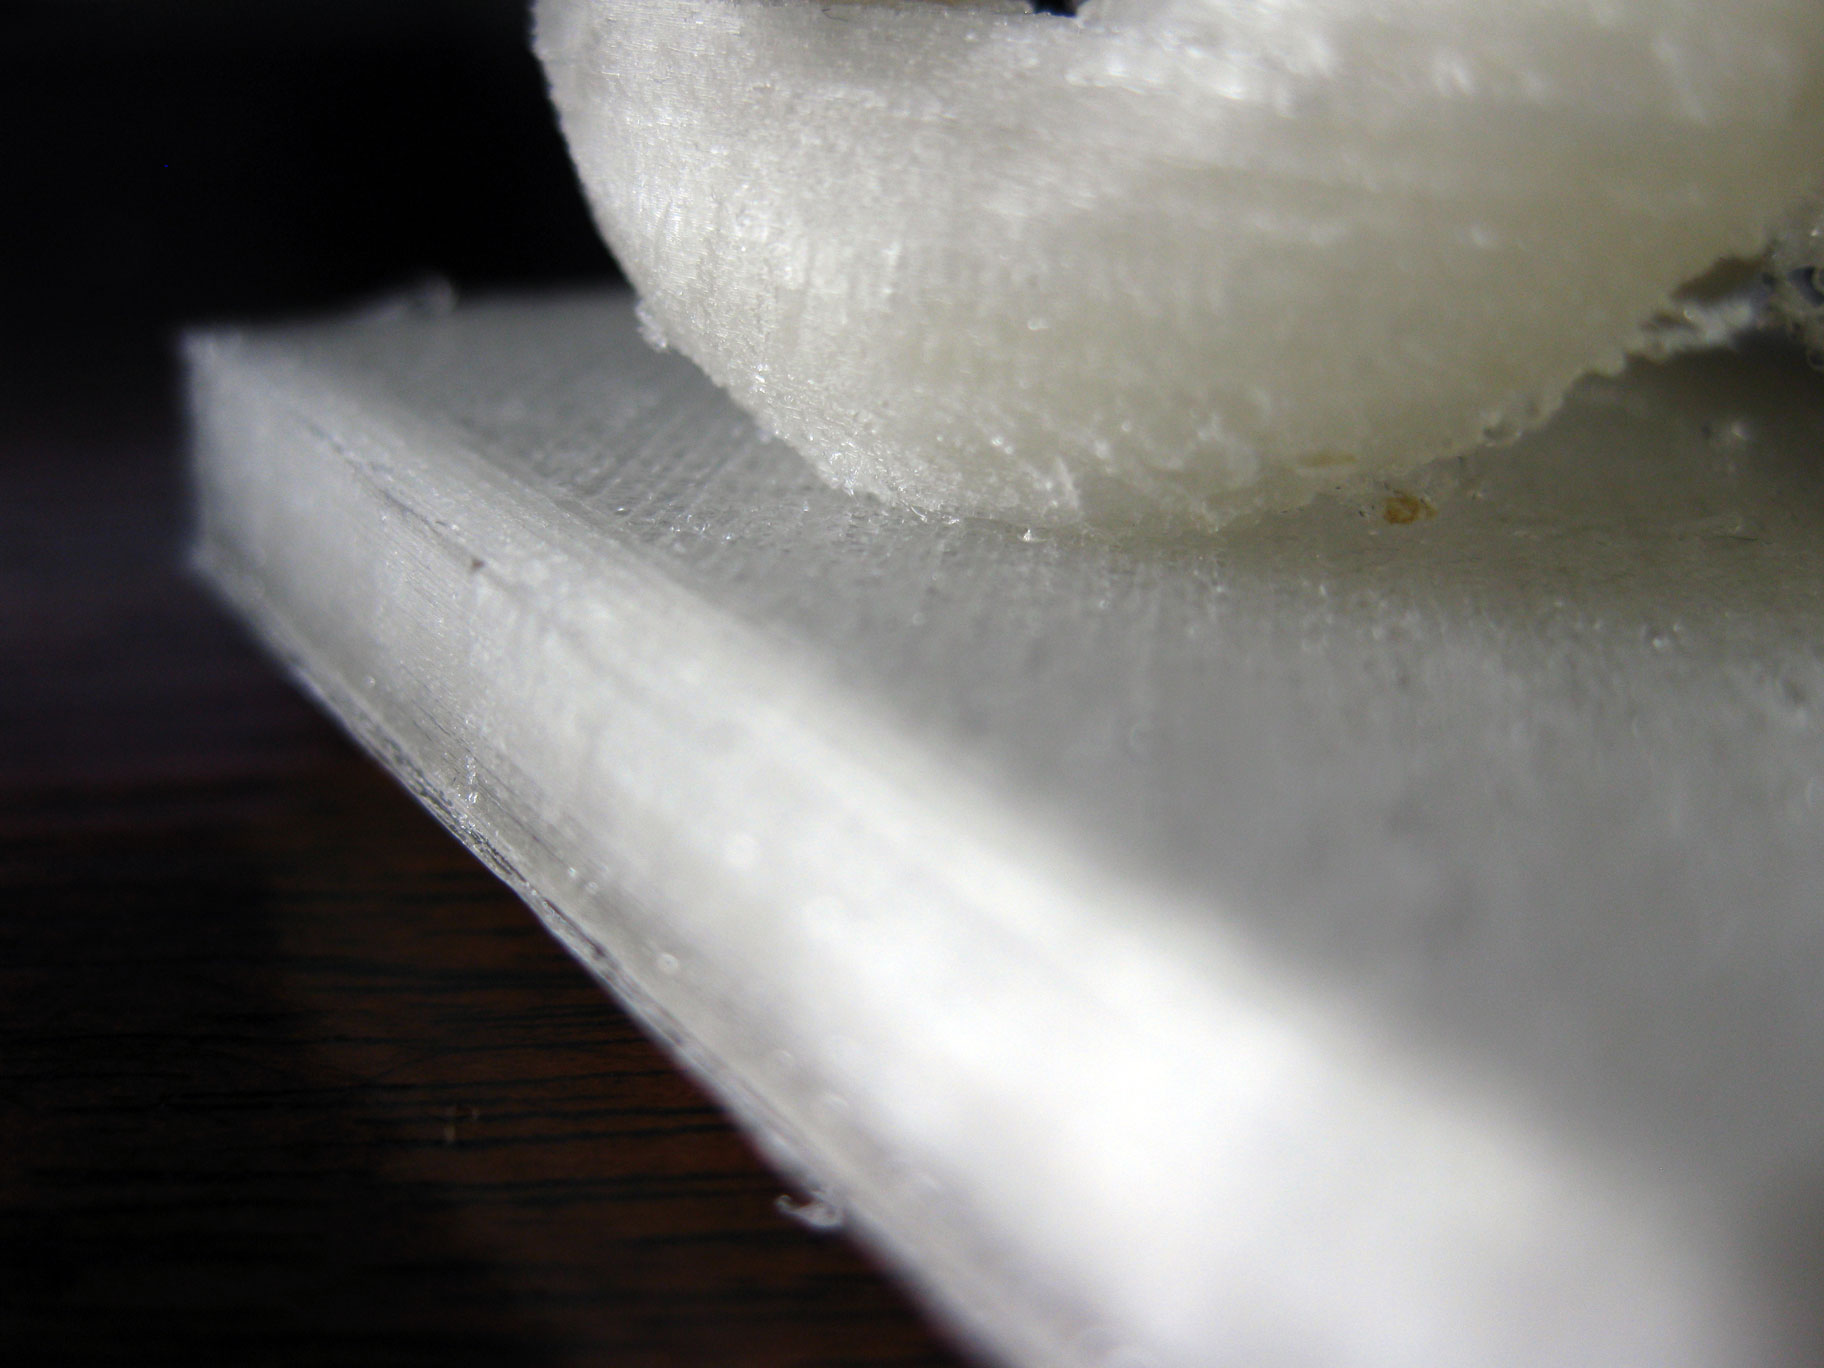
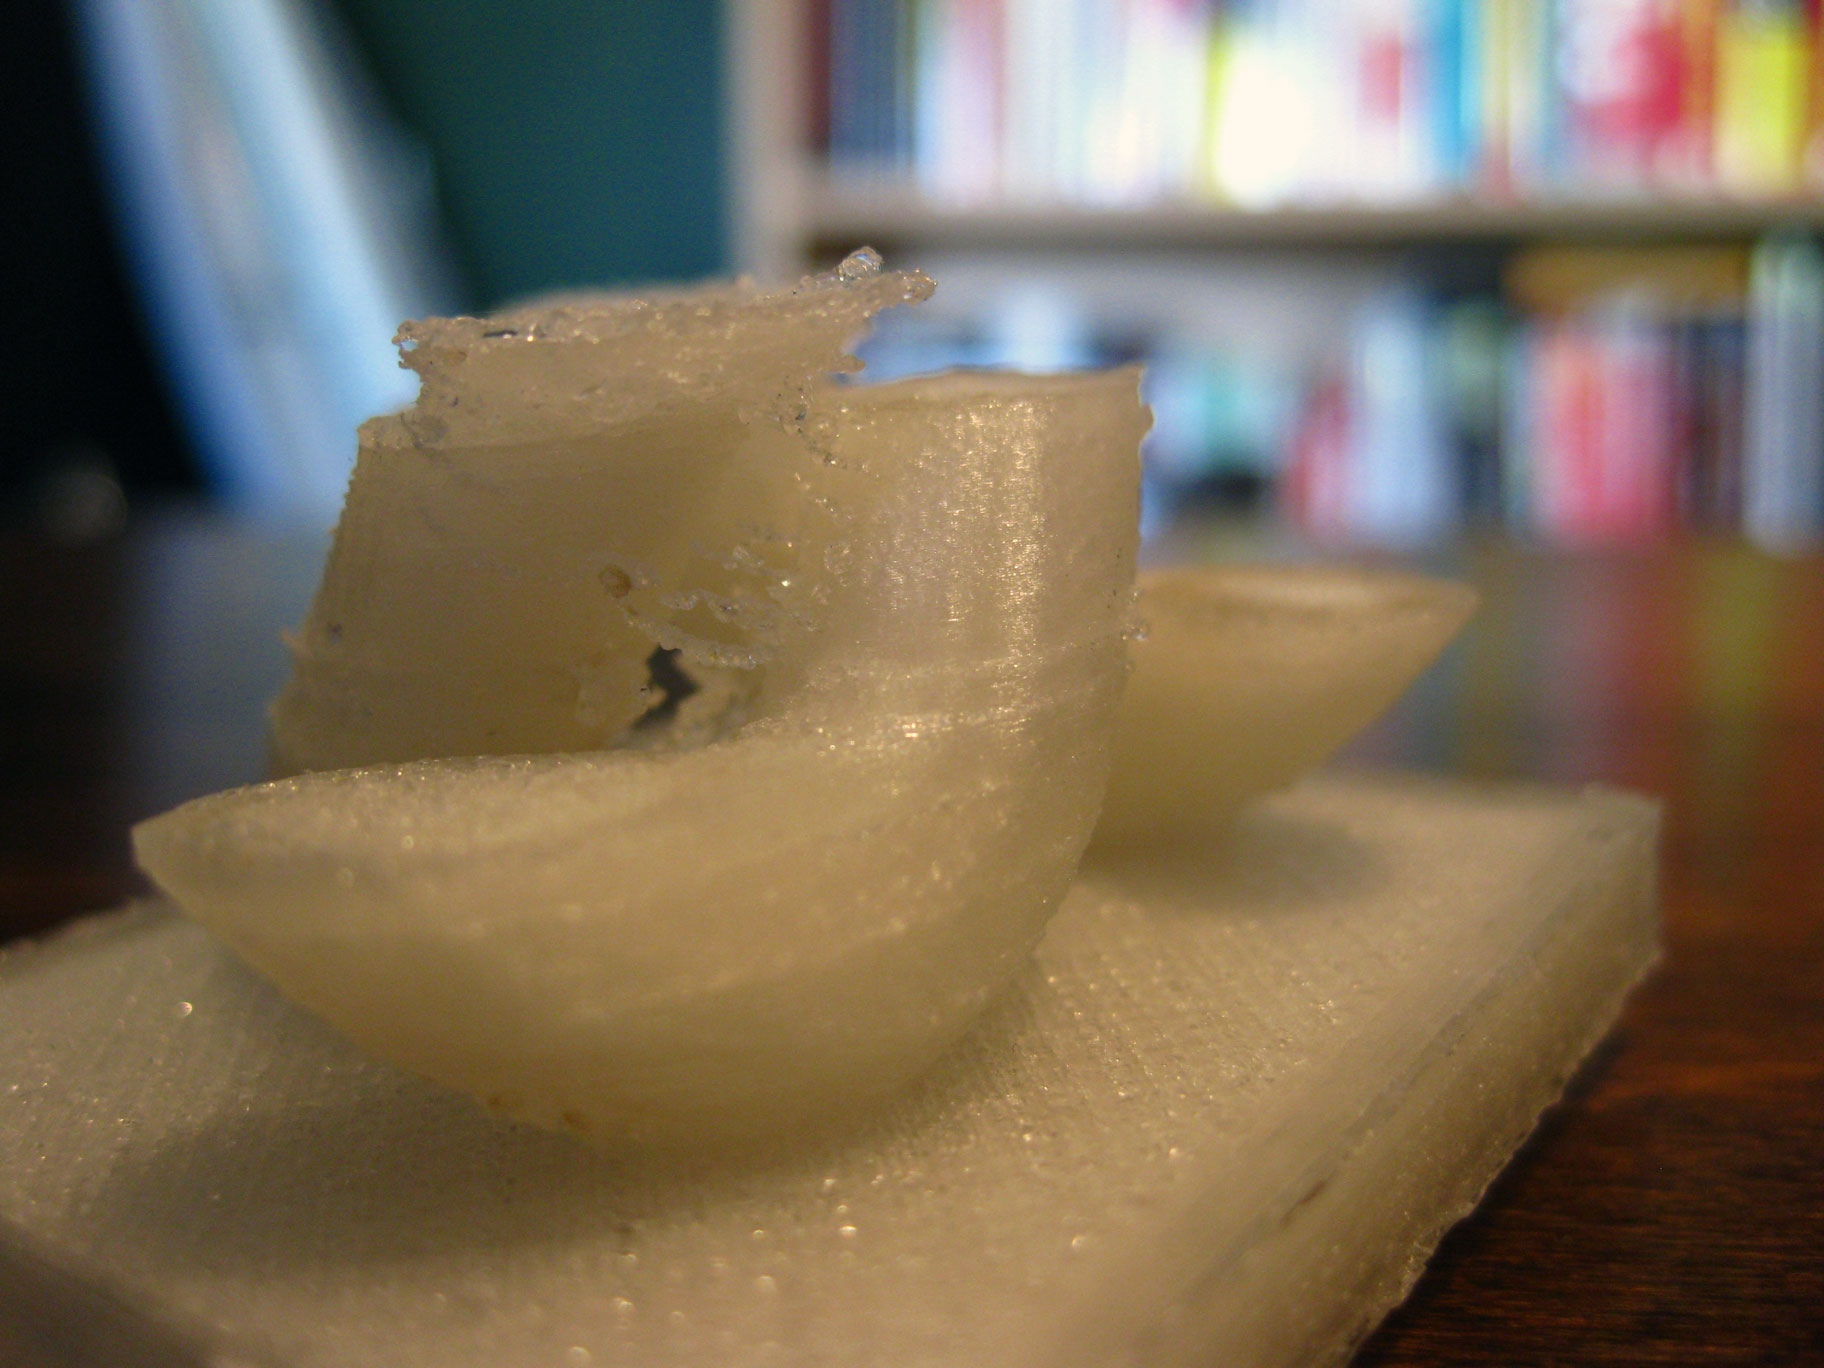
So we're definetly on the right track with getting the settings dialed in to get some awesome results. First layer is nothing but glass smooth. Its not even possible to see a single differentiation in the extrusion. Massive adhesion to the point that I ripped it apart taking it up from the glass bed. I could have waited till it cooled and maybe pumped it through a few heat/cool cycles to get it to pop, but the print was already having other problems and I stopped it half way through so it wasnt a big deal.
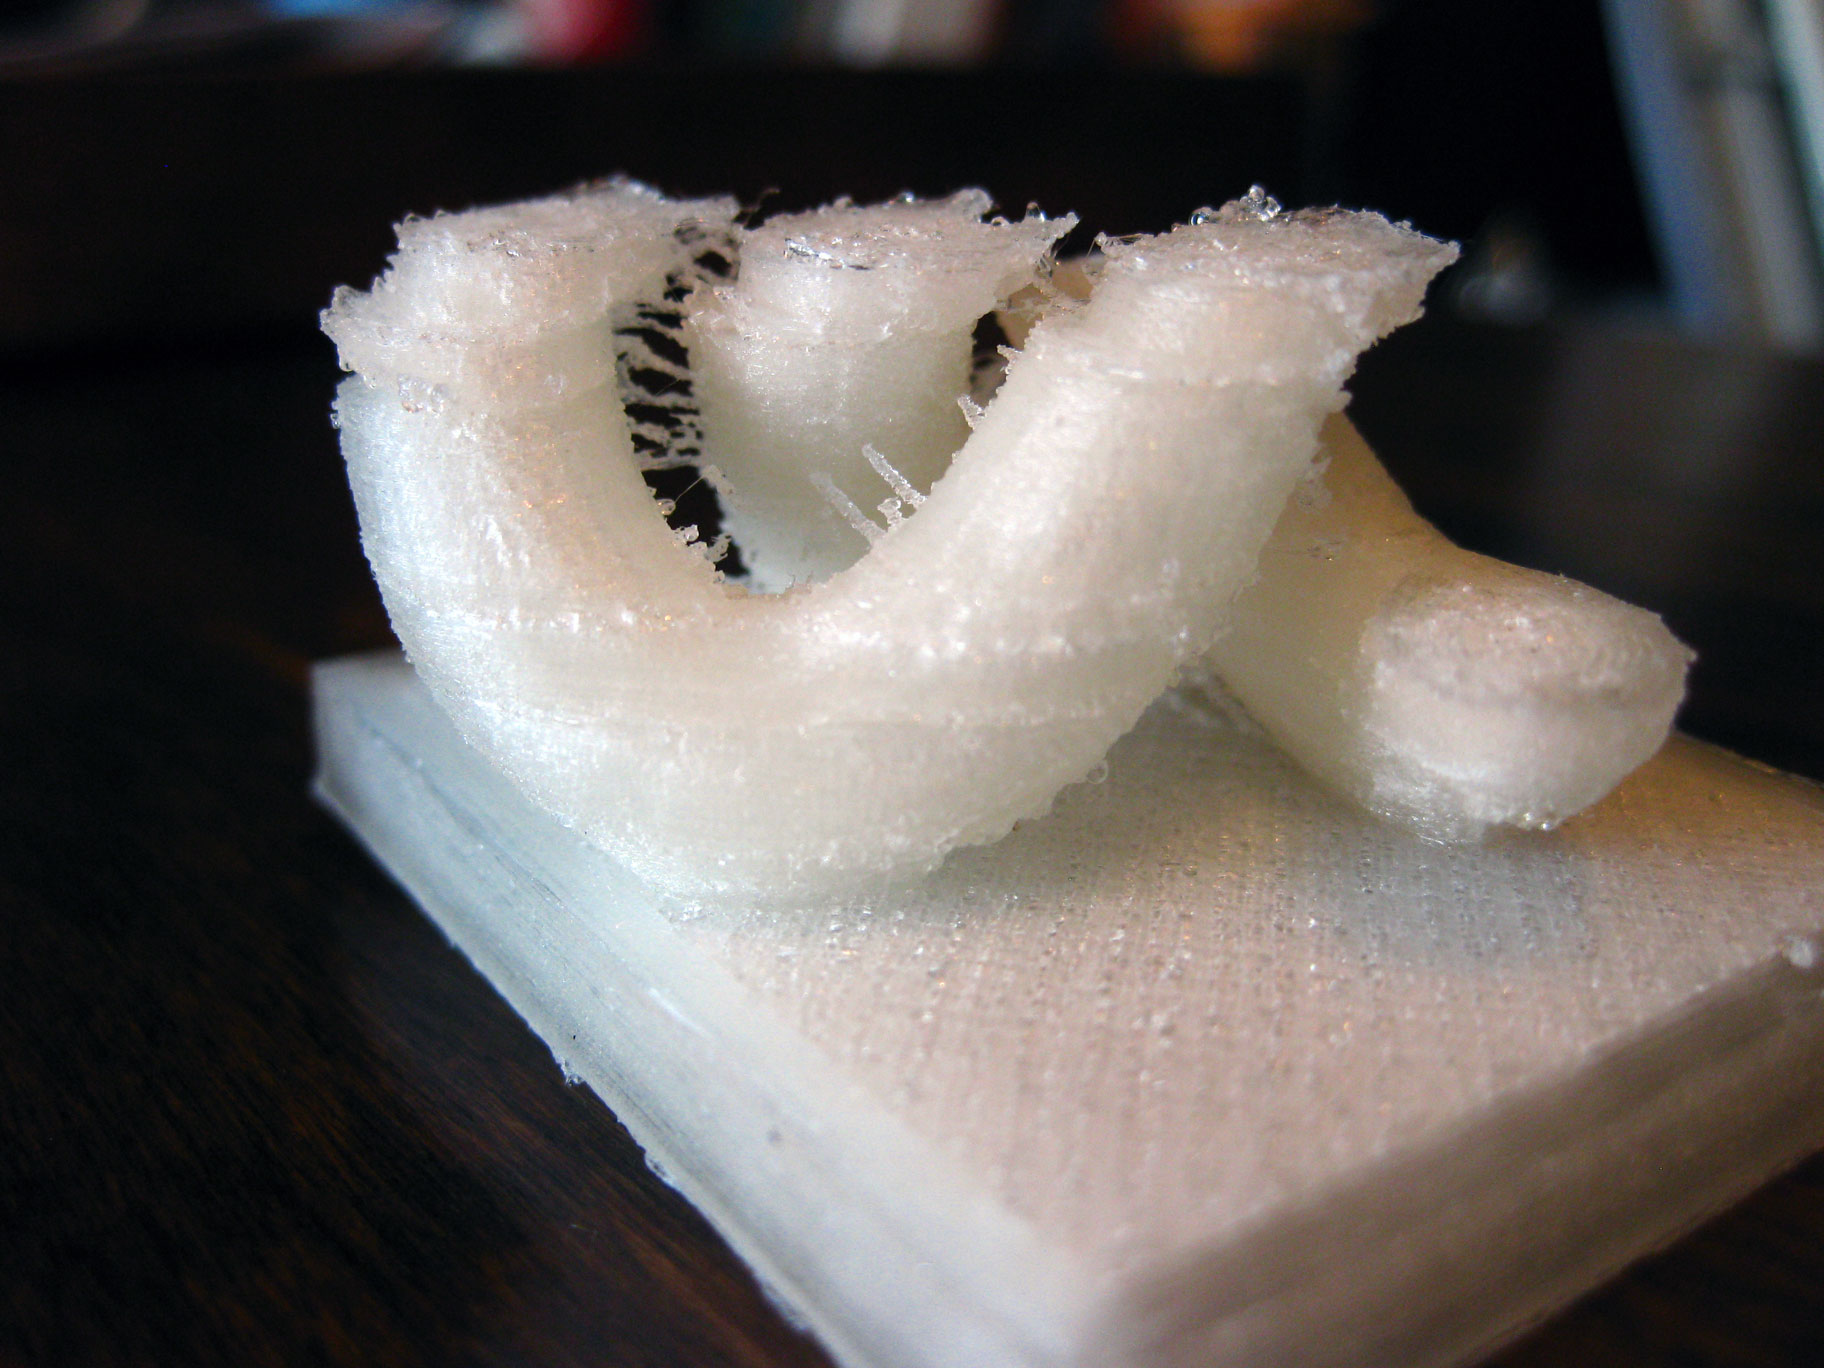
I was gone for a great deal of the printing. Apparently I had some problems with "cold extrusion prevented" at quite a few spots in the print, so it was missing a bunch of layers. I had layer temp set at 165 and Marlin configured for CEP at 150, so I find it really surprising that there was a 15C down swing for any length of time but apparently it happened. As a setup note, I've got my fan hanging from the end of the X rails and it blows across the platform. Its not mounted on the carraige blowing at the print directly. Hot end is insulated as best I can manage, but I suppose its time to correct that setup properly. When I do it again, I may just disable the CEP safety and see how it makes out.
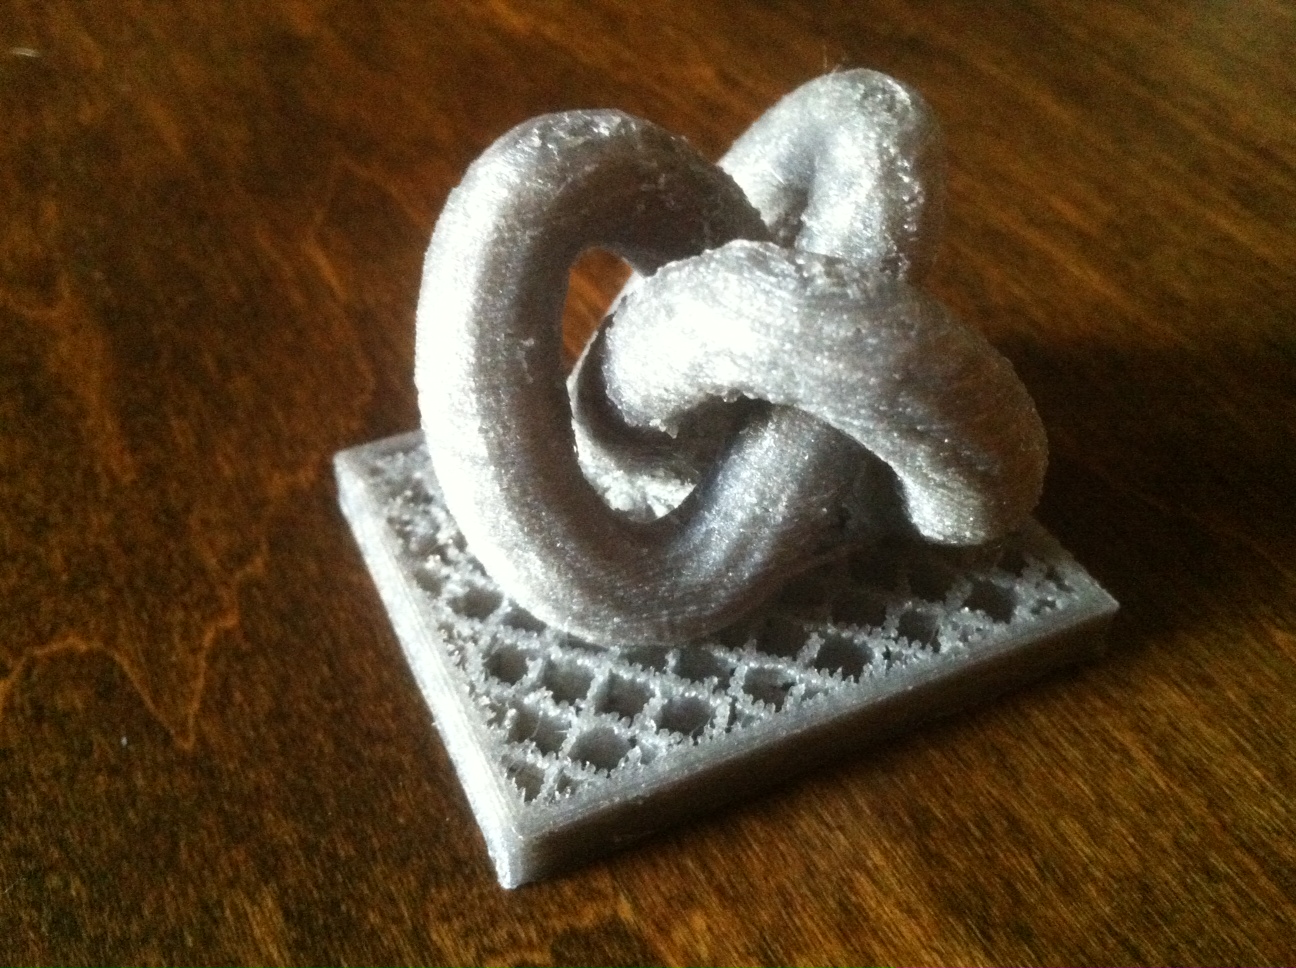
As far as what was printed, I'm ecstatic! Perimeter surface shows alot less bubbling. Its got a bit of a rough feeling to it, like 180grit sandpaper. Layers are incredibly hard to distinguish and the resolution is getting to be beyond anything I would have imagined possible. Top layer solid infill was much closer to completely full with 6 solids. I'm thinking 8 gets it finished. Stringing between moves is MUCH less significant. Still some, but nothing that couldnt be cleaned up within 3 minutes with an exacto and really not that much effort at all.
Settings this time around:
.05 layer height
6 perimeter
6 solid layers
30% fill
1mm retraction but doubled the speed to 60mms
cooling enabled
.35 nozzle
195C first layer and bed at 70C
165C subsequent and bed at 60C
40mms perimeters
40mms infill
Bottom layer @ 60%
Much appreciate the insight from you guys and I hope by tracking these results, someone in the future finds it useful!
I'm trying to design a new fan nozzle for a little fan I stole from a VGA card so hopefully I can get a fan mounted to the carraige and give this another shot by next weekend.
Pics attatched for inspection
JW
Josh
//++++++++++++++++++++++++++++++++++++++++++++++++++++++++++++++++++++++
//Prusa / RAMPS_1.4 & ATMega_2560 / Slic3r > Pronterface > Marlin / Luck
//++++++++++++++++++++++++++++++++++++++++++++++++++++++++++++++++++++++
So we're definetly on the right track with getting the settings dialed in to get some awesome results. First layer is nothing but glass smooth. Its not even possible to see a single differentiation in the extrusion. Massive adhesion to the point that I ripped it apart taking it up from the glass bed. I could have waited till it cooled and maybe pumped it through a few heat/cool cycles to get it to pop, but the print was already having other problems and I stopped it half way through so it wasnt a big deal.
I was gone for a great deal of the printing. Apparently I had some problems with "cold extrusion prevented" at quite a few spots in the print, so it was missing a bunch of layers. I had layer temp set at 165 and Marlin configured for CEP at 150, so I find it really surprising that there was a 15C down swing for any length of time but apparently it happened. As a setup note, I've got my fan hanging from the end of the X rails and it blows across the platform. Its not mounted on the carraige blowing at the print directly. Hot end is insulated as best I can manage, but I suppose its time to correct that setup properly. When I do it again, I may just disable the CEP safety and see how it makes out.
As far as what was printed, I'm ecstatic! Perimeter surface shows alot less bubbling. Its got a bit of a rough feeling to it, like 180grit sandpaper. Layers are incredibly hard to distinguish and the resolution is getting to be beyond anything I would have imagined possible. Top layer solid infill was much closer to completely full with 6 solids. I'm thinking 8 gets it finished. Stringing between moves is MUCH less significant. Still some, but nothing that couldnt be cleaned up within 3 minutes with an exacto and really not that much effort at all.
Settings this time around:
.05 layer height
6 perimeter
6 solid layers
30% fill
1mm retraction but doubled the speed to 60mms
cooling enabled
.35 nozzle
195C first layer and bed at 70C
165C subsequent and bed at 60C
40mms perimeters
40mms infill
Bottom layer @ 60%
Much appreciate the insight from you guys and I hope by tracking these results, someone in the future finds it useful!
I'm trying to design a new fan nozzle for a little fan I stole from a VGA card so hopefully I can get a fan mounted to the carraige and give this another shot by next weekend.
Pics attatched for inspection
JW
Josh
//++++++++++++++++++++++++++++++++++++++++++++++++++++++++++++++++++++++
//Prusa / RAMPS_1.4 & ATMega_2560 / Slic3r > Pronterface > Marlin / Luck
//++++++++++++++++++++++++++++++++++++++++++++++++++++++++++++++++++++++
|
Re: Tips for micro layer height April 01, 2012 06:31PM |
Admin Registered: 17 years ago Posts: 7,879 |
Mkouri Wrote:
-------------------------------------------------------
> Nophead,
> Any time I see you contradict something I've said
> or believe, I have to go back and rethink my
> position. Like Josh, I don't have a lot of choice
> with my Makergear hot-ends, but on the J-head hot
> ends where the nozzle and heater block are one,
> I've worried about the disparity in size between
> my thermistors and the cavities they're supposed
> to be inserted into. Would you recommend a
> thermal paste like for heat sinks, do you think
> I'm messing up by taping the thermistor to the
> surface? Or should I find physically larger
> thermistors that fit tightly?
I use glass rope adhesive to fix the thermistor into the hole. I think it is reasonably conductive. Some people use silicone adhesive. If find that less conductive and more prone to coming loose, but it does work.
The problem with fixing thermistors on the surface is you only get a small contact area and a much larger area exposed to the air. In my experience that makes them read low.
[www.hydraraptor.blogspot.com]
Sorry, only registered users may post in this forum.