Home
>
Developers
>
Topic
Delta 3D printer design under 200 €
Posted by boylucky
|
Delta 3D printer design under 200 € October 17, 2017 11:47AM |
Registered: 9 years ago Posts: 84 |
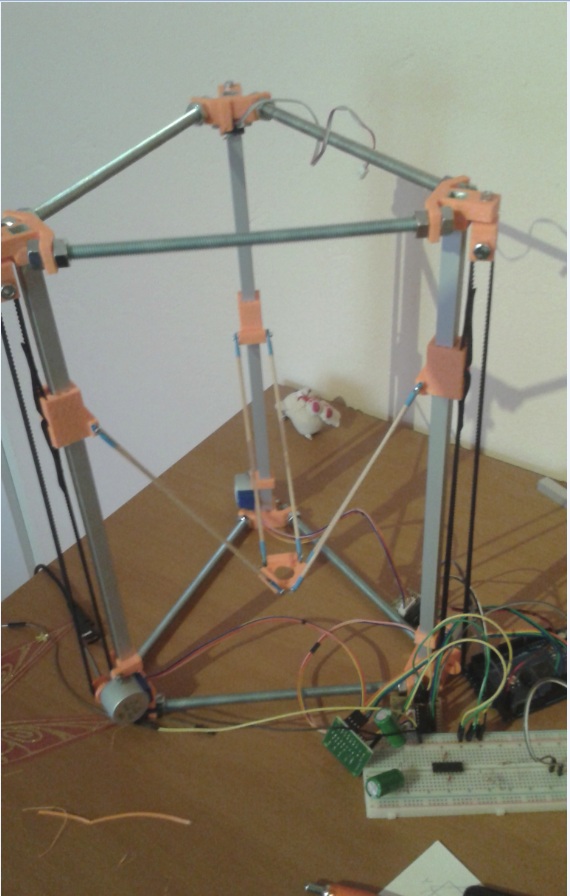
Hi all, I would like to ask you for your opinion about my Delta 3D printer design. I wanted to create relatively cheap 3D printer (under 200 €) for people as a starting point in 3D printing.
Basic parameters are:
Printing area - 160mm circle diameter, 150mm height of the object
Printer size 320mm, height 520mm + spool of PLA on the top.
Carbon rods 200mm with traxxas rod ends.
Electronics: Arduino Mega + RAMPS 1.4 + driver A4988
Nema17 steppers with 1.8 degree per step (+ 1/16 microstepping)
Hotend E3D V6 clone.
Timing belt GT2 - pulleys 20 teeth.
No heated bed and no autoleveling for now.
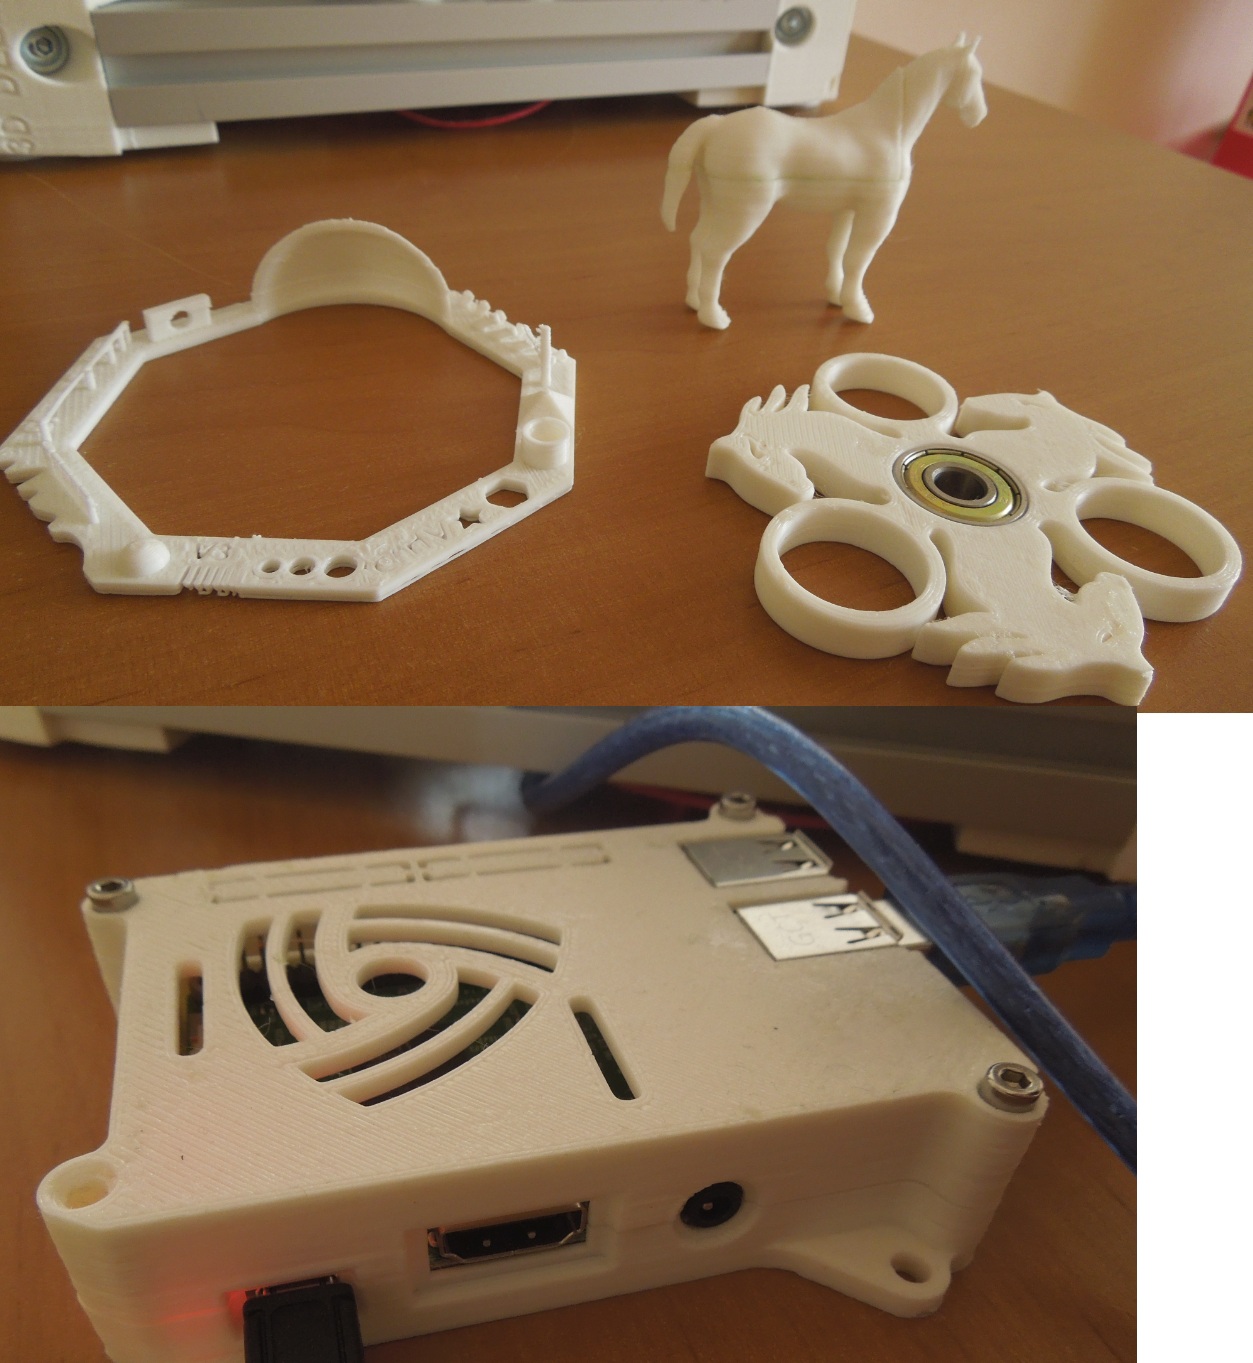
Currently running with Raspberry Pi and repetier server.
Work is still in progress.
Your opinion will be appreciated.
Sources are going to be provided on RepRap and thingiverse.com for further developement if somebody interested.
Edited 2 time(s). Last edit at 10/18/2017 02:17AM by boylucky.
Basic parameters are:
Printing area - 160mm circle diameter, 150mm height of the object
Printer size 320mm, height 520mm + spool of PLA on the top.
Carbon rods 200mm with traxxas rod ends.
Electronics: Arduino Mega + RAMPS 1.4 + driver A4988
Nema17 steppers with 1.8 degree per step (+ 1/16 microstepping)
Hotend E3D V6 clone.
Timing belt GT2 - pulleys 20 teeth.
No heated bed and no autoleveling for now.
Currently running with Raspberry Pi and repetier server.
Work is still in progress.
Your opinion will be appreciated.
Sources are going to be provided on RepRap and thingiverse.com for further developement if somebody interested.
Edited 2 time(s). Last edit at 10/18/2017 02:17AM by boylucky.
|
Re: New Delta 3D printer design under 200 € October 17, 2017 12:01PM |
Registered: 10 years ago Posts: 14,672 |
In what ways does it differ from the Mini Kossel?
Edited 1 time(s). Last edit at 10/17/2017 12:02PM by dc42.
Large delta printer [miscsolutions.wordpress.com], E3D tool changer, Robotdigg SCARA printer, Crane Quad and Ormerod
Disclosure: I design Duet electronics and work on RepRapFirmware, [duet3d.com].
Edited 1 time(s). Last edit at 10/17/2017 12:02PM by dc42.
Large delta printer [miscsolutions.wordpress.com], E3D tool changer, Robotdigg SCARA printer, Crane Quad and Ormerod
Disclosure: I design Duet electronics and work on RepRapFirmware, [duet3d.com].
|
Re: New Delta 3D printer design under 200 € October 17, 2017 01:22PM |
Registered: 8 years ago Posts: 5,232 |
|
Re: New Delta 3D printer design under 200 € October 18, 2017 02:27AM |
Registered: 9 years ago Posts: 84 |
I am sorry, the name of the topic was probably not choosen correctly. I did not ment I invented new features of the delta printer. I just wanted to say that I made my design of delta printer which I am going to share. You are right that there is not much difference between this printer and Kossel mini design. I wanted to make the construction more stabel so that is why I used the 3030 alu profiles. I also wanted to use this profiles as it is produced in my conutry for a good price. There is still lots of things to develope and the work is in progress. Anyway it can be already used as cheap 3D printer.
|
Re: Delta 3D printer design under 200 € October 19, 2017 03:11AM |
Registered: 7 years ago Posts: 507 |
What sort of build surface are you using? Deltas as a starting point can be difficult because of how hard calibration and debugging can be, so bed leveling is probably a good idea. There are a number of cheap and easy ways to implement this. My current favorite is having the effector platform be a sort of latch/trapdoor which can lift slightly when the nozzle touches the bed. This completes/breaks a circuit for bed leveling.
Personally I like the v rollers, and if you're using aluminium extrusion anyway I see them as a way to minimize part count and make things quieter. The linear rods on my printer grate and make nasty noises, especially at certain speeds.
I'm always interested in cheap builds, I find them a fun challenge and design exercise.
|
Re: Delta 3D printer design under 200 € October 20, 2017 03:07AM |
Registered: 9 years ago Posts: 84 |
Hi Trakyan,
the build surface is a glass with a tiny layer of a dry glue. I wanted to remove the heated bed to reduce power consumption and to use a less powerfull power supply. I successfully run the printer with 75W power supply (when measured it runs under 50W, mostly about 40W). But I am not good in electronics so probably would be better to use a bit powerfull one to avoid some problems. Anyway I found a quite good glue for printing without heated bed. when aplied in really thin layer. It is enough to apply it once, let it dry and then you can print many times on it. I did not try with ABS, just with PLA and that fits perfectly for it. It stick so good that sometimes it is a bit hard to remove the object, but this can be solved by a thiny layer of a hair spray to reduce a bit the stickiness with the glue surface. For really small objects the glue is perfect.
You are right that for biginners it can be a bit hard the bed leveling and calibration so any cheap autoleveling would definitely fit to this design. Like you said it can be really cheap one so the cost of the printer would be neraly unchanged. I was thinking to use just the same switch as for the endstops for the beginning. I also wanted to add a really small magnet to this switch to keep it there for autoleveing and then remove it to not touch the printed object after.
Regarding the v rollers I never tried to use them but you are right that the linear rods are sometimes noisy. I also tested the original Hiwin linear rails with the carriage. This I consider as the best solution but it double the printer price in this case.
About the cheap builds, I also did one model of a delta printer which was about $25. But it was really just a model without the hotend. It was made just for fun. Anyway I can imagine to made similar printer which could extrude some other material then plastics. I was thinking about some kind of plaster. This could be fun for children I guess and they could learn something during the build and printing. To show them that PC can be used also for something else then just playing games . Such printer would be also less dangerous as no hotend would be used. I attached the picture here in the attachment. You can also see the thread here.
When I speak about the plaster some time ago I build a delta printer for the soil printing. You can check a short video of printing here. or the thread with some more pictures here.
Edited 1 time(s). Last edit at 10/20/2017 03:14AM by boylucky.
the build surface is a glass with a tiny layer of a dry glue. I wanted to remove the heated bed to reduce power consumption and to use a less powerfull power supply. I successfully run the printer with 75W power supply (when measured it runs under 50W, mostly about 40W). But I am not good in electronics so probably would be better to use a bit powerfull one to avoid some problems. Anyway I found a quite good glue for printing without heated bed. when aplied in really thin layer. It is enough to apply it once, let it dry and then you can print many times on it. I did not try with ABS, just with PLA and that fits perfectly for it. It stick so good that sometimes it is a bit hard to remove the object, but this can be solved by a thiny layer of a hair spray to reduce a bit the stickiness with the glue surface. For really small objects the glue is perfect.
You are right that for biginners it can be a bit hard the bed leveling and calibration so any cheap autoleveling would definitely fit to this design. Like you said it can be really cheap one so the cost of the printer would be neraly unchanged. I was thinking to use just the same switch as for the endstops for the beginning. I also wanted to add a really small magnet to this switch to keep it there for autoleveing and then remove it to not touch the printed object after.
Regarding the v rollers I never tried to use them but you are right that the linear rods are sometimes noisy. I also tested the original Hiwin linear rails with the carriage. This I consider as the best solution but it double the printer price in this case.
About the cheap builds, I also did one model of a delta printer which was about $25. But it was really just a model without the hotend. It was made just for fun. Anyway I can imagine to made similar printer which could extrude some other material then plastics. I was thinking about some kind of plaster. This could be fun for children I guess
and they could learn something during the build and printing. To show them that PC can be used also for something else then just playing games . Such printer would be also less dangerous as no hotend would be used. I attached the picture here in the attachment. You can also see the thread here.When I speak about the plaster
some time ago I build a delta printer for the soil printing. You can check a short video of printing here. or the thread with some more pictures here.Edited 1 time(s). Last edit at 10/20/2017 03:14AM by boylucky.
|
Re: Delta 3D printer design under 200 € October 20, 2017 06:01AM |
Registered: 10 years ago Posts: 14,672 |
boylucky, you might care to look at the Fisher Delta for ideas. It was designed to be low cost and for a time it was priced at £199 which included Duet electronics. Like your design it uses smooth rods to guide the carriages. However, instead of aluminium extrusions, to provide rigidity it uses the smooth rods in combination with acrylic side panels.
Also similar to your design, the bed is unheated. The prototypes had the bed covered with masking tape, the beta and production kits included BuildTak. The bed is sprung-loaded against three sets of contacts, so that when the nozzle presses down at least one of the contacts is broken. This enables auto-calibration to be done.
There is a Fisher section of these forums, so you could ask there to see which features of the design users do and don't like.
Large delta printer [miscsolutions.wordpress.com], E3D tool changer, Robotdigg SCARA printer, Crane Quad and Ormerod
Disclosure: I design Duet electronics and work on RepRapFirmware, [duet3d.com].
|
Re: Delta 3D printer design under 200 € October 20, 2017 07:58PM |
Registered: 7 years ago Posts: 270 |
I would try to attach the plastic parts in more locations (especially at different planes) to the extrusions. From what I can tell compression forces are distributed though the face of the part and stretching through screw connections in the middle of the profile. If you brace the alu profile in plastic construction will be less susceptible to twisting especially when you print with ABS or PETG rather than PLA. Also it appears there's no way to adjust the alignment of the smooth rods.
|
Re: Delta 3D printer design under 200 € October 21, 2017 07:26PM |
Registered: 7 years ago Posts: 507 |
Good call on dropping the heated bed for cost. People fuss a lot about them but dropping that item has a significant reduction in cost of components and weight (if you're wanting to ship it). For beginners it also makes it safer, without a heated bed you can use a power brick like most laptops rather than power supply which can have some exposed wires which aren't suitable for new comers. The bed leveling method dc42 mention also seems like a neat idea, and with a stationary bed it might be the better option when compared to the trapdoor like method I mentioned (I think the layer one atom delta printer uses this method, tom on youtube did a review which covered this) as it might add some hysteresis to the nozzle when printing at higher speeds, whereas the bed which is stationary shouldn't have this issue. The reason I like the effector based one is because it uses slightly less parts and I've recently gone nuts on minimizing part counts on my designs. Currently working on a design with one size M8 bolt (and nuts/washers to go with it), 608 bearings and one size M3 bolt (may not even be needed) as the entire BOM bar things like motors, hotend which are a given on any 3D printer.
As for alternative extruding methods/materials, I've thought about this too for a cheaper (no heater) and safer alternative mostly for educational purposes (read: finished prints probably wont look pretty and wont be tough). I've thought about common PVA glue mixed with sawdust or something and extruded as a paste. PVA on it's own would be too runny and shrink too much between when it's deposited and dried, but mixed with something like sawdust it might hold its shape and volume better.
With your clay printer, I couldn't see any pictures of your extruder itself, just the one you linked to as what you based it off. Did you stick with the pneumatic clay extruder or did you do something different? Very interested to hear more about this as paste/clay extrusion is quite interesting for me, I've got an on again off again search going for a extruder design I like. I'm trying to avoid pneumatics just because that adds the need and noise for an air compressor, but finding a simple and constant flow rate pump is a challenge. Moineau pumps look interesting but the linkage that drives them looks scary from an assembly and maintenance point of view.
|
Re: Delta 3D printer design under 200 € October 22, 2017 04:56PM |
Registered: 9 years ago Posts: 84 |
Hi all,
first I would like to thanks for your ideas and coments.
@ dc42 - I checked the Fisher Delta printer and I remember I wanted to order one of it some time ago but it was not available at that time. It looks similar to my idea to provide a low cost delta printer in Europe. I was also thinking to use only the smooth rods as the construction of the printer. But I wanted to do the frame more tough. That is why I decide to use the aluminium extrusions of 30x30 mm which cost in total about 23 €. Of course it would be better to use it with metal corners too, but then the price is getting higher. I would like to make a design which would be really low cost but on the other side provided a acceptable print quality. That is also why I only used the cheap China Arduino Mega + RAMPS 1.4 + driver A4988 as electronics. Then it is really interesting for me that the Delta Fisher printer is supplied with the Duet board. I hope soon or later I will be able to order one of the Fisher Delta printer for testing and to see all the stuff on the printer for inspiration. In the beginning of developing of my delta design I also wanted to use most of the components from European suppliers. But soon I find out it is really hard to keep the price as low as possible in such case. That is why I had to order many parts from China in the end.
When you write about the BuildTalk - I was thinking to buy it too, but then I find out the glue which I mentioned before that perfectly do the job of keeping the PLA on plate. Then I completely removed the heated bed which was in my case also quite slow to heat the bad at required temperature. I see it also a bit more ecological when no extra power is required.
About the autocalibration I made a decision to start without it and later on to add it to the printer. But till now I used the printer without this feature as I still have not decided yet which method to use. I would like to include something really simple. One of my idea was also to have some conductive material on 3 points of the glas bed and set it only against these 3 points which would be far from the middle of the plate. Then one of my idea was also to have a really small coil with small magnet attached close or inside of it. Then measure when electric signal would be generated when magnet reach the plate and moves against the coil. But like I said I am not good in electronics at all so maybe both ideas are wrong. Anyway I wanted something small and simple. I will see later what will be the option I choose. Thanks for your comments.
@newbob - the bottom corners are attached with 10 screws with the alu extrusions, the top ones with 7. You are right that there is no mechanism to adjust the smooth rods. I considered the printed parts good enough for it to keep correct dimension.
@ Trakian - like you said, I also consider it as better option to start without heat bed for the biginners. And like I already mentioned it makes me more happy when the printer consump as low energy as possible especially when the printers run for many many hours. I also started to use the power brick to run the printer.
About the different material for printing without heating. I think in the future there will come many materials for the 3D printers with completely different property so maybe it will also develope for such kind of printers soon. Anyway have you tried your idea you mentioned?
About the clay printer I did. The extruder runs with the compressor. I wanted to do a different extruder first which would be pushed by the stepper motor. In the end I turned for the compresor option as it was acutally simplier for the biginning. I already had the compresor at home. I did just couple of tests with the printer when I builded it as I did not have much time for it during the year. I still consider the clay printing as really interesting field for 3D printing and I hope I will find some time for further developement. I had also an idea to make a bigger 3D printer which could be used for example in gardening to create object for plants and decorations directly in the gardens. That is a field I would like to develope in the future. The printer itselve must be easy to build and unbuild for easy transport and the build volume should be at least 150x150x100 cm I guess.
first I would like to thanks for your ideas and coments.
@ dc42 - I checked the Fisher Delta printer and I remember I wanted to order one of it some time ago but it was not available at that time. It looks similar to my idea to provide a low cost delta printer in Europe. I was also thinking to use only the smooth rods as the construction of the printer. But I wanted to do the frame more tough. That is why I decide to use the aluminium extrusions of 30x30 mm which cost in total about 23 €. Of course it would be better to use it with metal corners too, but then the price is getting higher. I would like to make a design which would be really low cost but on the other side provided a acceptable print quality. That is also why I only used the cheap China Arduino Mega + RAMPS 1.4 + driver A4988 as electronics. Then it is really interesting for me that the Delta Fisher printer is supplied with the Duet board. I hope soon or later I will be able to order one of the Fisher Delta printer for testing and to see all the stuff on the printer for inspiration. In the beginning of developing of my delta design I also wanted to use most of the components from European suppliers. But soon I find out it is really hard to keep the price as low as possible in such case. That is why I had to order many parts from China in the end.
When you write about the BuildTalk - I was thinking to buy it too, but then I find out the glue which I mentioned before that perfectly do the job of keeping the PLA on plate. Then I completely removed the heated bed which was in my case also quite slow to heat the bad at required temperature. I see it also a bit more ecological
when no extra power is required.About the autocalibration I made a decision to start without it and later on to add it to the printer. But till now I used the printer without this feature as I still have not decided yet which method to use. I would like to include something really simple. One of my idea was also to have some conductive material on 3 points of the glas bed and set it only against these 3 points which would be far from the middle of the plate. Then one of my idea was also to have a really small coil with small magnet attached close or inside of it. Then measure when electric signal would be generated when magnet reach the plate and moves against the coil. But like I said I am not good in electronics at all so maybe both ideas are wrong. Anyway I wanted something small and simple. I will see later what will be the option I choose. Thanks for your comments.
@newbob - the bottom corners are attached with 10 screws with the alu extrusions, the top ones with 7. You are right that there is no mechanism to adjust the smooth rods. I considered the printed parts good enough for it to keep correct dimension.
@ Trakian - like you said, I also consider it as better option to start without heat bed for the biginners. And like I already mentioned it makes me more happy when the printer consump as low energy as possible especially when the printers run for many many hours. I also started to use the power brick to run the printer.
About the different material for printing without heating. I think in the future there will come many materials for the 3D printers with completely different property so maybe it will also develope for such kind of printers soon. Anyway have you tried your idea you mentioned?
About the clay printer I did. The extruder runs with the compressor. I wanted to do a different extruder first which would be pushed by the stepper motor. In the end I turned for the compresor option as it was acutally simplier for the biginning. I already had the compresor at home. I did just couple of tests with the printer when I builded it as I did not have much time for it during the year. I still consider the clay printing as really interesting field for 3D printing and I hope I will find some time for further developement. I had also an idea to make a bigger 3D printer which could be used for example in gardening to create object for plants and decorations directly in the gardens. That is a field I would like to develope in the future. The printer itselve must be easy to build and unbuild for easy transport and the build volume should be at least 150x150x100 cm I guess.
|
Re: Delta 3D printer design under 200 € October 23, 2017 07:36AM |
Registered: 7 years ago Posts: 154 |
For Autocalibration there is nothing easier than piezo sensor - check other threads on this forum under "General"
My two printers do not have heatbeds and to get PLA stick to the printbed I use simple painters tape. You can use expensive "3M Blue painters tape" or just get to the next hardwarestore and pick any painters tape you can get.
Cheap, clean, easy to install.
My two printers do not have heatbeds and to get PLA stick to the printbed I use simple painters tape. You can use expensive "3M Blue painters tape" or just get to the next hardwarestore and pick any painters tape you can get.
Cheap, clean, easy to install.
|
Re: Delta 3D printer design under 200 € October 24, 2017 04:50AM |
Registered: 9 years ago Posts: 84 |
Thanks Dancer, the piezo looks good until what I checked for now. I have no experiences with it so could be interesting to test it. Do you have any suggestion which one to select? Should be cheap enough because otherwise it loose the sence to use it in the cheap 3D printer. I will also try in the discussion you mentioned.
|
Re: Delta 3D printer design under 200 € October 24, 2017 04:52AM |
Registered: 9 years ago Posts: 84 |
|
Re: Delta 3D printer design under 200 € October 25, 2017 10:01AM |
Registered: 7 years ago Posts: 507 |
I haven't put the idea into practice yet myself, but there are commercial printers out there using it (which is where I got the idea). It's essentially what the fisher uses except it's implemented on the effector rather than the print bed. Another one I find interesting is what lulzbot does with their printers, having the nozzle itself act as a probe by closing a circuit. Only works with conductive beds though so that can be an issue, the trapdoor type bed sensor isn't limited by this, though.
|
Re: Delta 3D printer design under 200 € November 08, 2017 06:18AM |
Registered: 7 years ago Posts: 23 |
you should be able to gain more height for printing when designing the effector a bit different. See here the effector that I am using on my delta machine.Quote
boylucky
Meanwhile I also created a basic page about this delta 3D printer where you can also get the STL files. Page is still in development but can be used for some info now.
You can access it here.
Edited 1 time(s). Last edit at 11/08/2017 06:19AM by xebbmw.
|
Re: Delta 3D printer design under 200 € November 08, 2017 07:28AM |
Registered: 9 years ago Posts: 84 |
Sorry, only registered users may post in this forum.