MechaBits KraftWerk'r
Posted by MechaBits
|
Re: MechaBits KraftWerk'r December 11, 2016 02:35PM |
Registered: 8 years ago Posts: 1,671 |
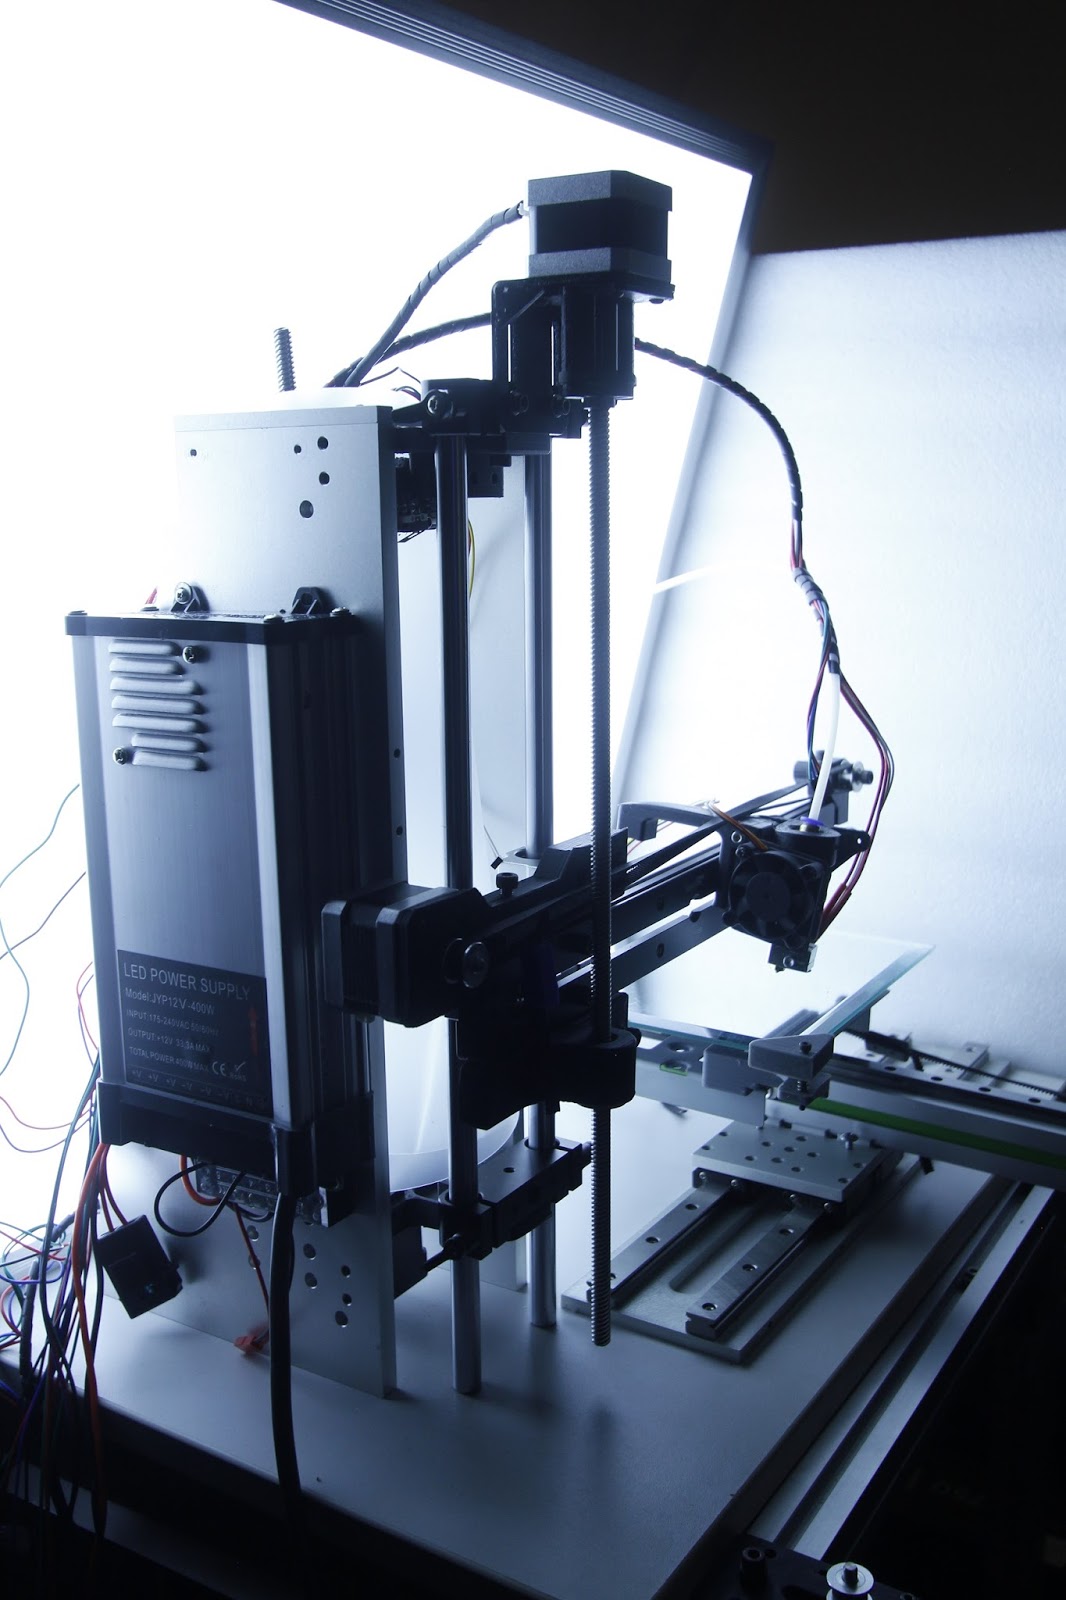

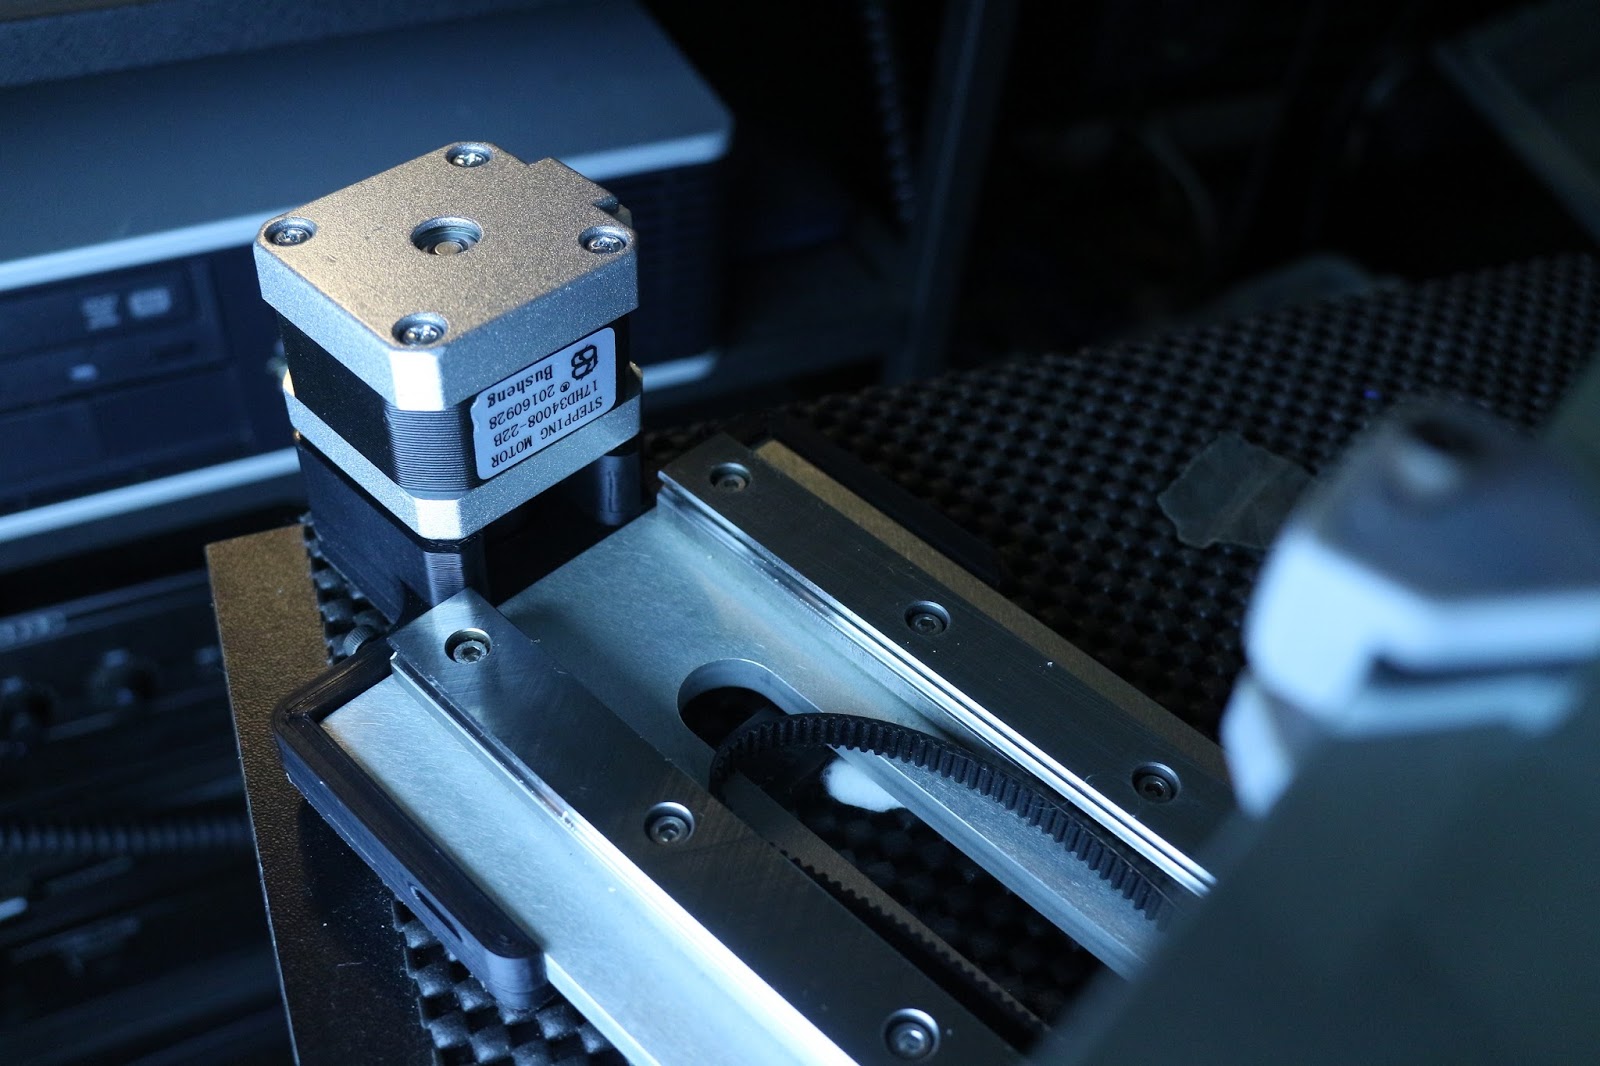
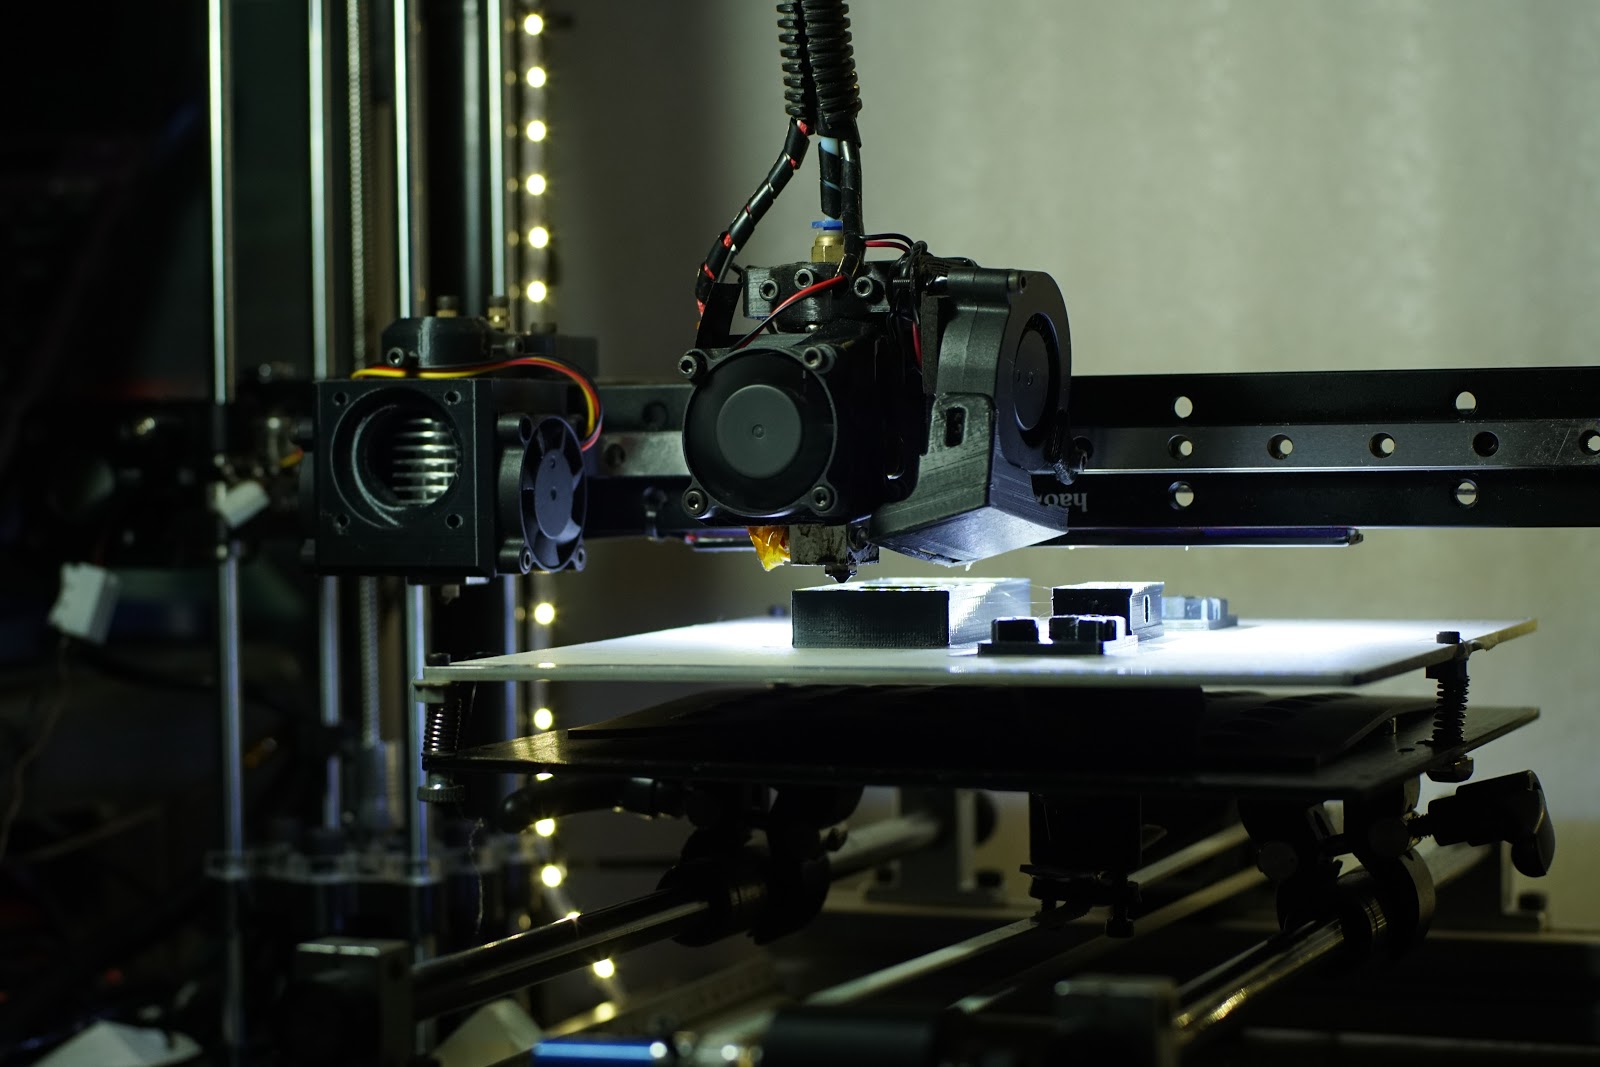
Taking shape just need one more rail for x,I one eye on the one on the XY table another eye on ebay, or have static head?
XY table might be tricky to get working, but fun to try, problem I have is driving the bottom carriage, as this is low profile, motor needs mounting somehow, into the base, but there's nowhere on the rail assembly to add anything, would like a central motor near Z base. idlers at ends of rails, there is just enough room under carriage for belt, but unless motor was sunk into worksurface it's going to be as usual the trickies axis to get right.
Edited 2 time(s). Last edit at 12/11/2016 05:48PM by MechaBits.
|
Re: MechaBits KraftWerk'r December 11, 2016 08:21PM |
Registered: 11 years ago Posts: 5,780 |
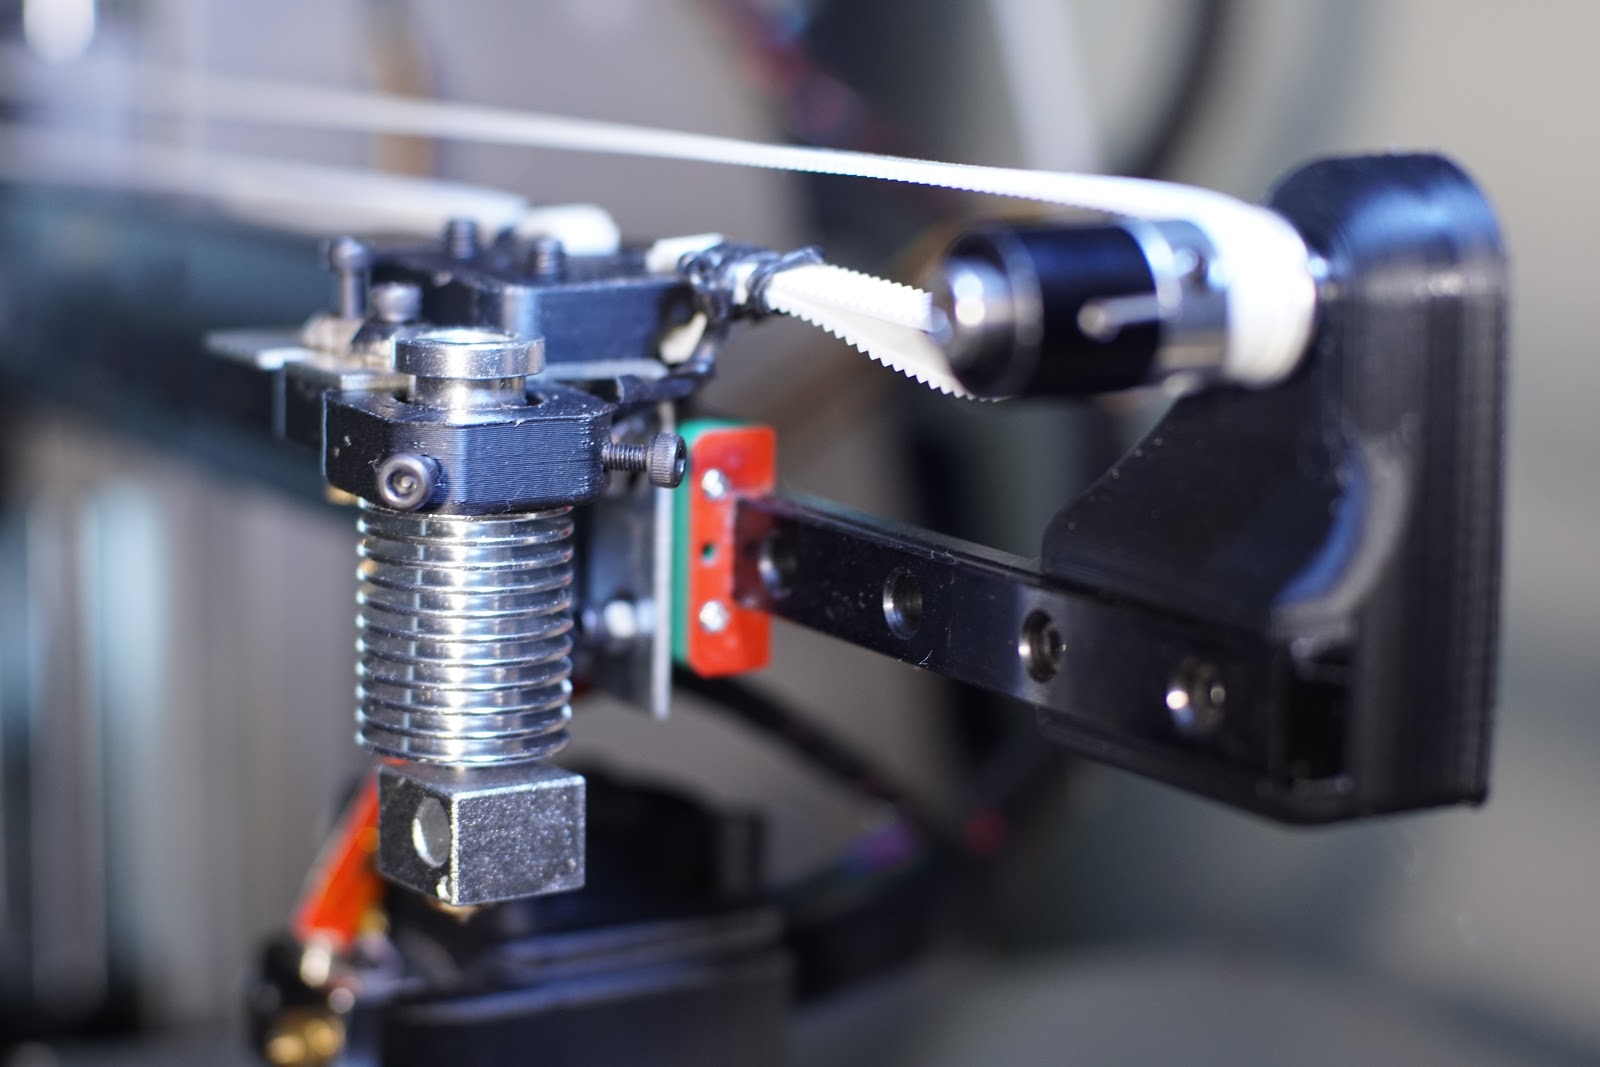
What's going on with the belt at the extruder?
Ultra MegaMax Dominator 3D printer: [drmrehorst.blogspot.com]
Ultra MegaMax Dominator 3D printer: [drmrehorst.blogspot.com]
|
Re: MechaBits KraftWerk'r December 11, 2016 08:54PM |
Registered: 8 years ago Posts: 1,671 |
Use your imagination....right now its just balancing, no rail  parts are leftovers from previous design, so still have the carriage for this to do, it doesn't need the bar at the back, as belt is closer & above carriage this time, though toying with adding 2 carriage/rails for independent heads, resisting the temptation to complicate things. Wanted to use a closed belt on the X but for the sake of 5mm couldnt, motor needed to clear the bar, could have mounted motor reversed, sticking out but decided against it, ideally bar need to be relocated about 50mm to get longer X, rail could extend past end if i use the large bolts for idler. If I had custom metal Z carriage I could get things where I wanted them.
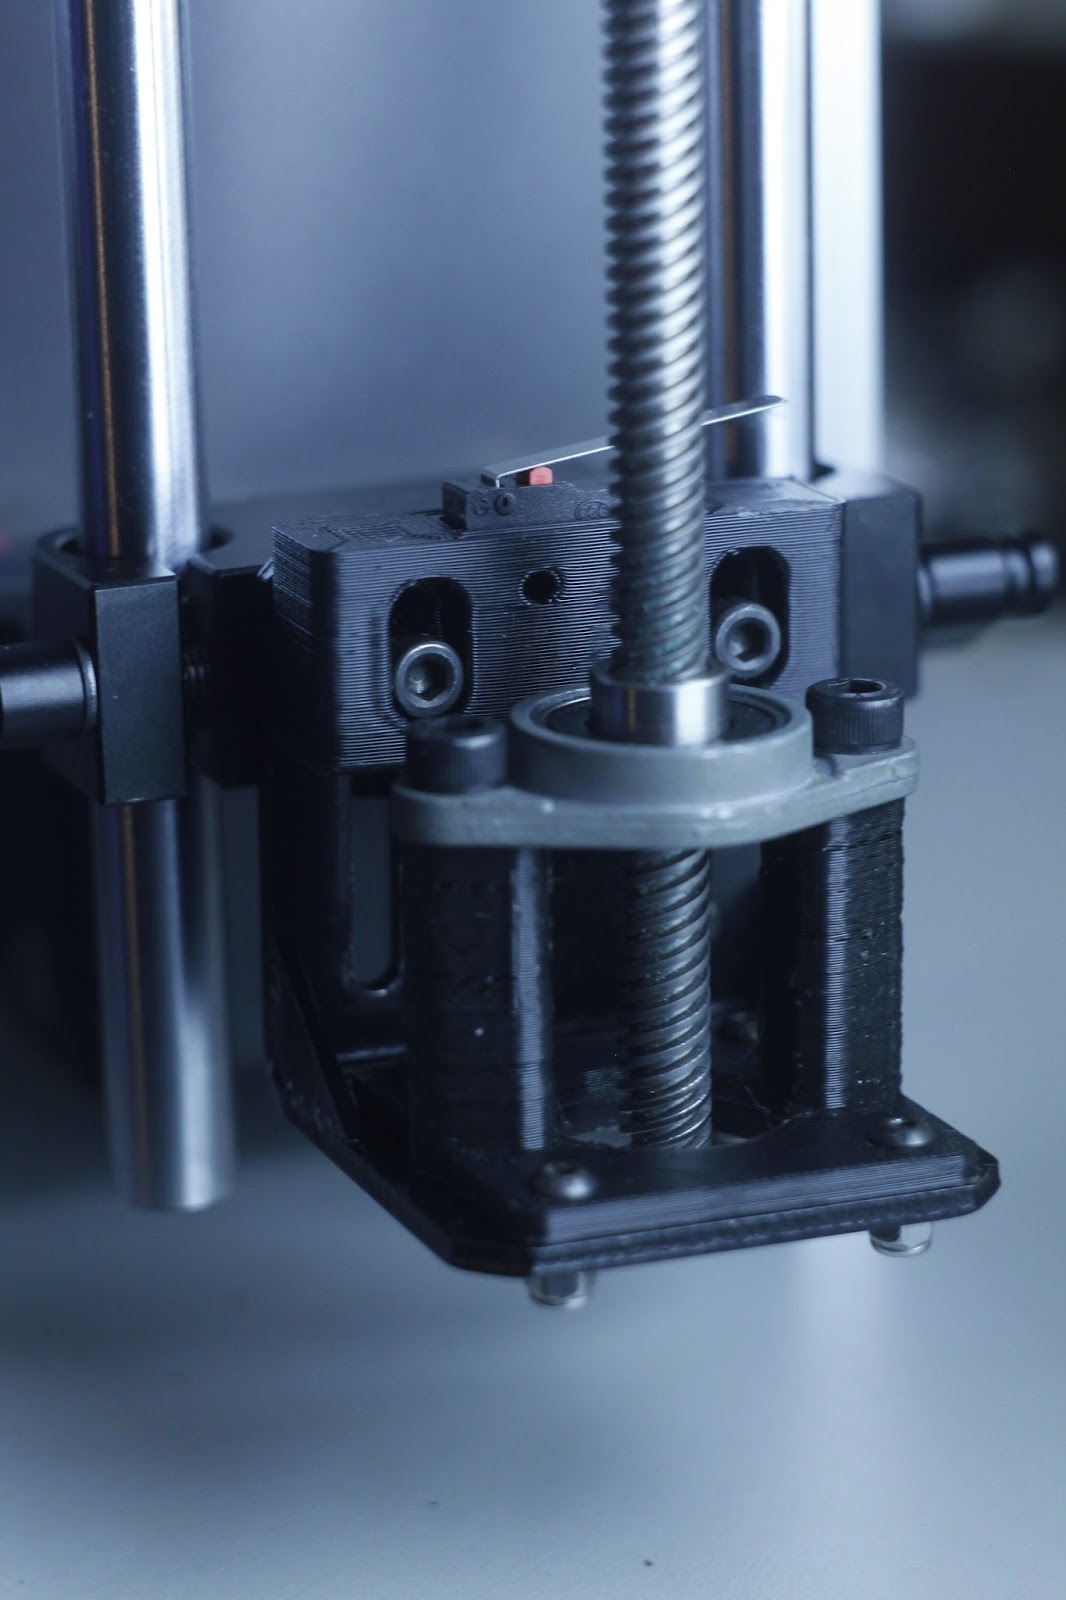
Also thinking about running a belt to the Z rod from the motor in the base, its a better one than on the top at the moment, but Z seems well constrained(works well without bottom bearing but I've added one), and is running solid, not sure if the belt would improve things
Edited 1 time(s). Last edit at 12/11/2016 10:02PM by MechaBits.
parts are leftovers from previous design, so still have the carriage for this to do, it doesn't need the bar at the back, as belt is closer & above carriage this time, though toying with adding 2 carriage/rails for independent heads, resisting the temptation to complicate things. Wanted to use a closed belt on the X but for the sake of 5mm couldnt, motor needed to clear the bar, could have mounted motor reversed, sticking out but decided against it, ideally bar need to be relocated about 50mm to get longer X, rail could extend past end if i use the large bolts for idler. If I had custom metal Z carriage I could get things where I wanted them.Also thinking about running a belt to the Z rod from the motor in the base, its a better one than on the top at the moment, but Z seems well constrained(works well without bottom bearing but I've added one), and is running solid, not sure if the belt would improve things
Edited 1 time(s). Last edit at 12/11/2016 10:02PM by MechaBits.
|
Re: MechaBits KraftWerk'r December 13, 2016 01:47PM |
Registered: 8 years ago Posts: 1,671 |


|
Re: MechaBits KraftWerk'r December 20, 2016 09:44PM |
Registered: 8 years ago Posts: 1,671 |
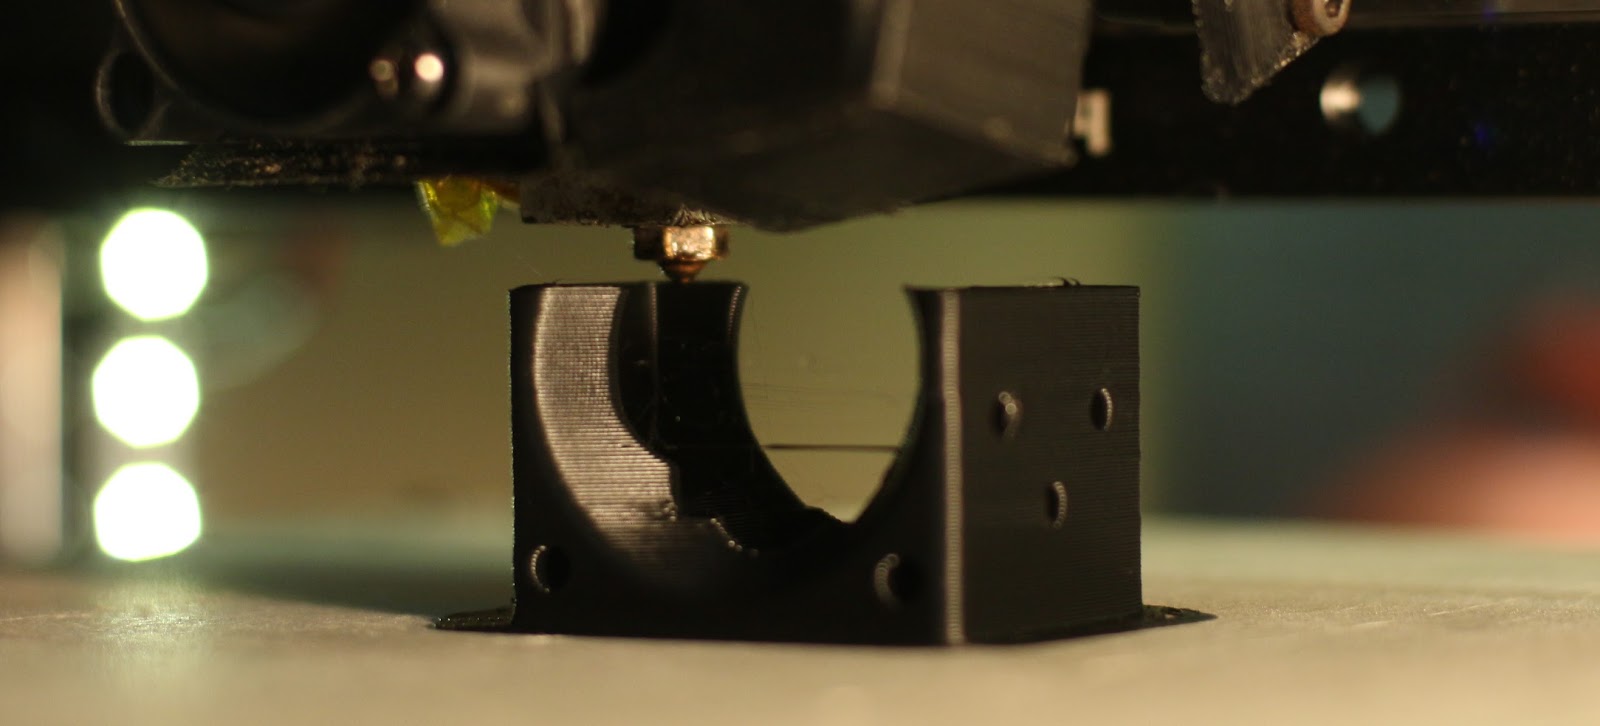

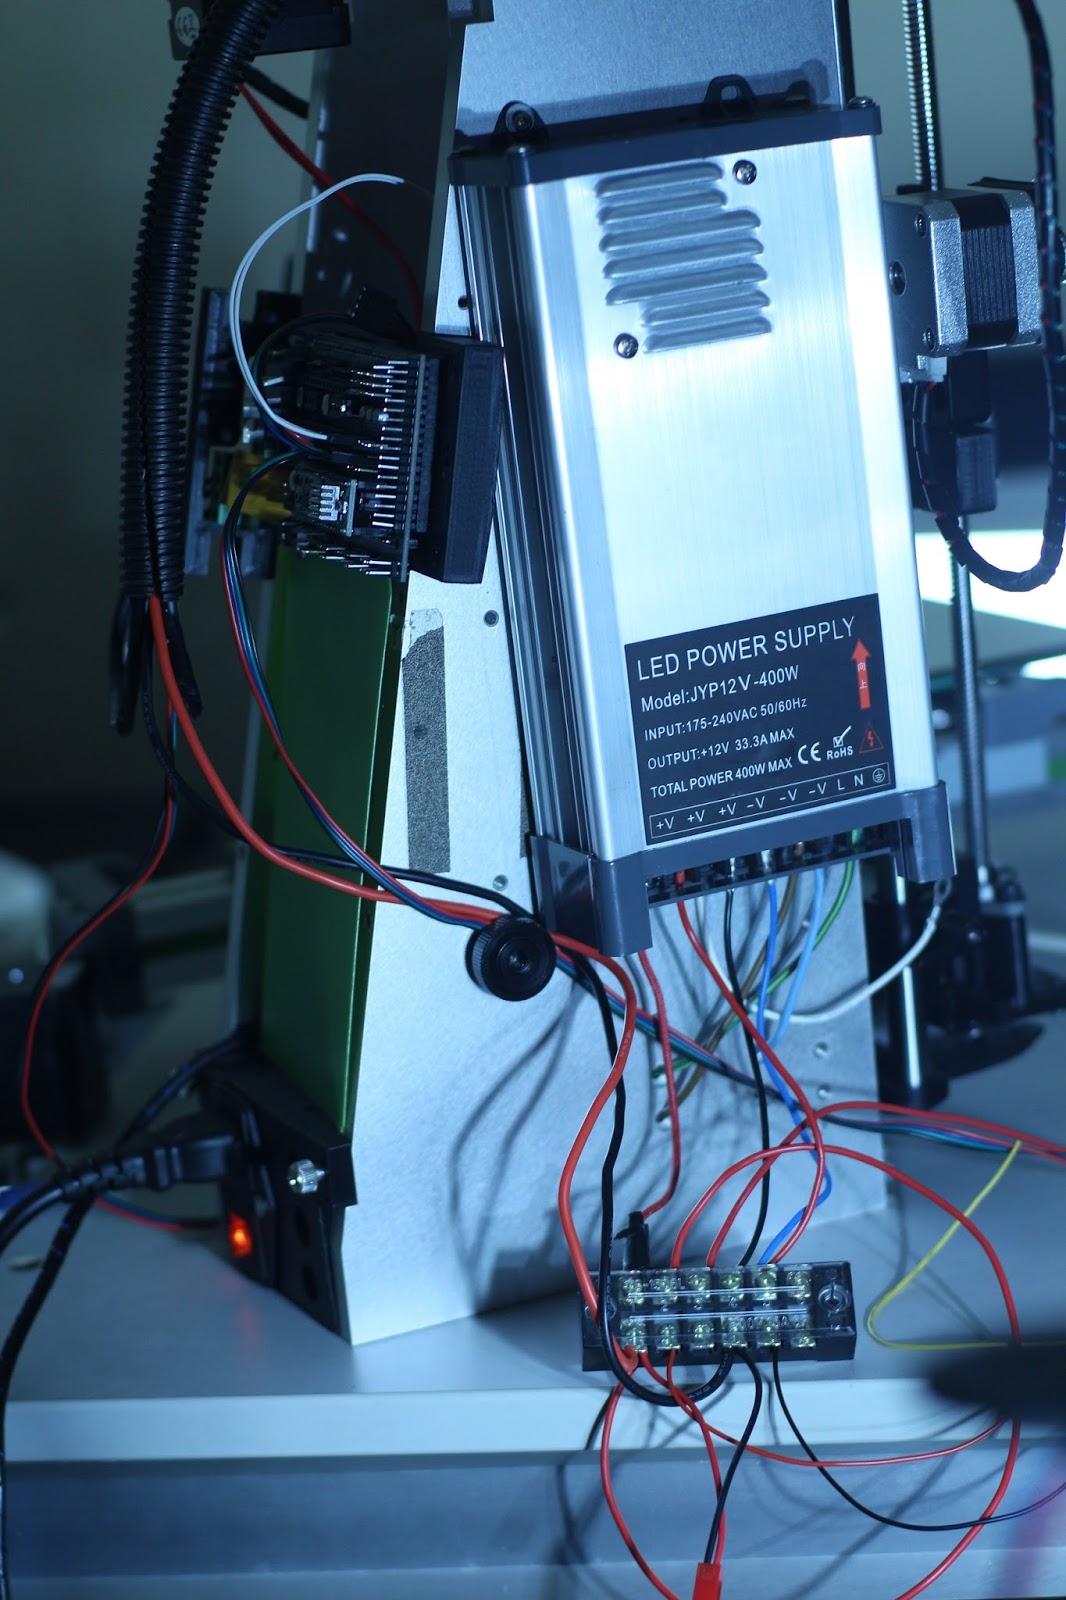
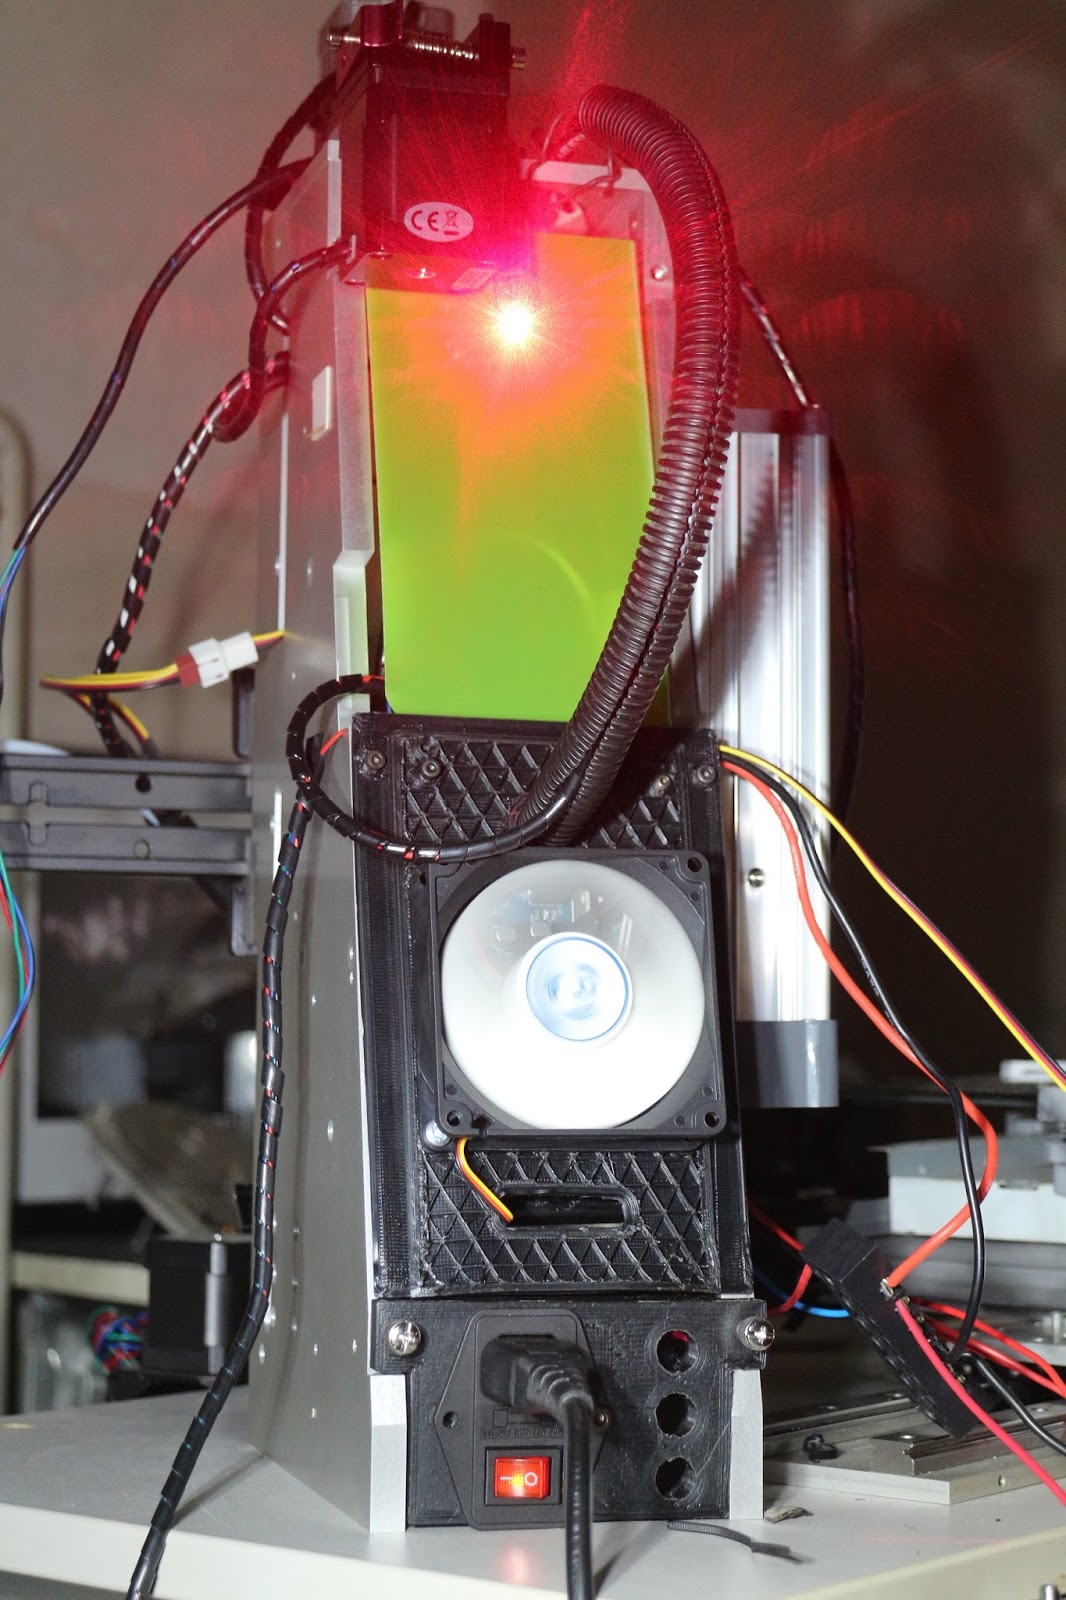
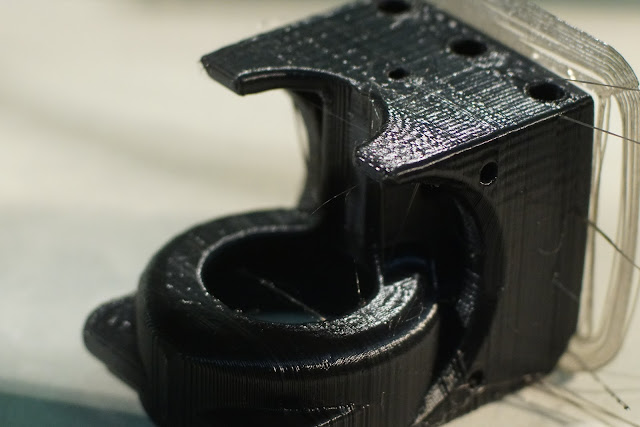
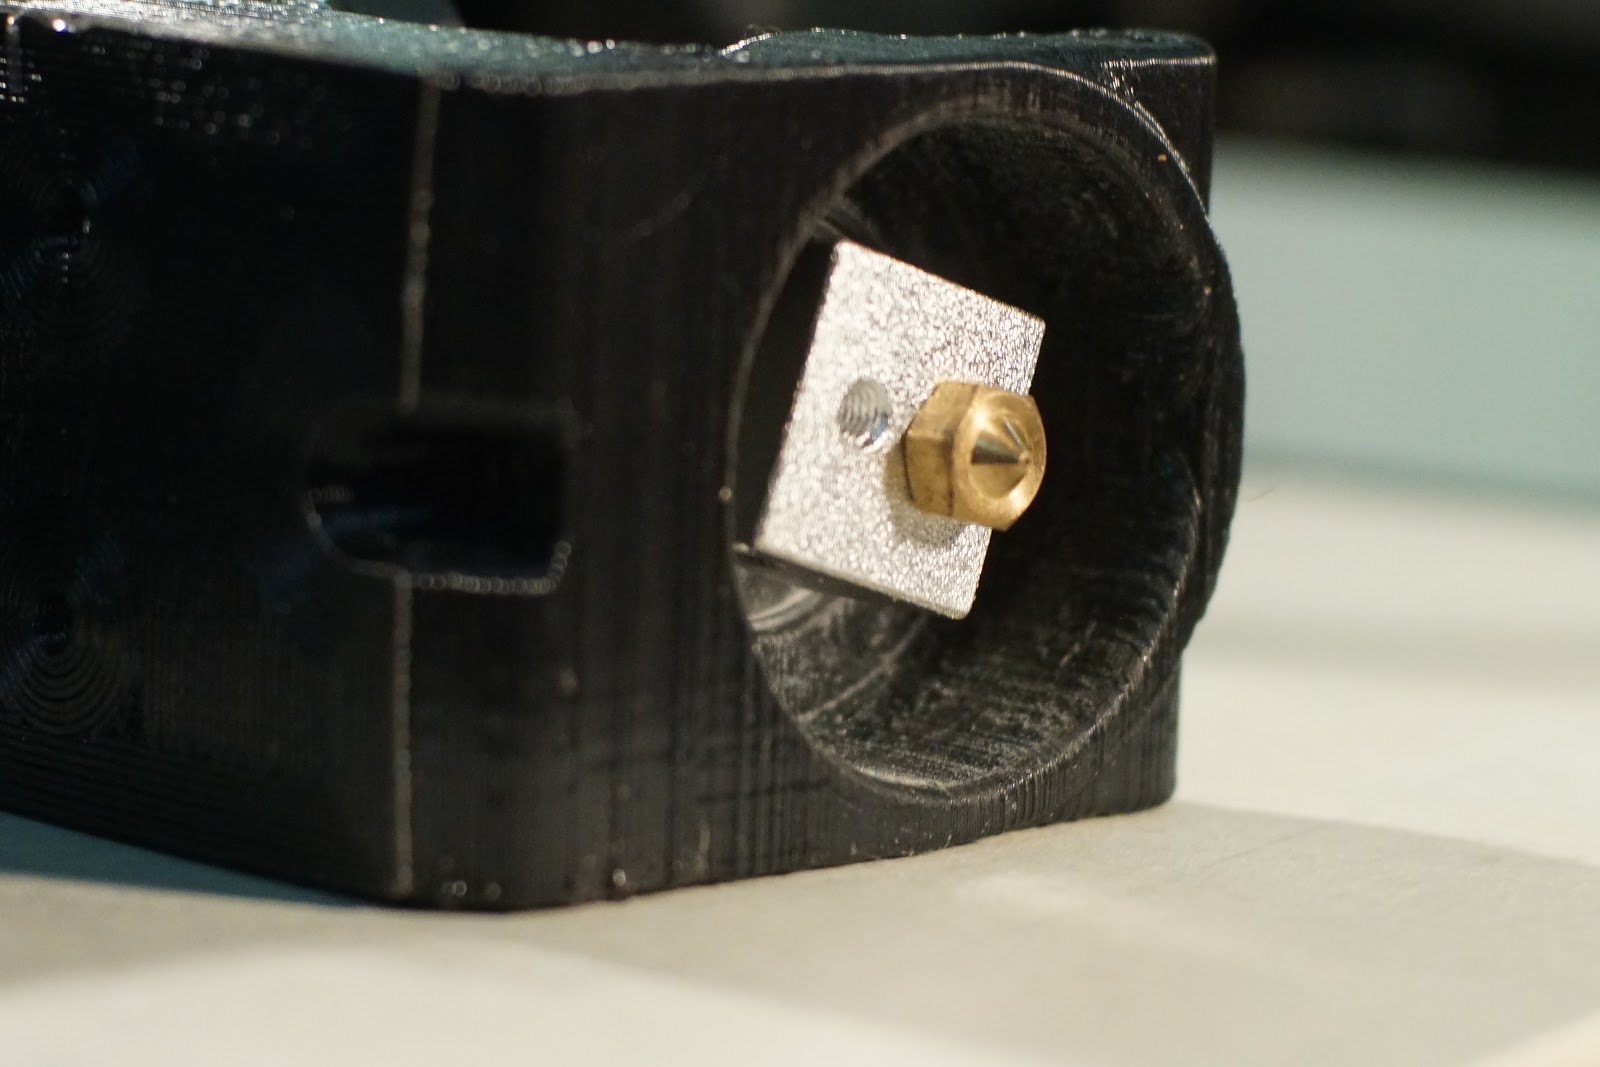
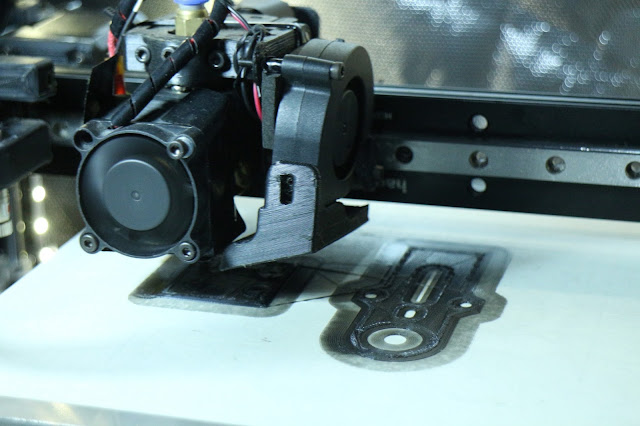
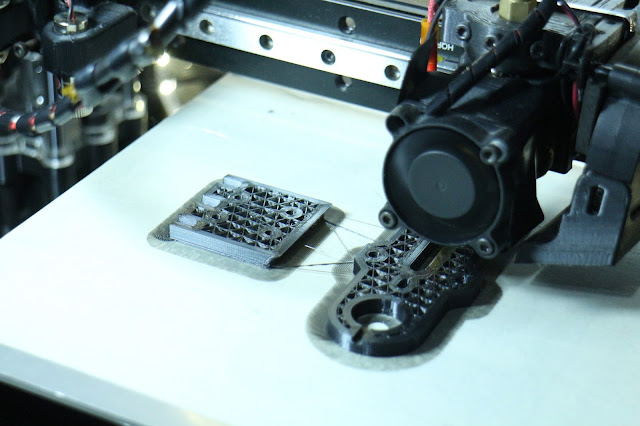
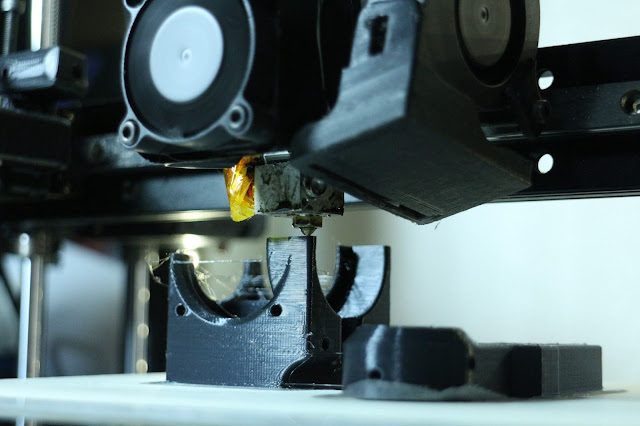
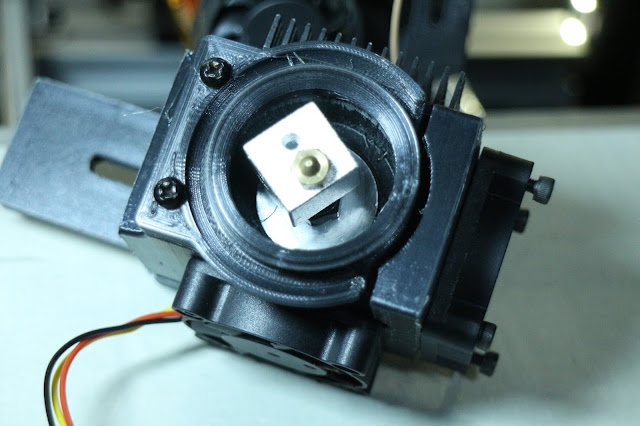
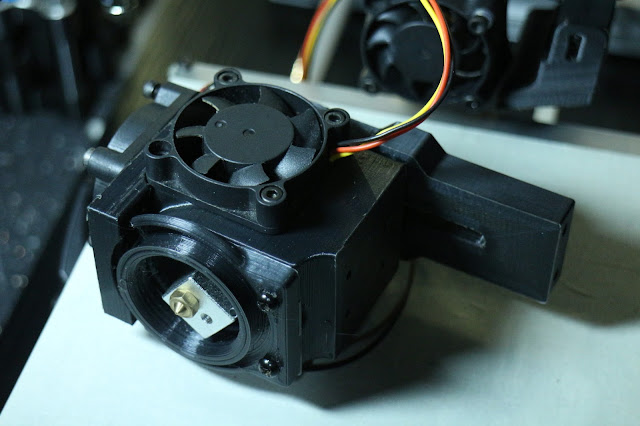
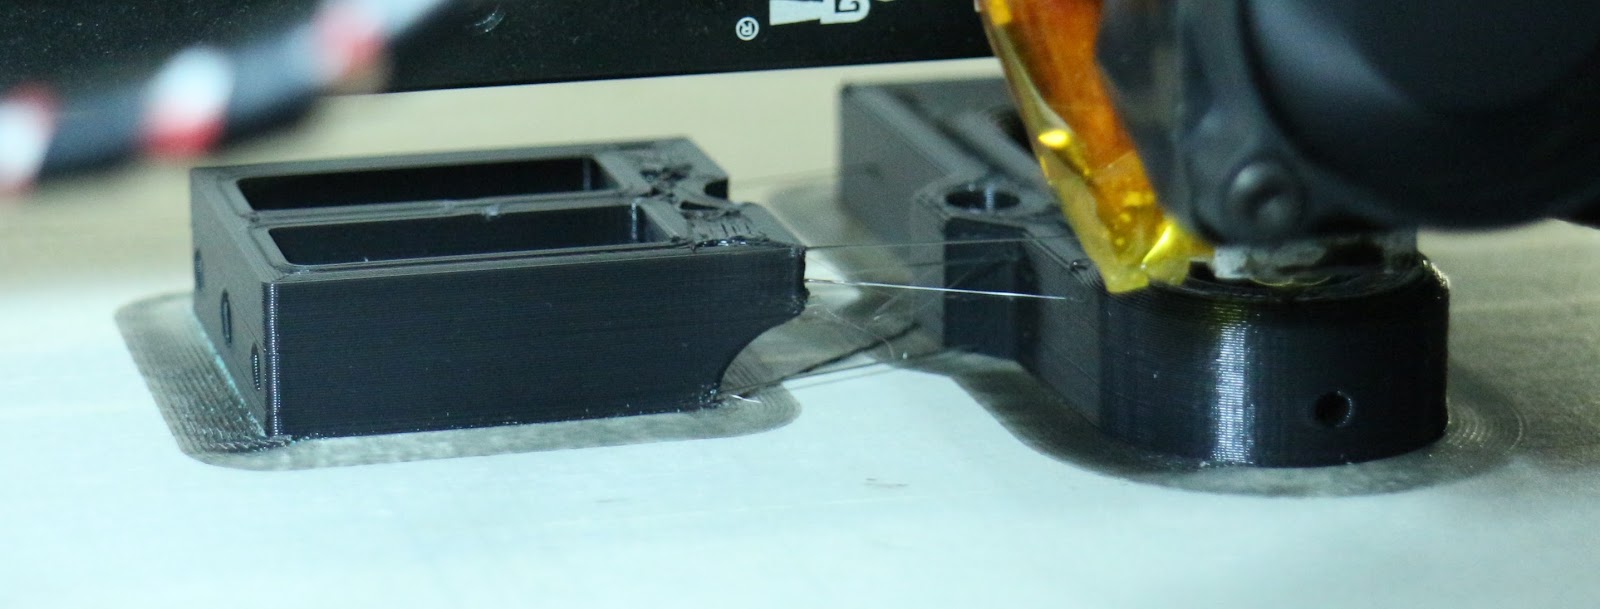
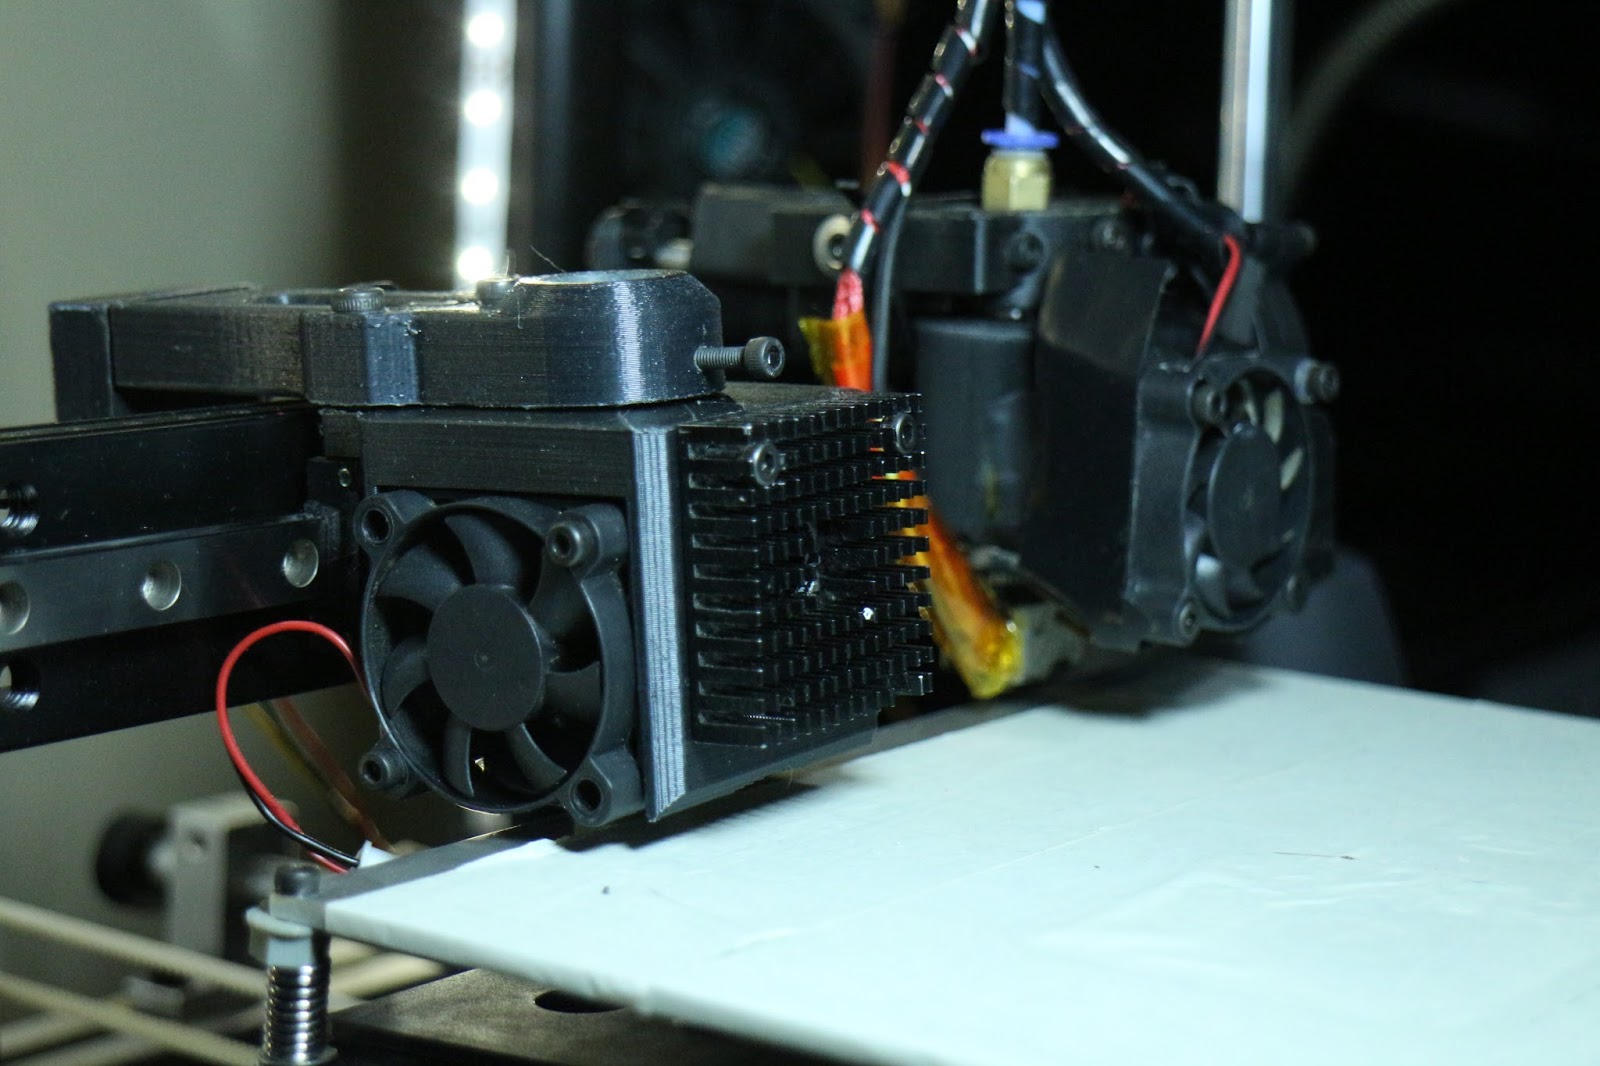
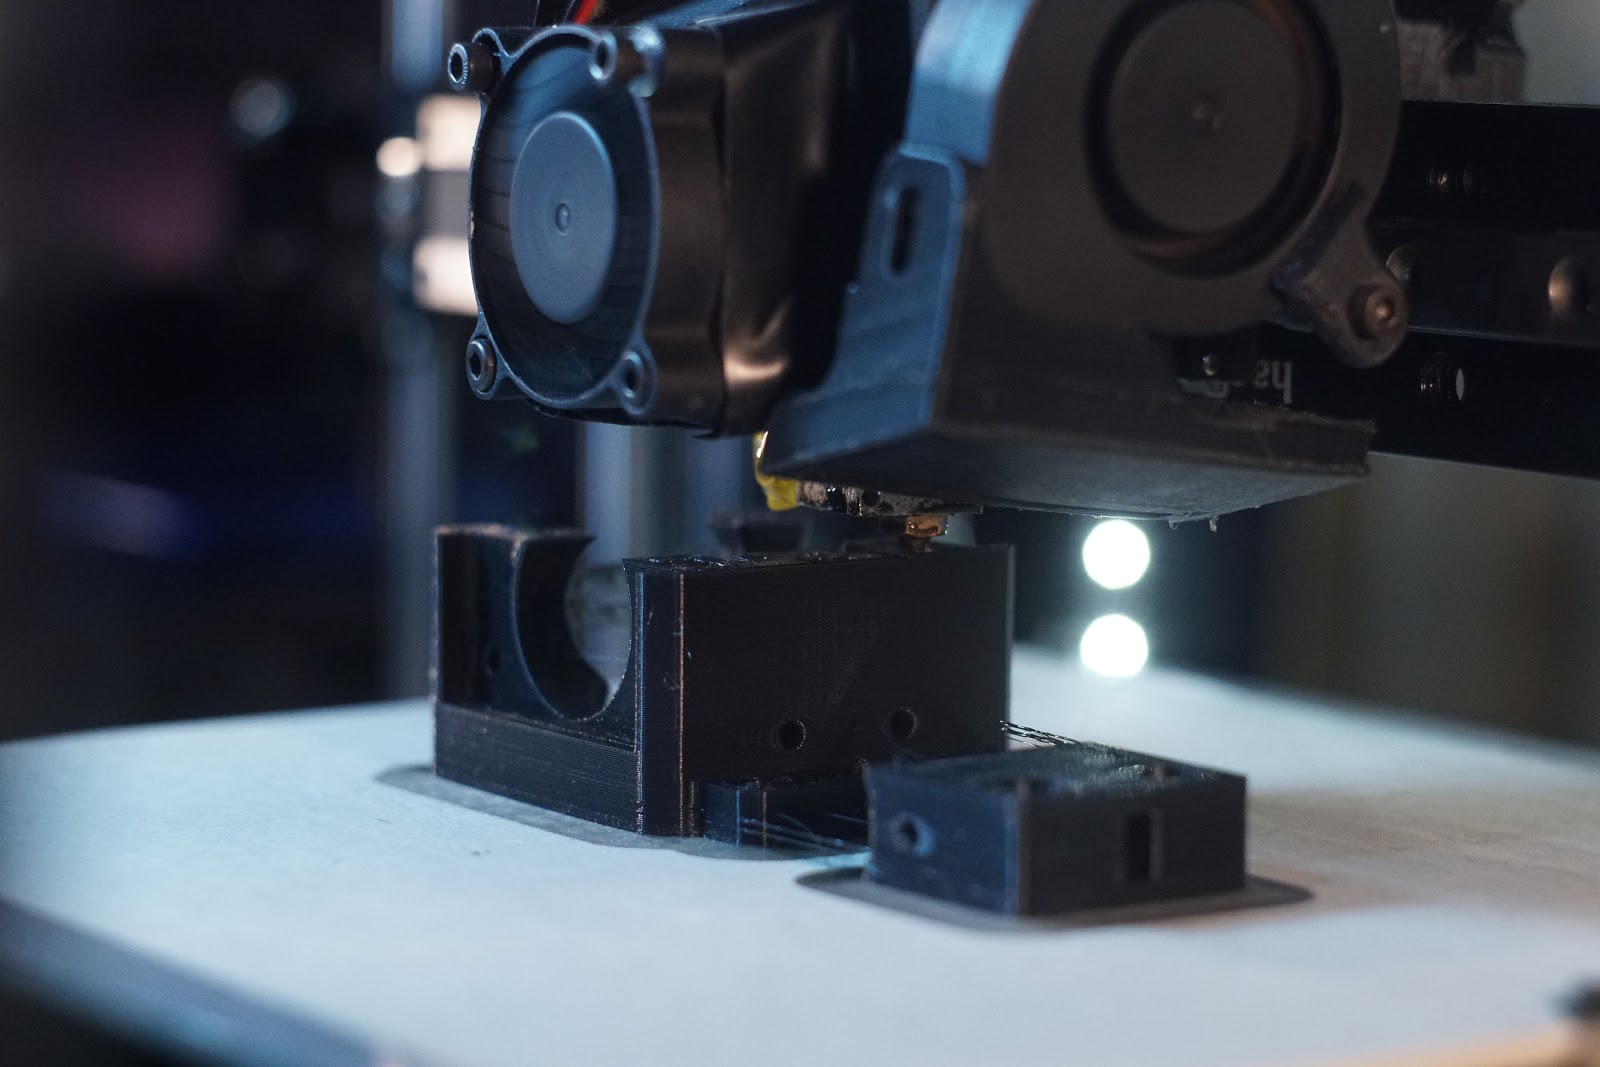
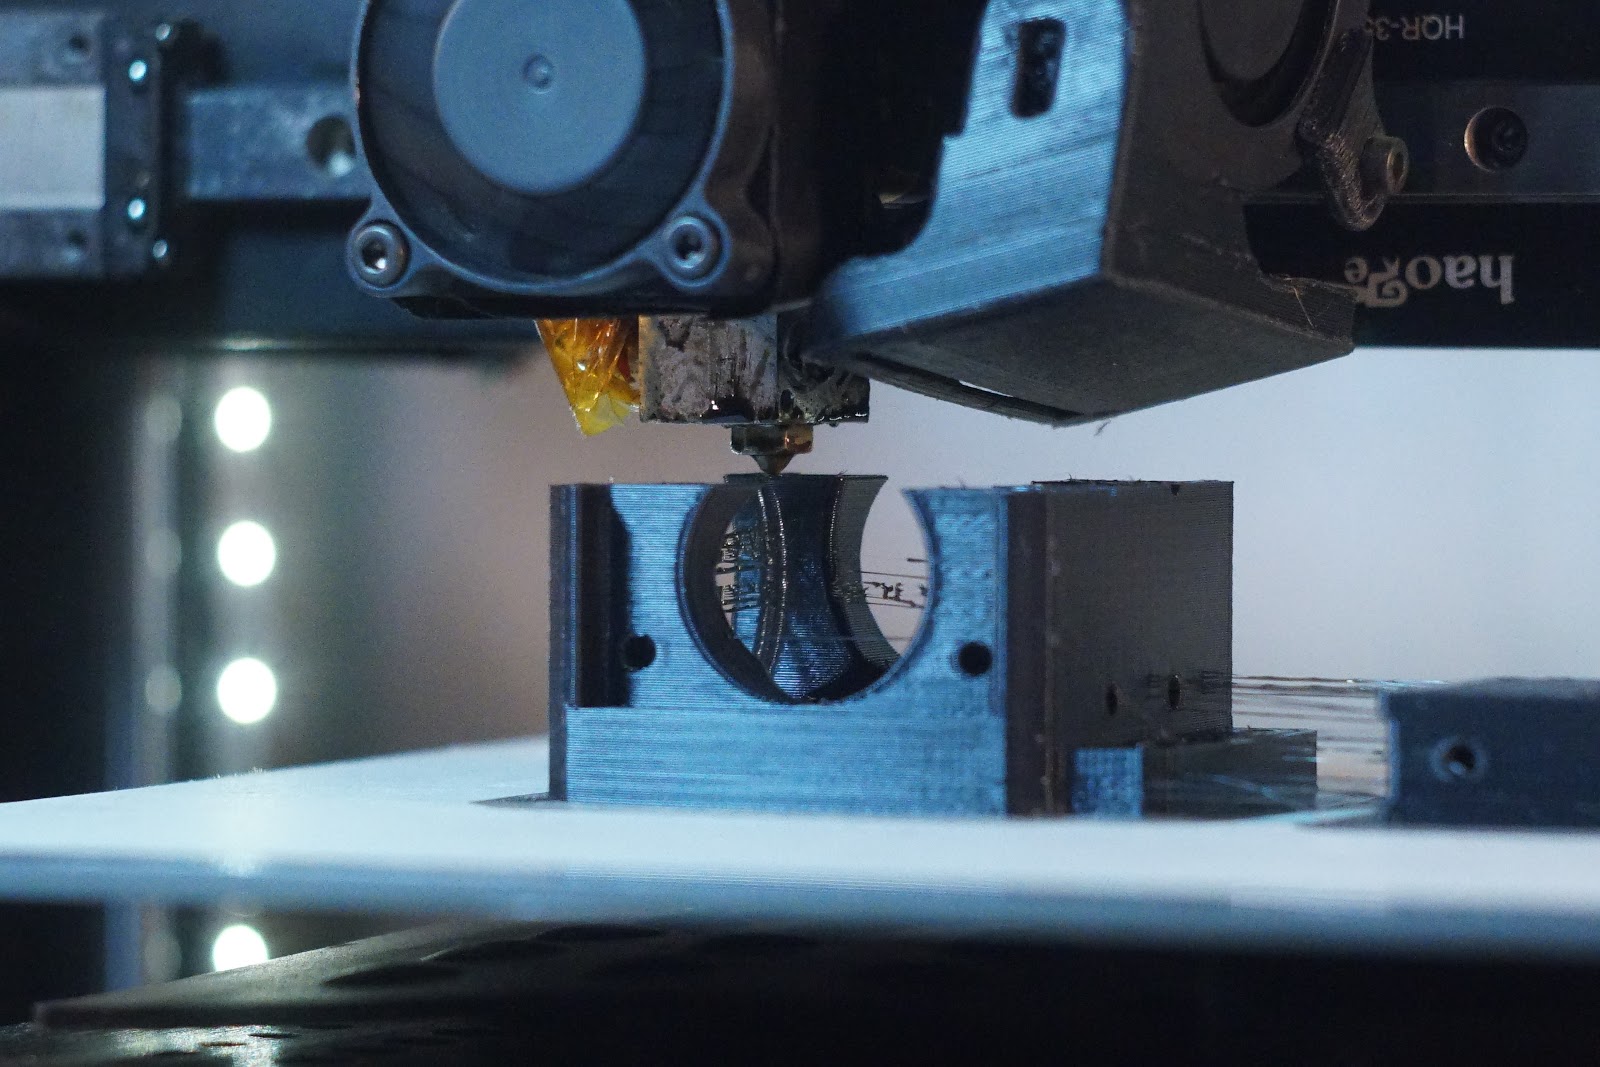
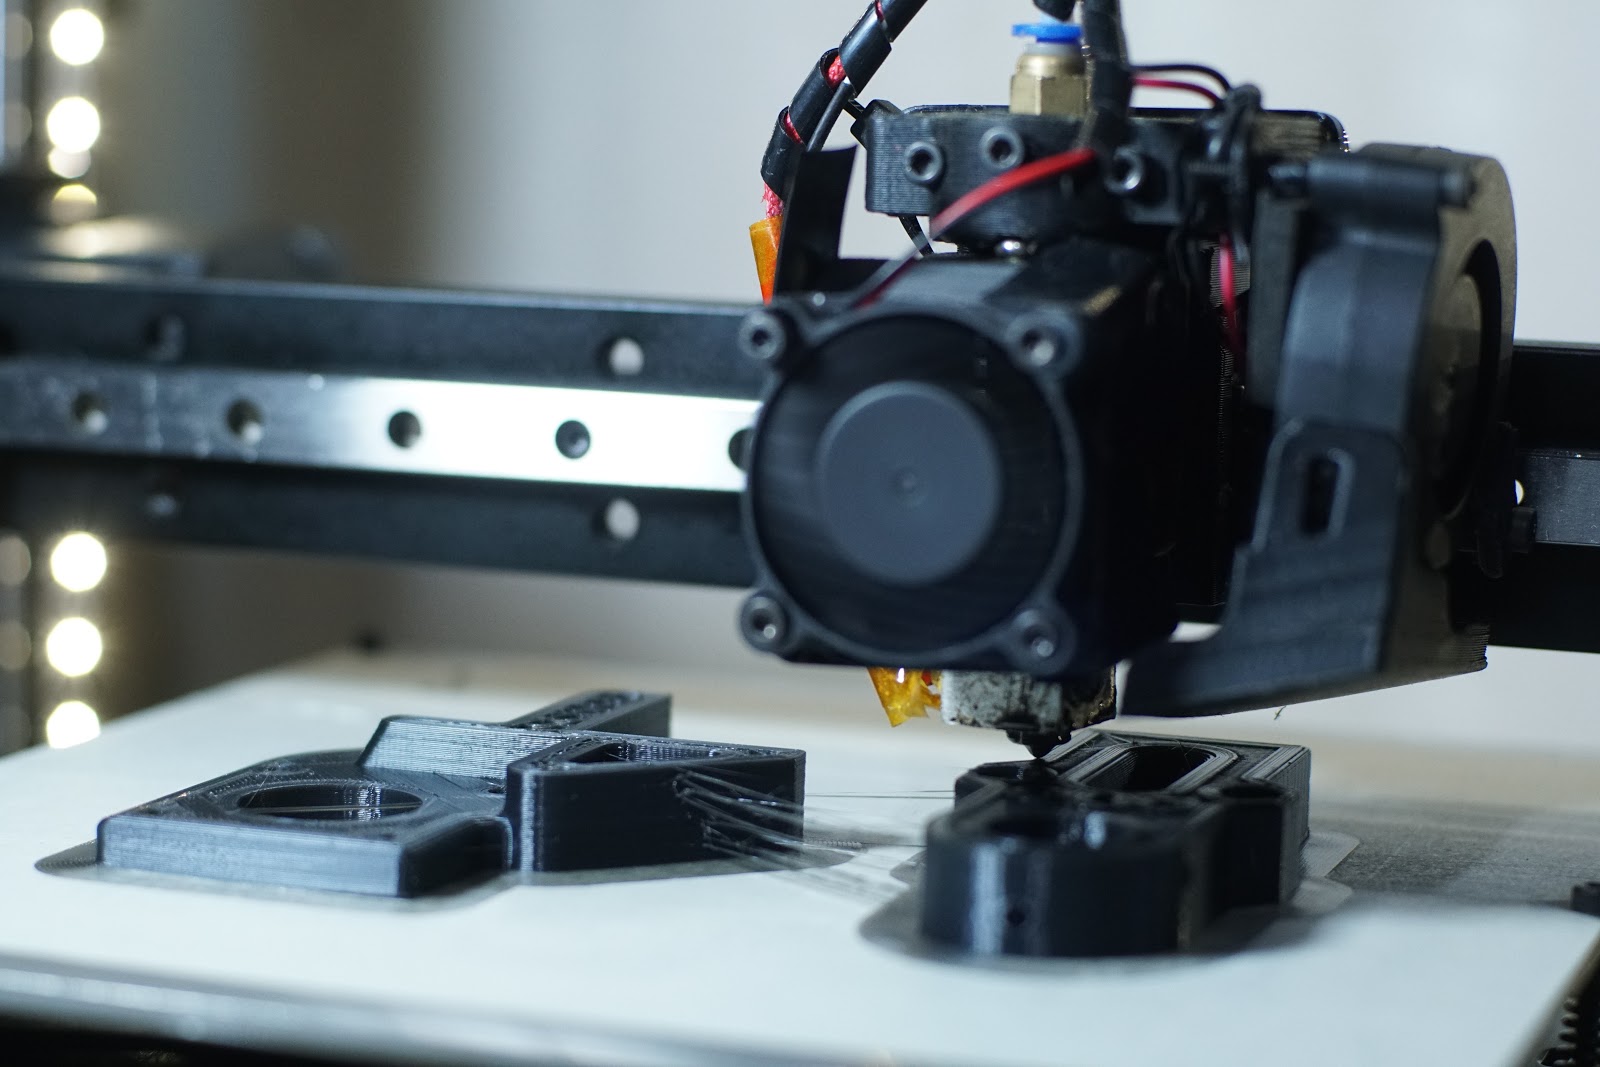
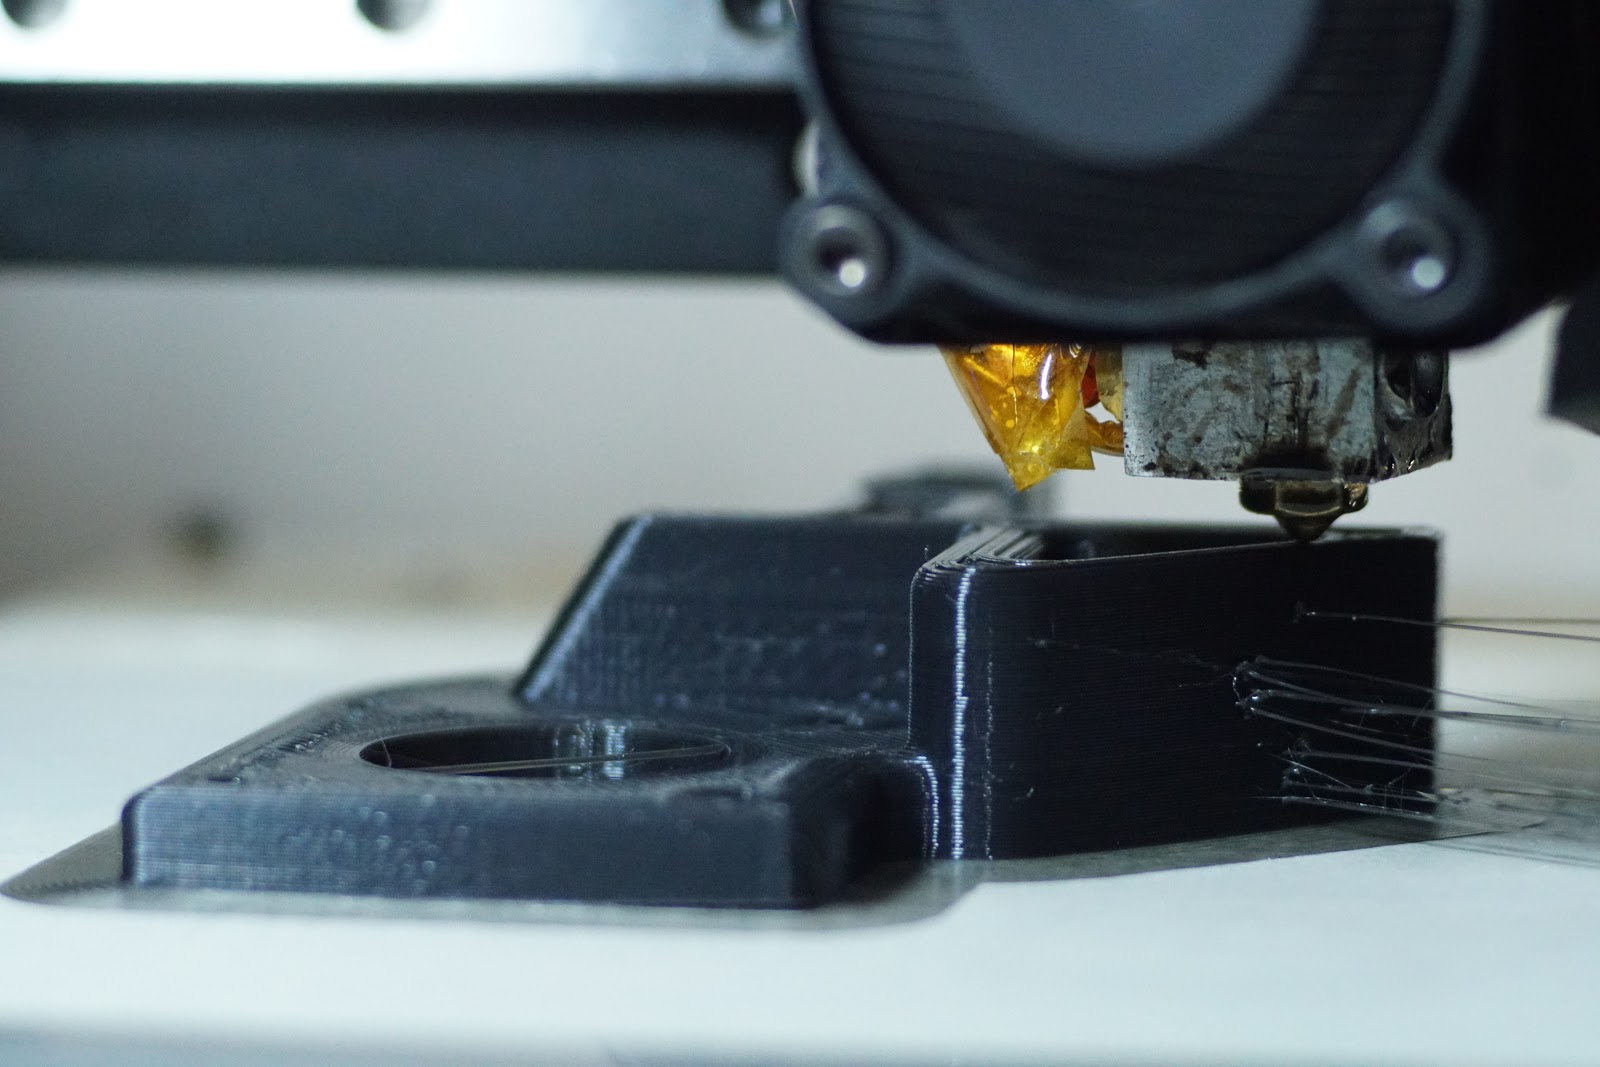
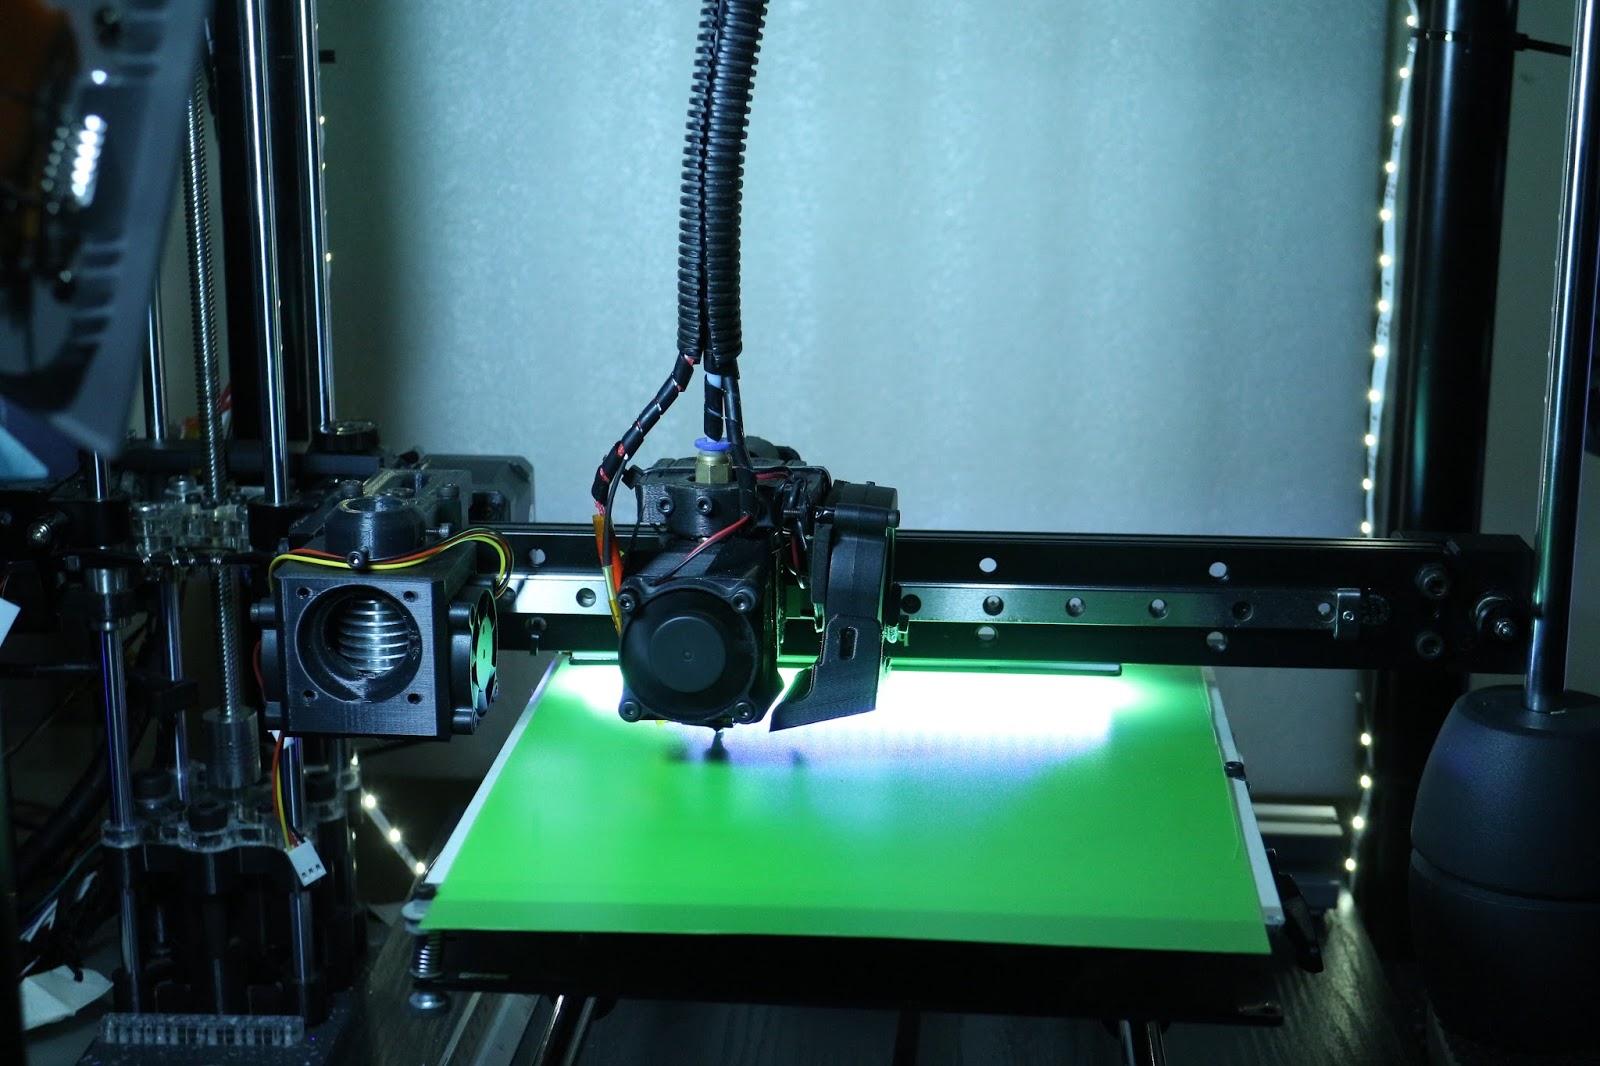
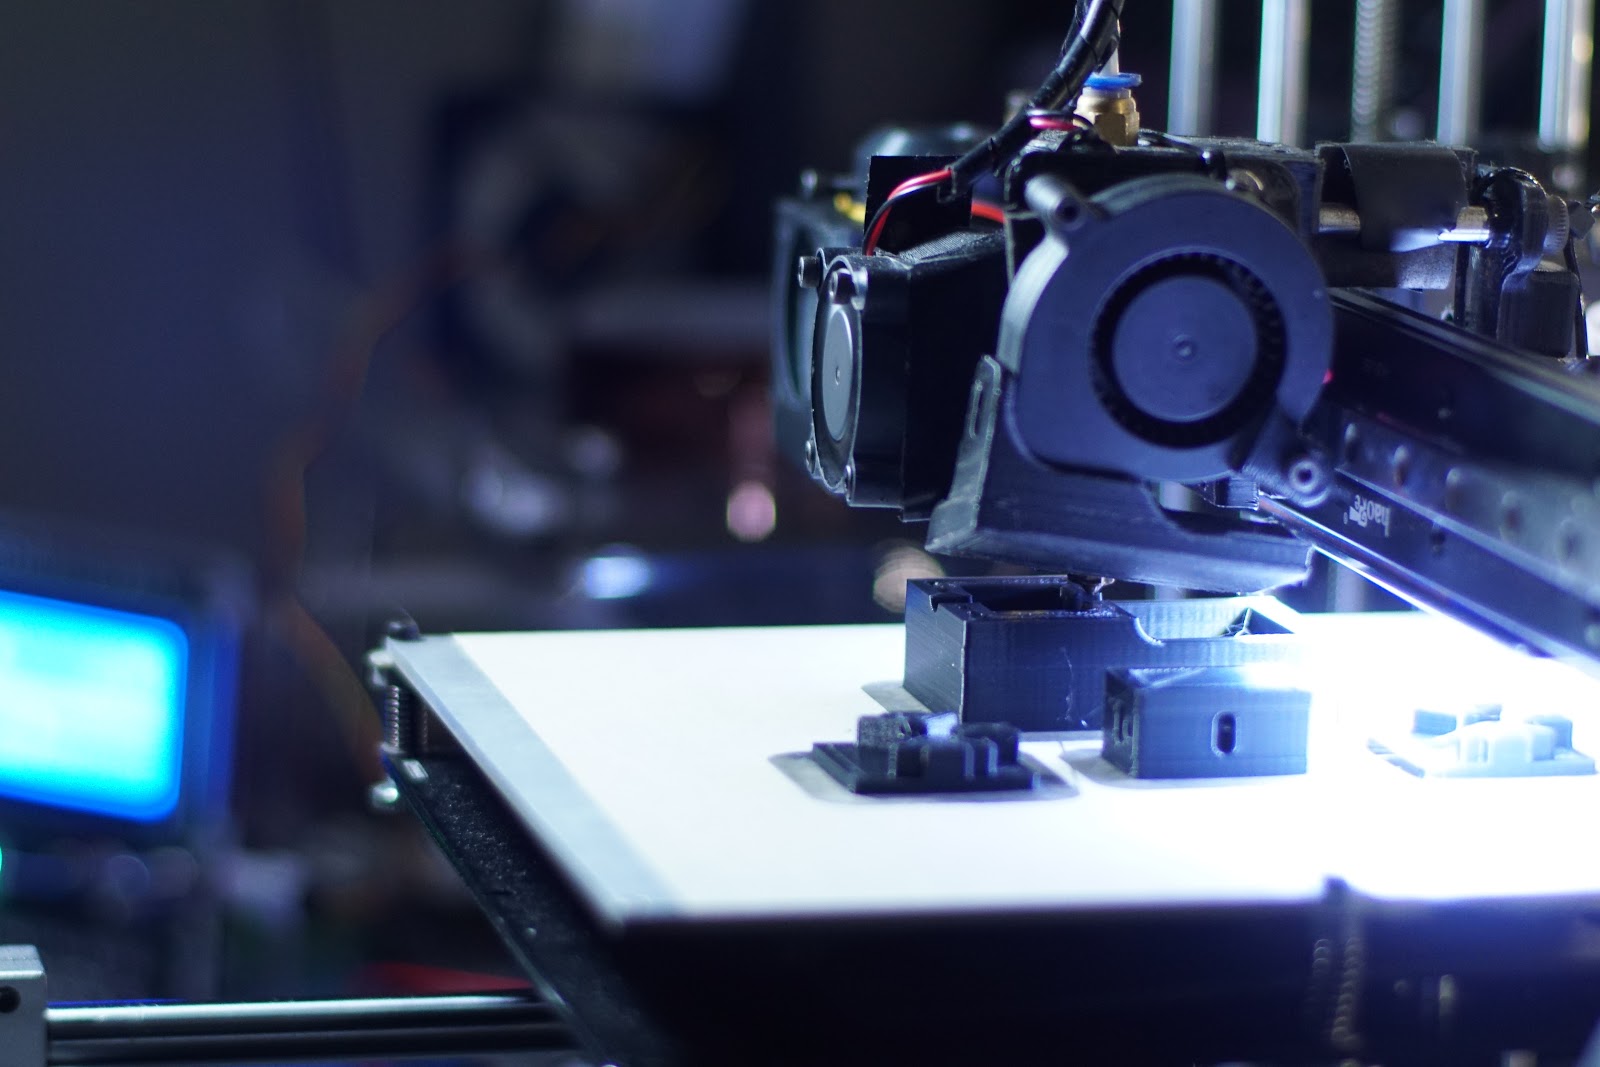
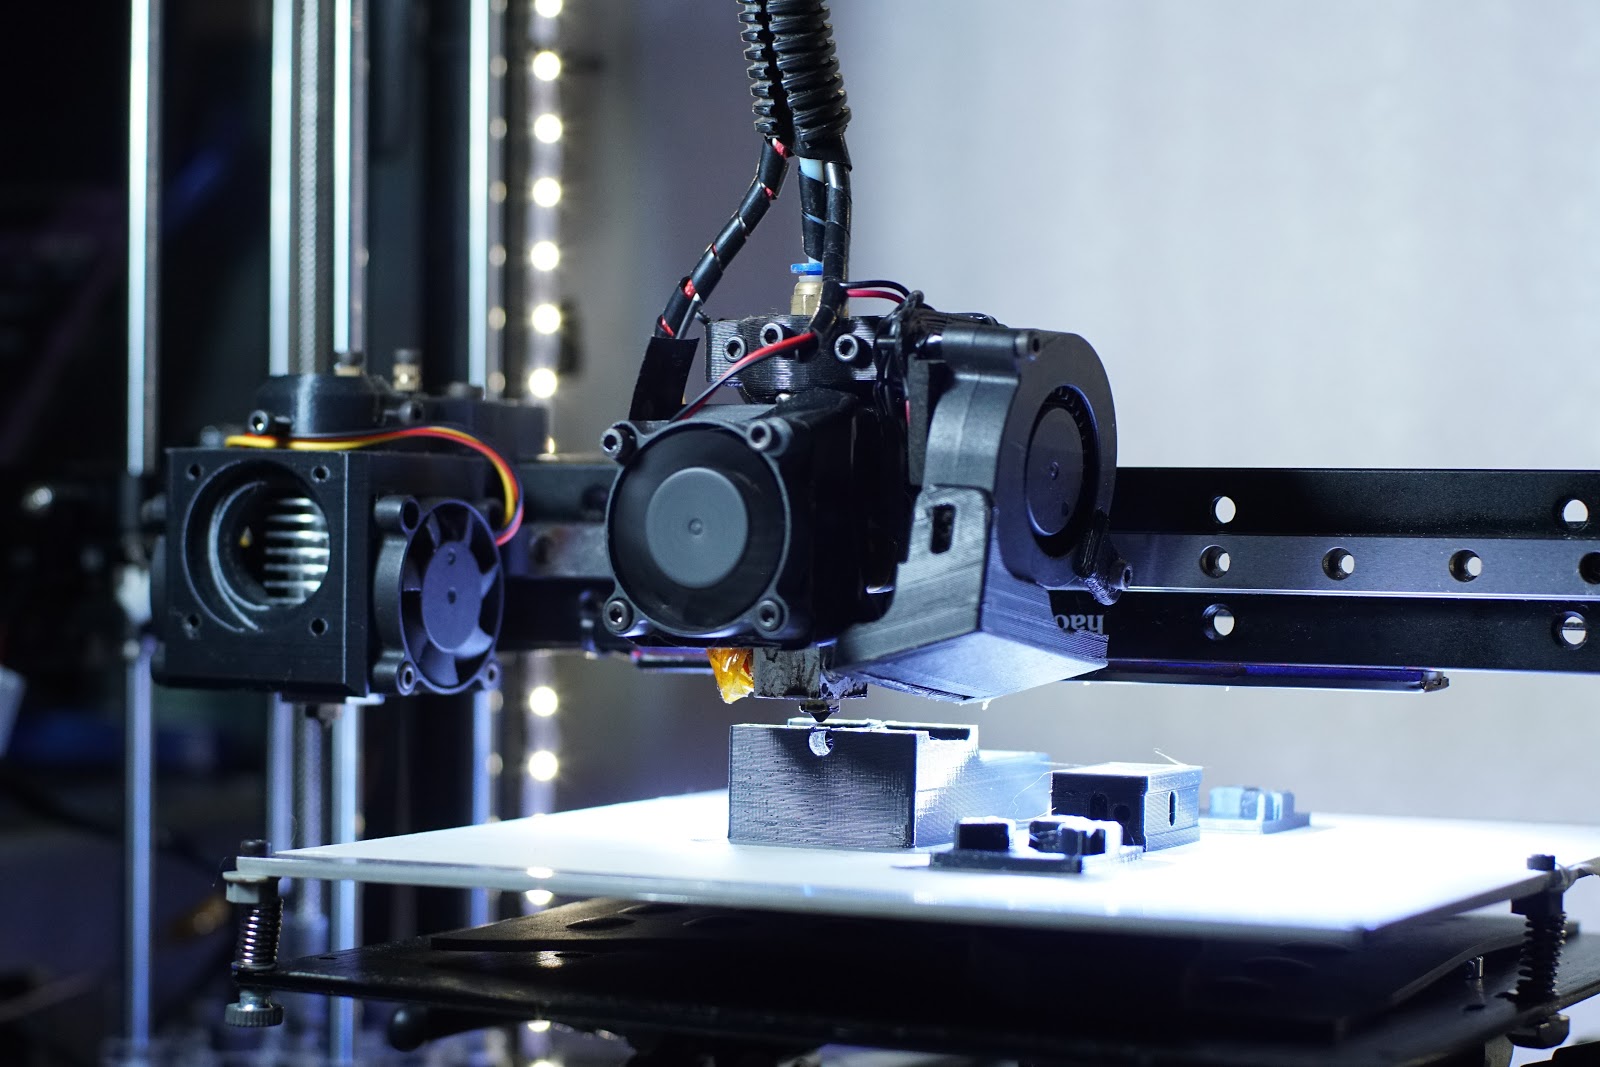
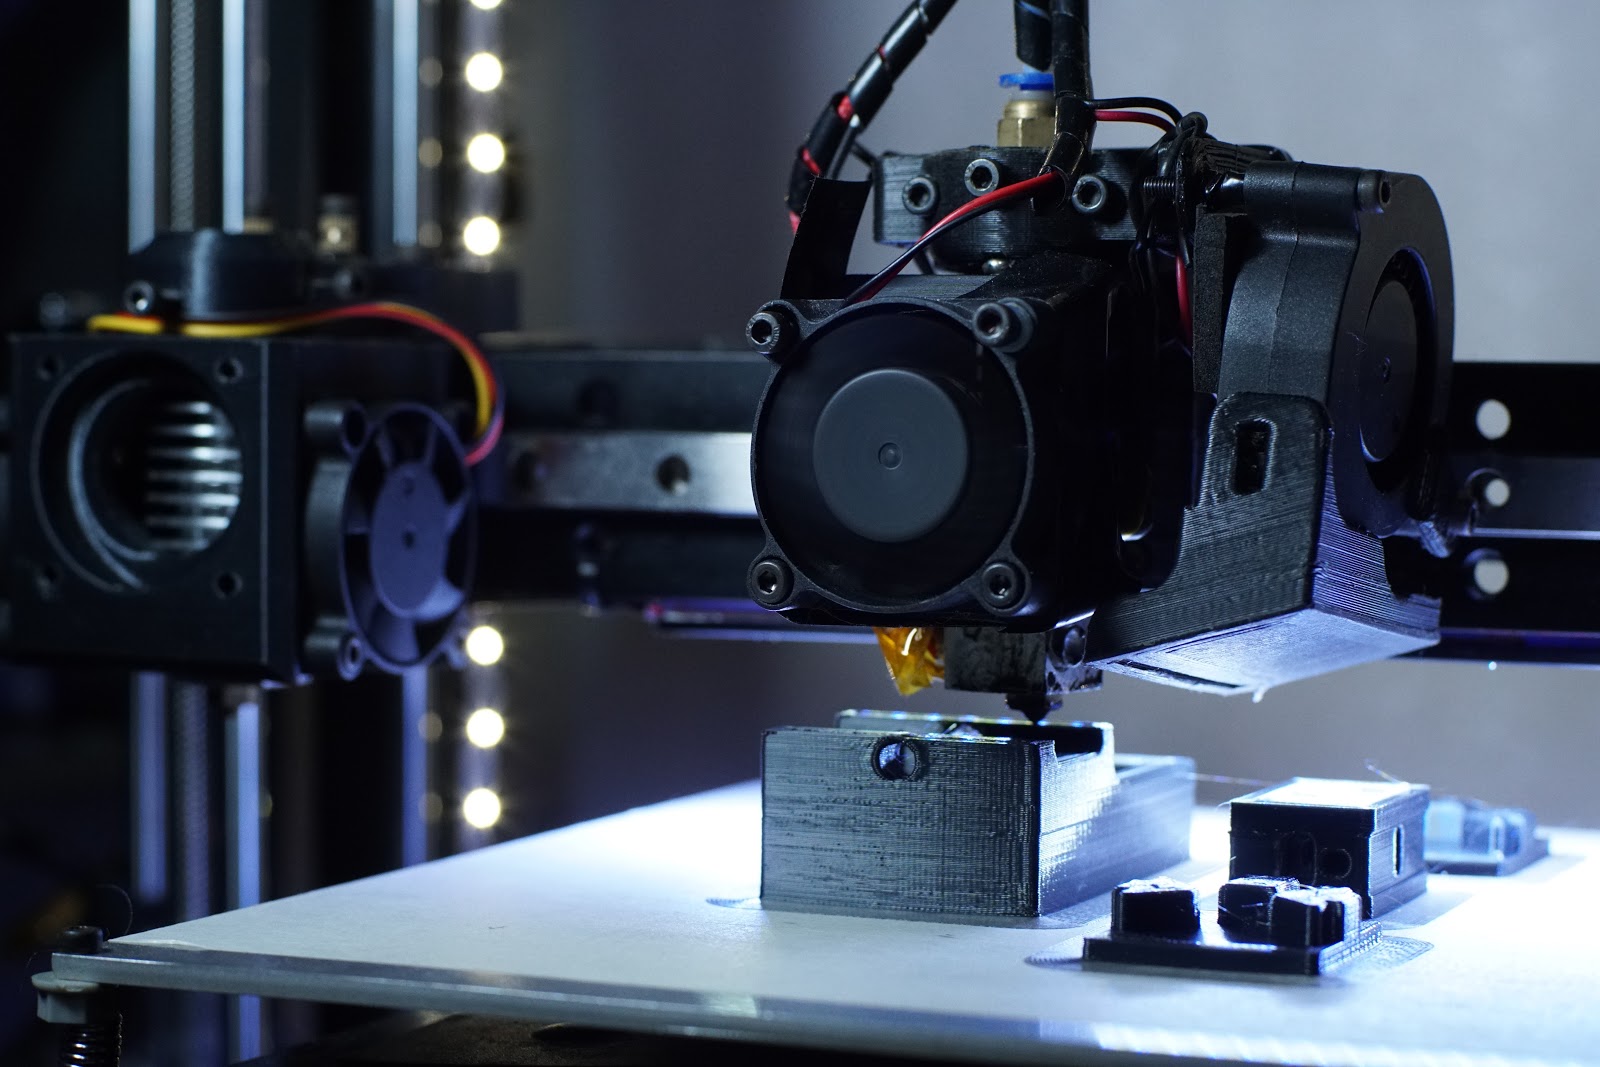
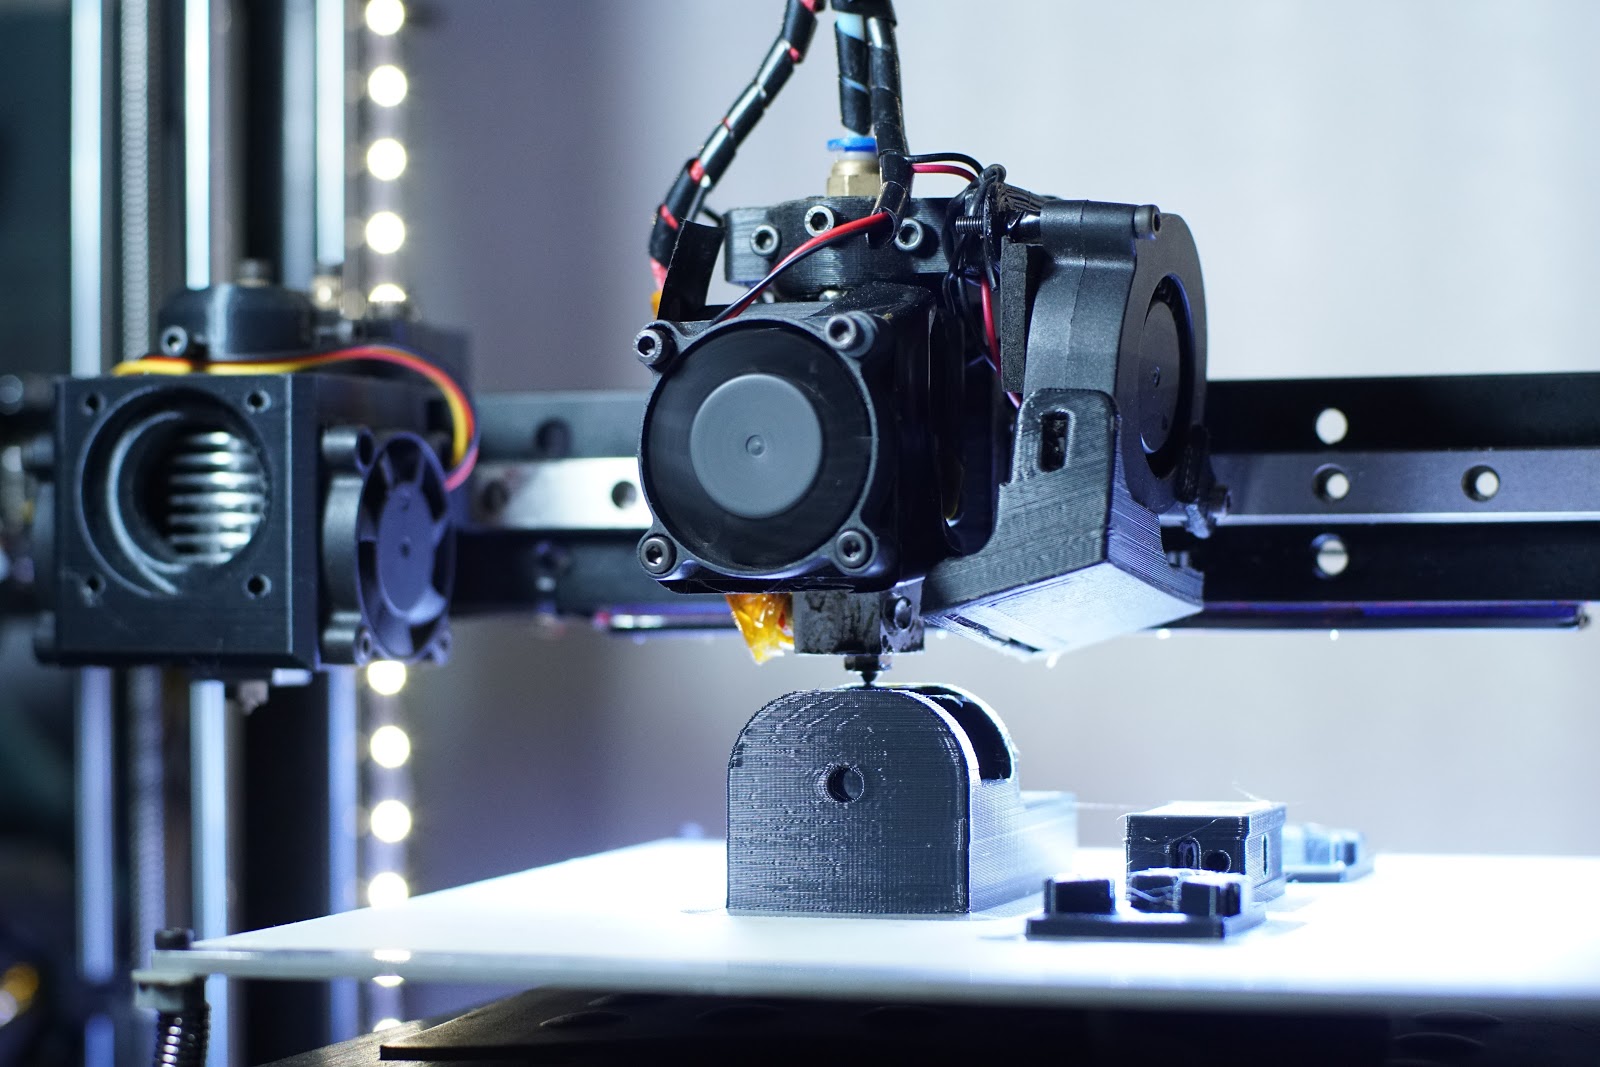
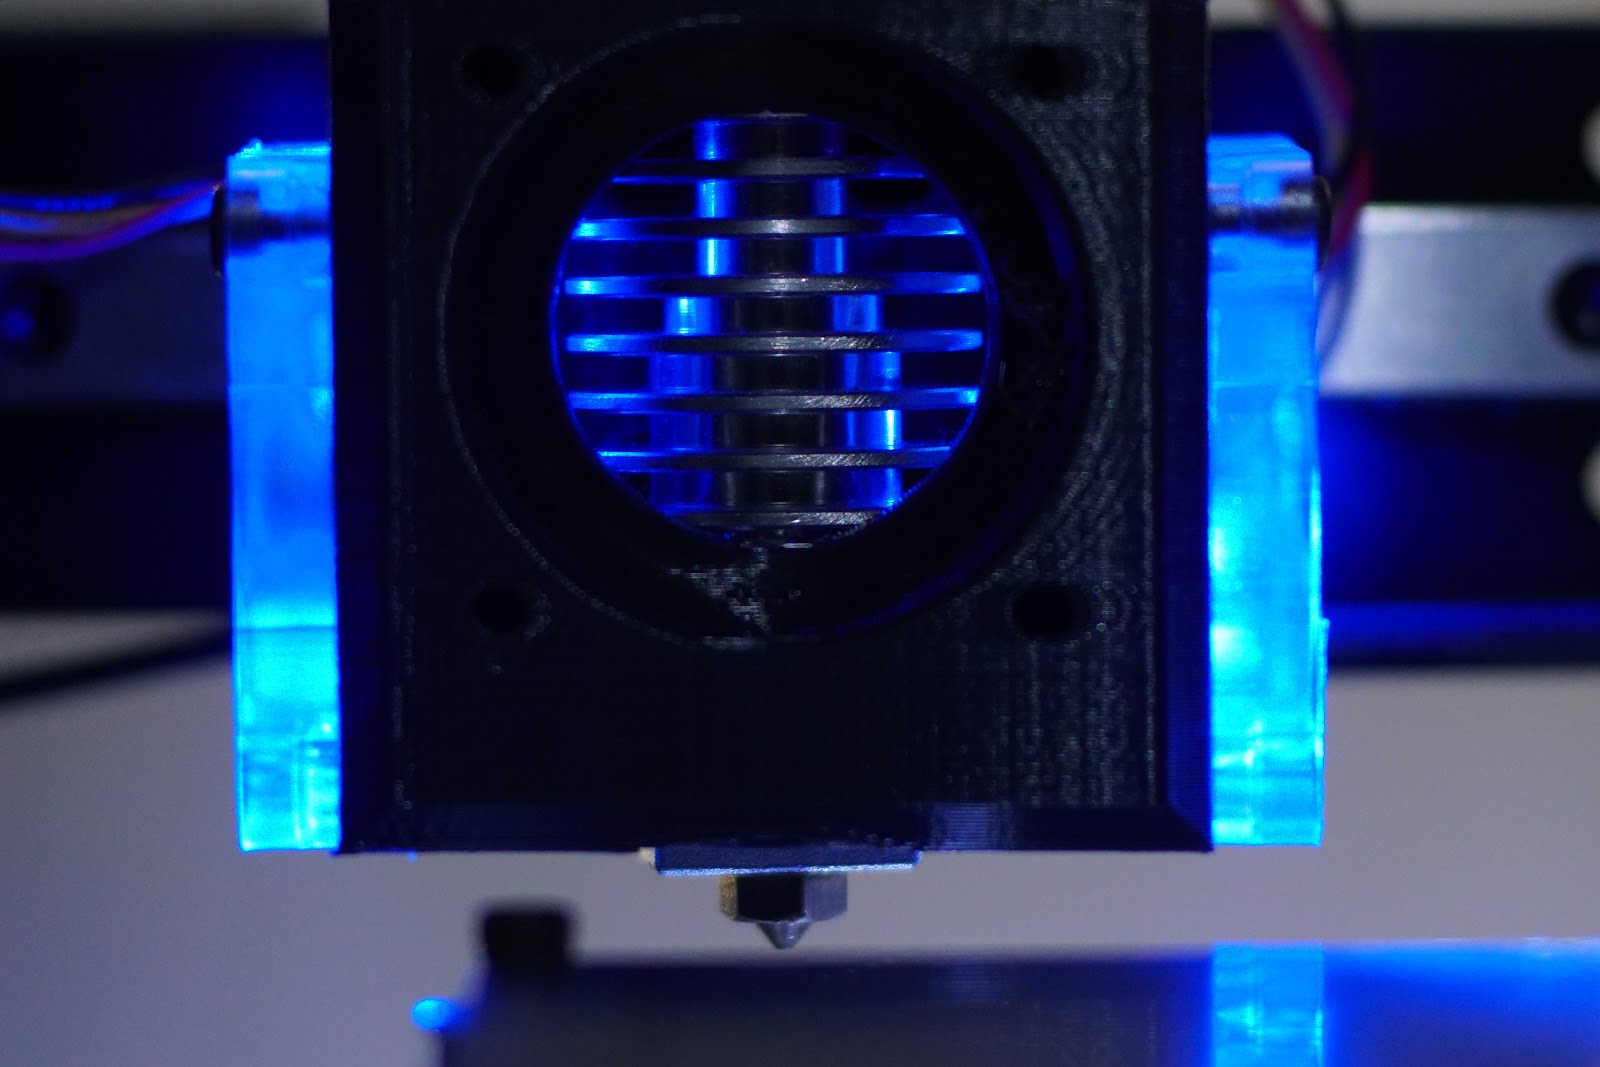
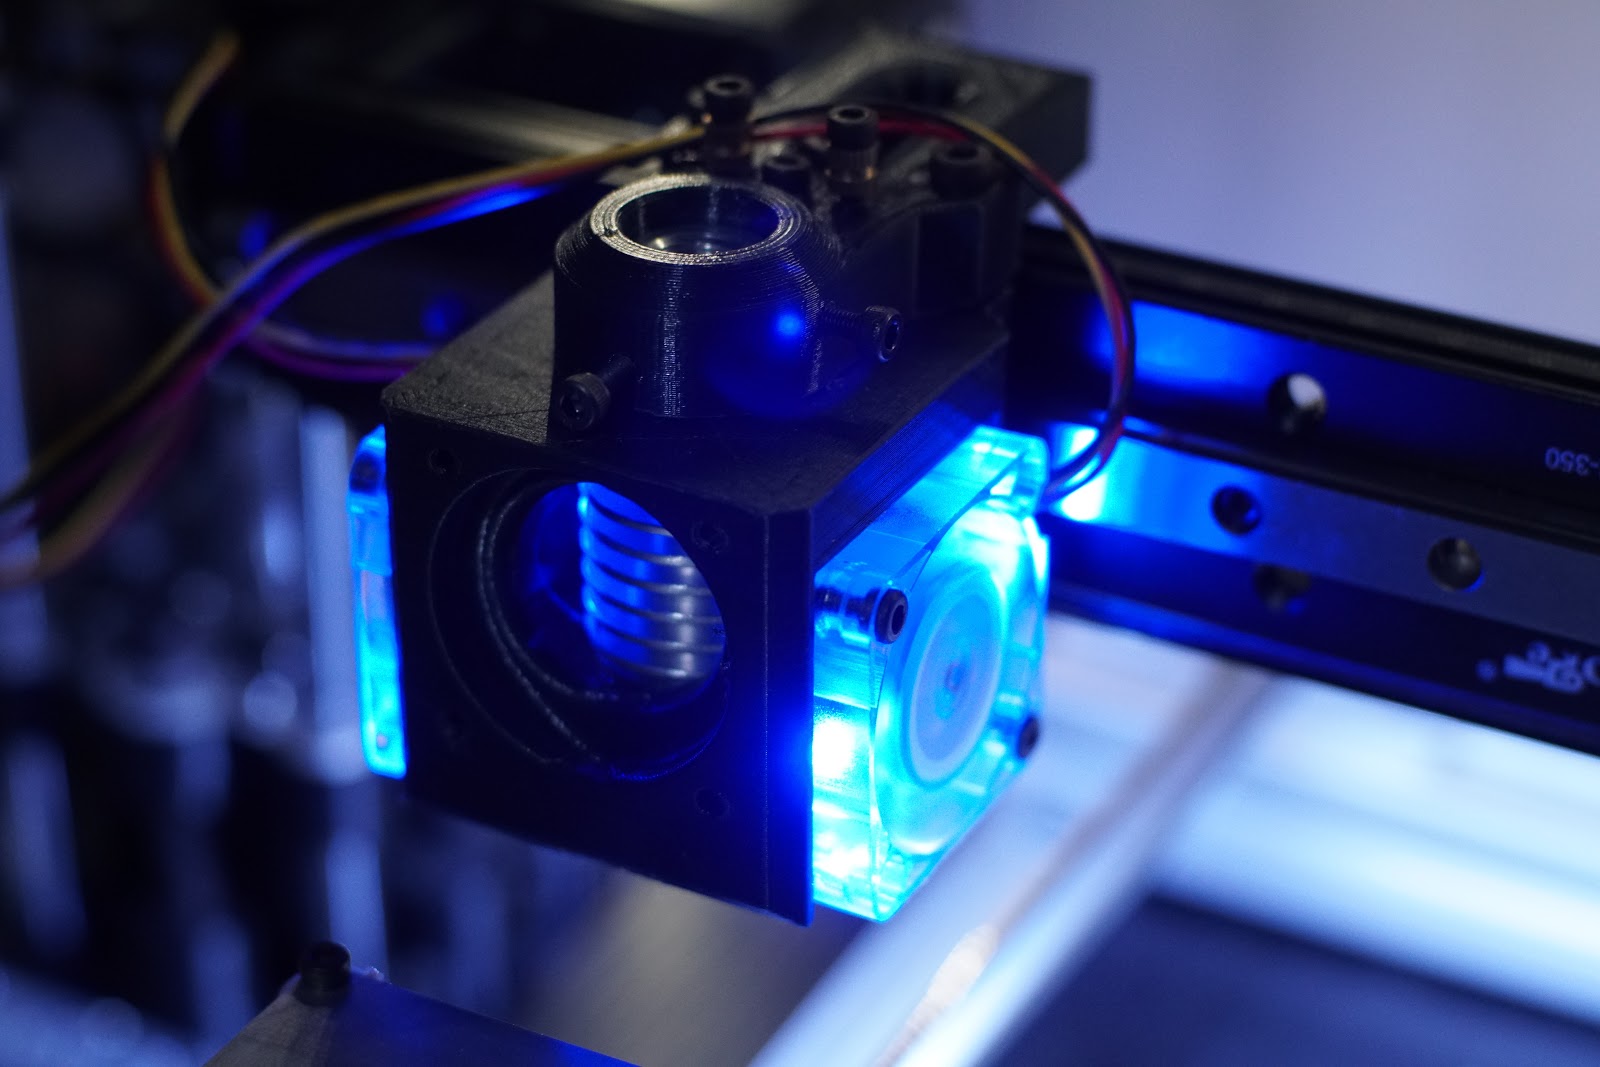
Clone Cooler, this thing is quiet(even with possible back pressure issues), both fans running, powering only on the red n black, not yello so not sure if thats 5v instead of 12? not sure if I have enough airflow down the trunk, blowing front to back looks really neat, no need for full ring, but could add 2 other slots below the fans in future.
Edited 3 time(s). Last edit at 12/21/2016 01:07AM by MechaBits.
|
Re: MechaBits KraftWerk'r December 29, 2016 09:02PM |
Registered: 8 years ago Posts: 1,671 |
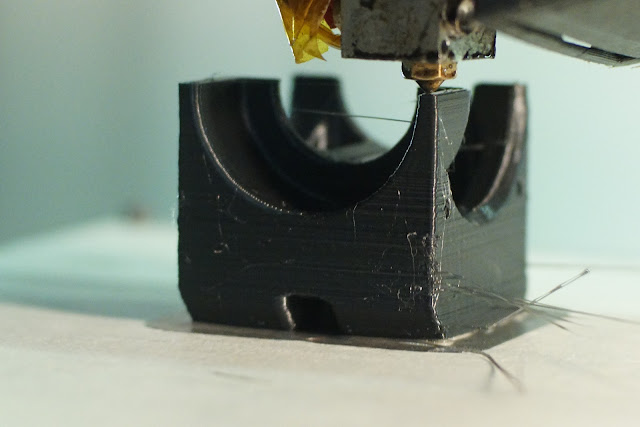
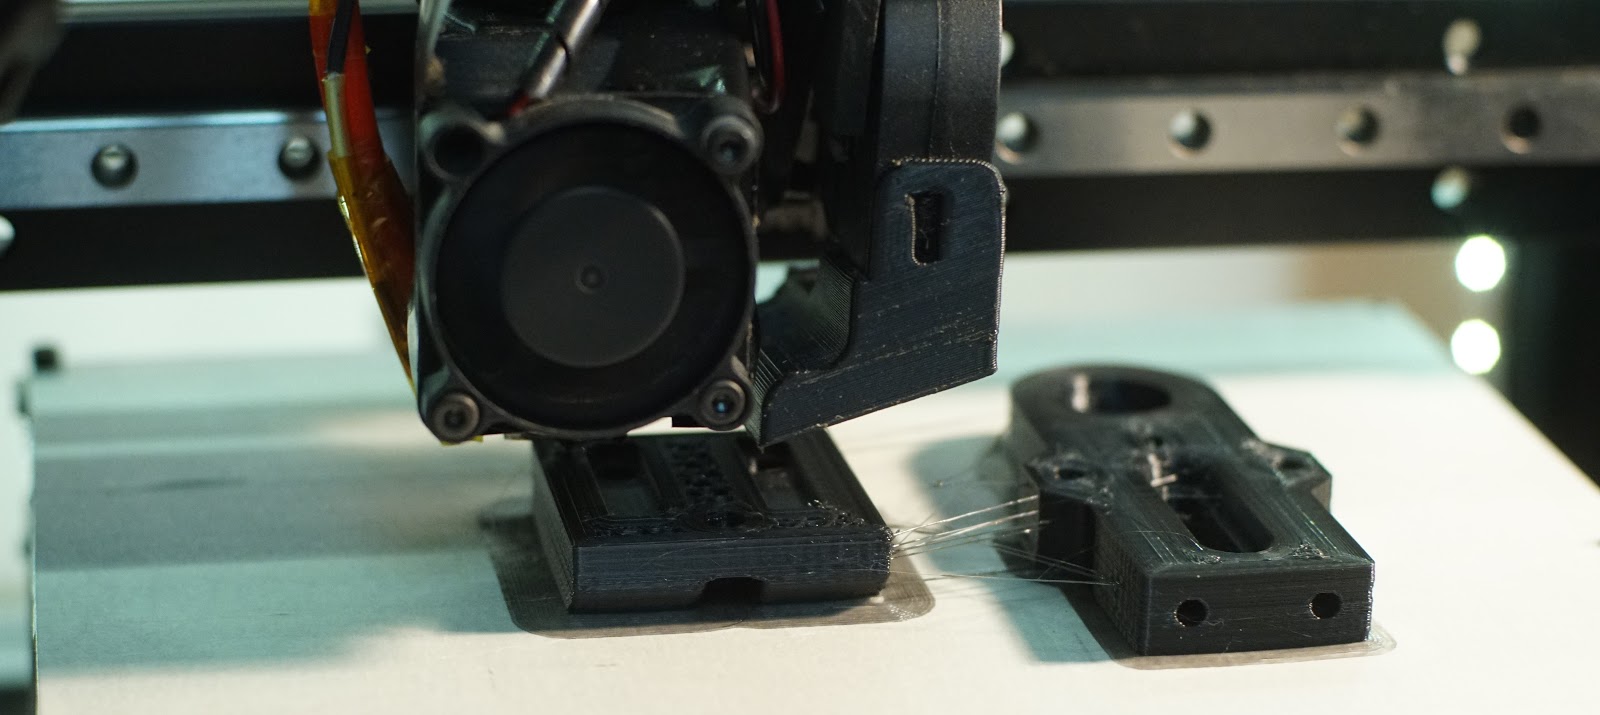
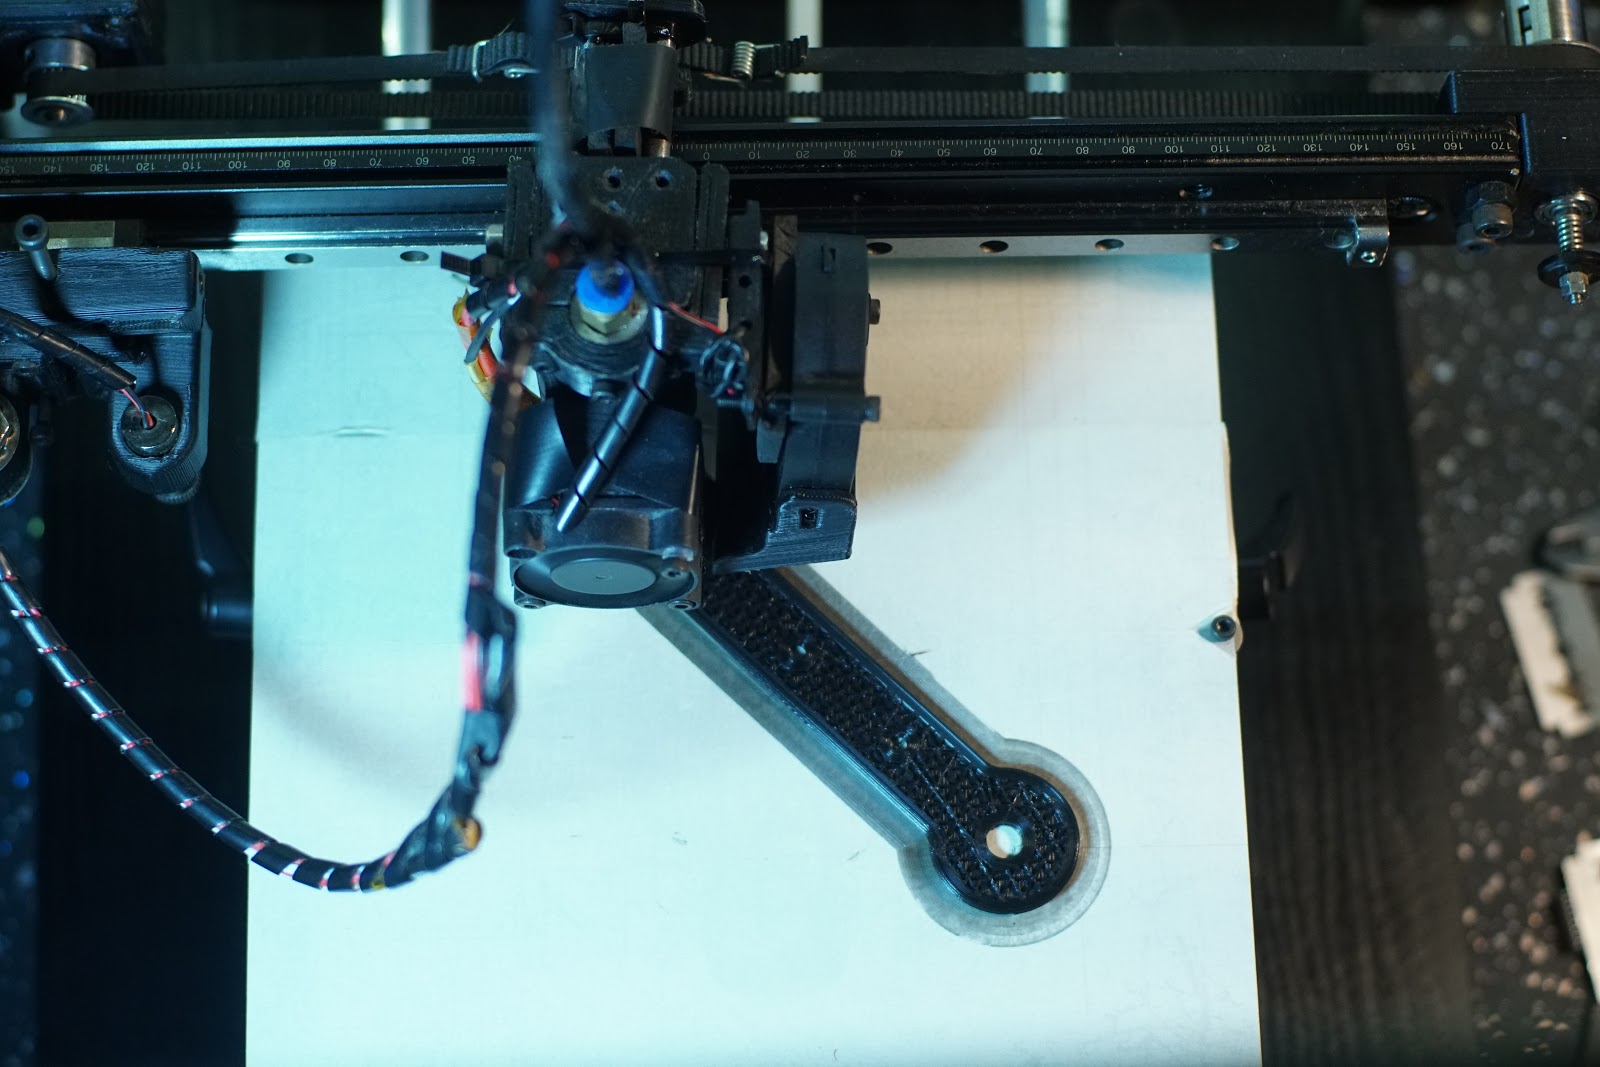
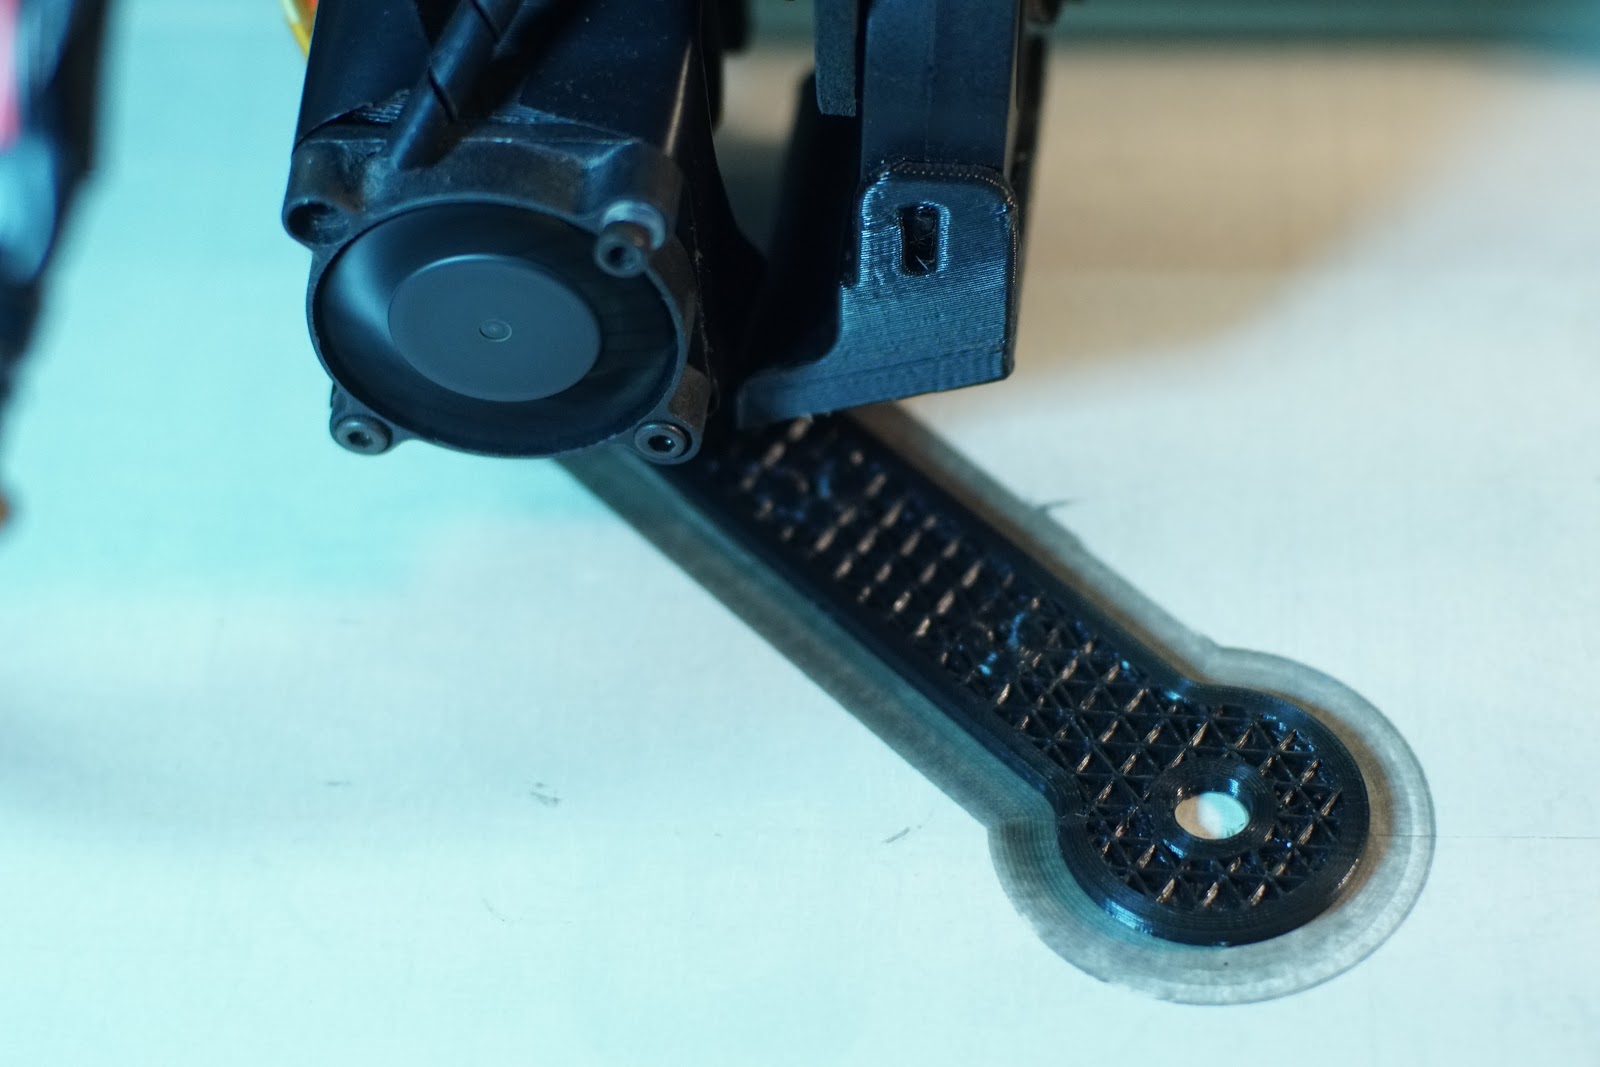
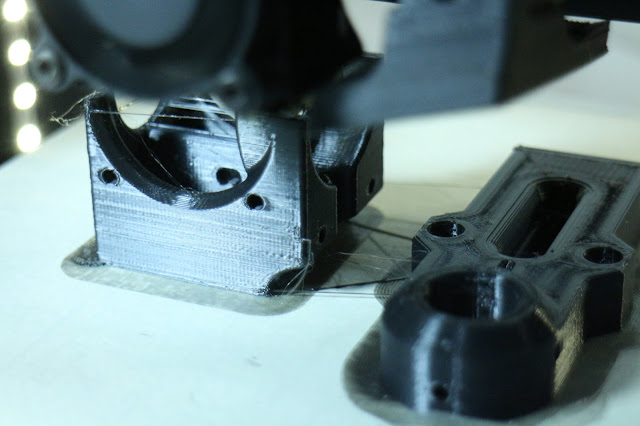
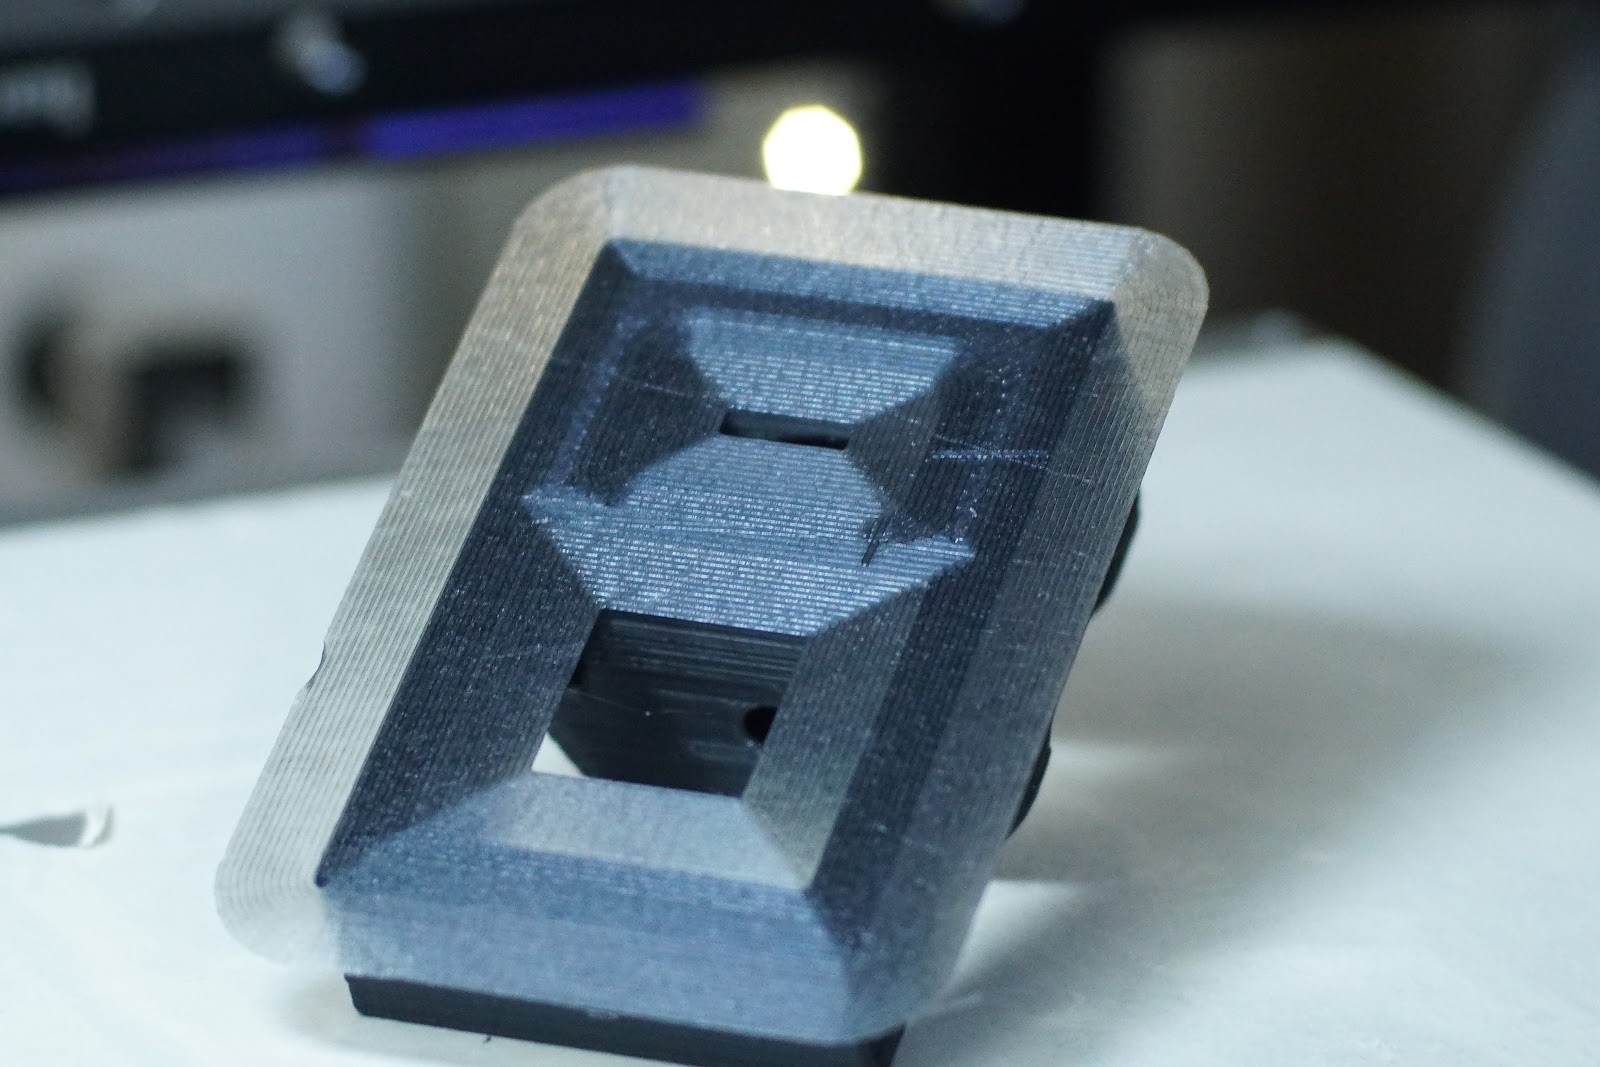
snapped the filament while detangling...
was designed to be in place the other way round ie first layer visible but because of the jam that came next, decided to use the infill side out.
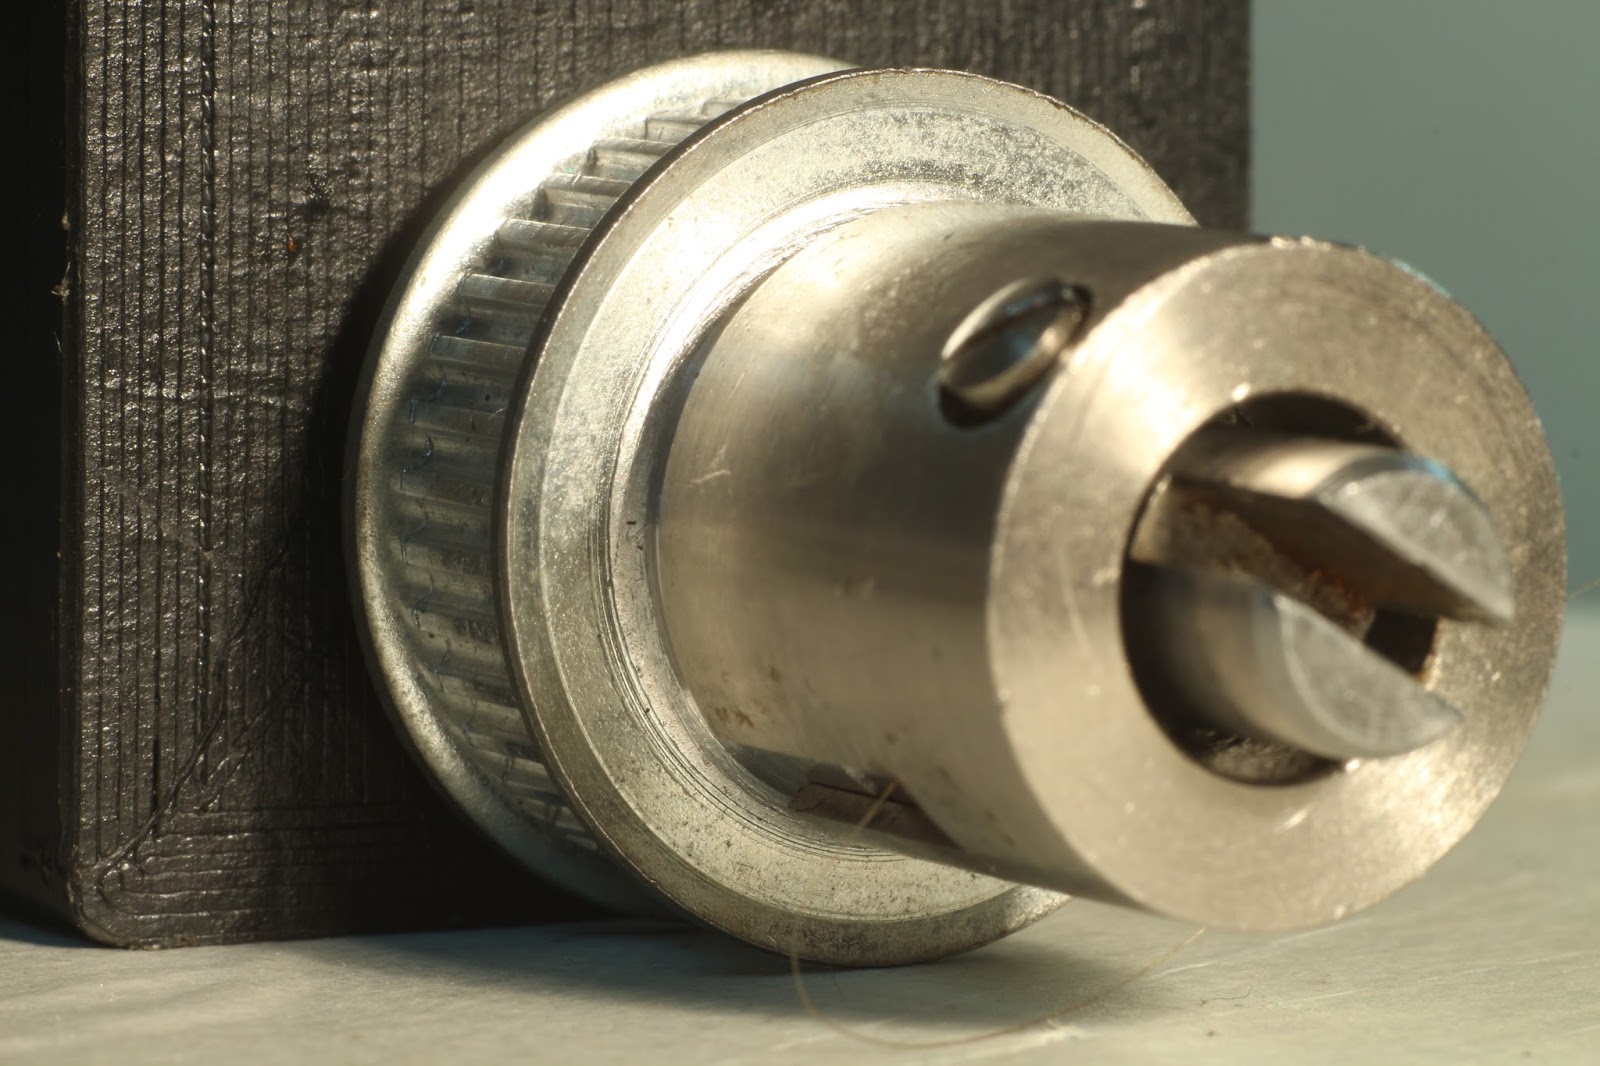
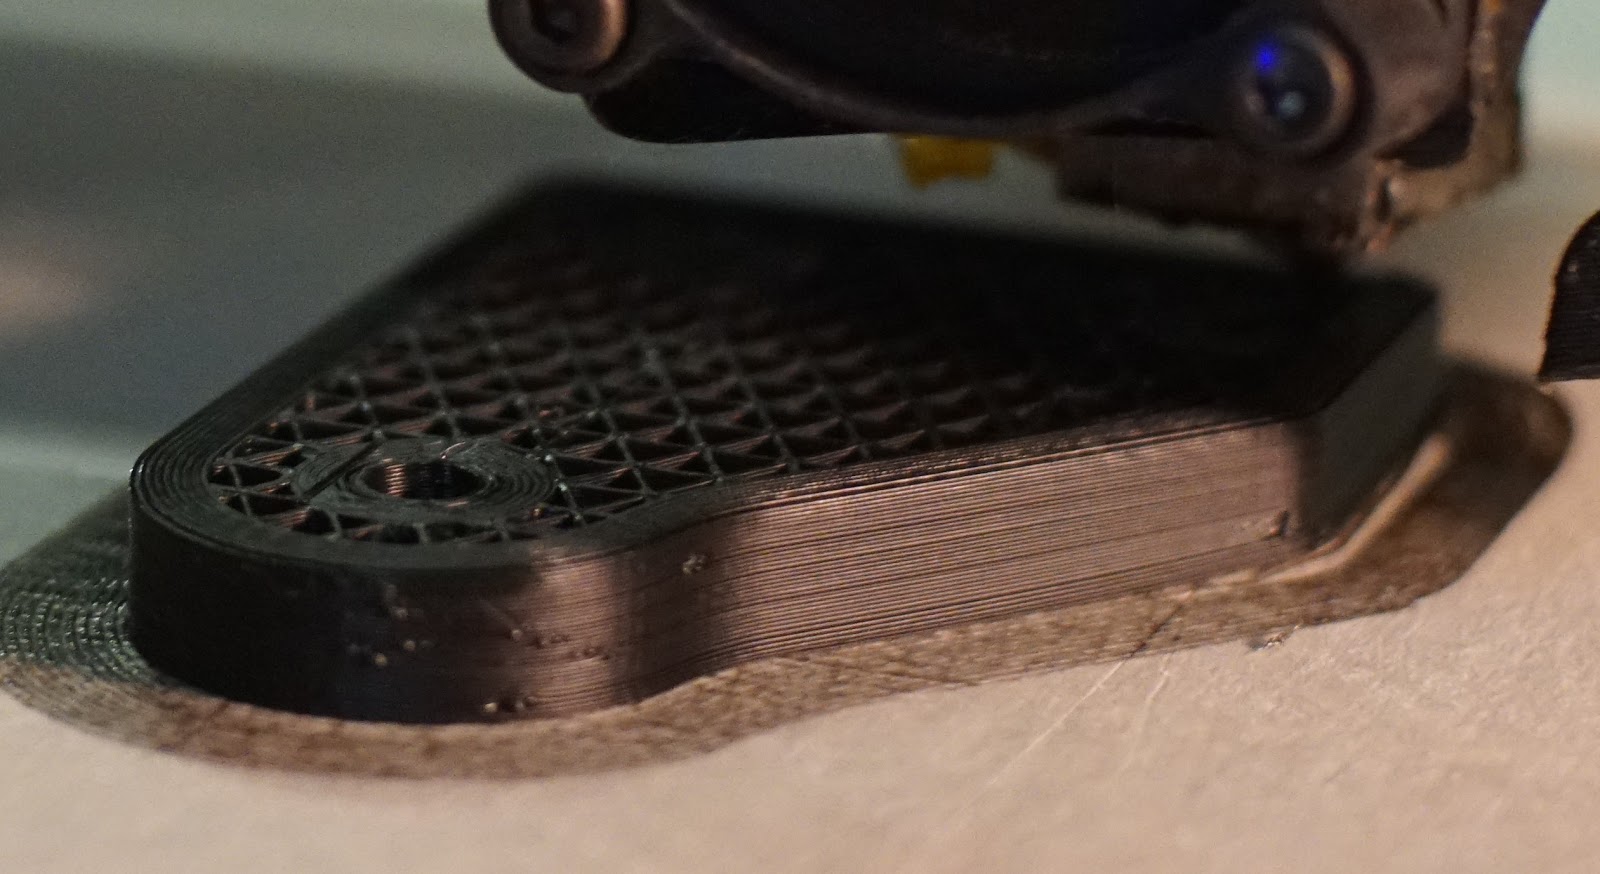
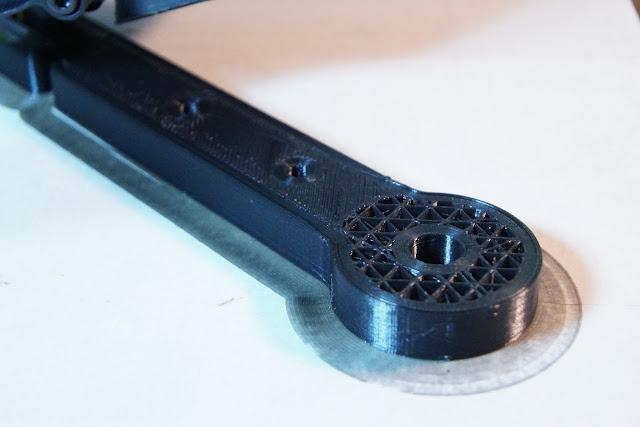
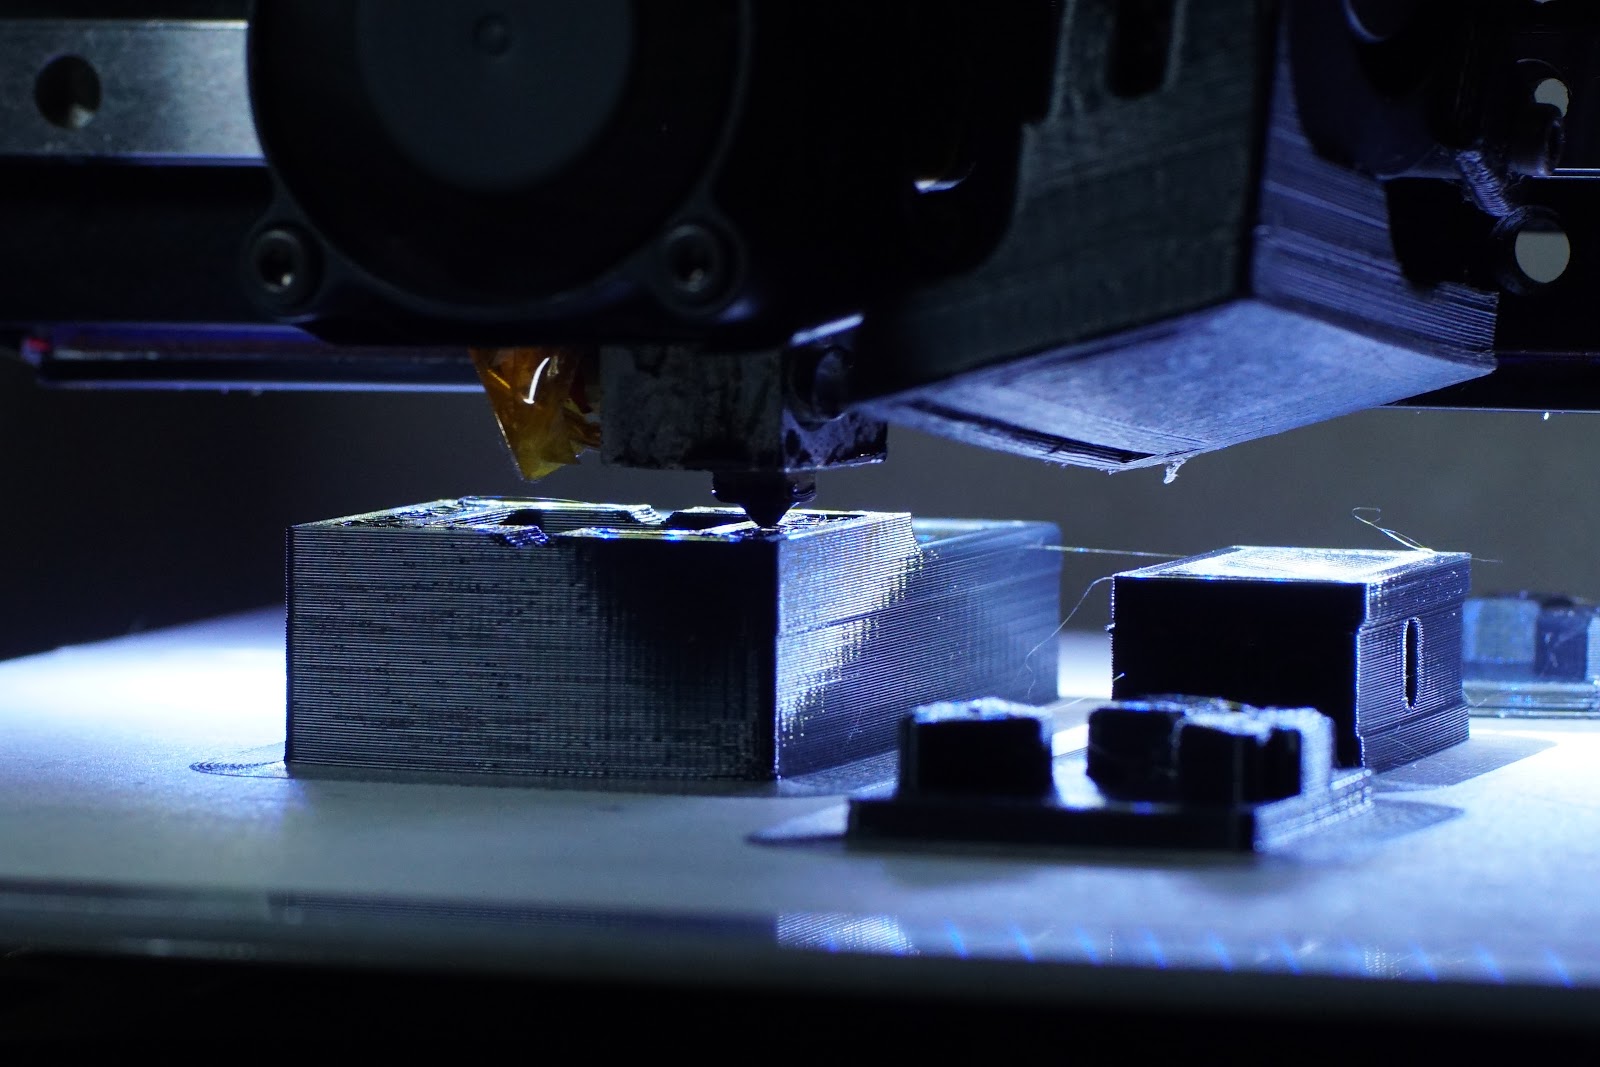
So had to find other nozzle my 0.5 all bunged up, had a 0.4 so put that on...nice to go a little finer after the .5, was very impressed with the first prints from it, decided to print a spare idler for the end of the X, as current one is using one of those gt2 pulleys with bearings and i dont know how long they will hold up, they seem like they could fail easy, so the new idler end has space for 2 14x5x5 bearings I had an old shaft from a focus module, and decided to use that to hold a big gt2 cog, dont have a spare smaller one.


Overkill I know but I'm ready for some future failure, and hopefully print improve again...the crazy thing about these prints was I forgot to change the layer height from the 0.3 to lower .28 or lower...but print came out solid, no hint of any de-lamination or weakness, was printing faster than normal too, so the z seams a little rough, but very happy, first layer looked nice too.
Edited 1 time(s). Last edit at 12/29/2016 09:11PM by MechaBits.
|
Re: MechaBits KraftWerk'r January 05, 2017 02:33AM |
Registered: 9 years ago Posts: 127 |
|
Re: MechaBits KraftWerk'r January 05, 2017 07:00AM |
Registered: 8 years ago Posts: 1,671 |
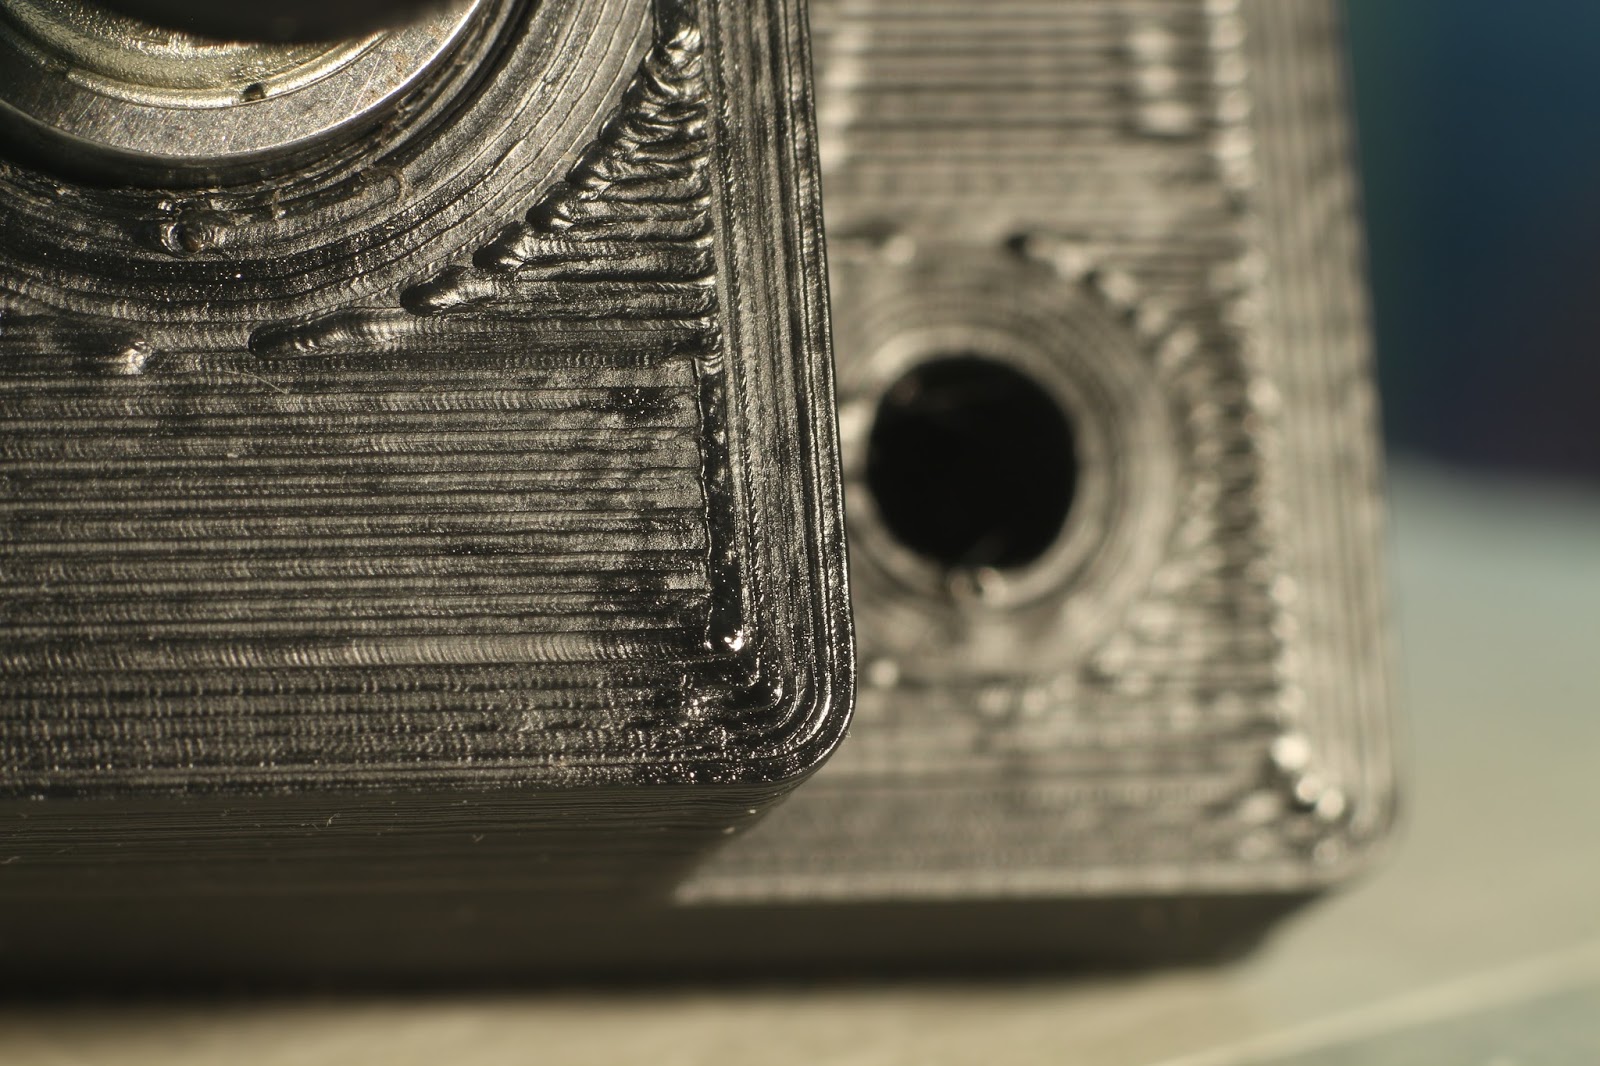
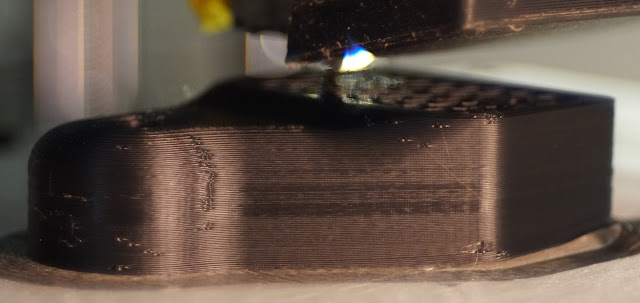
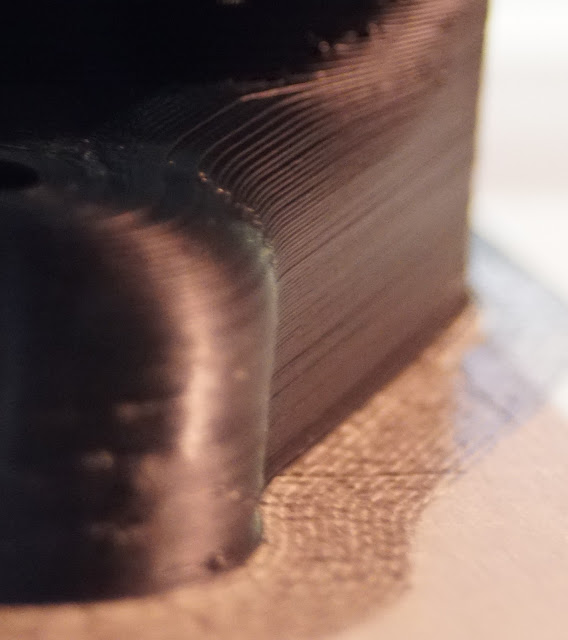
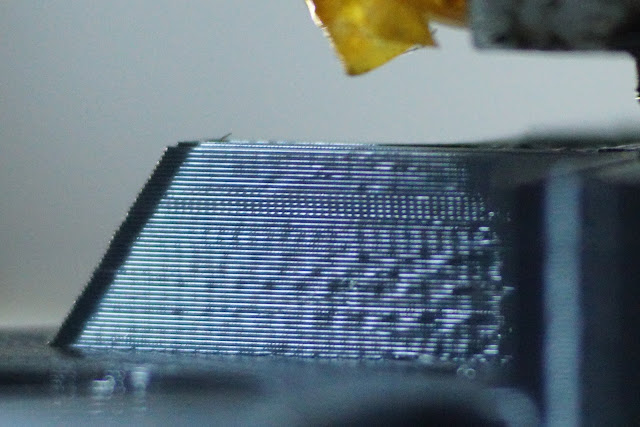
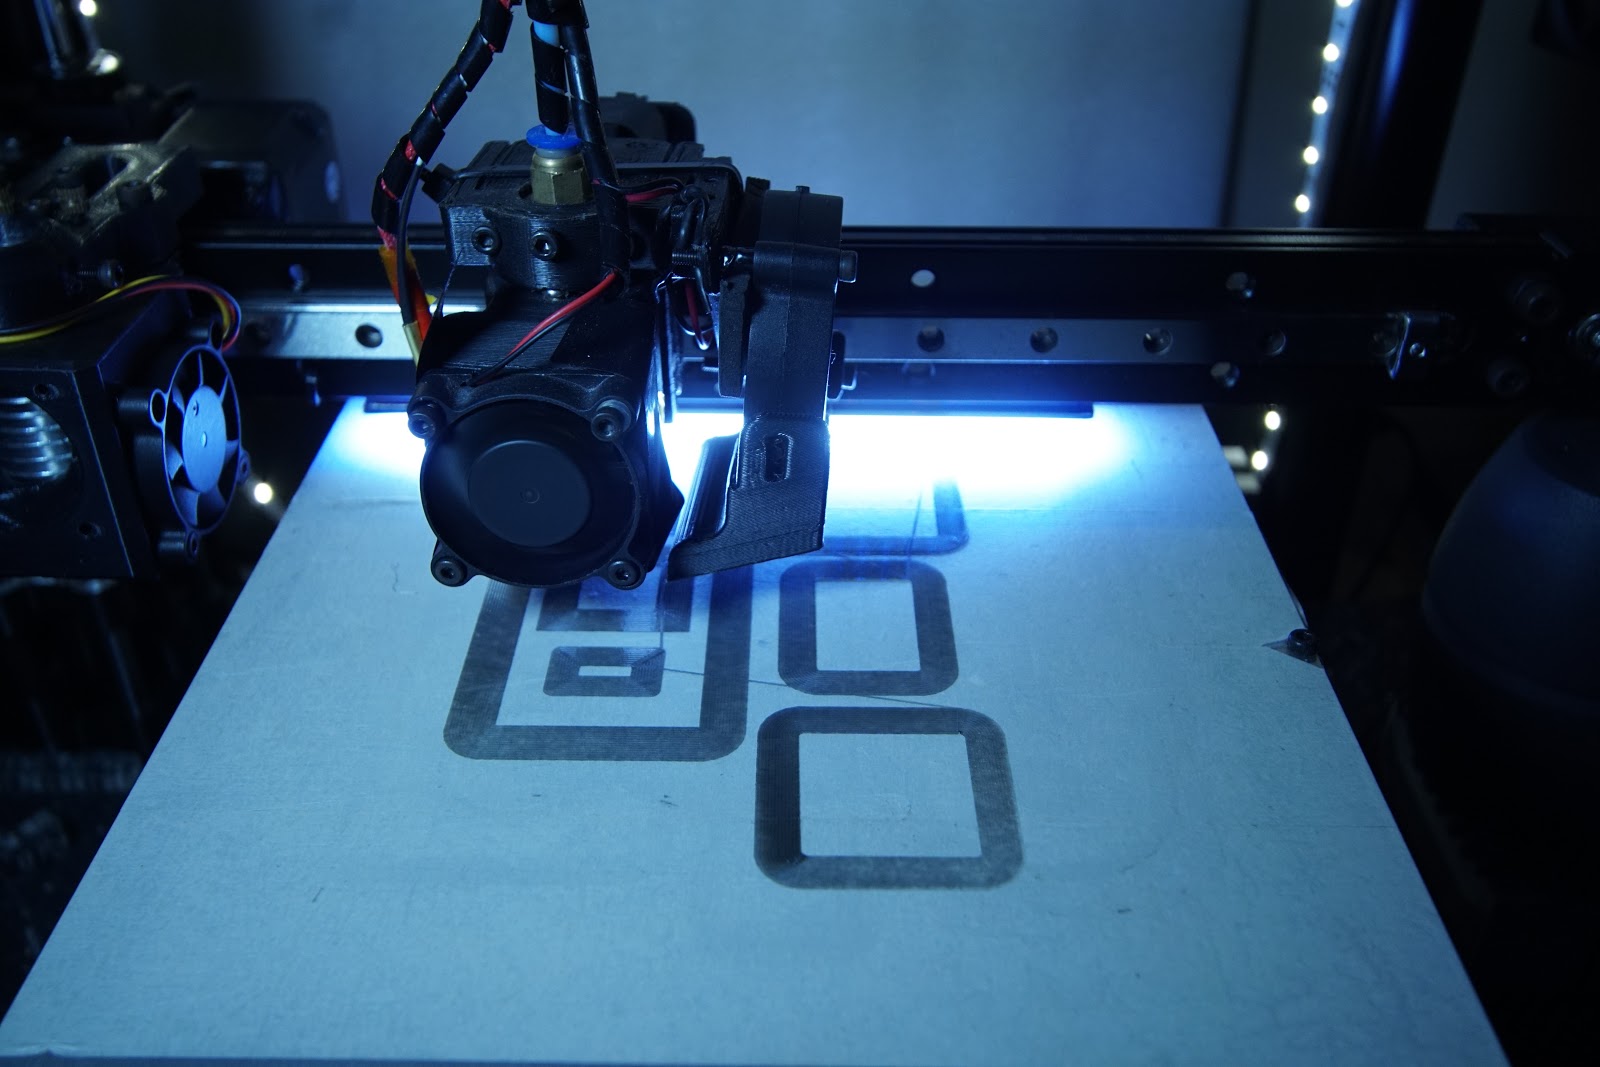
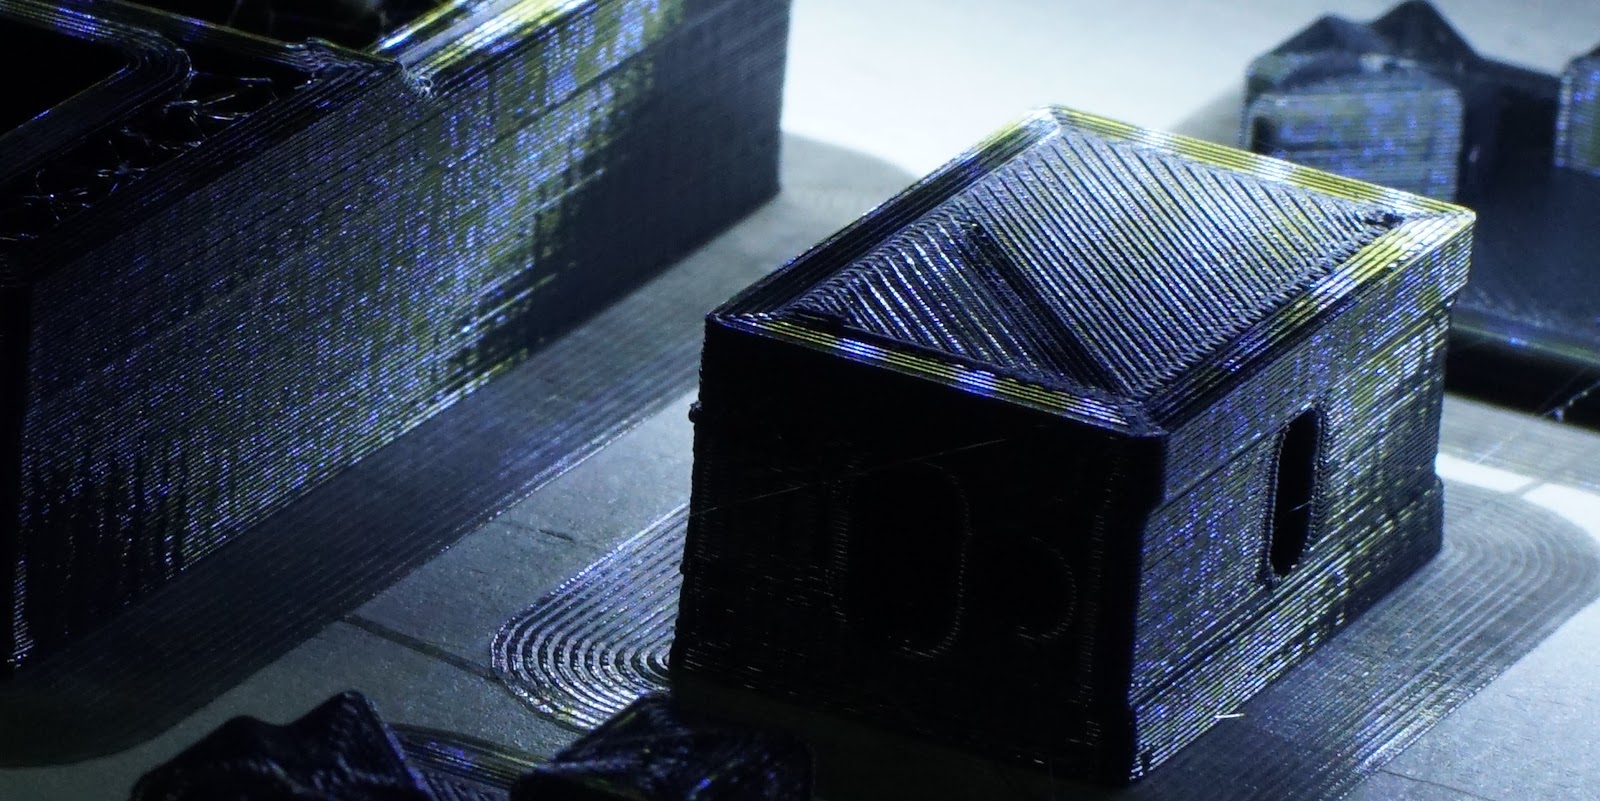
The ones in this thread are not printing yet, but I'm using 30-40mm as a baseline, but in the multiplier I bump it up to 1.4x/2x to go faster and also bring it down sometimes, though with the last print was fast probably reduced near the end cant remember. The Backplate was set higher and you can see it's quite ropey in the infill.
I have a feeling with the newer printer I could go faster than above with better quality as the machine feels more solid,
depends on my non geared bowden.
Edited 1 time(s). Last edit at 01/05/2017 07:04AM by MechaBits.
I have a feeling with the newer printer I could go faster than above with better quality as the machine feels more solid,
depends on my non geared bowden.
Edited 1 time(s). Last edit at 01/05/2017 07:04AM by MechaBits.
|
Re: MechaBits KraftWerk'r January 09, 2017 11:48PM |
Registered: 8 years ago Posts: 1,671 |


|
Re: MechaBits KraftWerk'r January 10, 2017 12:52AM |
Registered: 11 years ago Posts: 5,780 |
It looks like you're getting some pretty high quality prints out of that machine.
Edited 1 time(s). Last edit at 01/10/2017 12:52AM by the_digital_dentist.
Ultra MegaMax Dominator 3D printer: [drmrehorst.blogspot.com]
Edited 1 time(s). Last edit at 01/10/2017 12:52AM by the_digital_dentist.
Ultra MegaMax Dominator 3D printer: [drmrehorst.blogspot.com]
|
Re: MechaBits KraftWerk'r January 10, 2017 12:04PM |
Registered: 8 years ago Posts: 1,671 |
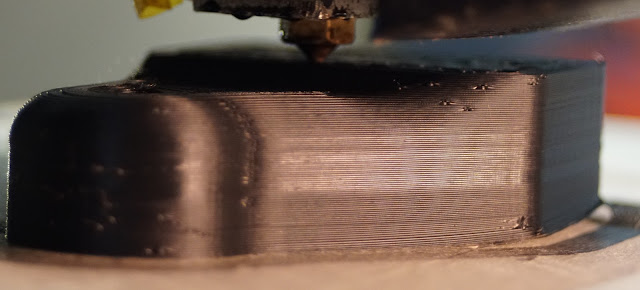
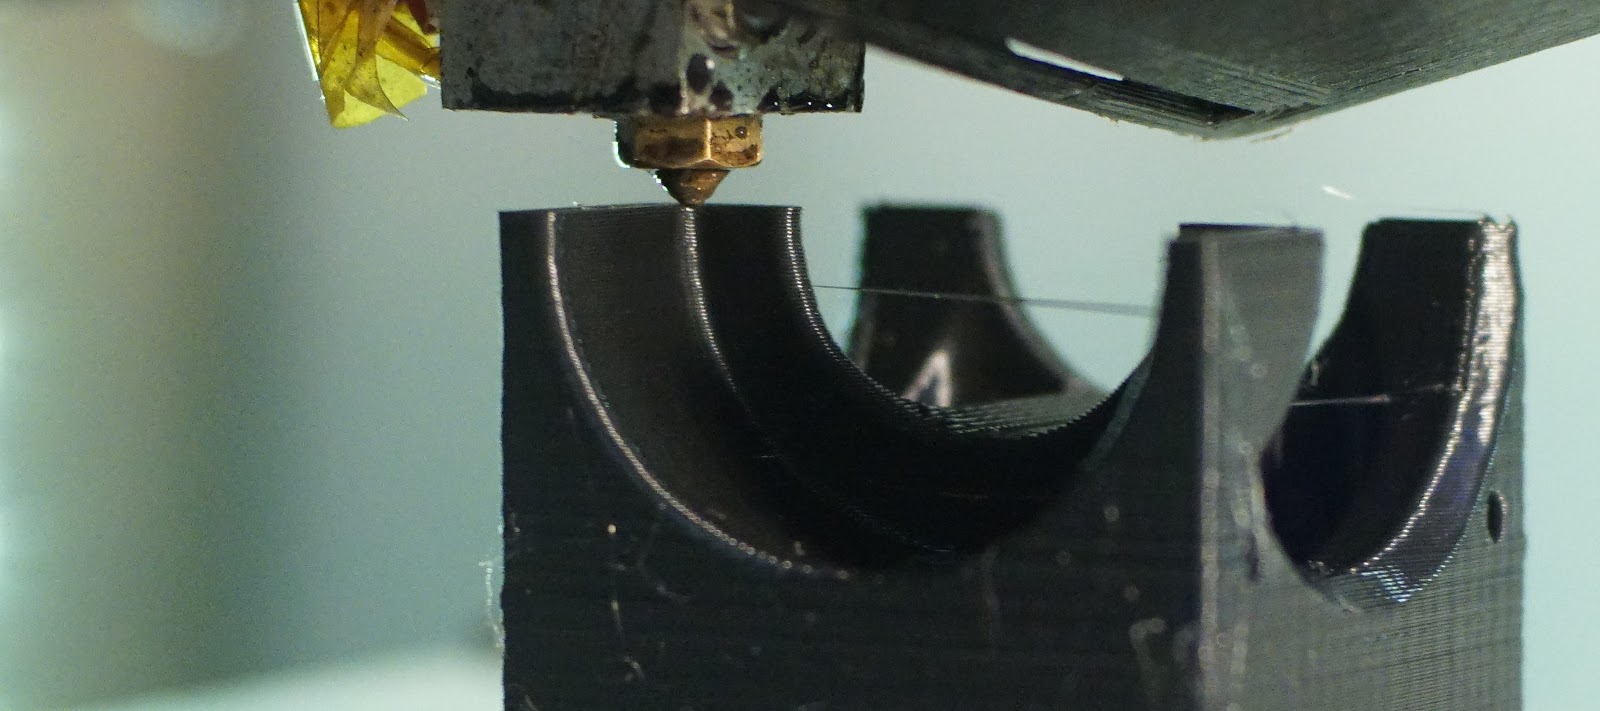
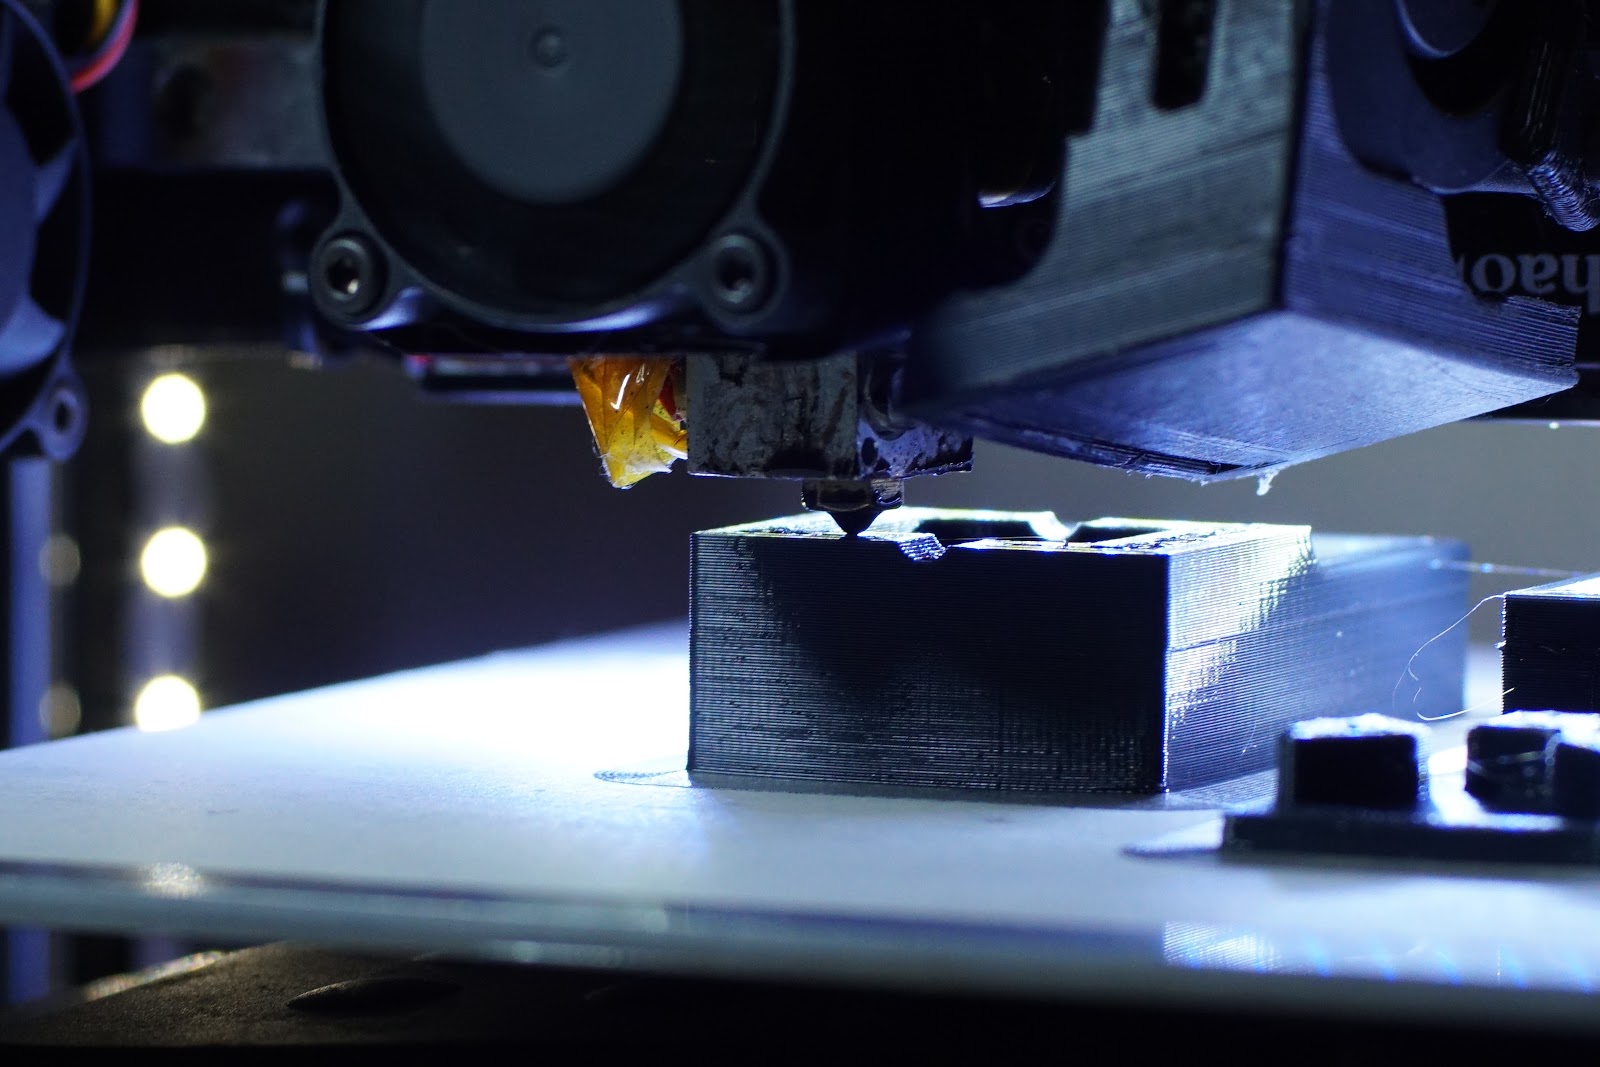
Yeah, this last one even felt smoother as it was going down, quieter...amazing how .1 nozzle difference looks so different.
I'm sure one of my y rails was slightly out, lots of black coming from short bearing compared to other, side a long bearing.
Which also happened on X, I still have to improve the bed, as it's just a perspex sandwich balancing on a 30mm bar too high from the rails.
So lots of room for improvement, hopefully I can get the twin rail version lower than current version, but it's not going to be much in it.
I had some strange white marks in the other prints...not sure if that was moisture as roll had been exposed for months, but didnt see them in this one,
I kept temp constant at 200, normally drop to 195, and was really happy with the look/sheen, not too glossy.
|
Re: MechaBits KraftWerk'r January 11, 2017 03:20AM |
Registered: 8 years ago Posts: 1,671 |


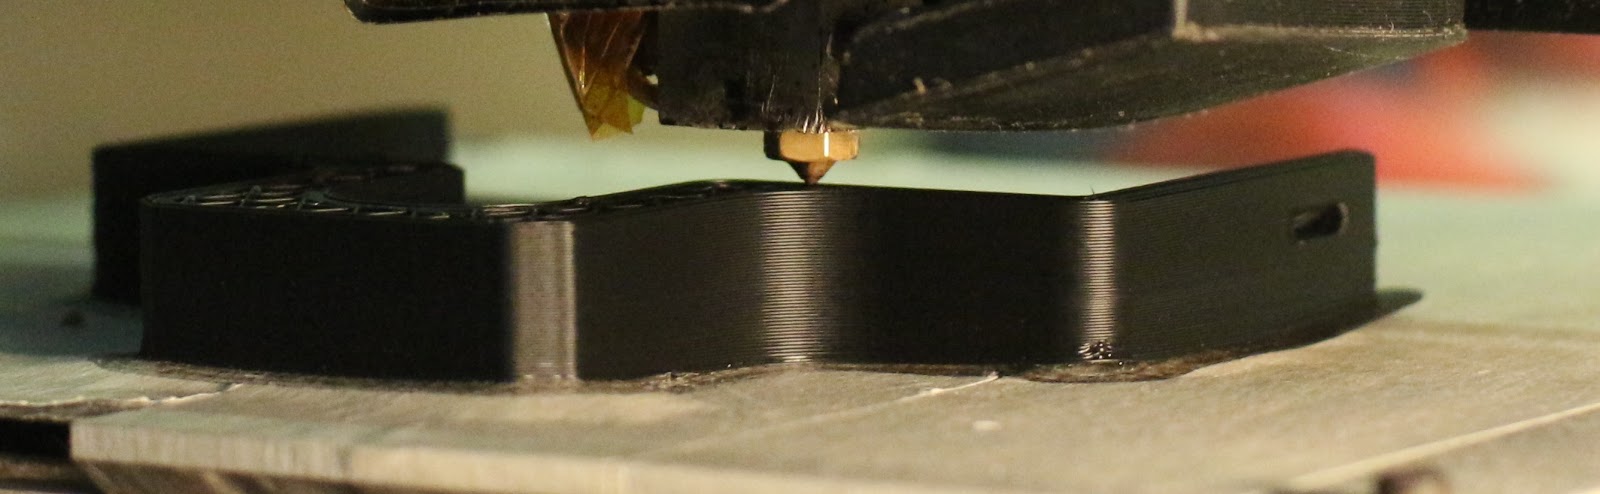
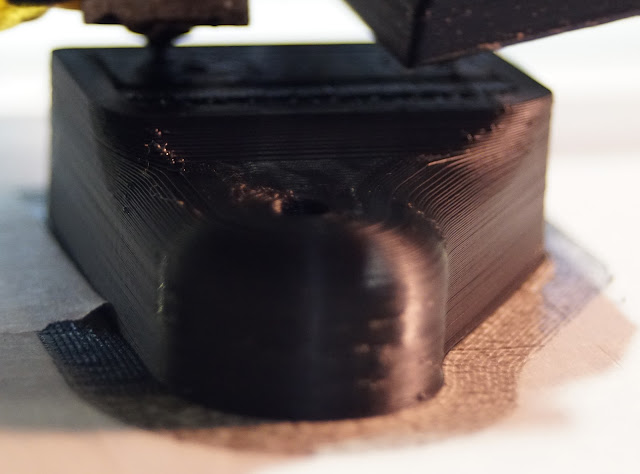
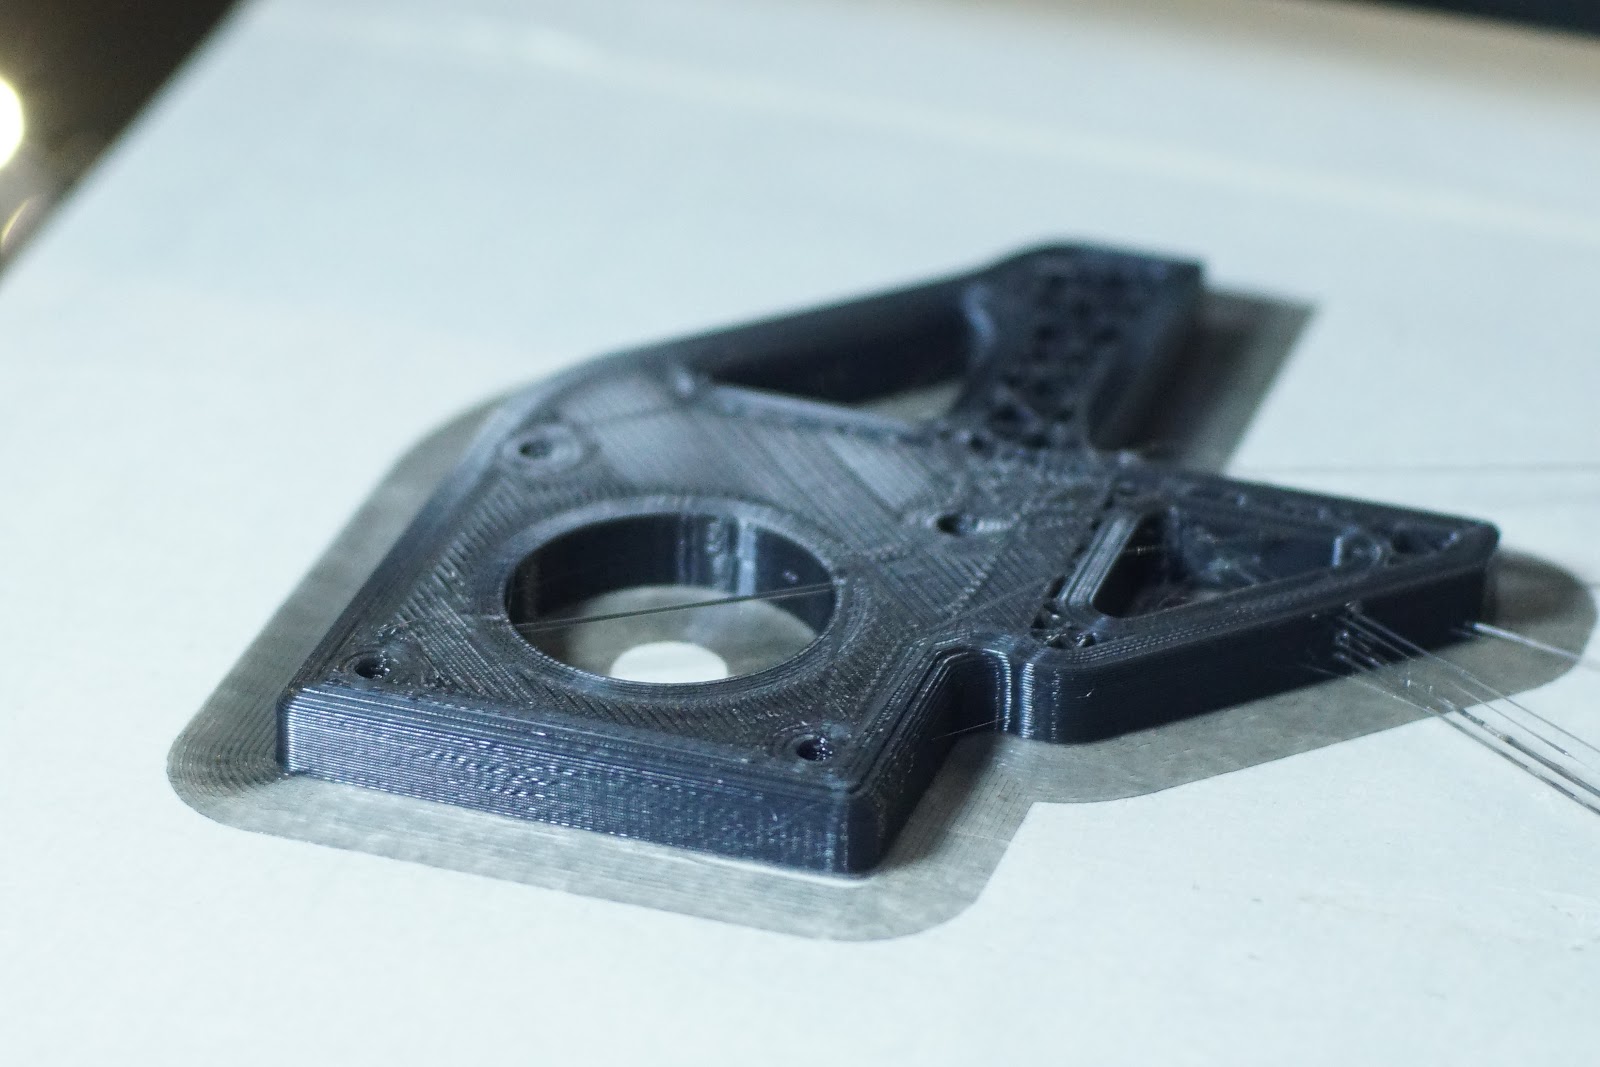
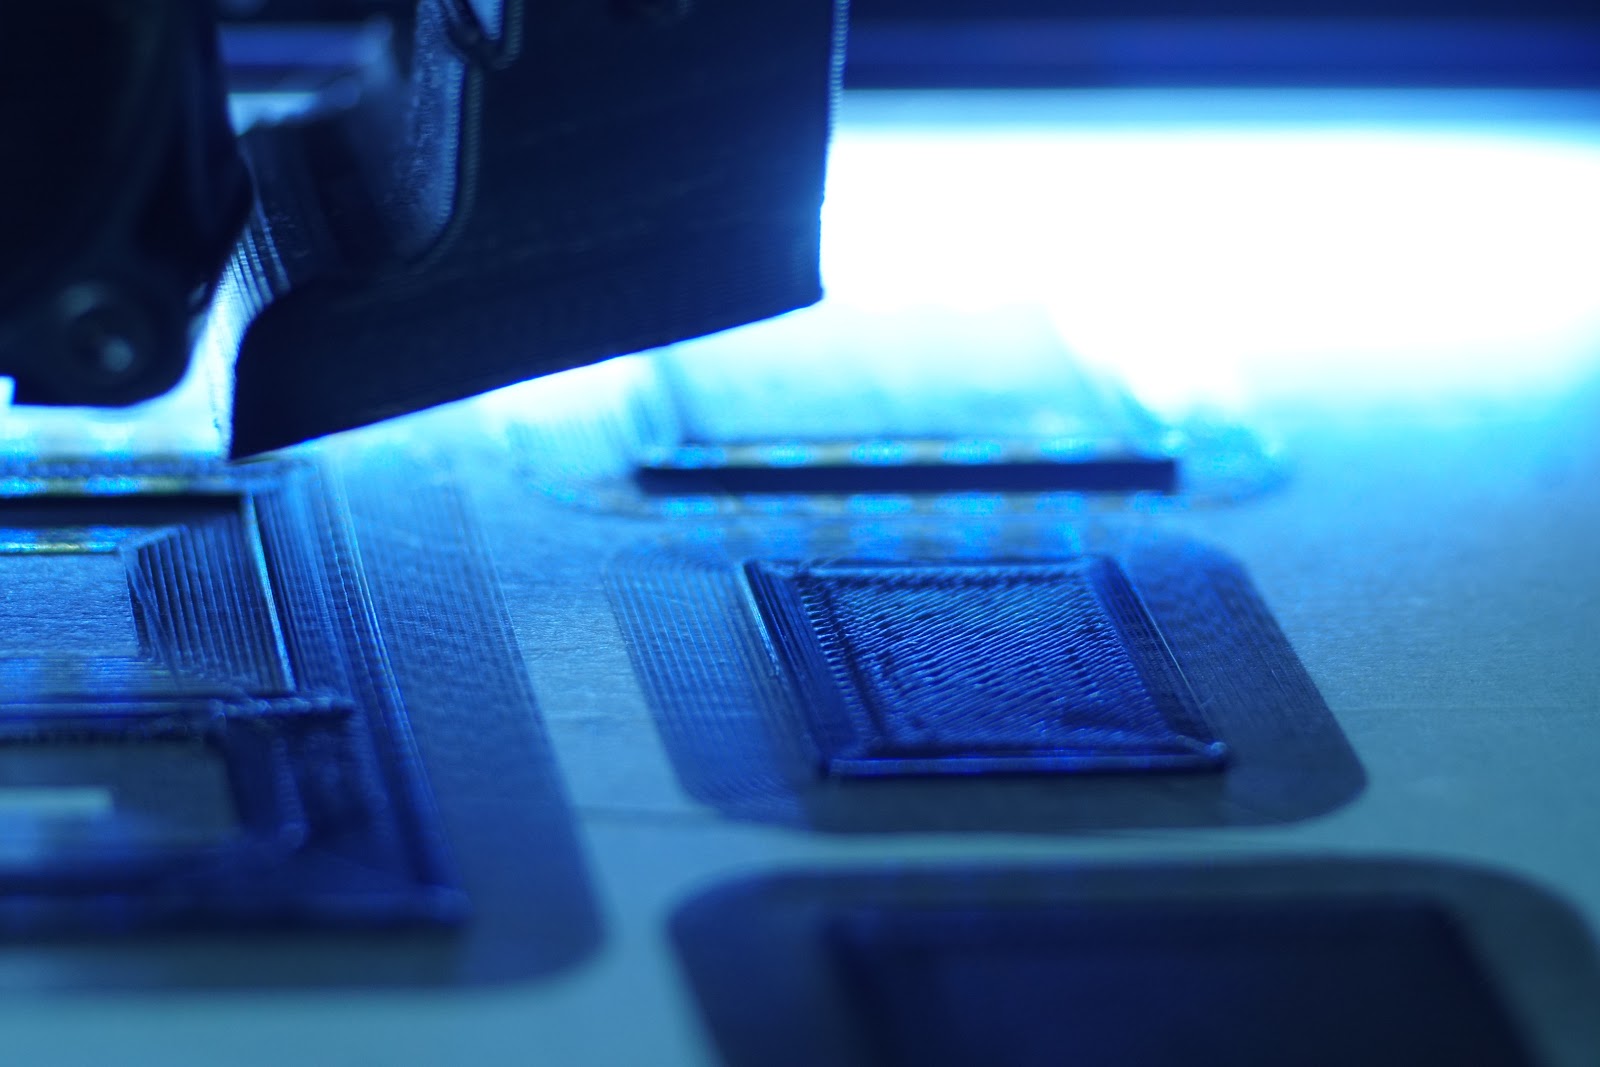
Some of the obvious lines caused by me messing with layer heights, and where printer swaps its approach to the layer when the height of a certain bit ends or begins.
Edited 2 time(s). Last edit at 01/11/2017 03:30AM by MechaBits.
|
Re: MechaBits KraftWerk'r January 11, 2017 07:24AM |
Registered: 11 years ago Posts: 5,780 |
It's a shame to use printed parts with those high quality linear guides. I've given up on printed parts for anything but simple belt clamps, and spacers and the like. I had a printed ABS motor mount in my machine for about 2 years and the combo of heating and cooling and belt tension caused it to distort. I hope you didn't use PLA to print that.
Polycarbonate might be OK...
That motor mount could easily be made from a piece of rectangular aluminum tubing. Screw it to a flat plate extension of the plate the guide rails are attached to and you'd be set for life. Here's one I used in my CoreXY mechanism:
You can make it with a hack saw to cut the tubing and a hand drill. You don't have to bore the large center hole for the step in the surface of the motor- just stand the motor on spacers about 1.5 mm tall (nuts) and you can use a 1/4" or 6 mm drill for the motor shaft. You can get aluminum tubing in different sizes to put the motor at the height you need.
Someone at the makerspace just gave me a bag full of torlon (high temperature plastic) scraps. Most are pretty small, but I'll find a use for some of them.
Edited 2 time(s). Last edit at 01/11/2017 07:36AM by the_digital_dentist.
Ultra MegaMax Dominator 3D printer: [drmrehorst.blogspot.com]
Polycarbonate might be OK...
That motor mount could easily be made from a piece of rectangular aluminum tubing. Screw it to a flat plate extension of the plate the guide rails are attached to and you'd be set for life. Here's one I used in my CoreXY mechanism:

You can make it with a hack saw to cut the tubing and a hand drill. You don't have to bore the large center hole for the step in the surface of the motor- just stand the motor on spacers about 1.5 mm tall (nuts) and you can use a 1/4" or 6 mm drill for the motor shaft. You can get aluminum tubing in different sizes to put the motor at the height you need.
Someone at the makerspace just gave me a bag full of torlon (high temperature plastic) scraps. Most are pretty small, but I'll find a use for some of them.
Edited 2 time(s). Last edit at 01/11/2017 07:36AM by the_digital_dentist.
Ultra MegaMax Dominator 3D printer: [drmrehorst.blogspot.com]
|
Re: MechaBits KraftWerk'r January 11, 2017 01:48PM |
Registered: 8 years ago Posts: 1,671 |
Yup you right, metal would be better, and I do like the way your simple box tubes keep cropping up everywhere, though I dont even have a press drill to play with. There are some aluminium nema mounts on ebay i could mod, but a square's probably better. These are PLA but strong enoungh, useless in heated chamber, also toying with the idea of using these rails for the cube's Z should be able to handle the weight, but not with PLA parts.
|
Re: MechaBits KraftWerk'r January 11, 2017 05:59PM |
Registered: 11 years ago Posts: 5,780 |
If the motor gets hot the PLA will deform.
Ultra MegaMax Dominator 3D printer: [drmrehorst.blogspot.com]
Ultra MegaMax Dominator 3D printer: [drmrehorst.blogspot.com]
|
Re: MechaBits KraftWerk'r January 11, 2017 06:42PM |
Registered: 8 years ago Posts: 1,671 |
If I stick with the silver & black nema it would probably get warm, I've not really tried these motors for any length of time under load, but perhaps the black one I have will be a lot better, none of my other black ones get warm at all, I think they are under loaded in my setup, probably only a quarter of the power they could handle, not sure never tweaked the vref's. I'll hopefully get some use out of it as is but with no more filament to go round, maybe I need to get an all metal 3.0mm and have that ready to go for this, I have 2 rolls of ABS but not ready for the hassle just yet, but would be good to have the option for 3mm filaments, starting to think about adding second head to current printer, not for dual colour but for both sizes.
Edited 1 time(s). Last edit at 01/11/2017 06:47PM by MechaBits.
Edited 1 time(s). Last edit at 01/11/2017 06:47PM by MechaBits.
|
Re: MechaBits KraftWerk'r January 13, 2017 03:04AM |
Registered: 8 years ago Posts: 1,671 |


|
Re: MechaBits KraftWerk'r January 25, 2017 07:44AM |
Registered: 8 years ago Posts: 1,671 |
The other day I was watching ebay, spotted some rails, black ones, 4 sold 5 left....I um'd n R'd for a few hours.
Decided to buy, hit refresh, ALL Gone Wondering if someone here snaffled them? (and are they any good?)
Sent off an email, next minute the sellers managed to tweek the numbers and put others up for sale.
I snagged 1, thinking I'd get the news it was out of stock, but no it came super quick and I think its good enough quality,
I got the 450mm (possibly should have got the 470mm but they where gone.
I also got 2 other 400mm silver ones, cheaper...but on the slow boat,
So while waiting for them, I had to knock another design together to make use of 400mm 8mm rods.
I decided to revisit the idea of using the HiFi Stand I got for £10.
So I needed 4 ends to slot onto the 20mm square tube of the HiFi stand,
I have 3 ends done(first warped a bit, second perfect, third a little warp again),
another to do later, but so they hopefully wont be redundant when the other rails come I added some mount holes for them...
but I'm not so sure that the holes will line up at one end, but for the rails they are perfect.
hoping to power one direction with this little nema 35, I have placed a bearing at the opposite side incase I later want to add a shaft to drive other side of the dual shaft nema35. But I'm hoping to get away without it, I'm thinking of trying to move the carraige with a belt from one corner arranged in a T shape so it goes down the Y and along the x & back to other end of Y. the belt will be 90 degrees to the other one. so working in different plane.
I ordered 2 more black rails, knowing I can put them to good use, even though they are a little too long to be used as arms on the other printers.
The pics are a bit crap as the stand currently has printer one on the top and I had to test the thing on the lower shelf, and its a bit dark down there.
Decided to buy, hit refresh, ALL Gone
Wondering if someone here snaffled them? (and are they any good?)Sent off an email, next minute the sellers managed to tweek the numbers and put others up for sale.
I snagged 1, thinking I'd get the news it was out of stock, but no it came super quick and I think its good enough quality,
I got the 450mm (possibly should have got the 470mm but they where gone.
I also got 2 other 400mm silver ones, cheaper...but on the slow boat,
So while waiting for them, I had to knock another design together to make use of 400mm 8mm rods.
I decided to revisit the idea of using the HiFi Stand I got for £10.
So I needed 4 ends to slot onto the 20mm square tube of the HiFi stand,
I have 3 ends done(first warped a bit, second perfect, third a little warp again),
another to do later, but so they hopefully wont be redundant when the other rails come I added some mount holes for them...
but I'm not so sure that the holes will line up at one end, but for the rails they are perfect.
hoping to power one direction with this little nema 35, I have placed a bearing at the opposite side incase I later want to add a shaft to drive other side of the dual shaft nema35. But I'm hoping to get away without it, I'm thinking of trying to move the carraige with a belt from one corner arranged in a T shape so it goes down the Y and along the x & back to other end of Y. the belt will be 90 degrees to the other one. so working in different plane.
I ordered 2 more black rails, knowing I can put them to good use, even though they are a little too long to be used as arms on the other printers.


The pics are a bit crap as the stand currently has printer one on the top and I had to test the thing on the lower shelf, and its a bit dark down there.
|
Re: MechaBits KraftWerk'r June 12, 2017 03:27PM |
Registered: 8 years ago Posts: 1,671 |
Well I'm really having trouble using up this Black, wondering which parts I really need//want in Black,
A month or more with no printing, I decided I had to do some thing so thought i'd do an alternate end idler for linear guide on the Godzilla. Though this one relies on the pulleys with bearings, an alternate design with bearing just looks a little cumbersome. Ive put the 400mm black one on the arm and its longer than my back plate, not that it matters the last portion is unsupported, though I also have a smaller silver rail with same hole spacing I might use that in the future. I have probably enough left for one more carriage plate for this machine keeping all main parts same colour.

A month or more with no printing, I decided I had to do some thing so thought i'd do an alternate end idler for linear guide on the Godzilla. Though this one relies on the pulleys with bearings, an alternate design with bearing just looks a little cumbersome. Ive put the 400mm black one on the arm and its longer than my back plate, not that it matters the last portion is unsupported, though I also have a smaller silver rail with same hole spacing I might use that in the future. I have probably enough left for one more carriage plate for this machine keeping all main parts same colour.


|
Re: MechaBits KraftWerk'r June 15, 2017 05:49PM |
Registered: 8 years ago Posts: 1,671 |

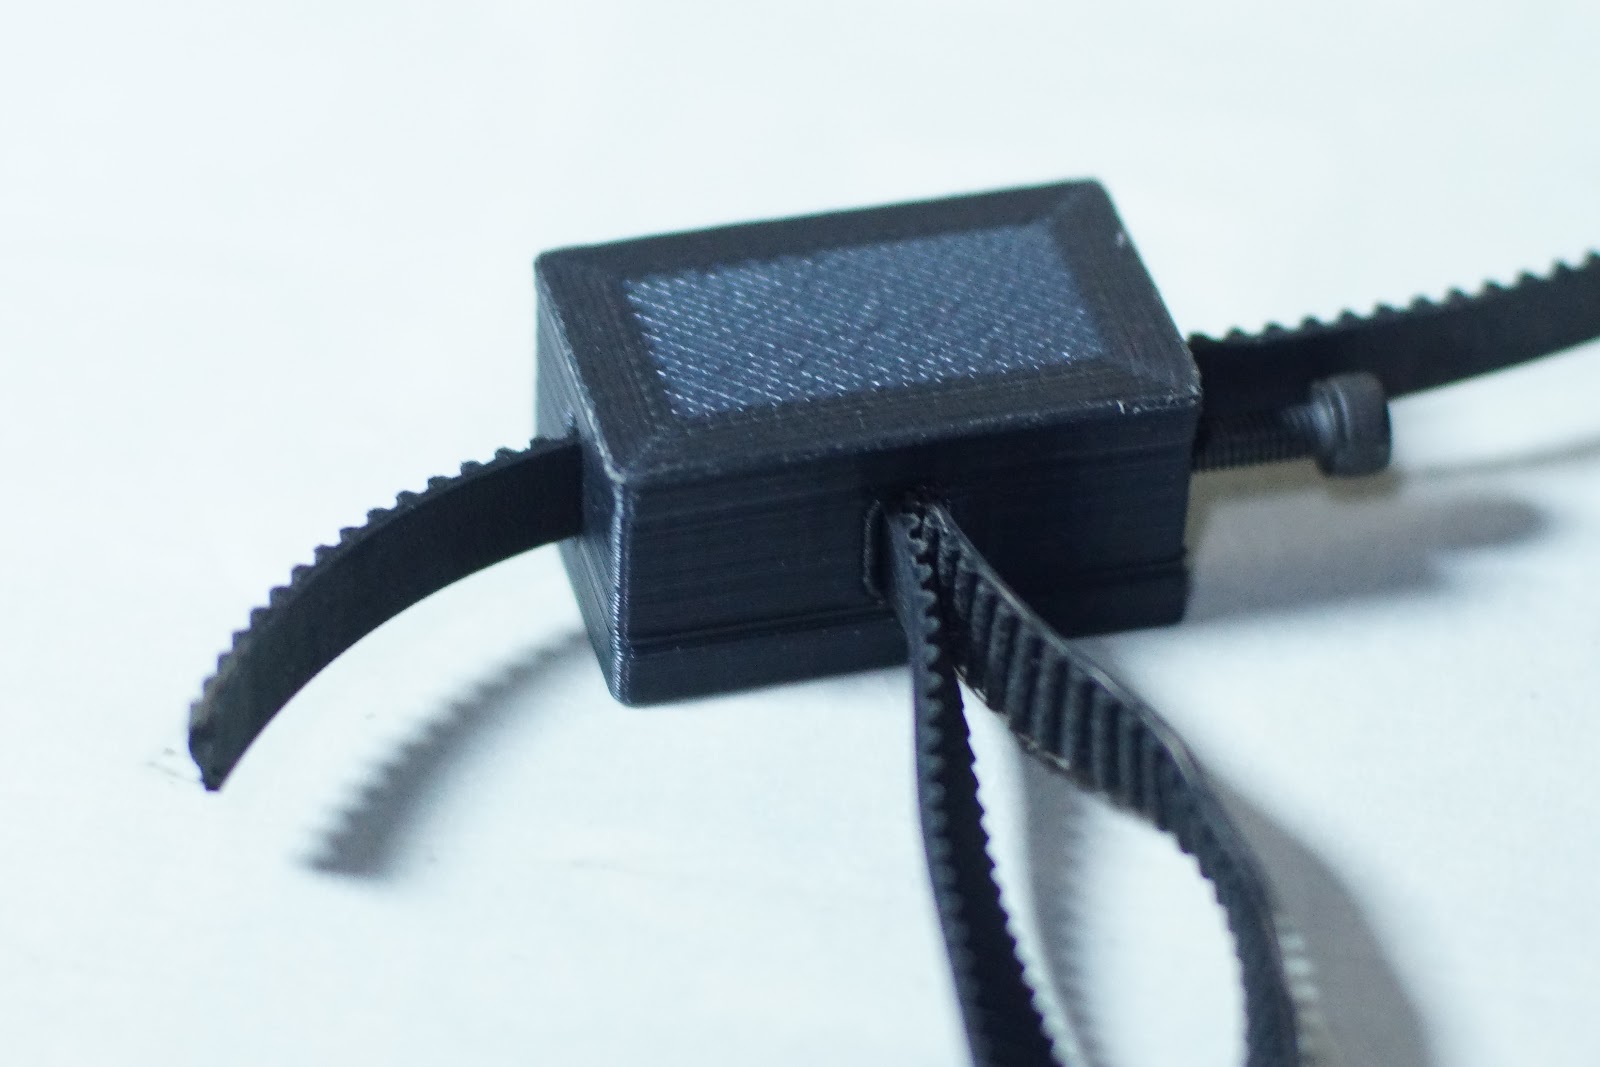
So I ended up with 2 of these very cheap L brackets four joining wood, made of nasty metal, but I thought it might help to reduce the plastic & rather than trying to print 1 part carriage I can split it into smaller parts(& because of print orientation issues when trying to design the ideal one part part.
So just added the belt holder/actuator half, and another left over hotend holder, and though I thought the L brackets might be a little too bendy, all seems fine. just need to make a proper dual front for it, though the length of this arm means a hell of a lot of room for more.
|
Re: MechaBits KraftWerk'r August 22, 2017 08:52AM |
Registered: 8 years ago Posts: 1,671 |

|
Re: MechaBits KraftWerk'r August 28, 2017 10:20PM |
Registered: 8 years ago Posts: 1,671 |
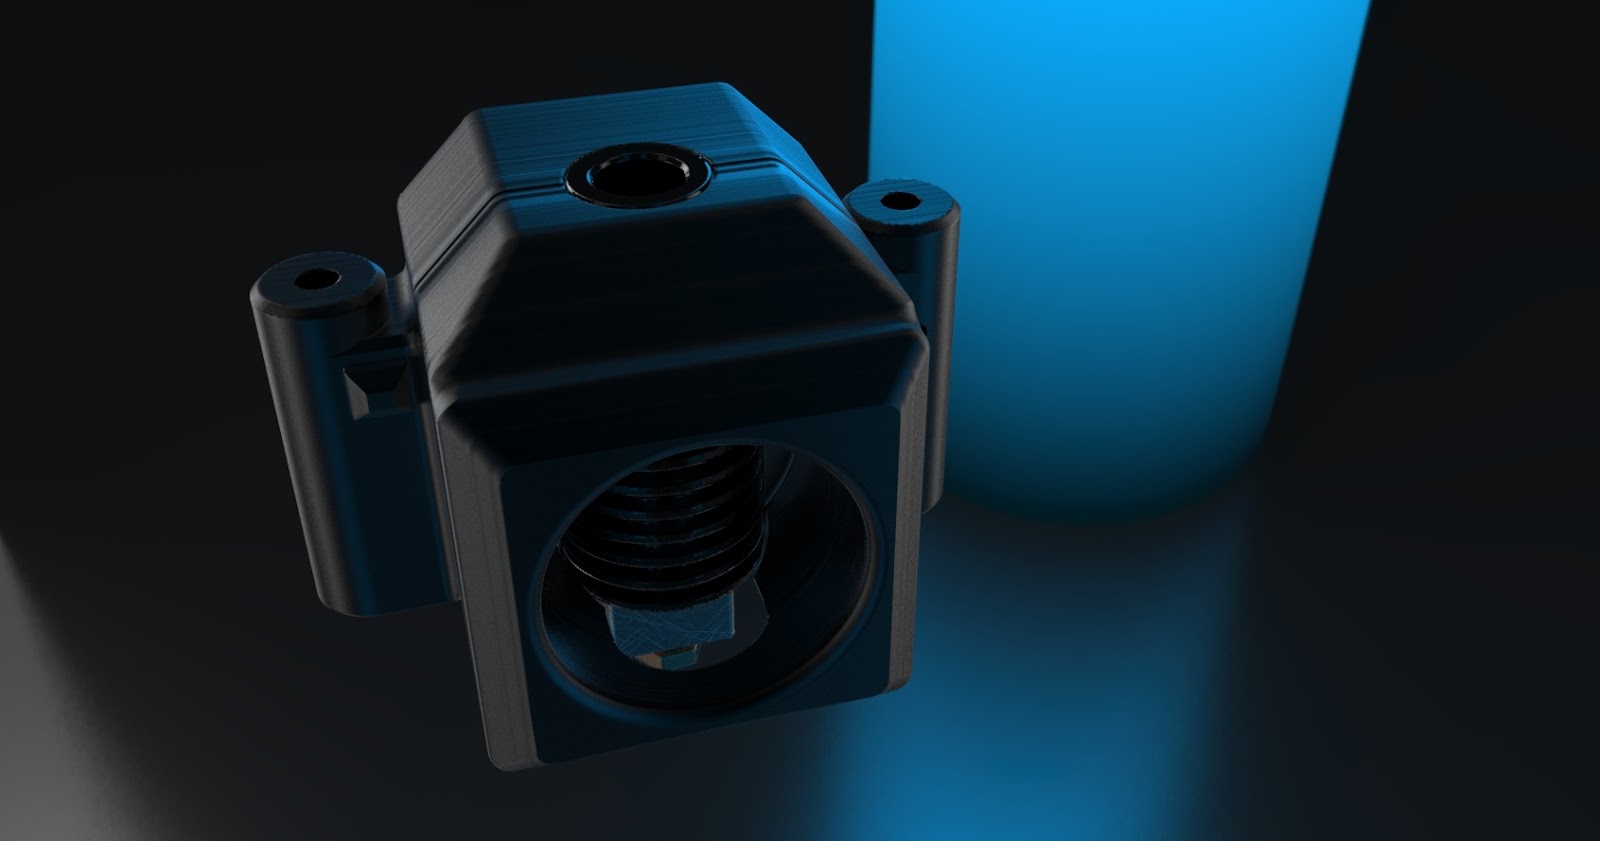
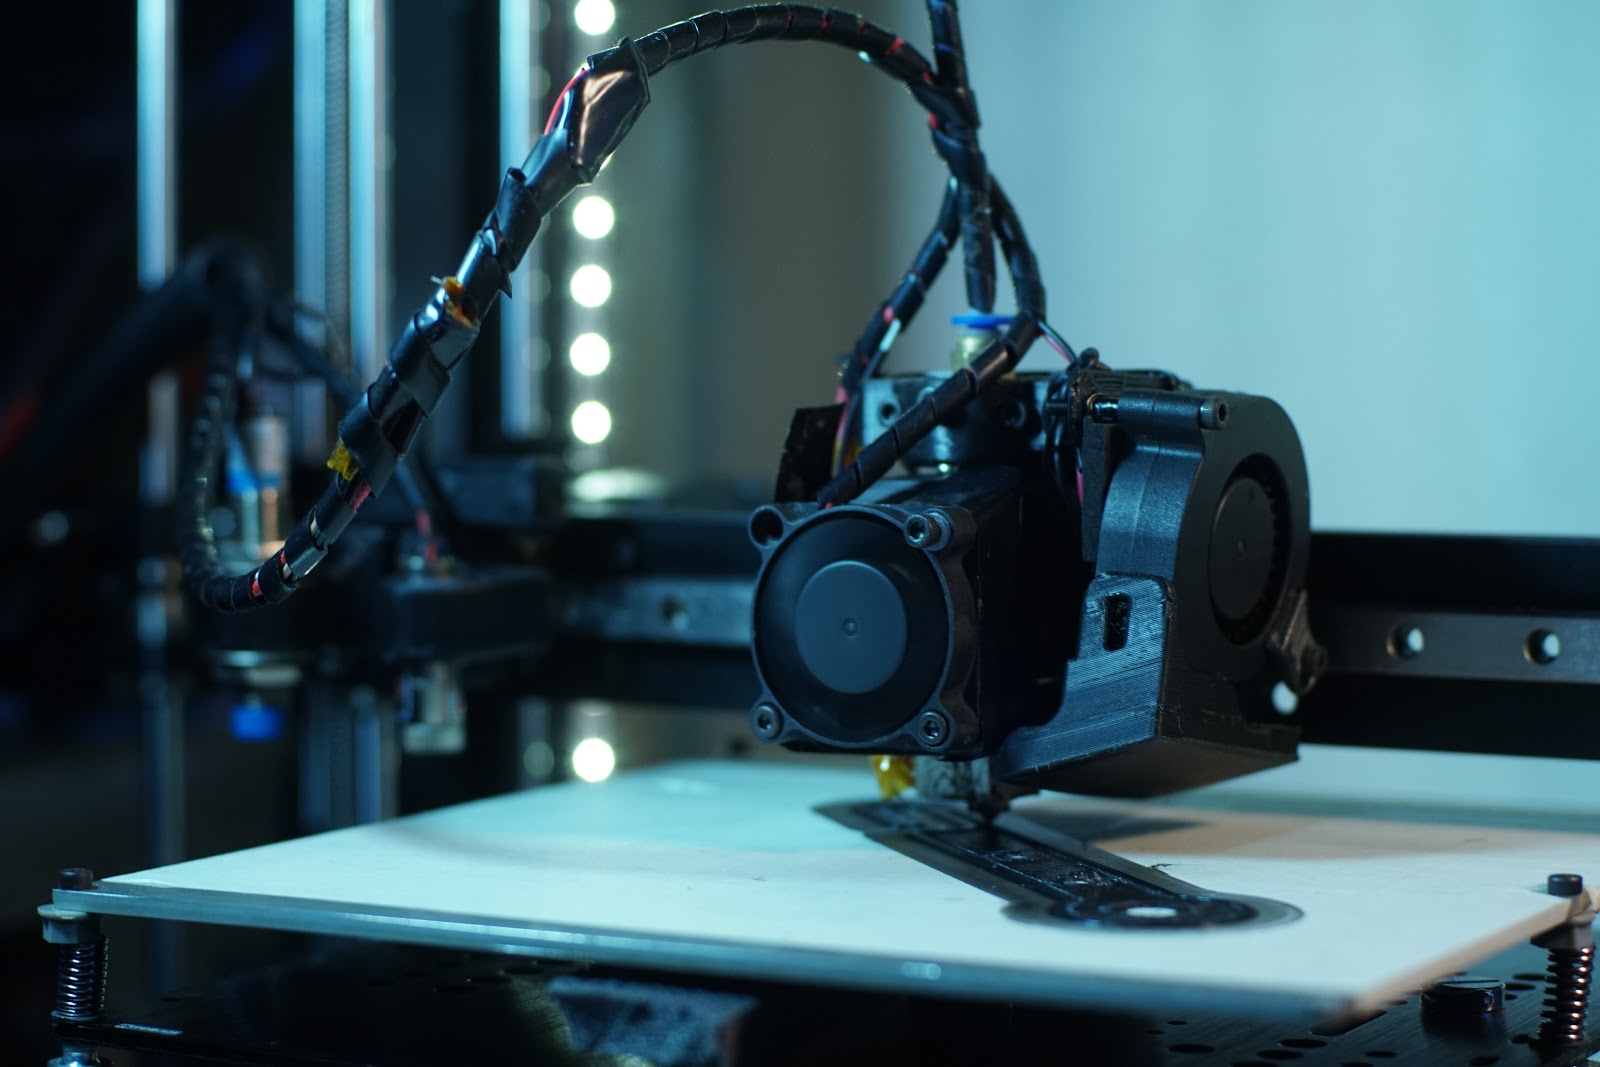
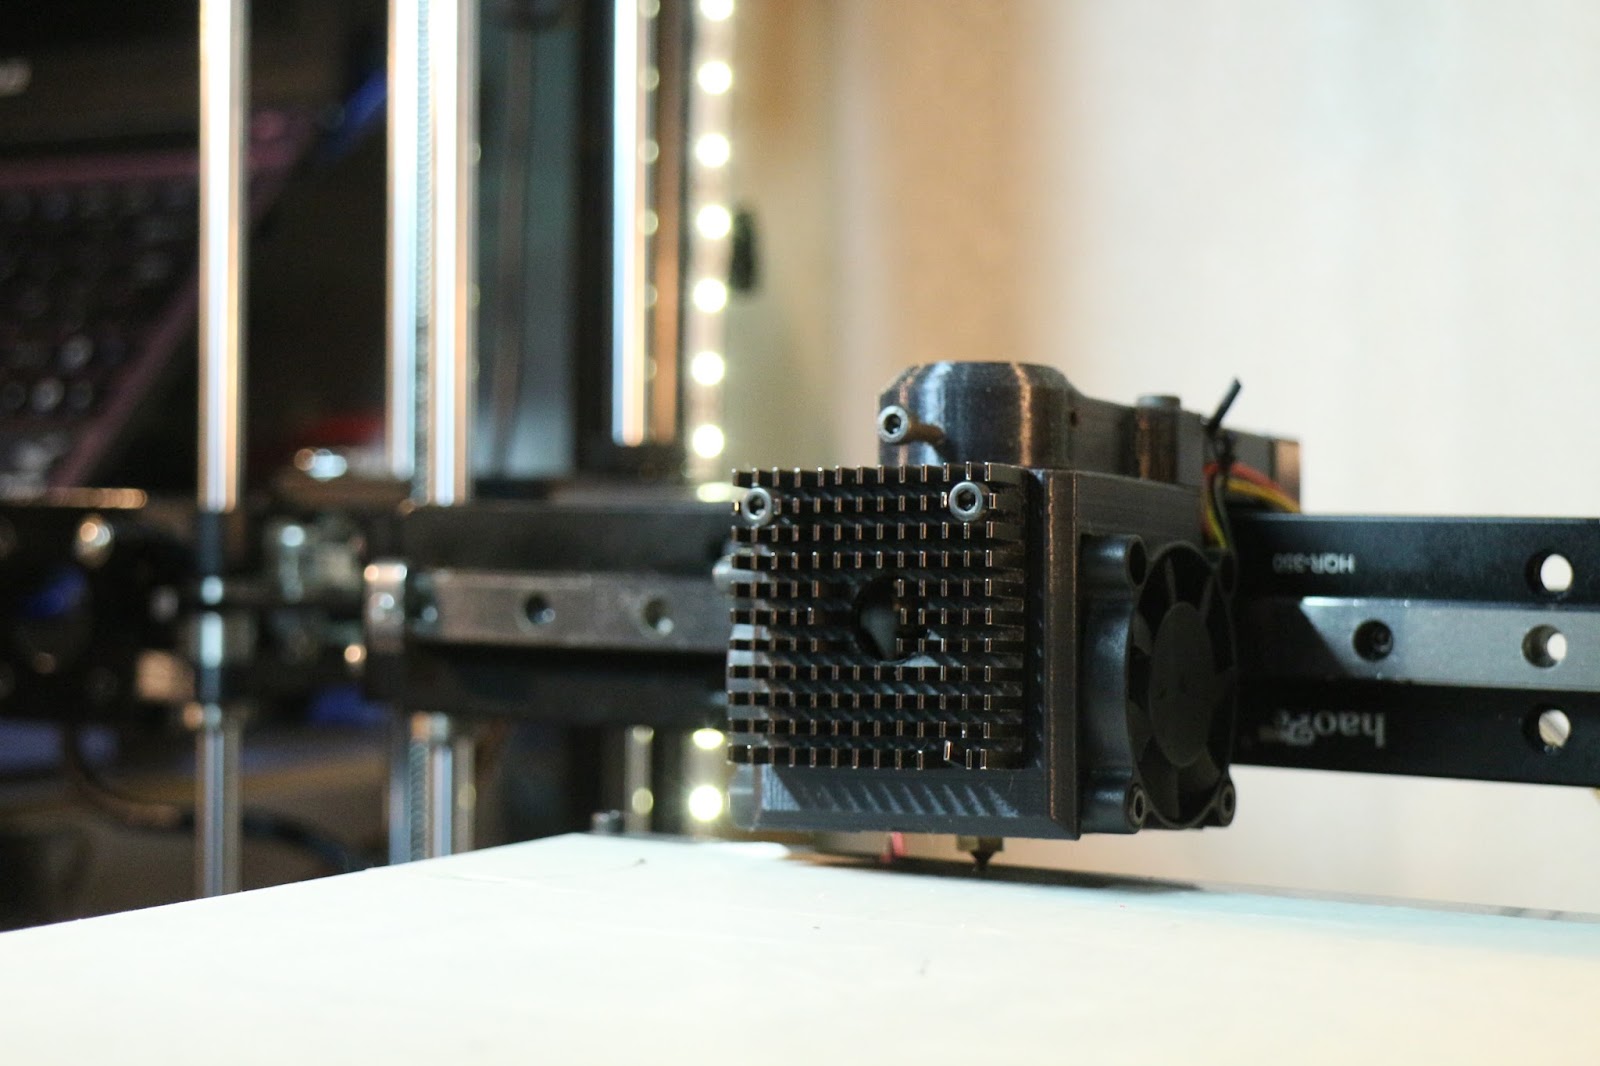
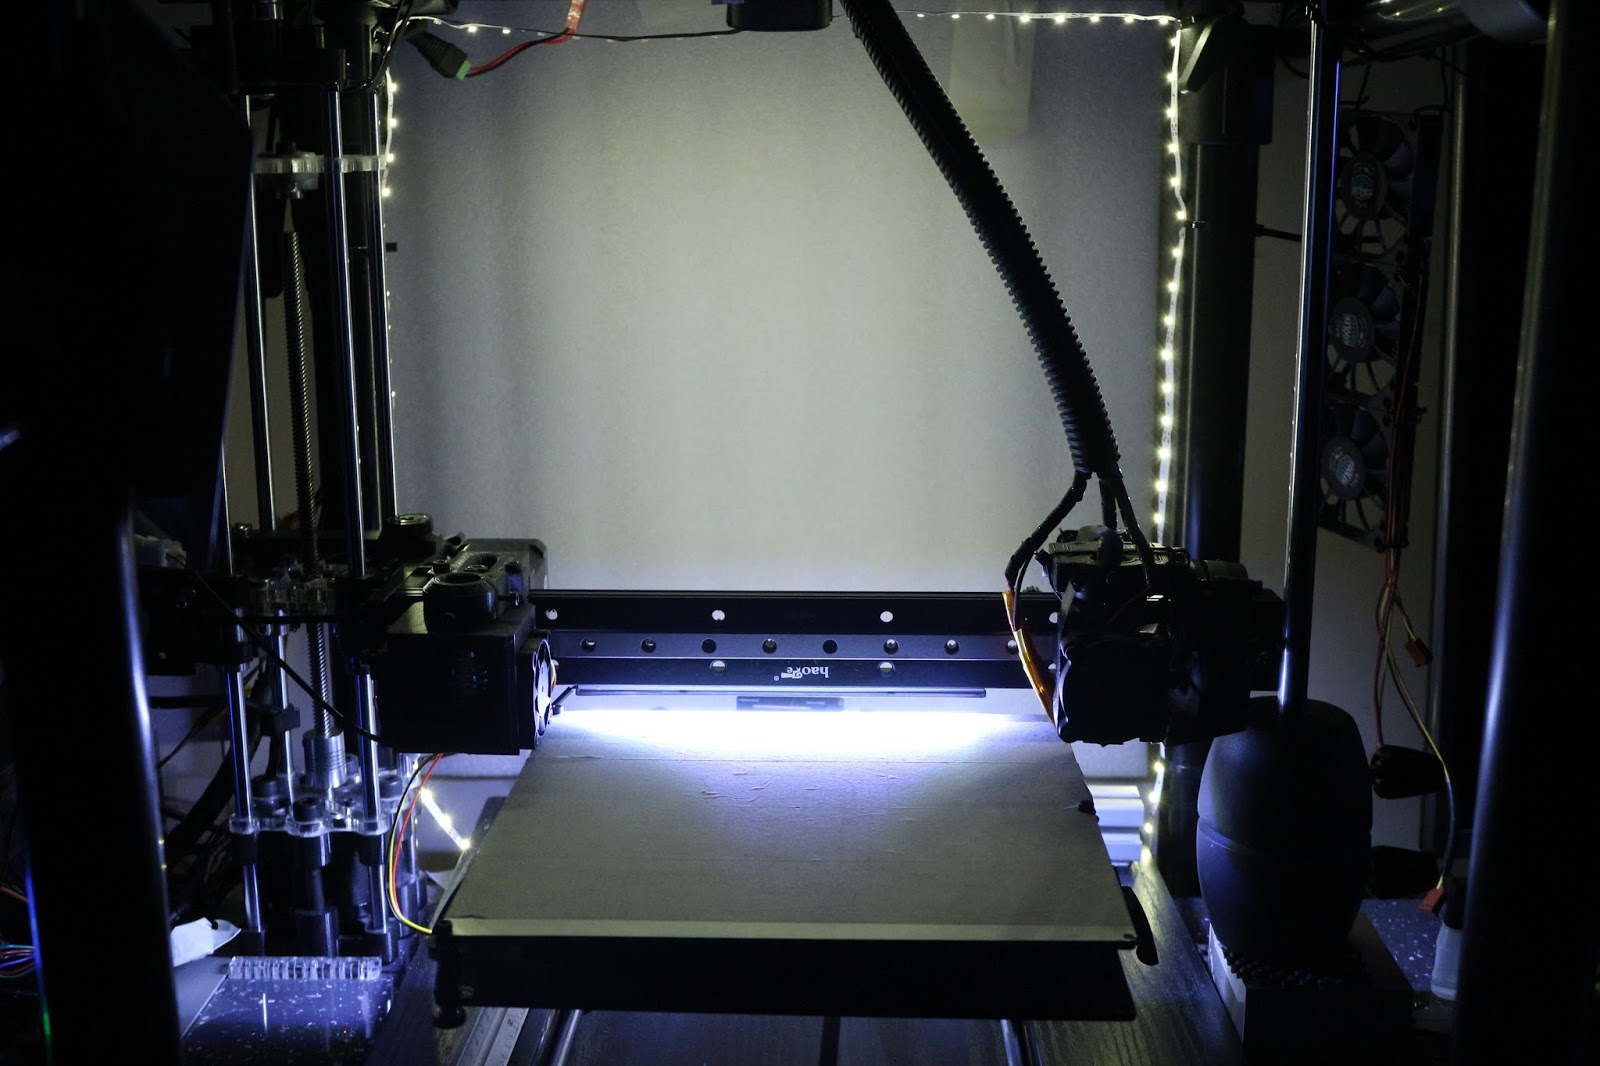
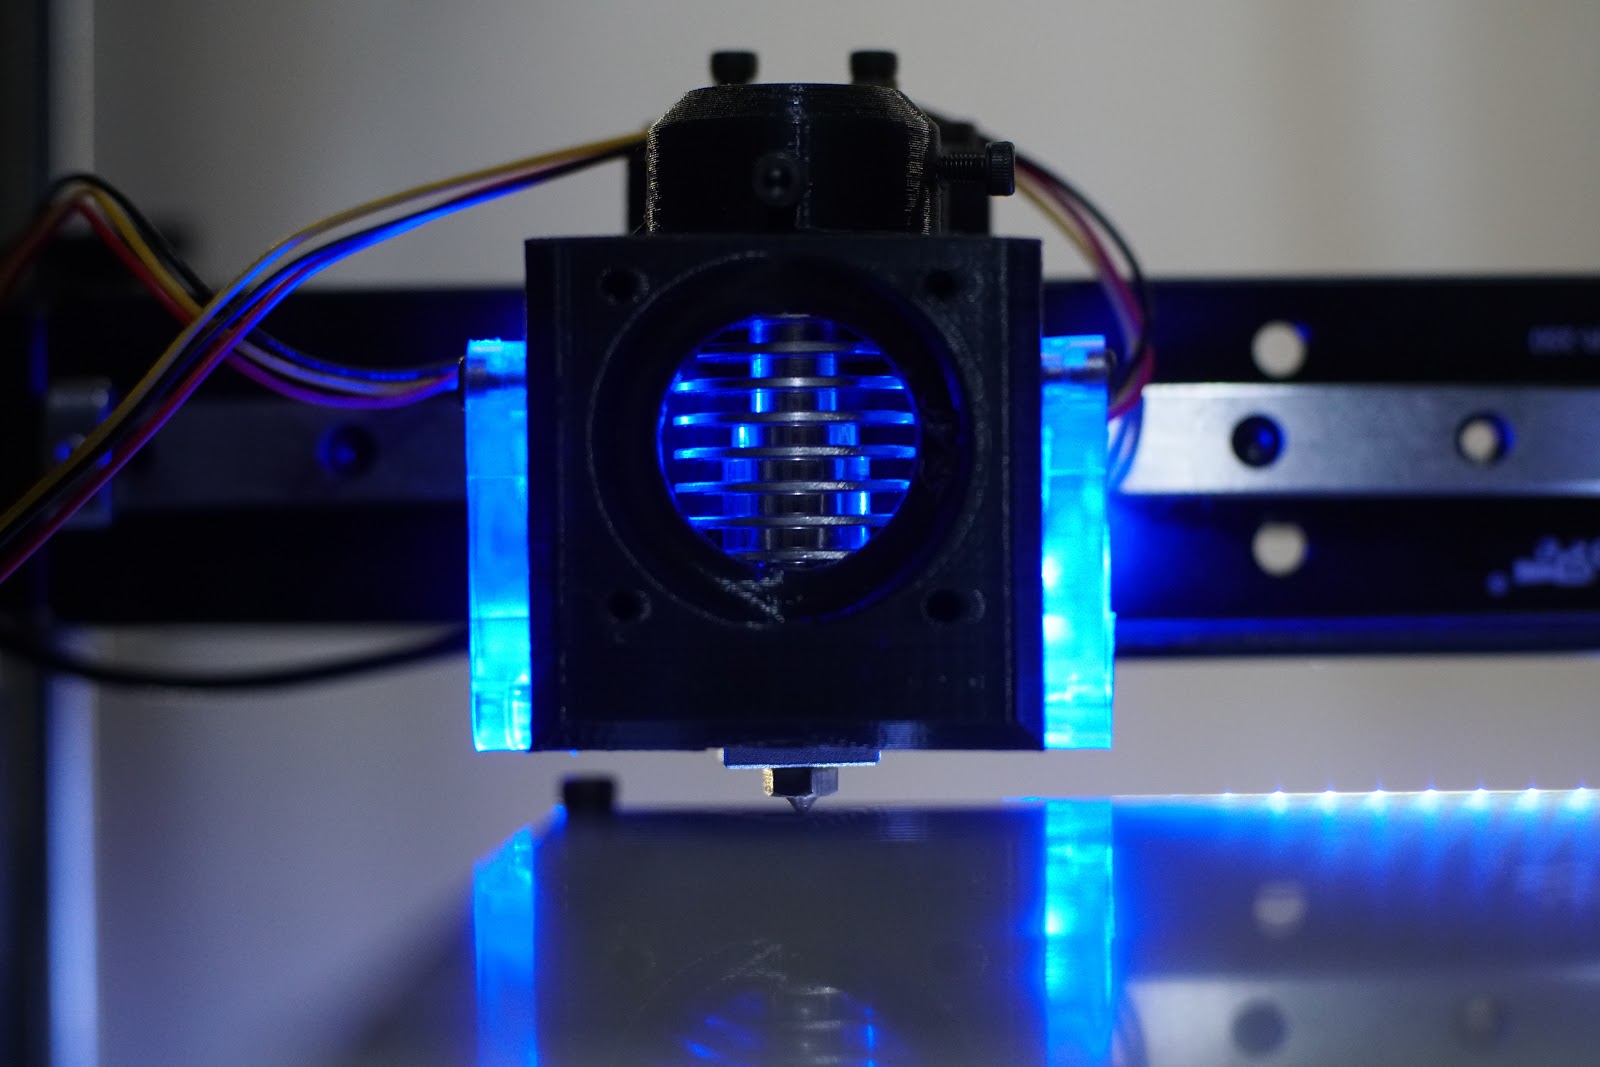
First prints with some cheap PLA, I'm on the Hunt for the Best Matte Black filament. Dont Like Shiny, Testing out a new Hotend Carriage arrangement, will probably do the camera one at some point, but before I did I thought i'd test out another idea, I should have spent a little more time on it, I was thinking of adding some metal shield(alu can) inside the cowl, but cooled from outside, just need duct to hang from front half, from the 2 spare fan holes, have about 2mm clearance, with a little room for adjustment, be good to have a lid/thin part cooler, or just blow air around rim, not sure how long it'll hold up around the hotend, but my other fan cowls doing ok.


 I've run out of 40mm fans so just ordered some new Blue LED ones, and a strip of LED's for under the arm.
I was about to print a spool bobbin, that I could use for different diam' but the roll sits fine on the 35mm poles, lucky I didnt bother because it wouldnt have fitted the hole in the roll of grey I have, so In an effort to remove effort in 3D Printing the obligatory filament(so exciting) guide has just come off the production line, designed to go in the end of the 35mm tubes.


 Now time to print some bigger parts...
Edited 2 time(s). Last edit at 08/30/2017 05:20PM by MechaBits.


I was about to print a spool bobbin, that I could use for different diam' but the roll sits fine on the 35mm poles, lucky I didnt bother because it wouldnt have fitted the hole in the roll of grey I have, so In an effort to remove effort in 3D Printing the obligatory filament(so exciting) guide has just come off the production line, designed to go in the end of the 35mm tubes.


Edited 2 time(s). Last edit at 08/30/2017 05:20PM by MechaBits.
|
Re: MechaBits KraftWerk'r September 02, 2017 12:01AM |
Registered: 8 years ago Posts: 1,671 |
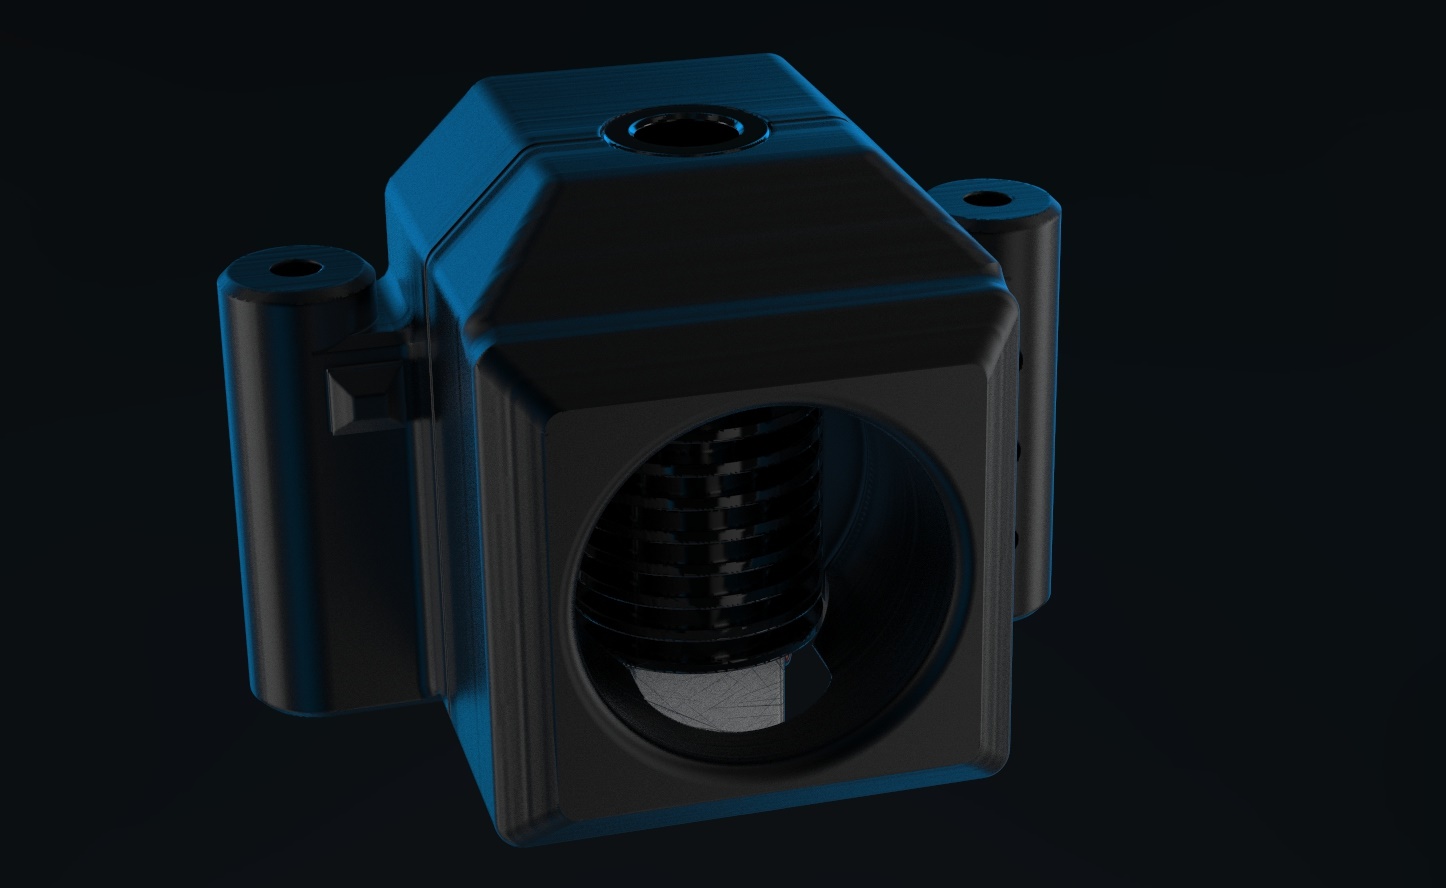
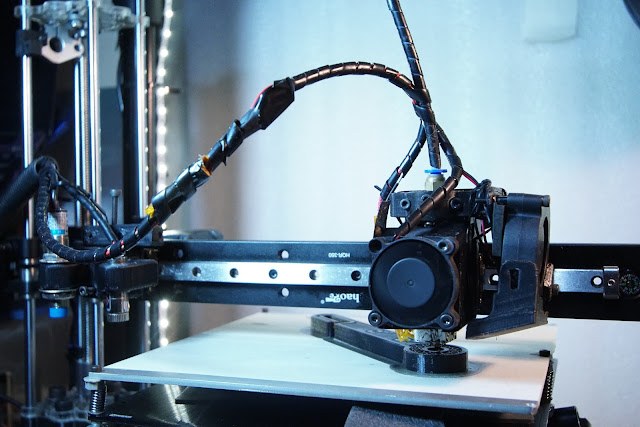
Decided to reprint the recent V6 Carriage/Cowl for the V5 hotend that's on the Printer, why change it, a black one from USA would be nice, if only I hadnt boxed it in at the front, though the Silver should look cool under the Blue neon fans, you can lift the bonnet when not using part cooling, it would be interesting to see it in clear or translucent material, but could look even cheaper than shiny black PL, (the V6 one is now bare & open as I needed the fans from it),The V5 one came out Perfect, I only hope it works as envisaged, though there are a few tweeks I could improve with, things are really close/tight I should have left more wiggle room, I should have a slightly shorter skirt/shield, and maybe a wider part cooling duct,(testing out an idea there, but these latest parts where all completed without part cooling) though i'll be testing out a longer 40mm barrel if I need to drop the nozzle a smidgen, also wondering about alt heating block maybe a volcano one (just so its taller than it is wide) , but a little worried it has no heatbreak, but I will be adding 6mm steel nuts in strategic places like the one currently running, and trying a 15mm long 40w heater to see if that helps...or redesign part cooling bit,


Edited 1 time(s). Last edit at 09/02/2017 12:10AM by MechaBits.


Edited 1 time(s). Last edit at 09/02/2017 12:10AM by MechaBits.
|
Re: MechaBits KraftWerk'r September 04, 2017 02:54AM |
Registered: 8 years ago Posts: 1,671 |


|
Re: MechaBits KraftWerk'r September 04, 2017 07:44AM |
Registered: 11 years ago Posts: 5,780 |
It looks nice, but why does it look tilted?
Ultra MegaMax Dominator 3D printer: [drmrehorst.blogspot.com]
Ultra MegaMax Dominator 3D printer: [drmrehorst.blogspot.com]
|
Re: MechaBits KraftWerk'r September 04, 2017 01:19PM |
Registered: 8 years ago Posts: 1,671 |
Same reason as the last one, I didnt screw it on yet, contemplating a little riser carriage with some magnets, but want to keep them far enough away from my balls, in the carriage...I have 2 link bars to go to the belt, first one warped...I used that to see if I should change the second...and for some stupid reason I thought I needed an extra 10mm length, now I dont need that...so I either use the warped one or print another with some mag mods, or some adapter block for carriage that maybe I can put a few more holes on, for some other stuff.
Though part of me wants to go back to a multipart part but just 2, and have the front half attach with magnets holding/clamping hotend to the carriage.
Edited 2 time(s). Last edit at 09/04/2017 03:37PM by MechaBits.
Though part of me wants to go back to a multipart part but just 2, and have the front half attach with magnets holding/clamping hotend to the carriage.
Edited 2 time(s). Last edit at 09/04/2017 03:37PM by MechaBits.
|
Re: MechaBits KraftWerk'r September 06, 2017 12:00AM |
Registered: 8 years ago Posts: 1,671 |
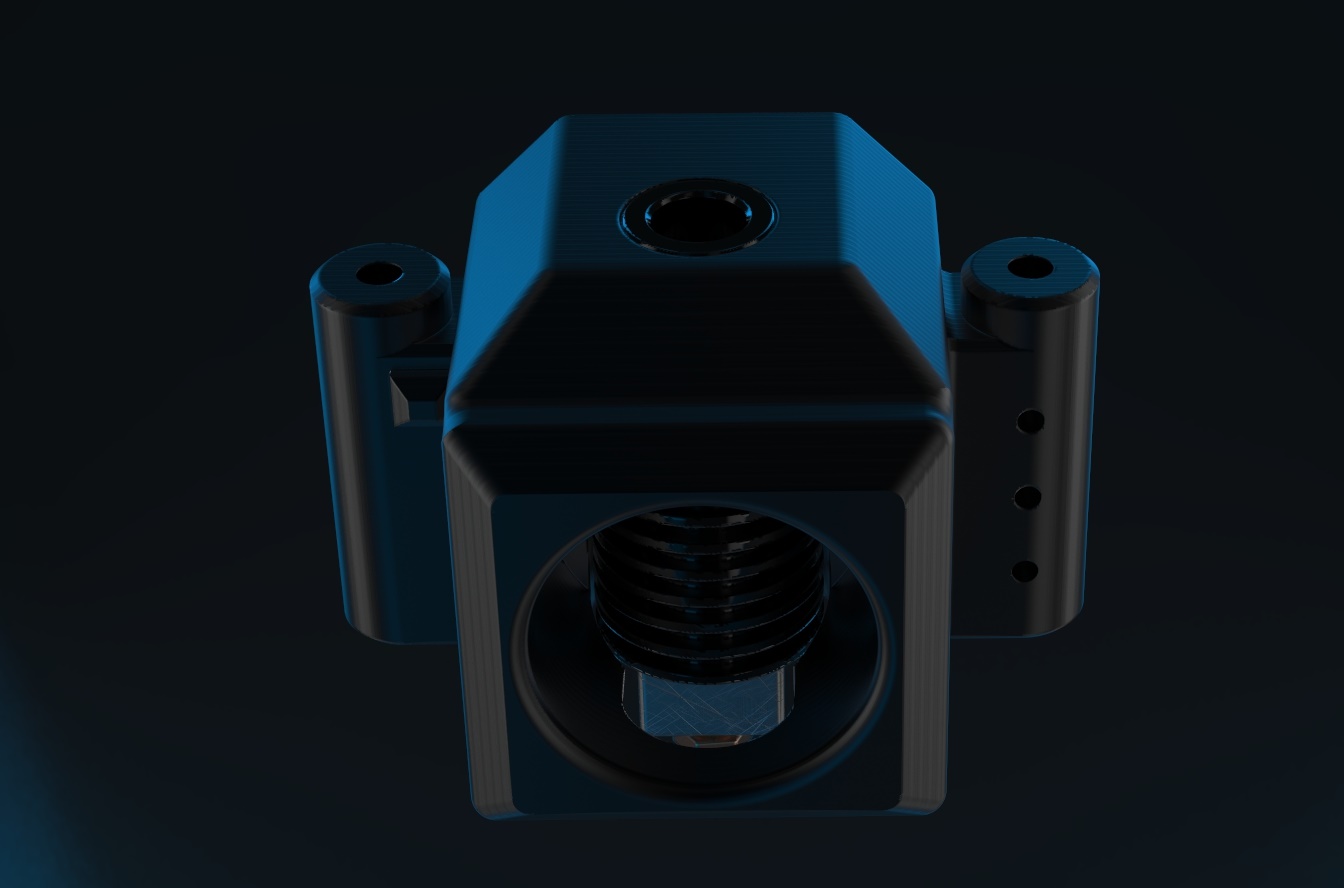
I screwed it... on  and its all level, though I wont be swapping over till the blue fans arrive, the radial fan was really doing my head in, and those other nice 40mm flat ones are a little too expensive, but wouldnt mind a few at some point.


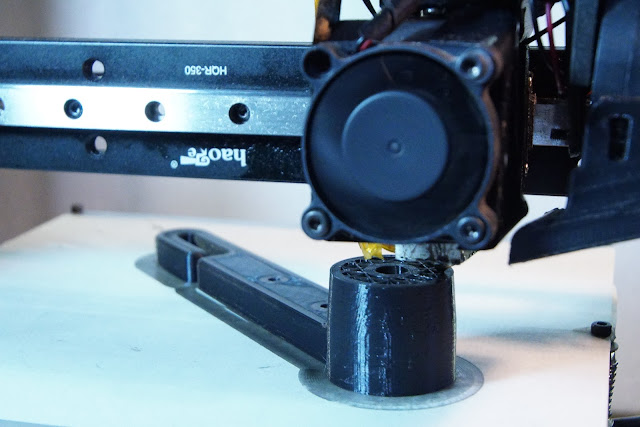
 You know how it always makes sense to add another part to allow the other to cool(unless you solved the issue once & for all), but then you endup with longer waiting times for the part you really want, thats what this is, another 3030 motor mount, I thought I would reprint some of my other parts, I've got some rather large prints to come for the Z Base & Top, probably 20 or 30 hours of printing for parts I dont need right away...have to concentrate on parts I really want to use first.
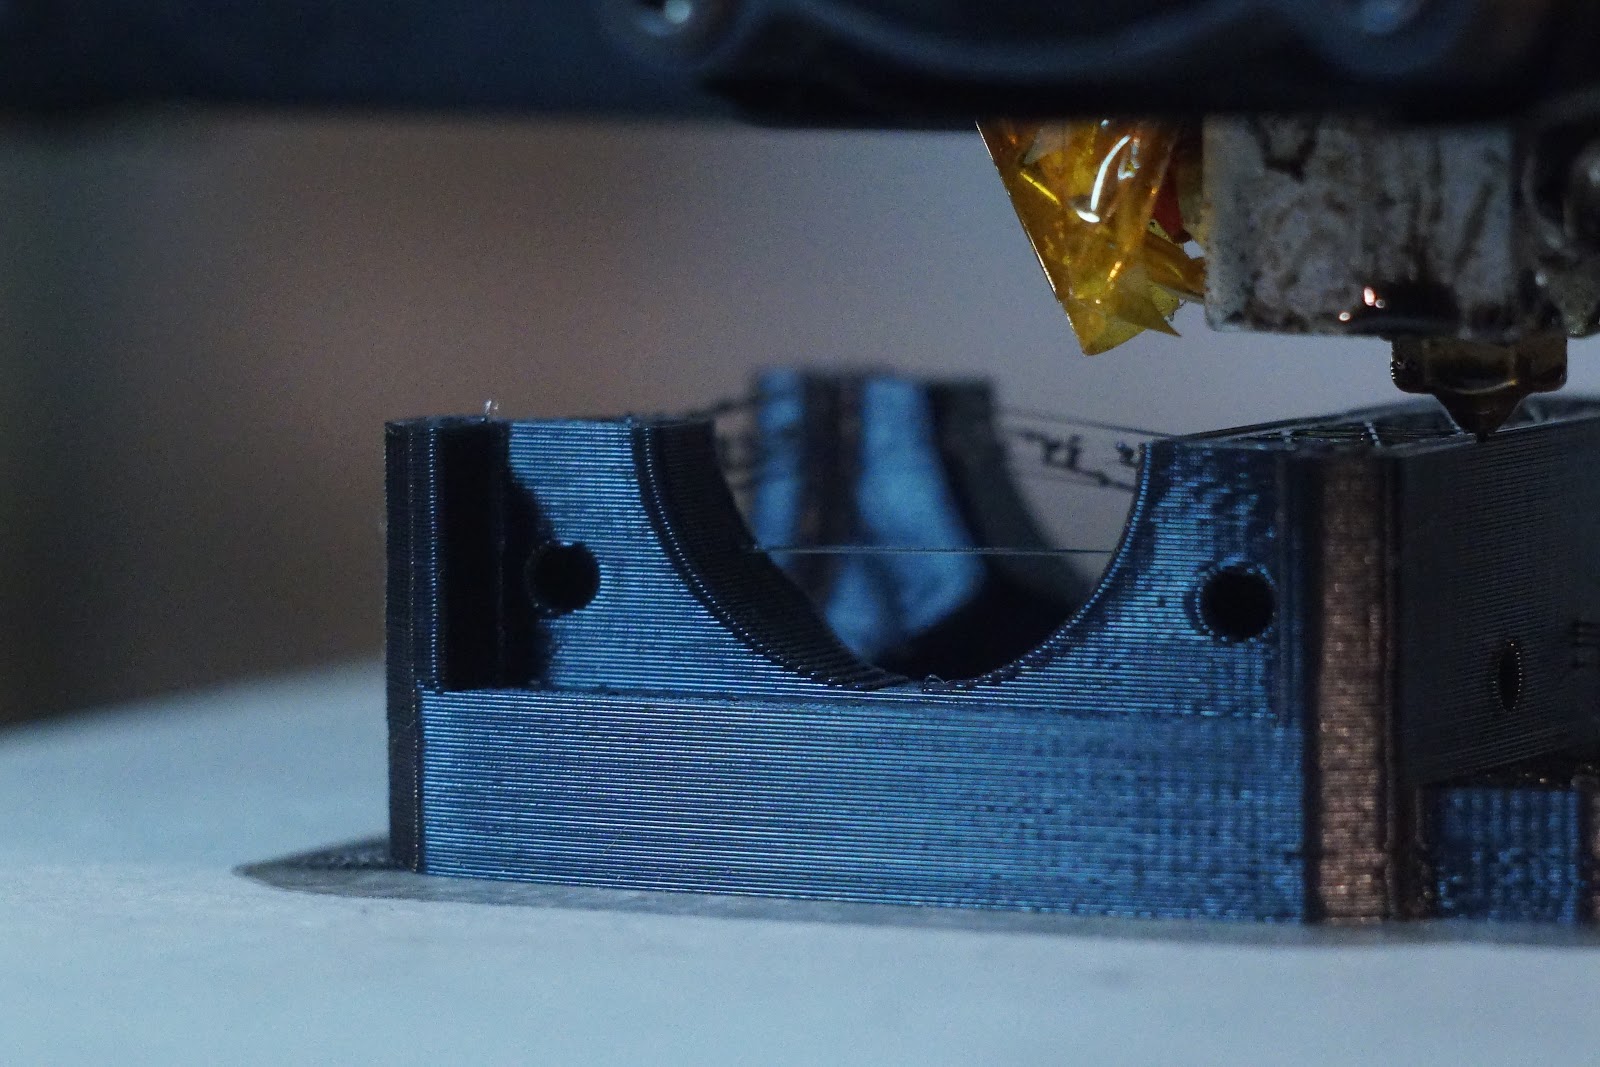
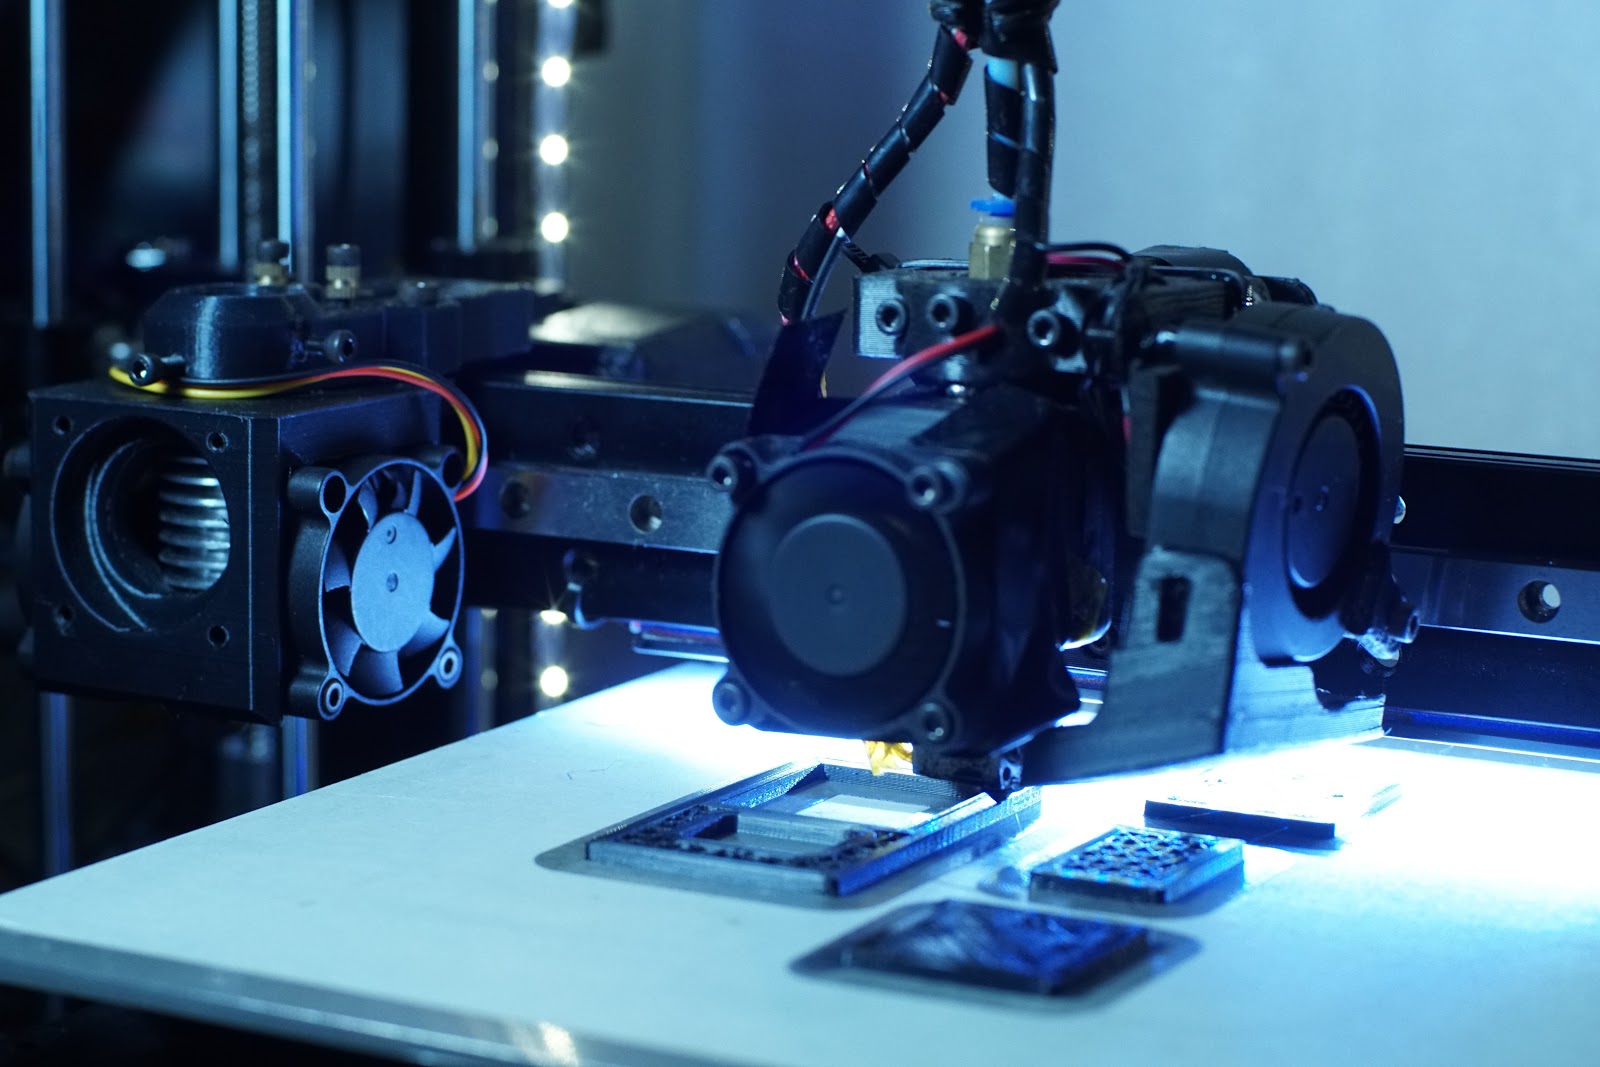
Some interesting artifacts depending on the light, but there are some dents in certain places(not the ones in this pic, some others), I'm wondering near the top where the lines go into perfect dots, wondering what the print would look like if I got that all over, I think I need to re-tighten the Y, maybe alter X a little, when I change head i'll remove the springs, and line up belt a little better, also maybe change the idler to be same size, as there is a little diagonality to the belt, might also beef up the motor mount on the arm, as it can flex a tiny amount, and also would like to support the end of the shaft so as not to stress the shaft/bearings out, then maybe i'll see a little more improvement, clamping the bed down wouldnt be a bad idea too its just sitting there at the moment.
Some of the prints earlier in the thread seemed much better, wondering if it was just the matt-ness of the other filament or changes in setup, or just lighting, will have to investigate, or find some mat black. Now need a second carriage to match first for dual setup, Back to the magnets or some other hard link.
But just before printing a carriage link i realize I dont want second head travelling all the time especcially as I have no way to stop it going over part when not in use, have to think of something else...hmmm do I really want Dual and all the Hassle?
Edited 6 time(s). Last edit at 09/06/2017 03:37PM by MechaBits.
and its all level, though I wont be swapping over till the blue fans arrive, the radial fan was really doing my head in, and those other nice 40mm flat ones are a little too expensive, but wouldnt mind a few at some point.


Some interesting artifacts depending on the light, but there are some dents in certain places(not the ones in this pic, some others), I'm wondering near the top where the lines go into perfect dots, wondering what the print would look like if I got that all over, I think I need to re-tighten the Y, maybe alter X a little, when I change head i'll remove the springs, and line up belt a little better, also maybe change the idler to be same size, as there is a little diagonality to the belt, might also beef up the motor mount on the arm, as it can flex a tiny amount, and also would like to support the end of the shaft so as not to stress the shaft/bearings out, then maybe i'll see a little more improvement, clamping the bed down wouldnt be a bad idea too its just sitting there at the moment.
Some of the prints earlier in the thread seemed much better, wondering if it was just the matt-ness of the other filament or changes in setup, or just lighting, will have to investigate, or find some mat black. Now need a second carriage to match first for dual setup, Back to the magnets or some other hard link.
But just before printing a carriage link i realize I dont want second head travelling all the time especcially as I have no way to stop it going over part when not in use, have to think of something else...hmmm do I really want Dual and all the Hassle?
Edited 6 time(s). Last edit at 09/06/2017 03:37PM by MechaBits.
|
Re: MechaBits KraftWerk'r September 06, 2017 10:25PM |
Registered: 8 years ago Posts: 1,671 |


|
Re: MechaBits KraftWerk'r September 09, 2017 05:23AM |
Registered: 8 years ago Posts: 1,671 |

|
Re: MechaBits KraftWerk'r September 09, 2017 10:22AM |
Registered: 8 years ago Posts: 1,671 |


I put 2x 3mm screws in the top as +/- Binding posts for 12v (or 7v as the fans have some oompf to them) But Maybe I can just have them arcing...bzzzz crackle & pop goes my PSU and molten PLA all over the place.
Edited 1 time(s). Last edit at 09/09/2017 05:20PM by MechaBits.


Sorry, only registered users may post in this forum.