How to mount the Micron 3DP Extruder/Hotend to the PRUSA I3 rework 3D printer.
Also applicable to the standard i3 just change the X carriage to the rework Four bearing type.
You will need :
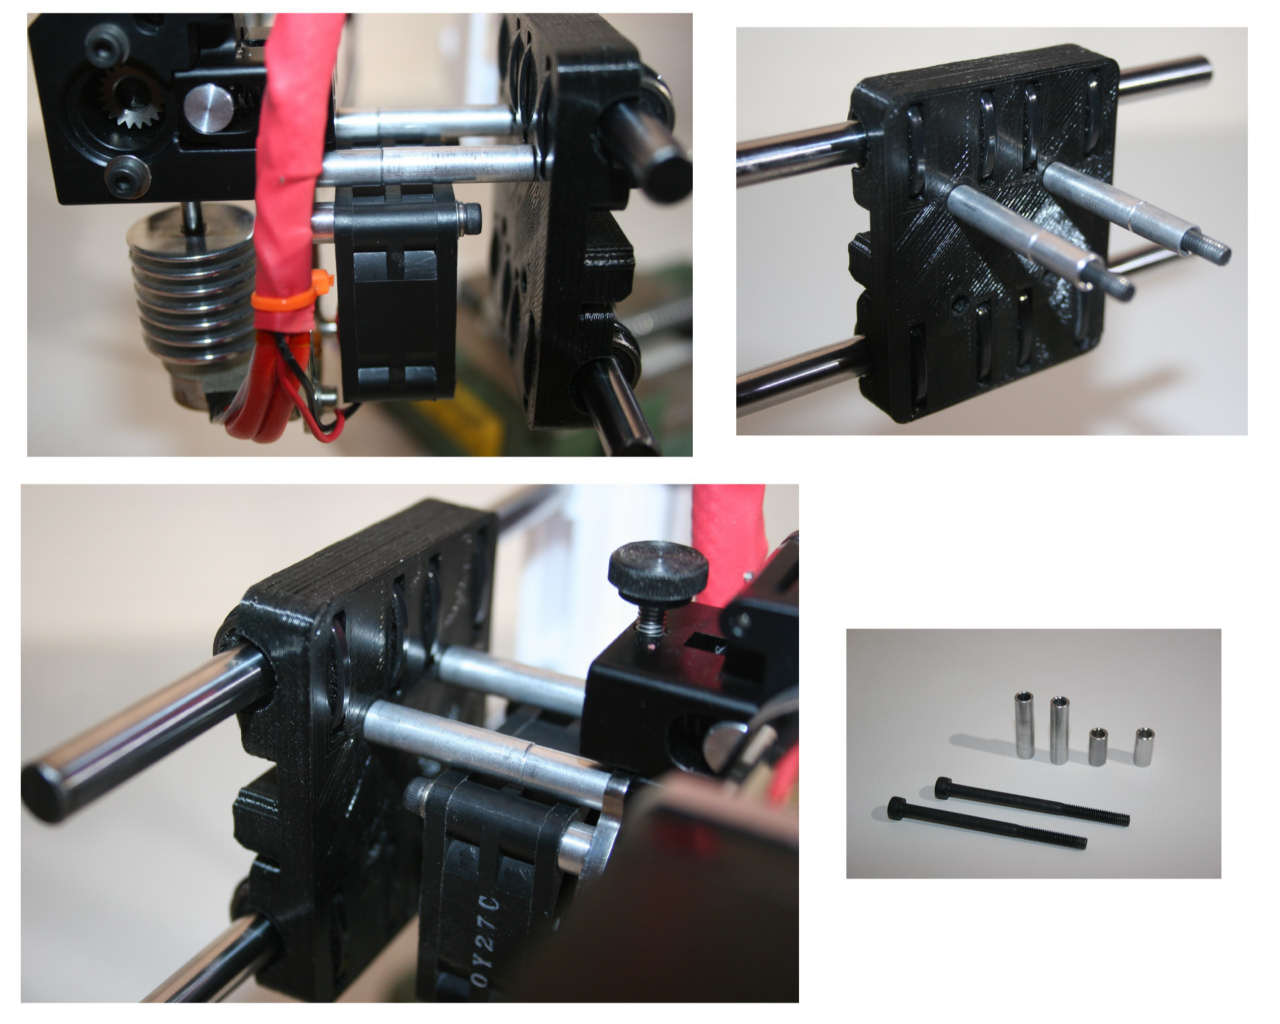
1. Two 60mm M4 bolts
2. Two 38mm M4 spacers (or 1.5 Inch #6)
Remove your old Extruder/ Hotend assembly from you printer.
Remove the Two 5mm bolts that hold the Hotend to the extruder
you now have two pieces. Insert the Two 60mm bolts into the upper
holes of the X carriage (you can use the lower pair if you wish to
have a lower extruder nozzle) place the spacers on the bolts and
fasten the 3DP assembly onto the carriage. Adjust your "Y" axis
build plate 15mm forward to line up the new nozzle at 0,0.
One of the advantages of this mounting method is that the nozzle
is visible while printing as is the removal bolt for quick changing
of the DFGNM.
If you are changing the X carriage you may want to consider printing
the new i3 K1 version (http://www.thingiverse.com/thing:379590)
It features integrated bed leveling servo mount, a large hole (that improves
airflow to the Hotend and no Ty wrap bearing fastening.
Phil