Turn you 3D Printer into a Rail Gun
Posted by MechaBits
|
Turn you 3D Printer into a Rail Gun February 01, 2017 05:17PM |
Registered: 8 years ago Posts: 1,671 |

What's the law on turning your 3D Printer into a Rail Gun?, Weapon of Mass Distraction. Disruption.
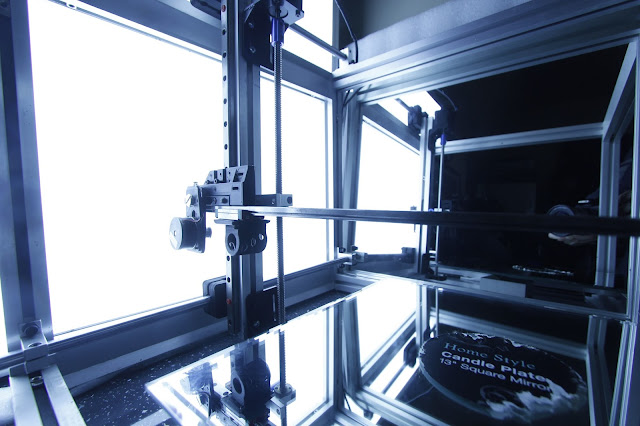
So Armed with 3 470mm Black rails, and 2 400mm I realize if I want the HiFi and the Cube working I need 6 Rails
I had planned on using 12mm rods in the Cube, but the 400mm rails are just too perfect not to use them.
But the problem of printing something to join the ends of the cross rail, minimize racking, something possibly modular so the 2 printers could share the rail. This Arrangement solves all that, I have a really strong joint there is no way it will deviate.
So I could use it on any Z, or I'm thinking of adding the 2x12mm rods to one side of the cube to get this running on them then I could do away with a support/bearing at other end, I can spread the bearing(alongY) far if needed so there would be minimal play in the bearings(especially with the longer ones. Run it like a rail gun.
|
Re: Turn you 3D Printer into a Rail Gun February 02, 2017 04:11AM |
Registered: 11 years ago Posts: 528 |
|
Re: Turn you 3D Printer into a Rail Gun February 02, 2017 04:46AM |
Admin Registered: 16 years ago Posts: 13,884 |
... have seen a rail-gun some years ago, that accelerated small aluminium coated styrofoam-spheres to hypersonic speeds for testing space-satellite shields against micro-meteorites 
This projectiles won't bounce around - when penetrating the thin foil at the gun outlet (needed to contain the vacuum inside) they already starts to burn/melt and when hitting something, they completely went to plasma, so no problems with littering or debris
Viktor
--------
Aufruf zum Projekt "Müll-freie Meere" - [reprap.org] -- Deutsche Facebook-Gruppe - [www.facebook.com]
Call for the project "garbage-free seas" - [reprap.org]
|
Re: Turn you 3D Printer into a Rail Gun February 02, 2017 11:22AM |
Registered: 8 years ago Posts: 312 |
|
Re: Turn you 3D Printer into a Rail Gun February 02, 2017 02:41PM |
Admin Registered: 16 years ago Posts: 13,884 |
... was a project for ESA, where they had to test best variants of lightweight "micro-meteorite-shields" - best was stacked aluminium and glass filled FR4 sheets with some centimeters gap between them, so the particles had the chance to evaporate and spread to bigger diameters ... otherwise they would simply "drill a hole" through the housing and cause havoc inside.
AFAIK they could generate speeds with up to 15000m/s with a railgun length of 30 meters ... a bit too big for my basement, but could fit inside the garden
Viktor
--------
Aufruf zum Projekt "Müll-freie Meere" - [reprap.org] -- Deutsche Facebook-Gruppe - [www.facebook.com]
Call for the project "garbage-free seas" - [reprap.org]
|
Re: Turn you 3D Printer into a Rail Gun February 02, 2017 08:05PM |
Registered: 9 years ago Posts: 425 |
|
Re: Turn you 3D Printer into a Rail Gun February 02, 2017 10:30PM |
Registered: 8 years ago Posts: 1,671 |
Dont Encourage me Mutley( Evil Mutly Laugh) I try to amuse whenever I can, it's the only thing to do when faced with a world that going mad...I have to try to fit in...or the Lizard People will get me.
I'm thinking If I can lift the 2 12mm rods in Z instead of the bed, I can have XYZ Motion Combined, perhaps an even better way can be discovered?
I'm thinking If I can lift the 2 12mm rods in Z instead of the bed, I can have XYZ Motion Combined, perhaps an even better way can be discovered?
|
Re: Turn you 3D Printer into a Rail Gun February 11, 2017 02:46PM |
Registered: 8 years ago Posts: 1,671 |


Re-Armed & Re Loaded
After a little experimentation, I discovered 12mm rods move easier than 12mm Guides, having the 12mm guides in typical core XY really does need the extra belt arrangement, though with strong enough joint it may be possible to drive from only one side, but with the 12mm rails & an unsupported far end, the whole thing moves smoother, So I would like to have this arrangement doing the XY, and being lifted in Z at same time, keeping bed static.
Ideally longer bearings, maybe a 3rd one.
Edited 3 time(s). Last edit at 02/11/2017 03:03PM by MechaBits.
|
Re: Turn you 3D Printer into a Rail Gun March 02, 2017 03:36PM |
Registered: 8 years ago Posts: 1,671 |
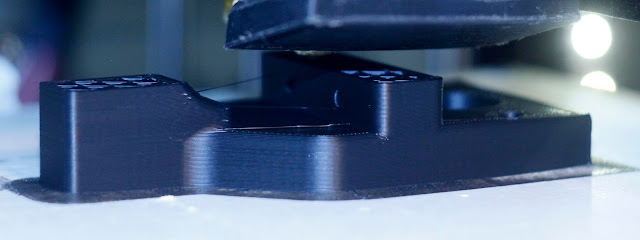
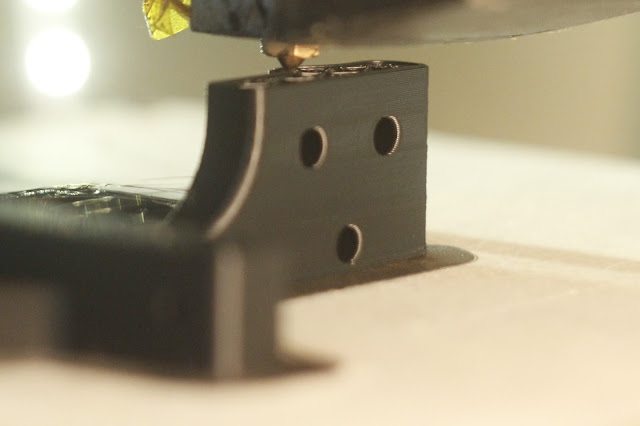
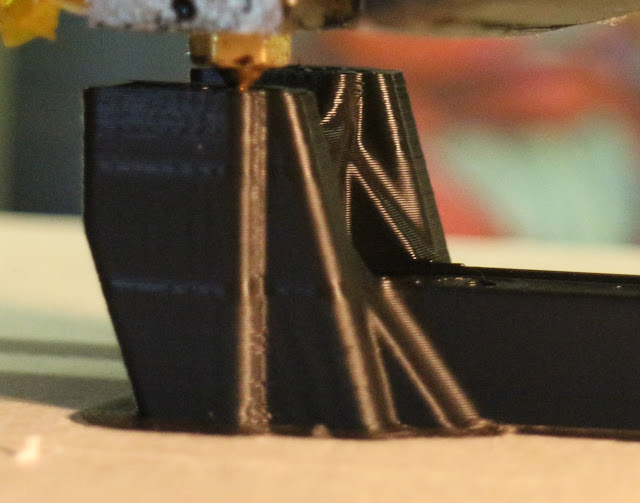
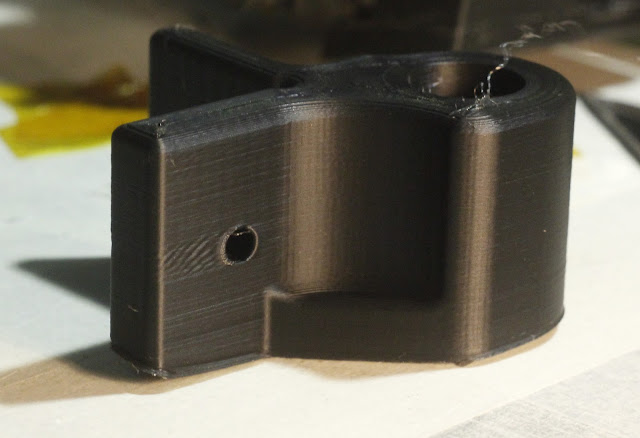
Well it's been probably a month without printing anything, due to being down to last half kilo of filament, and sick of searching for more, and with the new price norm' it makes me wonder where its leading, with the price of plastic parts get too expensive to justify not moving to metal...most parts i've printed where for 3d printers, even though my initial goal was to not have plastic parts in the printer. Though this print was probably one of the best to date, even though it may not get used or superseded, I know I am trying to minimize waste but had to try this out, I was going to use a 10mm rail clamp for the tr8 nut and make a different joiner, but decided to make it one piece, if I have to rotate 90 degrees, i'd create a different carriage,
while mulling over various config's of a cube... I've hit upon what may be my most minimal X arm to date, and its long but strong, possible one of the most minimal designs out there, with no more than a few metal parts and one printed carriage, oh and the screw support, though that can be a 22mm flange bearing.

Edited 3 time(s). Last edit at 03/03/2017 09:10PM by MechaBits.
while mulling over various config's of a cube... I've hit upon what may be my most minimal X arm to date, and its long but strong, possible one of the most minimal designs out there, with no more than a few metal parts and one printed carriage, oh and the screw support, though that can be a 22mm flange bearing.


Edited 3 time(s). Last edit at 03/03/2017 09:10PM by MechaBits.
|
Re: Turn you 3D Printer into a Rail Gun March 02, 2017 08:49PM |
Registered: 8 years ago Posts: 916 |
|
Re: Turn you 3D Printer into a Rail Gun March 02, 2017 09:17PM |
Registered: 8 years ago Posts: 1,671 |
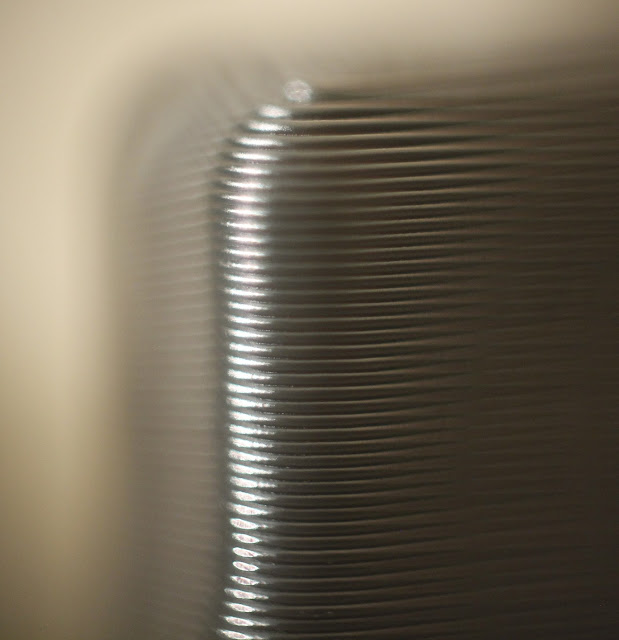
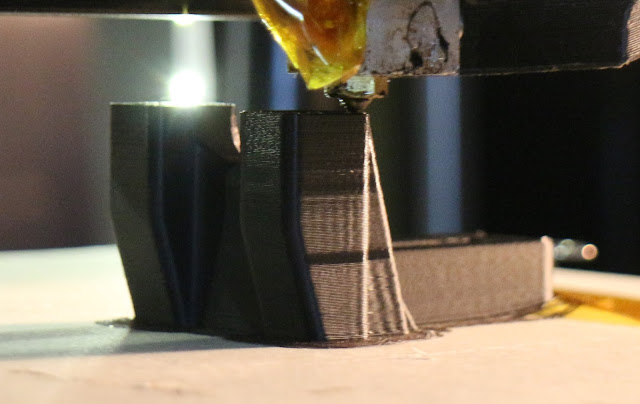
Cheers, now the older parts are looking tatty, with this kind of quality it does tempt me to try some better filament,
but was more than happy with the excelvan helps a lot if part aint warping, decided on .24 for these layers,
just realized the carriage is fine/useful still if I use the axis rotated 90 deg, just need a cool fan mount,
holes at top or bottom for extra's or to allow hotend to be attached to the flat surface.
but was more than happy with the excelvan
helps a lot if part aint warping, decided on .24 for these layers, just realized the carriage is fine/useful still if I use the axis rotated 90 deg, just need a cool fan mount,
holes at top or bottom for extra's or to allow hotend to be attached to the flat surface.
|
Re: Turn you 3D Printer into a Rail Gun March 05, 2017 01:39PM |
Registered: 8 years ago Posts: 1,671 |

|
Re: Turn you 3D Printer into a Rail Gun March 06, 2017 10:55PM |
Registered: 8 years ago Posts: 1,671 |
F is also for Fail or halF a Face Palm


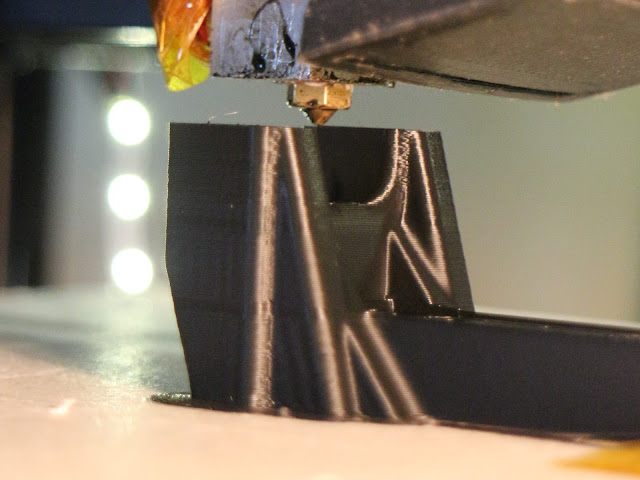
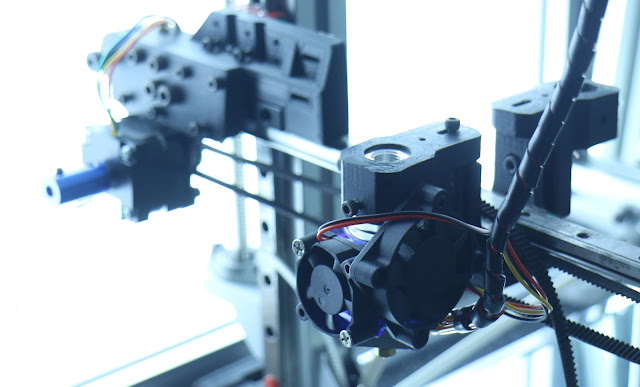
After printing 2 new parts to make things work, another idea pops into head, after tons of iterations trying to solve one arrangement, I put it together as in the pics but even though I knew the one belt crossed the other thought they would be ok as on different levels, forgot I was pulling one higher, so carriage runs into it, only a minor issue that could be sorted, but it gave me the idea to flip the rail...to solve that issue, but in order to do so, I would need to flip the Z bearings/barwhich holds motor...then I thought why not ditch all of that, mount the Z bearings on the 3030...do away with a load of parts, re-arange so it all works from the 3030, much better. The main worry was keeping the rail joint stiff...and i'm happy its stiff enough. So i get an F for Foresight but a T for the main XY axis.


After printing 2 new parts to make things work, another idea pops into head, after tons of iterations trying to solve one arrangement, I put it together as in the pics but even though I knew the one belt crossed the other thought they would be ok as on different levels, forgot I was pulling one higher, so carriage runs into it, only a minor issue that could be sorted, but it gave me the idea to flip the rail...to solve that issue, but in order to do so, I would need to flip the Z bearings/barwhich holds motor...then I thought why not ditch all of that, mount the Z bearings on the 3030...do away with a load of parts, re-arange so it all works from the 3030, much better. The main worry was keeping the rail joint stiff...and i'm happy its stiff enough. So i get an F for Foresight but a T for the main XY axis.
|
Re: Turn you 3D Printer into a Rail Gun March 06, 2017 10:57PM |
Registered: 11 years ago Posts: 5,780 |
|
Re: Turn you 3D Printer into a Rail Gun March 07, 2017 03:24PM |
Registered: 8 years ago Posts: 1,671 |
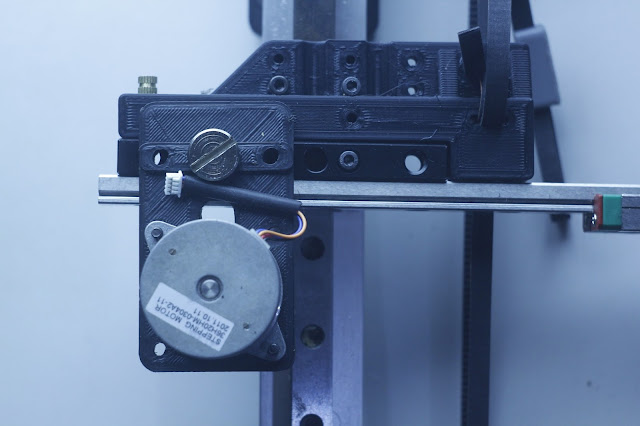
Cheers, the motor mount was an old print for 3030 I was trying to implement the other motor there, for rack n pinion type movement with a piece of belt, would make things simpler, but I veered of in other direction, do you know of any other printer that does all axis at once...i'm sure there must be some out there but dont remember seeing any.
Edited 3 time(s). Last edit at 03/07/2017 06:14PM by MechaBits.
Edited 3 time(s). Last edit at 03/07/2017 06:14PM by MechaBits.
|
Re: Turn you 3D Printer into a Rail Gun March 07, 2017 10:14PM |
Registered: 8 years ago Posts: 1,671 |
I though I was going to run this thing like a linear turntable, flat xy so the belt was ok, but I think i've decided to run this 3030 vertical, attach the 12mm bearing blocks(loose most of the other black parts I could have kept them and dangled this from top of cube but decided just 2 blocks either end would be even better. A quick re-jig and it's almost done. Would be nice to do some custom Z mot mounts for the 3030 to bring things inline but being low on plastic i'm saving it for something I really need.
ie parts for the X carriage and perhaps new mot mount & end bearing holder.

Shaved off at least a kilo from previous arrangement(maybe 2), free'd up lots of parts, don't have to move the bed, more free parts, remains Cartesian keeping things simple for me, slides & sounds like swish swoosh, so maybe it wont handle the speeds of core XY but looks like I can enclose it quite easy, if the single X rail gives issue I could double it up, back to back. would be good if i could get all the motion outside at the back because then I can use 3/350mm square, as it is might need 200 x 300.
Decided to try to move leadscrew to side or even back, lots of parts from Kraftwerk'r to help out. Wondering about the small motors I have if they will cut it, a nema35 for the X and a small pancake for the Z, would help.
Edited 4 time(s). Last edit at 03/08/2017 07:21PM by MechaBits.
|
Re: Turn you 3D Printer into a Rail Gun March 10, 2017 03:21AM |
Registered: 8 years ago Posts: 1,671 |

A little Remix, do you really gain on the swings if you loose on the roundabout?
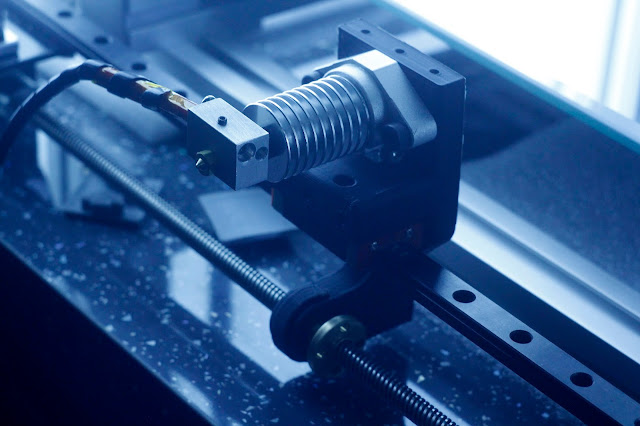
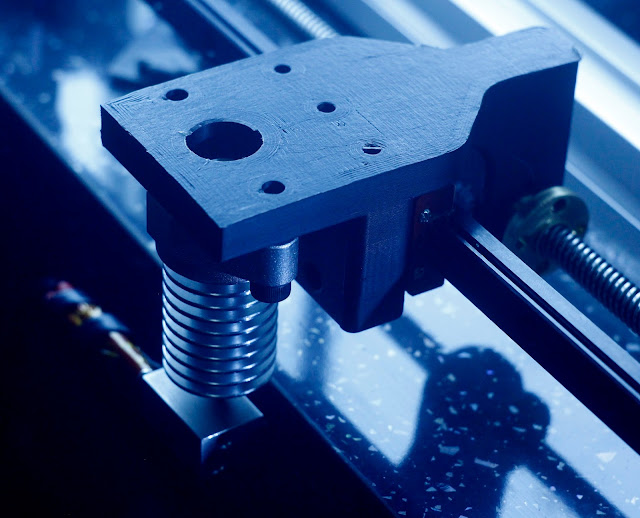
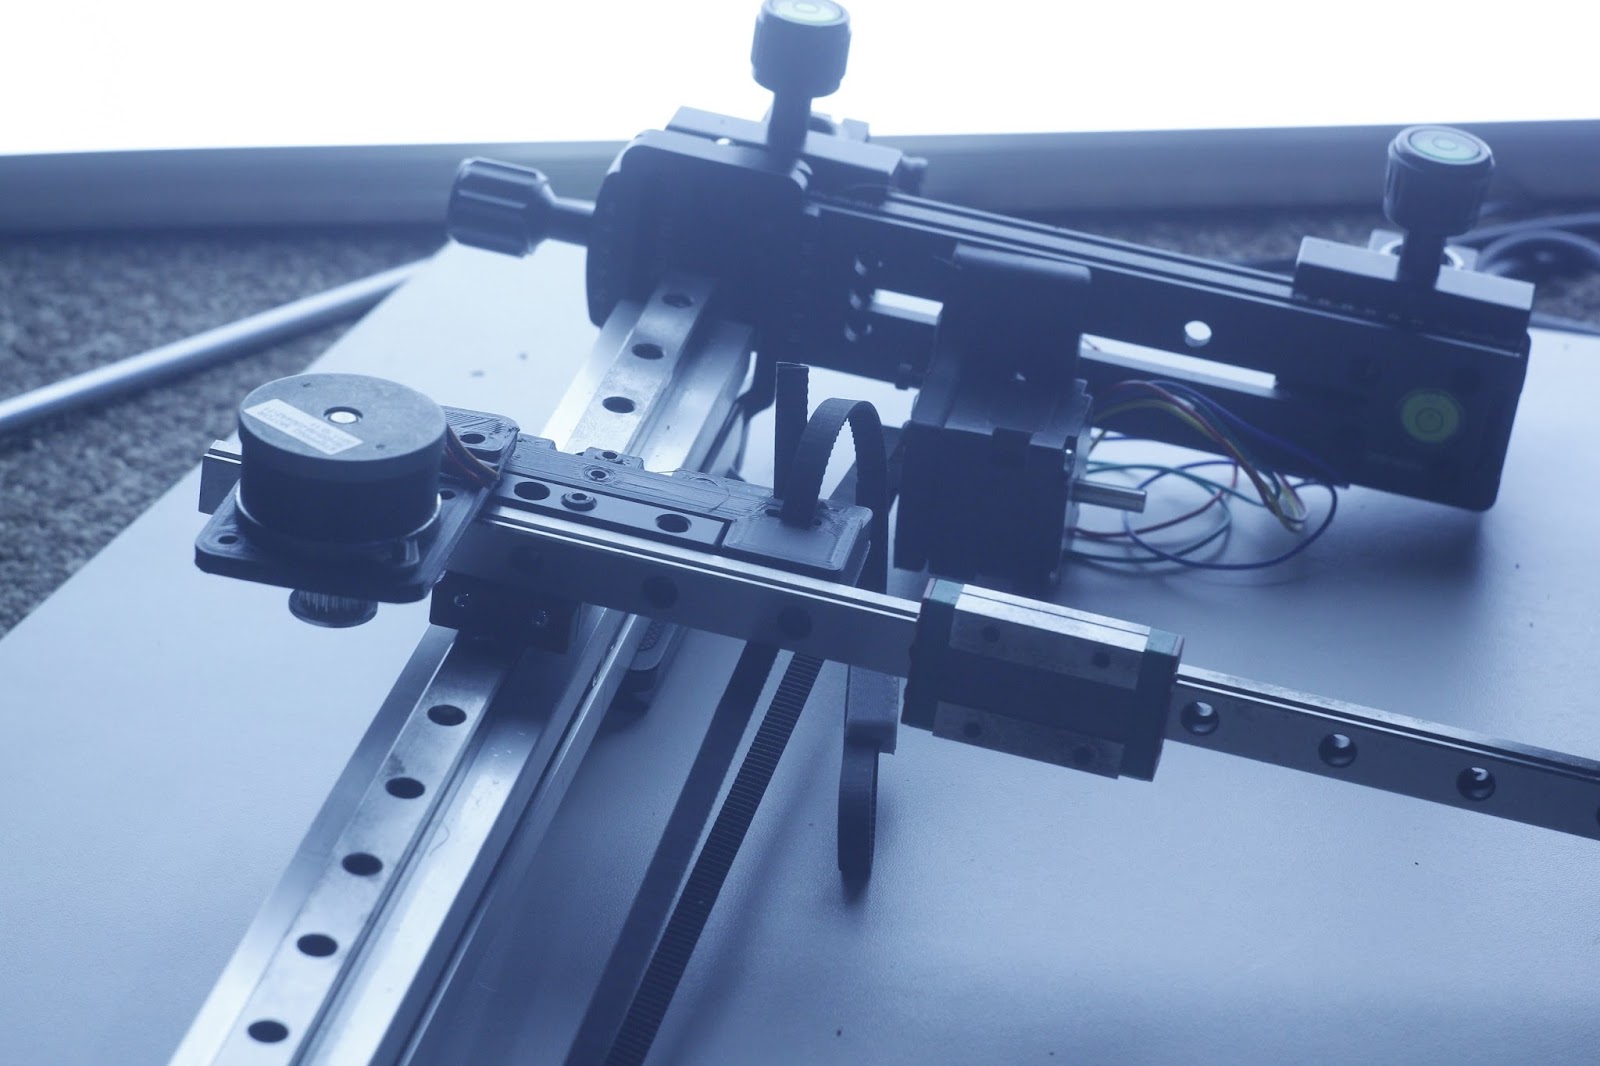
When putting the cube together I had many ideas/arrangements for the gantry motion, a previous config would have been fine if i'd put the cube on its other side, to be similar to this setup but i'm currently using plastic bearing holders/link previously all metal, so thinking of doing that again but with 12mm long block bearings which are showing up on ebay now, should be better than what i have now.
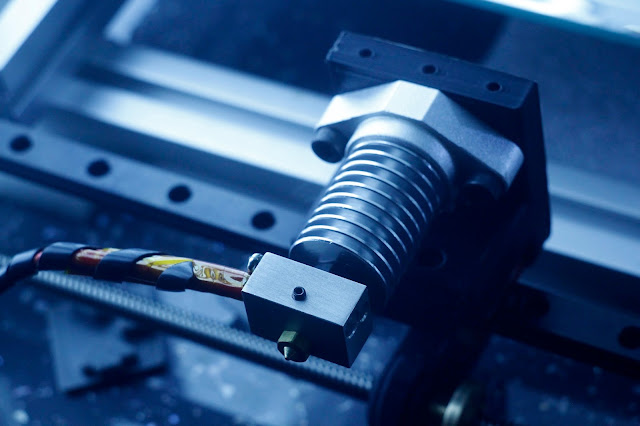
Put the Z screw on back, with lighter motor...might put the nema35 there, I had this short finer leadscrew came in handy would like to try it out. Ready to print an end for X, but not until finalizing a design for motor mount/carriage Z actuator, trying for an all in one piece, but sometimes things need to be seperate...bolting the seperate pieces helps visualize what I really want...
I've run a shaft off the dual shaft nema ready for extra belt if needed...I dont think it does....doesnt seems to act like a pendulum, but just in case, I have the option...I am tempted to run the belt half way up Z as that could also help, but currently there is more weight near top so i figured put the belt where the mass is...and it's the white gt2 which seems a lot stiffer than the black stuff.
I also rearranged the 3030 & bottom rail, thinking it make it a little neater, stiffer?, and allows me to adjust Z tilt, and add the end bearing for shaft easier, will be using metal mounts. Might move belts n motors to back, would be good to have the whole assembly on removable side. Not sure I'm happy with the loss of height, toying with the idea of having both...so I could change over, with a locator pin either end. Also toying with duplicating Z on the free end of X, for a stronger gantry cube...
So i'm loosing core speed, and perhaps a litte(probably a lot) stiffness on the x, my motors might need water cooling, or flexi cable driven drives? If I ever get to the point of multiple extruders, I'll need to add the corners i've cut.
Edited 12 time(s). Last edit at 03/11/2017 09:50PM by MechaBits.
|
Re: Turn you 3D Printer into a Rail Gun March 11, 2017 09:59PM |
Registered: 8 years ago Posts: 1,671 |


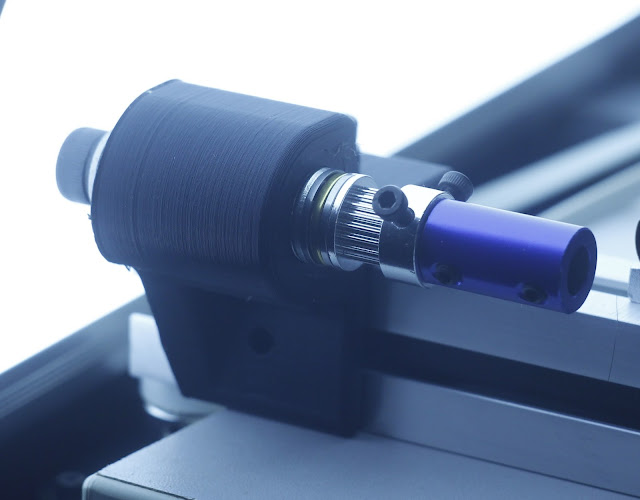
Decided to bolt on to already printed parts, new part 26g, the dual shaft nema will be good to attach flexi cable if needed(one day)
Might run second belt lower under frame, just need a proper carriage and the X end doing in black, better design.
Edited 3 time(s). Last edit at 03/12/2017 10:12AM by MechaBits.
|
Re: Turn you 3D Printer into a Rail Gun March 11, 2017 10:07PM |
Registered: 8 years ago Posts: 1,671 |
Can't wait for the next part to come off the production line, I've replaced the cheap 5mm bearing idler on my printing printer, for the stronger double bearing one I had( lets see if it reduces the ringing on x),

and for the new X idler I'm testing on 0.2 layers, it's looking good so far,

...spoke too soon, something strange....think it was browsing web while trying to print, X shifted, warning on screen x endstop hit(even though there are no endstops wired up)...screen goes white....unplug, still white, plug in again back to normal....2hrs into 3hour print...bummer.
things where looking so good.
Edited 8 time(s). Last edit at 03/13/2017 08:43AM by MechaBits.
|
Re: Turn you 3D Printer into a Rail Gun March 12, 2017 08:24AM |
Registered: 8 years ago Posts: 1,671 |
Another fail
 This time I think I triggered a Thermal Runaway...fire in the barrel of the gun and the increasing smell of PLA, printer stopped after most of print maybe 90%, heater didnt stop....
higher n higher it went....kill the power and then there's no fans to cool it...turn power back on and it carries on climbing...no doubt its totally buggered now, lucky I have some spare throats etc, but if I have to redo thermistor(even though it seems to be reading room temp now, it went over 270 in the meltdown) & cartridge its a ball ache.
So perhaps now is a good time to do something else for a while.
Though even now thinking about another version, if I use the 2m corner profiles instead of the 400mm, i'll rescue 4 of the short pieces,
would be interesting to put a 1m linear rail in there for Z attached to the 400m 3030 or a new longer piece, but would need a belt arrangement for Z with motor mounted on same piece...but then again how many times would I need such a beast, and can I afford to feed it...Looks like the Infinity Cube Printer will suck Time & Matter, Light, Space & Cash into a Infinite Loop Black Hole.
Edited 5 time(s). Last edit at 03/13/2017 08:40AM by MechaBits.
|
Re: Turn you 3D Printer into a Rail Gun March 13, 2017 05:27AM |
Registered: 8 years ago Posts: 1,671 |


|
Re: Turn you 3D Printer into a Rail Gun March 13, 2017 03:25PM |
Registered: 10 years ago Posts: 770 |
|
Re: Turn you 3D Printer into a Rail Gun March 14, 2017 01:58AM |
Registered: 8 years ago Posts: 1,671 |
I can still see some ringing, I've reduced it a bit but more is possible, especially when slower, wish I had the deceleration into/out of curves, but dont think its a part of MatterControl, maybe a little but more of a fiddle with Accel/Jerk could help. On the cube I wondering about adding second drive/sync shaft at other end, as I have the self aligning bearings for 8mm and they will bolt on to 3030 easy, probably better than the arrangement I am using.

Edited 1 time(s). Last edit at 03/14/2017 02:39AM by MechaBits.

Edited 1 time(s). Last edit at 03/14/2017 02:39AM by MechaBits.
|
Re: Turn you 3D Printer into a Rail Gun March 14, 2017 04:00PM |
Registered: 10 years ago Posts: 770 |
|
Re: Turn you 3D Printer into a Rail Gun March 17, 2017 12:27PM |
Registered: 8 years ago Posts: 1,671 |
Well if I could do half as well in sales of i3 then maybe i'd be onto something.
When I set out on this project I hoped it could be as good as an ultimaker but for less cash & less parts.
Just printed the last parts, kinda wishing the rail was rotated 90 deg, with 2 hotends on same side & closer but whats done is what needed to be done at the time.

Edited 2 time(s). Last edit at 03/19/2017 04:02AM by MechaBits.
When I set out on this project I hoped it could be as good as an ultimaker but for less cash & less parts.
Just printed the last parts, kinda wishing the rail was rotated 90 deg, with 2 hotends on same side & closer but whats done is what needed to be done at the time.


Edited 2 time(s). Last edit at 03/19/2017 04:02AM by MechaBits.
|
Re: Turn you 3D Printer into a Rail Gun March 18, 2017 06:45PM |
Registered: 8 years ago Posts: 1,671 |


I had to tidy up the Mechabits all over the floor, orphaned parts,
and others parts clumping together to form new modules...
I have 3x470mm black rails still to use, 2 as other X axis and one with the integrated Z bearings
, which will be another printer based on the rail gun idea from B4,
I had a few 8mm rods and the 2x3030 which instead of being the cantilevered support,
can now be used in another way, the bed above, It seems quite sturdy, portable, if I can get a 300x200 bed on there, id be happy with that size, might stretch to 300x300, so If I can get one ore printer out of these parts, I'm hoping for one that can do larger parts but with say only 200mm height, but using the 400mm rails, might be able to push that to 300mm high.
a lot less intricate than the threaded rod type setups.
might use it instead of the current one on 12mm rods.
Ordered a few more parts, needed 2x 12mm x 400mm for the Z of the Rail Gun,
but can also be used on the inside flank of the cube.
Edited 2 time(s). Last edit at 03/19/2017 03:58AM by MechaBits.
|
Re: Turn you 3D Printer into a Rail Gun March 28, 2017 09:22PM |
Registered: 8 years ago Posts: 1,671 |


Another Gun for Run n Gun, makes a change for printing printer parts,
A piece to hold the Anamorphic inplace, and another piece a cam adapter plate, so I can use a normal camera on a Mamiya Angle grip, built like a tank, but wasnt long before I printed another part for printer bed drive, looking forward to receiving my vslot bed support any day now even though its only 3mm alu, it's going to make the bed look really neat.
A Motor Bracket to hold motor 24mm above the 3030...I whittled down a number of designs for 2 different orientations, Ideally I think I want it so shaft is horizontal not vert' but if I want to use metal motor mount and metal idler it has to be this orientation unless I use additional parts, anyway I was a little skeptical as to how this part would hold up due to the weak Z...and pretty quick I realized I wasnt going to get away with it, failing to leave a fraction of clearance for motor, I split it just putting the motor in place...so I had already design a replacement piece that will just act s a brace for the metal motor mount, printed in the stronger orientation.
I think i'm going with this one, 3030mount.pdfor something just to bolt metal mount to


Edited 5 time(s). Last edit at 03/29/2017 04:59AM by MechaBits.
|
Re: Turn you 3D Printer into a Rail Gun March 29, 2017 08:35PM |
Registered: 8 years ago Posts: 1,671 |
Not much Black left now, Final parts for new bed done, Recieved a noname brand of Grey, will try as soon as blacks done, even though I would like another set of these parts in grey to go with the 3030...next time as I have 2 beds to do.

Edited 1 time(s). Last edit at 03/29/2017 08:36PM by MechaBits.


Edited 1 time(s). Last edit at 03/29/2017 08:36PM by MechaBits.
|
Re: Turn you 3D Printer into a Rail Gun March 30, 2017 05:20PM |
Registered: 8 years ago Posts: 1,671 |

|
Re: Turn you 3D Printer into a Rail Gun April 12, 2017 12:10PM |
Registered: 8 years ago Posts: 1,671 |

now the problem is do I keep the old one that has performed ok, or scavenge it for MechaBits to help out in other areas of the build.


The Old bed had 300mm rails, the new rods are 400mm and ideally would replace the 500mm ones on the cube as they are too long, then I could use the 500's on the new bed, but dont have a 300x200 or 300x300 support plate, so that idea will have to wait. While waiting for the rods I decided to fix the linear rail to the bed plate, that is the low profile bed arrangement I really want, but it presents other problems, I cant then use the 3030 the same way I have now, and the motor & idler need a way to be mounted, so I would probably mount it on one longer piece of extrusion.
Then I have these other bits still lying around, the leadscrew X axis, with bearings either end or cantilevered...though I know the bearings are too short for that to work, but as a normal dual z arm it could work ok, I also got some onger housed 12mm bearings, solid replacing the plastic on the cube., but am also tempted to use on the bed, as it would lower the build height.
I'm mulling over mounting other printers to the cube to make a crazy 4in1 machine, but the leadscrew arm is too big for the cube, would be good to have it on one side of the cube, another printer on the top, etc
Edited 1 time(s). Last edit at 04/12/2017 09:26PM by MechaBits.

Sorry, only registered users may post in this forum.