RadRacer builds a "BerryBot3D"
Posted by Rad Racer
|
Re: RadRacer builds a "BerryBot3D" January 01, 2014 11:49AM |
Registered: 10 years ago Posts: 51 |
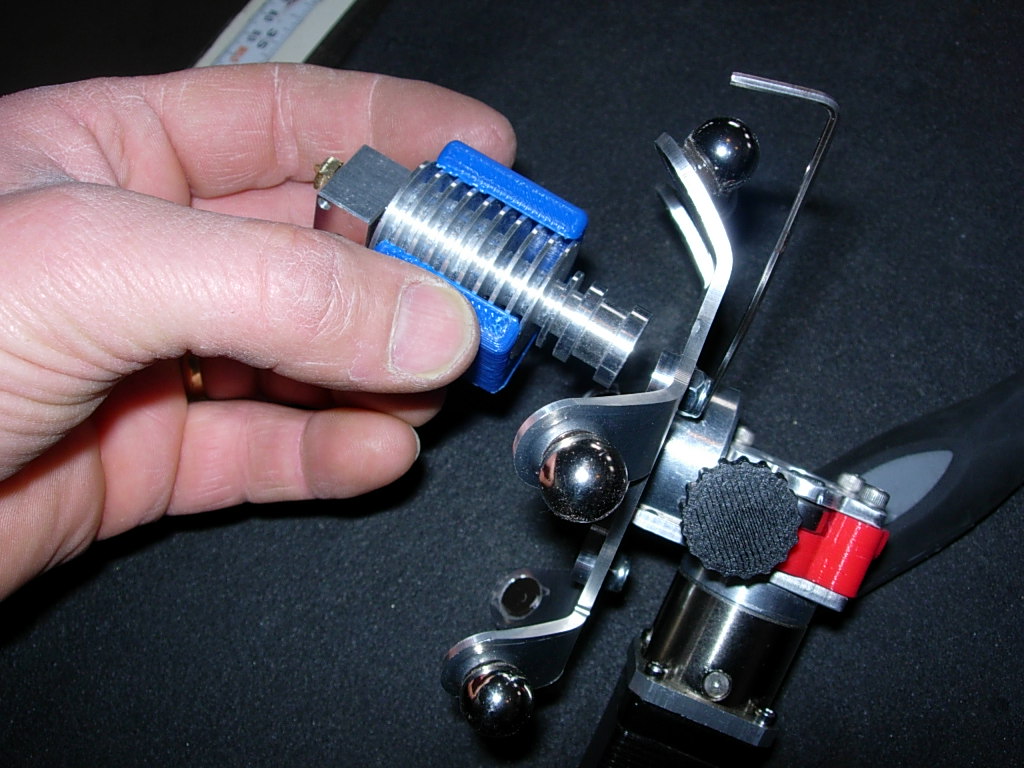
Hotend is complete.
This is a E3D hotend and a filament driver from Warner Berry.
This is a E3D hotend and a filament driver from Warner Berry.
|
Re: RadRacer builds a "BerryBot3D" January 01, 2014 12:00PM |
Registered: 10 years ago Posts: 51 |
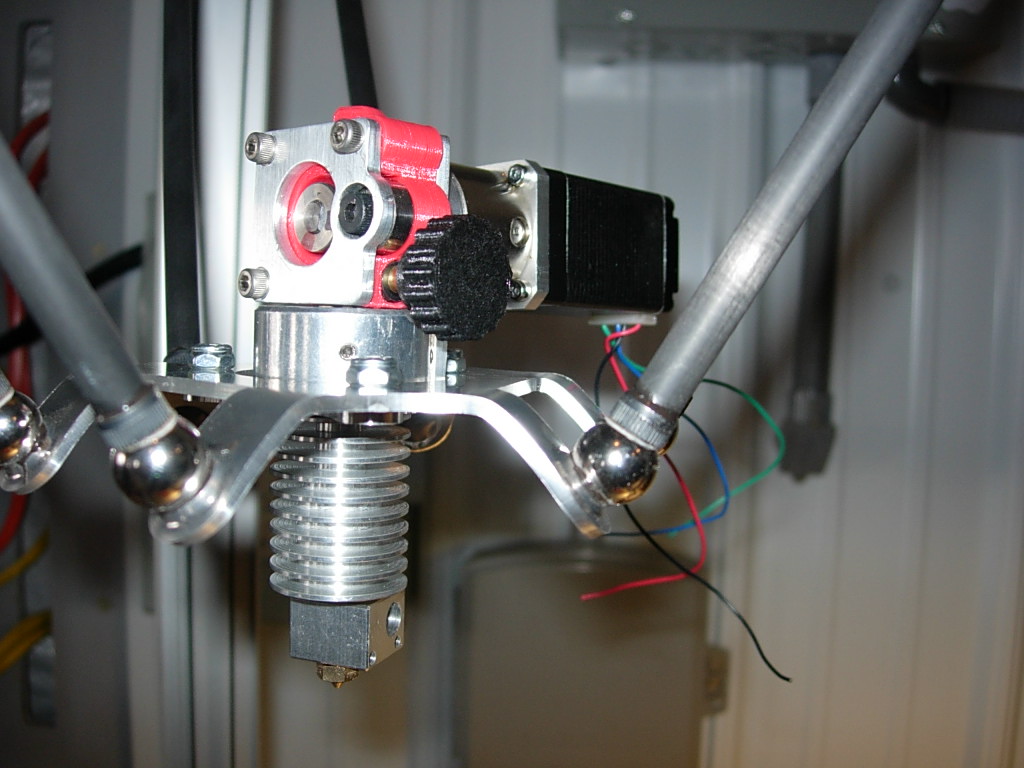
Here's a few more pictures....just hours from the first tests 
The home switches are Omron optical sensors they are mounted to an adjustable mount. I have used these before....the repetability is fantastic.
Edited 1 time(s). Last edit at 01/01/2014 07:48PM by Rad Racer.
The home switches are Omron optical sensors they are mounted to an adjustable mount. I have used these before....the repetability is fantastic.
Edited 1 time(s). Last edit at 01/01/2014 07:48PM by Rad Racer.
|
Re: RadRacer builds a "BerryBot3D" January 01, 2014 01:31PM |
Registered: 10 years ago Posts: 106 |
|
Re: RadRacer builds a "BerryBot3D" January 01, 2014 03:35PM |
Registered: 10 years ago Posts: 51 |
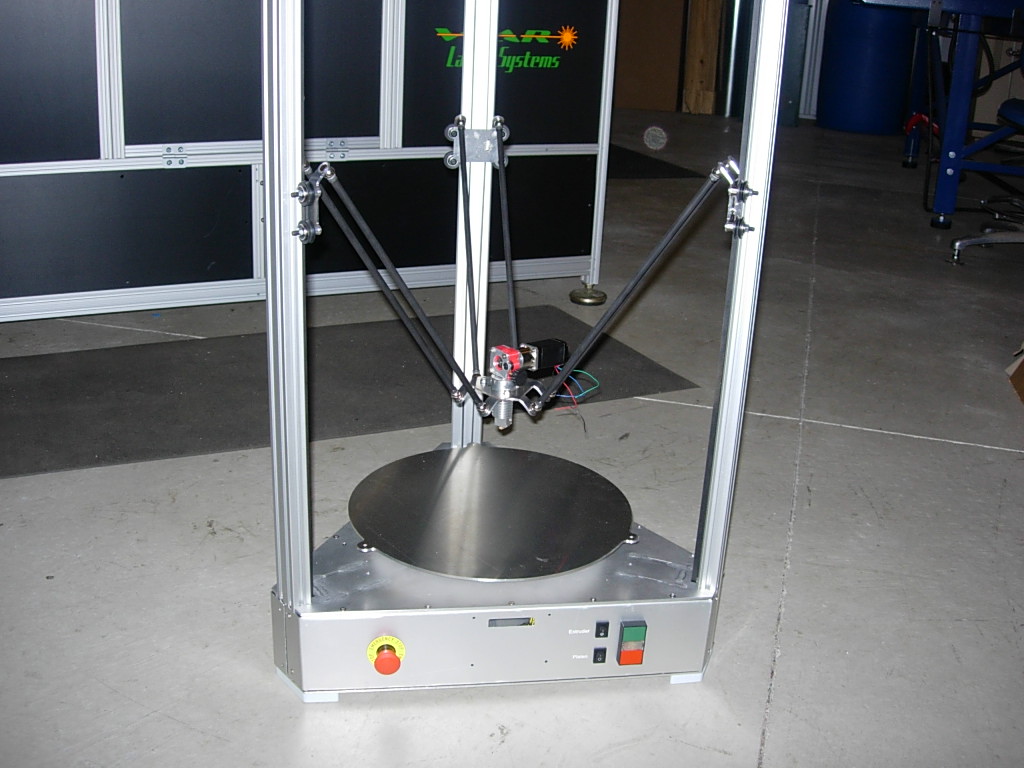
I will draw something up and post it in the next couple of days.....right now I want to focus on printing. The hot bed is complete just need to add a couple of wires for hot end then I can take her for a test drive 
|
Re: RadRacer builds a "BerryBot3D" January 02, 2014 02:05AM |
Registered: 11 years ago Posts: 12 |
|
Re: RadRacer builds a "BerryBot3D" January 04, 2014 02:14AM |
Registered: 11 years ago Posts: 739 |
|
Re: RadRacer builds a "BerryBot3D" January 04, 2014 12:26PM |
Registered: 11 years ago Posts: 246 |
|
Re: RadRacer builds a "BerryBot3D" January 05, 2014 09:08PM |
Registered: 10 years ago Posts: 51 |
|
Re: RadRacer builds a "BerryBot3D" January 05, 2014 09:44PM |
Registered: 11 years ago Posts: 246 |
Quote
Rad Racer
Sorry guys....I don't have the STL files, Warner sent me the direct drive assembly for my machine.
The stepper can be purchased at www.stepperonline.com.
Thanks a lot for the link
 BTW, do you use the 27:1 geared Nema11 stepper?
Do you know if Werner posts his STLs anywhere that is accessible (Thingiverse?). In one of his videos he designed an interesting printed worm gear extruder. I would love to print one of those to test it out!
Eric
|
Re: RadRacer builds a "BerryBot3D" January 06, 2014 12:33AM |
Registered: 10 years ago Posts: 51 |
I use the 5:1 stepper. 480 E-Steps for this motor and hob setup (200 * 5 * 16 / 3.1416 / 10.6mm)
I am not sure if or where the STL's maybe posted.....I will ask him.
I finally squirted some plastic this weekend, the first couple of prints were rough but look pretty good now. I will post a couple of pictures tomorrow.
Wayne
I am not sure if or where the STL's maybe posted.....I will ask him.
I finally squirted some plastic this weekend, the first couple of prints were rough but look pretty good now. I will post a couple of pictures tomorrow.
Wayne
|
Re: RadRacer builds a "BerryBot3D" January 06, 2014 02:48AM |
Registered: 11 years ago Posts: 739 |
then you've got all the parts from Warner
Also the metal parts of the slides and effector
or you built
I have built a similar system
this
Edited 3 time(s). Last edit at 01/06/2014 02:53AM by maralb.
Also the metal parts of the slides and effector
or you built
I have built a similar system
this


Edited 3 time(s). Last edit at 01/06/2014 02:53AM by maralb.
|
Re: RadRacer builds a "BerryBot3D" January 06, 2014 08:07AM |
Registered: 10 years ago Posts: 51 |
|
Re: RadRacer builds a "BerryBot3D" January 11, 2014 06:10PM |
Registered: 10 years ago Posts: 27 |
|
Re: RadRacer builds a "BerryBot3D" January 12, 2014 02:56PM |
Registered: 10 years ago Posts: 51 |
|
Re: RadRacer builds a "BerryBot3D" January 13, 2014 05:02AM |
Registered: 10 years ago Posts: 27 |
|
Re: RadRacer builds a "BerryBot3D" January 25, 2014 07:01PM |
Registered: 10 years ago Posts: 51 |
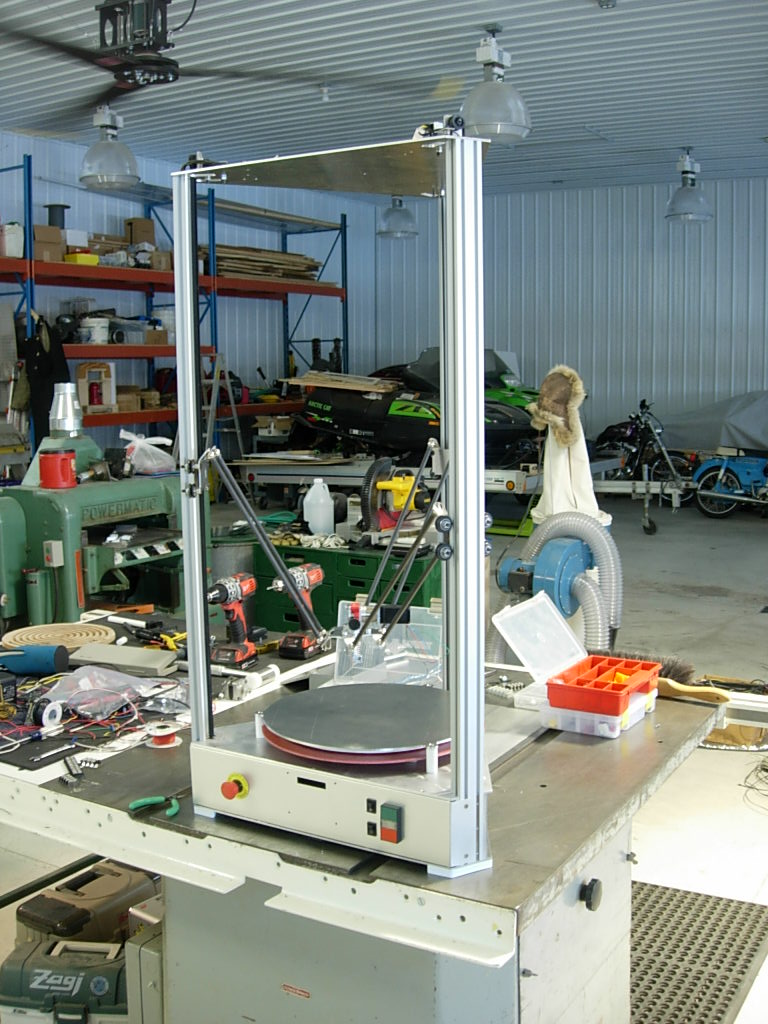
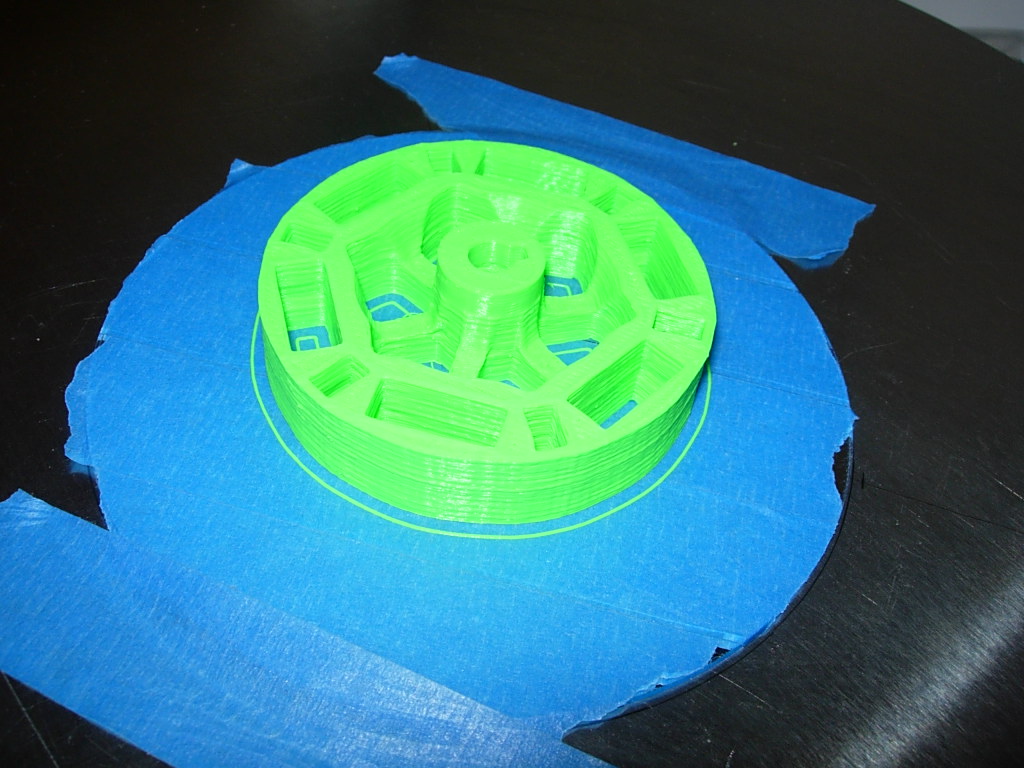
My machine is calibrated and running, here is a flywheel printed from PLA.....at 150mm/s it took ~1.5hrs.
I took some practice parts to get the temps right for high speed printing. To print this part at speed I needed to run the extruder at 240c after the first layer
I took some practice parts to get the temps right for high speed printing. To print this part at speed I needed to run the extruder at 240c after the first layer
|
Re: The "BerryBot3D" is up and running. January 26, 2014 04:43PM |
Registered: 10 years ago Posts: 51 |
|
Re: RadRacer builds a "BerryBot3D" January 26, 2014 04:59PM |
Registered: 10 years ago Posts: 51 |
Thought I would share this, it's the insulator blanket for my E3D hotend.
Insulating around the heater and thermistor wires is a PIA, they make it tough to get a good fit......after after a few failed attempts I finally found a good way to insulate the head and not have it sag or come loose. I used 1" insulating material covered it with 1" Kapton tape and cut holes in the insulation / tape sandwich. I used a laser to cut the holes but I am sure the same thing could be done with a paper punch.
Enjoy,
Wayne
|
Re: RadRacer builds a "BerryBot3D" January 29, 2014 08:03AM |
Registered: 10 years ago Posts: 1,381 |
|
Re: RadRacer builds a "BerryBot3D" February 10, 2014 08:52PM |
Registered: 10 years ago Posts: 38 |
Awesome job on replicating the BerryBot. Your machine looks sweet.
Just out of curiosity, is it possible to upgrade this current design to utilize the E3D Kraken 4-nozzle hotend?
Also, if one was to scale up the BerryBot design to have a build envelop of 18"x24" (DXH) what would need to change besides the print surface and longer pillars? Lastly, is there a difference between using T-Slot versus V-Slot extrusions for the pillars?
Please keep us posted with more pictures!
|
Re: RadRacer builds a "BerryBot3D" February 17, 2014 01:07PM |
Registered: 10 years ago Posts: 51 |
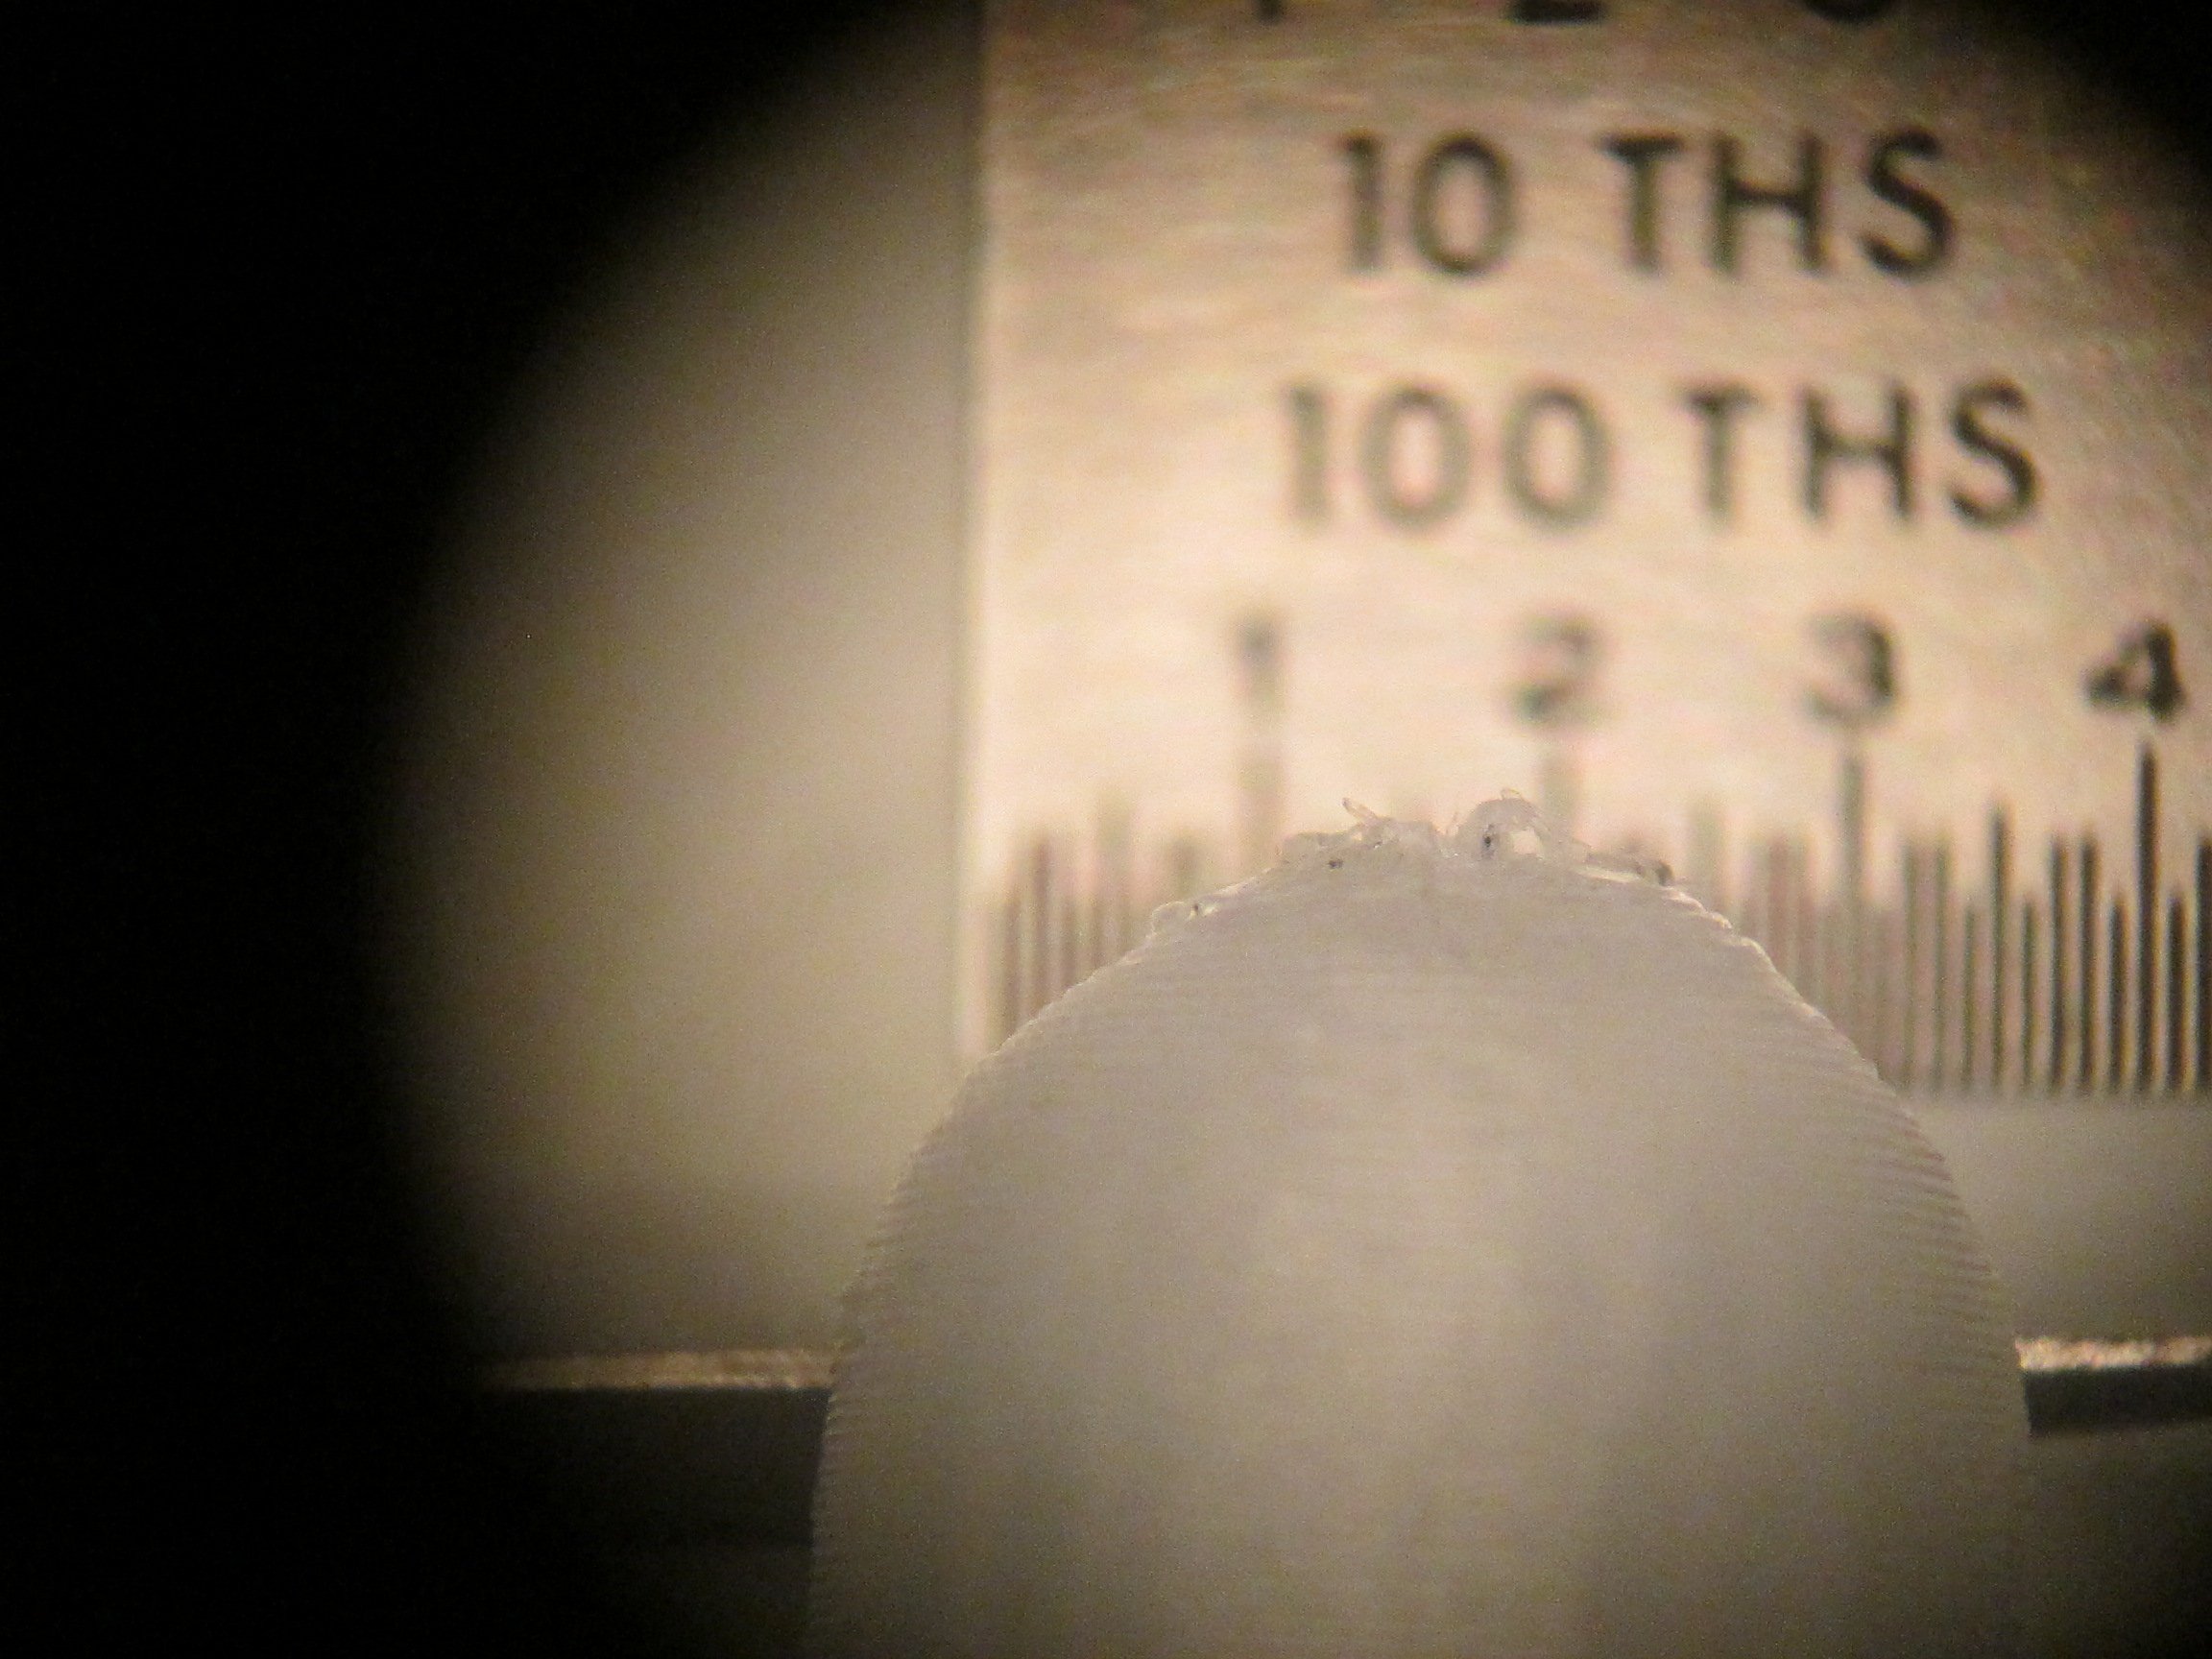
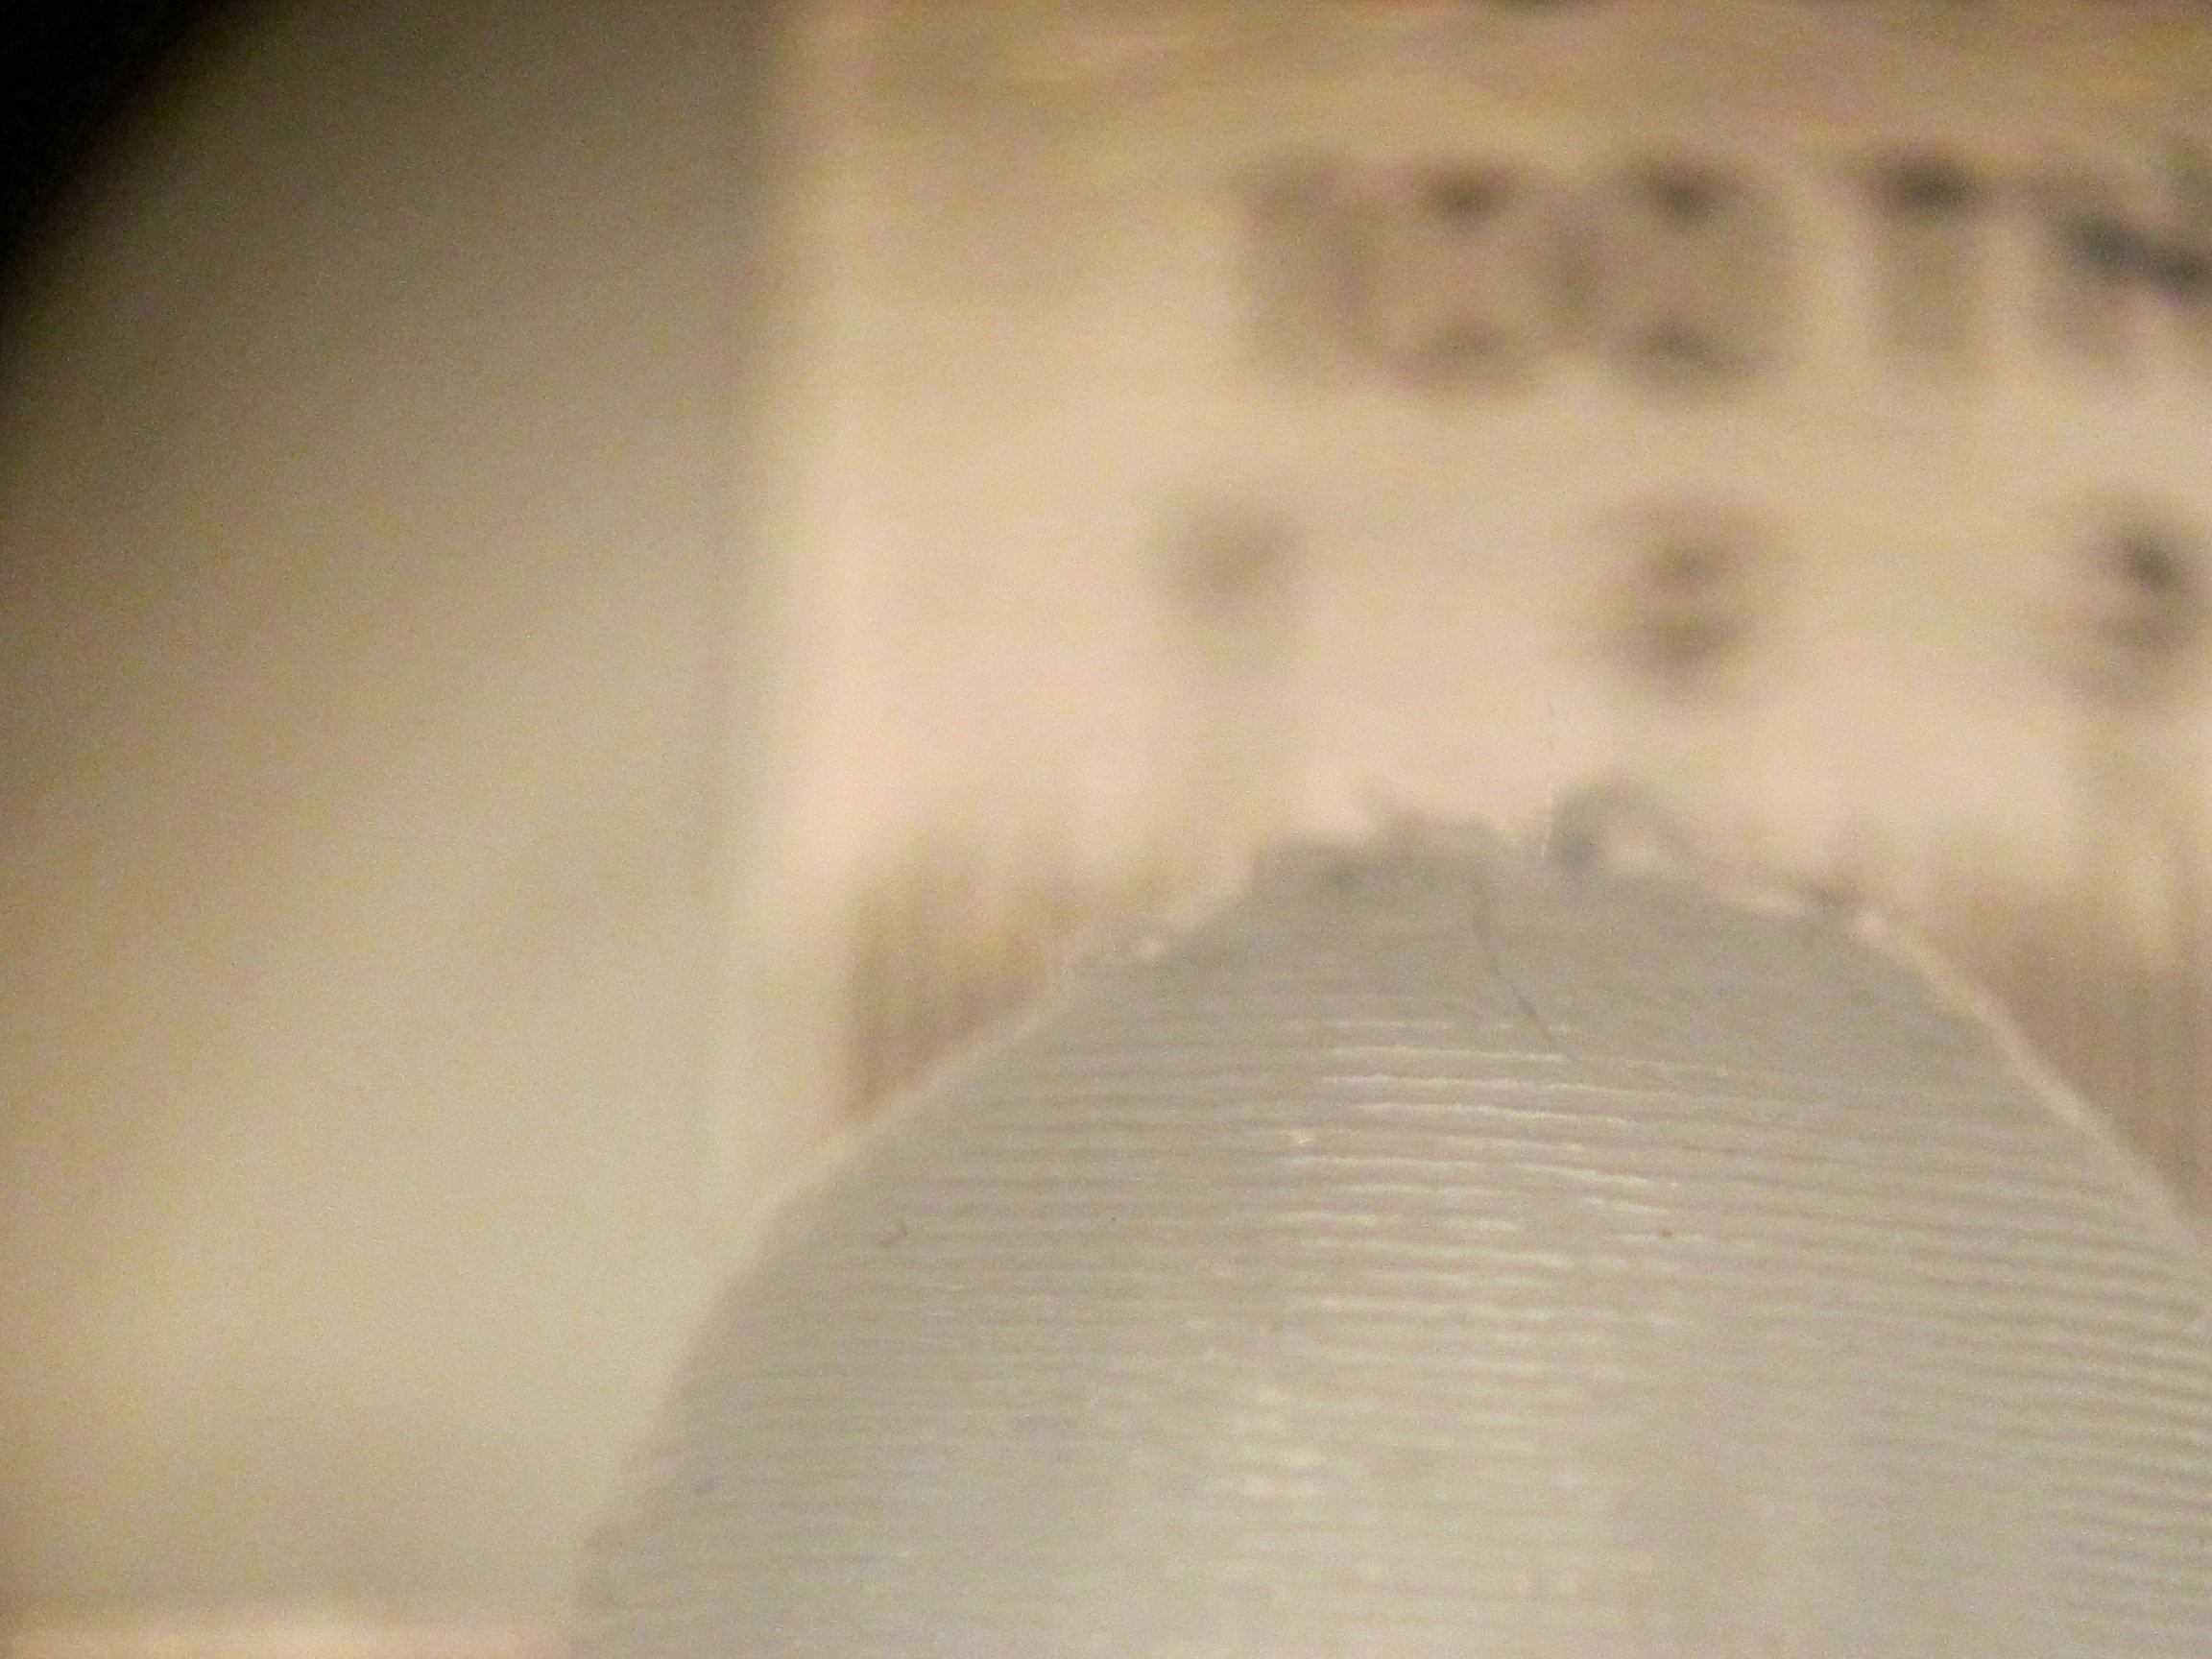
Here are a few photo's showing surface detail for the "Surface Finish Calibration" shape that was downloaded from [www.thingiverse.com]. These photos were taken under a microscope @ 12X mag. Although not that clear.....the ruler was meant to provide some scale for the features.
I am really impressed with the printer it is very accurate and fast. This item was printed in ABS at 125mm/s with a .4 tip and .15 layer height.
I am really impressed with the printer it is very accurate and fast. This item was printed in ABS at 125mm/s with a .4 tip and .15 layer height.
|
Re: RadRacer builds a "BerryBot3D" February 17, 2014 01:27PM |
Registered: 10 years ago Posts: 51 |
NKOTB,
Thanks, glad you like the machine.
The delta (robot) design can certainly be scaled up... there are many instances of these machines being used in industrial applications (see attached) This particular design would probably require a little mechanical analysis to determine how the added weight effects the overall performance. A power train upgrade would also be recommended Nema 17 > Nema 23 motors.
|
Re: RadRacer builds a "BerryBot3D" February 19, 2014 02:54PM |
Registered: 10 years ago Posts: 38 |
RadRacer: Are you saying that NEMA17's are better than NEMA23's? I thought NEMA23's are more powerful, no? Also, what profile of aluminum extrusions do you have on your BerryBot for the main pillars 20x40 or 40x80? What would you suggest for pillar extrusion thickness if I am planning on building a similar machine but with a build envelop of 20"x24"? I am thinking of going with CF rods as it seems to be the best choice for strength and light-weight to minimize the moving mass. Do you have any other suggestions I should consider for materials for the rods connecting to the end effector? NEMA23's should be powerful enough for the control-arms/end effector, right?
I'm thinking of applying a bowden style setup with my machine to further improve the moving mass of the end effector. Do you think it would make more sense to design an end effector that is able to hold multiple single hotends or to design the end effector to hold the Kraken 4-nozzle hotend? NEMA17's should be powerful enough for the filament-extruders, right?
Thanks in advance for all your input. Really excited to be building my own Delta printer, and look forward to seeing more of what your machine can do!
|
Re: RadRacer builds a "BerryBot3D" February 19, 2014 07:00PM |
Registered: 11 years ago Posts: 205 |
|
Re: RadRacer builds a "BerryBot3D" February 20, 2014 01:14AM |
Registered: 10 years ago Posts: 38 |
Quote
garyhlucas
New,
If you 3D model a Berrybot for a build size like you said you will find out that you can't enclose the triangle without losing a huge amount of your built area. So to get the size you want with 3 towers and enclosed it won't fit through a standard 36" door opening! Just a thought.
Garyhlucas: The standard door width where I'm from is only around 27" (including the actual door still in the frame). That's besides the point. What I'm interested in knowing is how you came to the calculation that the triangle would be bigger than 36"? The bottom base would be more of a hexagon in shape than an actual triangle, wouldn't it? What's the biggest build envelop I would be able to have if I aim to have the entire machine able to go through a standard 27" wide door frame? Mind helping me out with the math here, pleasse.
Edited 1 time(s). Last edit at 02/20/2014 01:17AM by NewKidOnTheBlock.
|
Re: Re: RadRacer builds a "BerryBot3D" February 21, 2014 01:19PM |
Registered: 11 years ago Posts: 205 |
New,
You want a big build envelope for big parts. So it is likely you'll need an enclosure to control temperature. So you will find that you either need to put the three columns very far apart or make your enclosure a hexagon. My calculation comes from the 3d model I've done in Solid Works for the printer I am building. This one is for a friend and if it comes out well I hope to sell just the machined parts with my grandson so others could build them this way. There is no welding, and using T-slot extrusions it can be scaled up or down.
You want a big build envelope for big parts. So it is likely you'll need an enclosure to control temperature. So you will find that you either need to put the three columns very far apart or make your enclosure a hexagon. My calculation comes from the 3d model I've done in Solid Works for the printer I am building. This one is for a friend and if it comes out well I hope to sell just the machined parts with my grandson so others could build them this way. There is no welding, and using T-slot extrusions it can be scaled up or down.
|
Re: Re: RadRacer builds a "BerryBot3D" February 21, 2014 05:04PM |
Registered: 10 years ago Posts: 38 |
Quote
garyhlucas
New,
You want a big build envelope for big parts. So it is likely you'll need an enclosure to control temperature. So you will find that you either need to put the three columns very far apart or make your enclosure a hexagon. My calculation comes from the 3d model I've done in Solid Works for the printer I am building. This one is for a friend and if it comes out well I hope to sell just the machined parts with my grandson so others could build them this way. There is no welding, and using T-slot extrusions it can be scaled up or down.
I found this picture and thought the design would work. I plan on lining the inside of the machine with heat reflective tape to contain as much heat inside as possible along with a glass door on the front. I am also planning on making a platen following in Berry's design so that should warm the inside up enough so printing with ABS shouldn't warp even on bigger models.
If the build envelop is say 20" x 20" x 24" (xyz), so a square delta and not a circle-based design, how much more room would be required by the two arms in the front?
|
Re: Re: RadRacer builds a "BerryBot3D" February 21, 2014 06:31PM |
Registered: 11 years ago Posts: 205 |
In order to print over the whole bed shown the head has to go out the front of the printer. What are the dimensions of that printer? What is the bed size? That Printer Dimensions/ That Bed size * Your Bed Size = Your printer size. The front to back distance will have to about equal the left to right dimension.
|
Re: Re: RadRacer builds a "BerryBot3D" February 21, 2014 06:40PM |
Registered: 11 years ago Posts: 205 |
By the way. You want to do 3D printing. Unless you want to only print stuff other people designed then you are going to need a program to produce 3D models. So really that should be your first purchase not the last. If you get that first you will be able to answer all your questions before you build stuff that won't work at all. "Ooh, if I had just made that part a 1/4" shorter the left over material could have made part B instead of buying another whole length I don't really need!" By time you actually get around to printing you will know enough to be able to model what you want. As you are building you may need parts you can't make. Drawings are the language that manufacturers speak. The more you can tell them about a part you need the likely cheaper it will be to have made. Better to find out your 'simple' part is going to cost $500 before you have a half built printer and can't finish!
So a 3D modeling program purchased first is likely to save you money. It's funny how often the what I have in my head can't actually be made in the real world!
So a 3D modeling program purchased first is likely to save you money. It's funny how often the what I have in my head can't actually be made in the real world!
|
Re: Re: RadRacer builds a "BerryBot3D" February 22, 2014 02:29AM |
Registered: 10 years ago Posts: 38 |
Quote
garyhlucas
By the way. You want to do 3D printing. Unless you want to only print stuff other people designed then you are going to need a program to produce 3D models. So really that should be your first purchase not the last. If you get that first you will be able to answer all your questions before you build stuff that won't work at all. "Ooh, if I had just made that part a 1/4" shorter the left over material could have made part B instead of buying another whole length I don't really need!" By time you actually get around to printing you will know enough to be able to model what you want. As you are building you may need parts you can't make. Drawings are the language that manufacturers speak. The more you can tell them about a part you need the likely cheaper it will be to have made. Better to find out your 'simple' part is going to cost $500 before you have a half built printer and can't finish!
So a 3D modeling program purchased first is likely to save you money. It's funny how often the what I have in my head can't actually be made in the real world!
garylucas: Are you actually trying to say that I need to know how to use 3D model software first before I can build a 3D printer and start printing stuff? That's like saying I need to know how to write code before I can put together a computer tower LOL.
Anyway, back to business.
Rad Racer: How did you determine the proper distance from the edge of the platen to the side of the aluminum profile you gave the control-arms attached to. Is there specific length for the CF rods or is the length ok as long as it reachs all sides of the platen?


Sorry, only registered users may post in this forum.