RadRacer builds a "BerryBot3D"
Posted by Rad Racer
|
RadRacer builds a "BerryBot3D" November 23, 2013 11:39PM |
Registered: 10 years ago Posts: 51 |
I had started building a Rostock machine when I stumbled upon Werner's design in this forum. I immediately changed coarse and started working on my own BarryBot....it's a fantastic design, minimal part count yet robust, perfect combination.
Perhaps I should introduce myself before I start rambling on about this build. I am electrical engineer by trade, been at it for about 25yrs. I also enjoy mechanical engineering, the two go together very well, electro-mechanical engineering I have a wife and 3 sons my oldest is working on his ME degree, the middle on his EE degree and my youngest is a student at MCAD with an eye toward photo journalism/conflict photography. I have built quite a few machine over the years(lasers, routers and a plasma cutter) but this is my first venture into 3D printing. I am excited about 3D printing this machine will nicely complement my other machines.
I also want to extend a big thank you to Werner Barry for the advice and guidance with this project.
Perhaps I should introduce myself before I start rambling on about this build. I am electrical engineer by trade, been at it for about 25yrs. I also enjoy mechanical engineering, the two go together very well, electro-mechanical engineering
I have a wife and 3 sons my oldest is working on his ME degree, the middle on his EE degree and my youngest is a student at MCAD with an eye toward photo journalism/conflict photography. I have built quite a few machine over the years(lasers, routers and a plasma cutter) but this is my first venture into 3D printing. I am excited about 3D printing this machine will nicely complement my other machines.I also want to extend a big thank you to Werner Barry for the advice and guidance with this project.
|
Re: RadRacer builds a "BerryBot3D" November 23, 2013 11:49PM |
Registered: 10 years ago Posts: 51 |
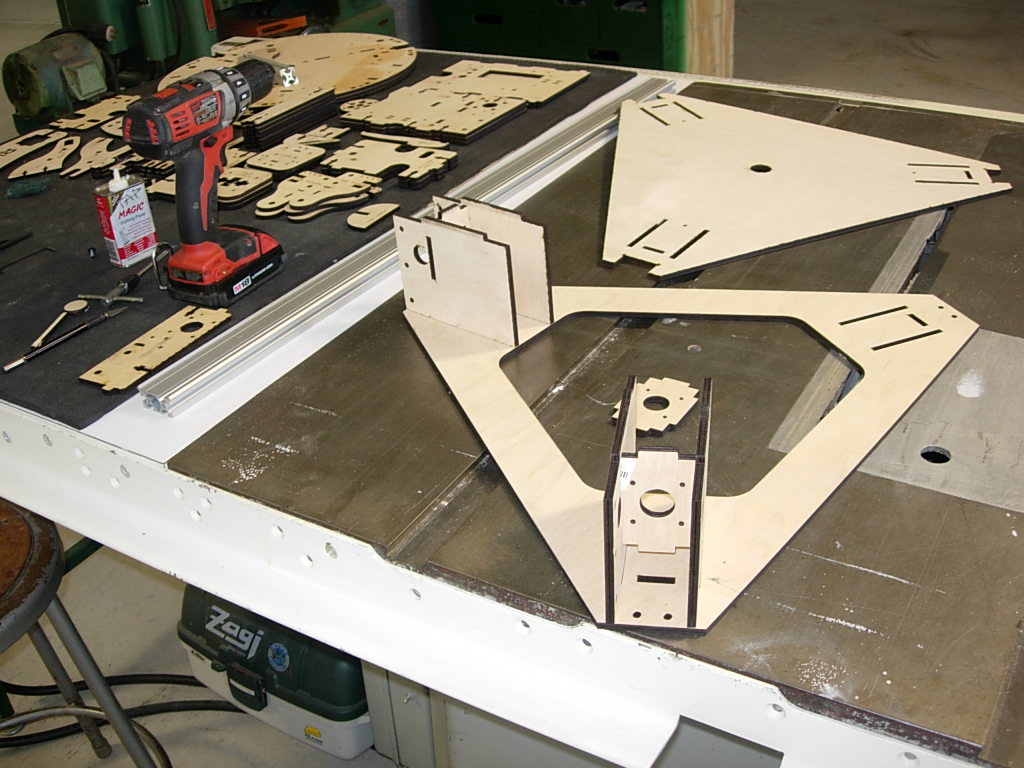
This first unit was cut from 1/4" plywood to prove out the design file. After a couple of tweaks I loaded the aluminum on the router and pressed go
|
Re: RadRacer builds a "BerryBot3D" November 23, 2013 11:52PM |
Registered: 10 years ago Posts: 51 |
|
Re: RadRacer builds a "BerryBot3D" November 23, 2013 11:57PM |
Registered: 10 years ago Posts: 51 |

|
Re: RadRacer builds a "BerryBot3D" November 24, 2013 02:50AM |
Registered: 13 years ago Posts: 1,797 |
|
Re: RadRacer builds a "BerryBot3D" November 24, 2013 03:52AM |
Registered: 11 years ago Posts: 1,171 |
|
Re: RadRacer builds a "BerryBot3D" November 24, 2013 11:14AM |
Registered: 10 years ago Posts: 27 |
|
Re: RadRacer builds a "BerryBot3D" November 24, 2013 12:23PM |
Registered: 10 years ago Posts: 51 |
Joseph,
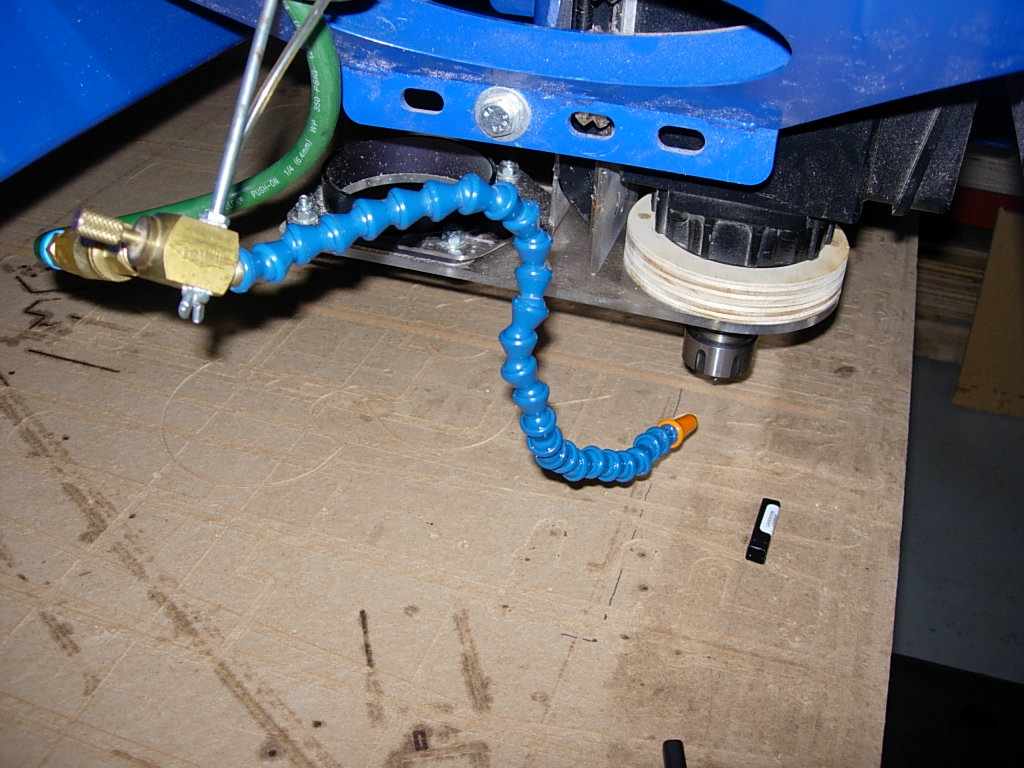
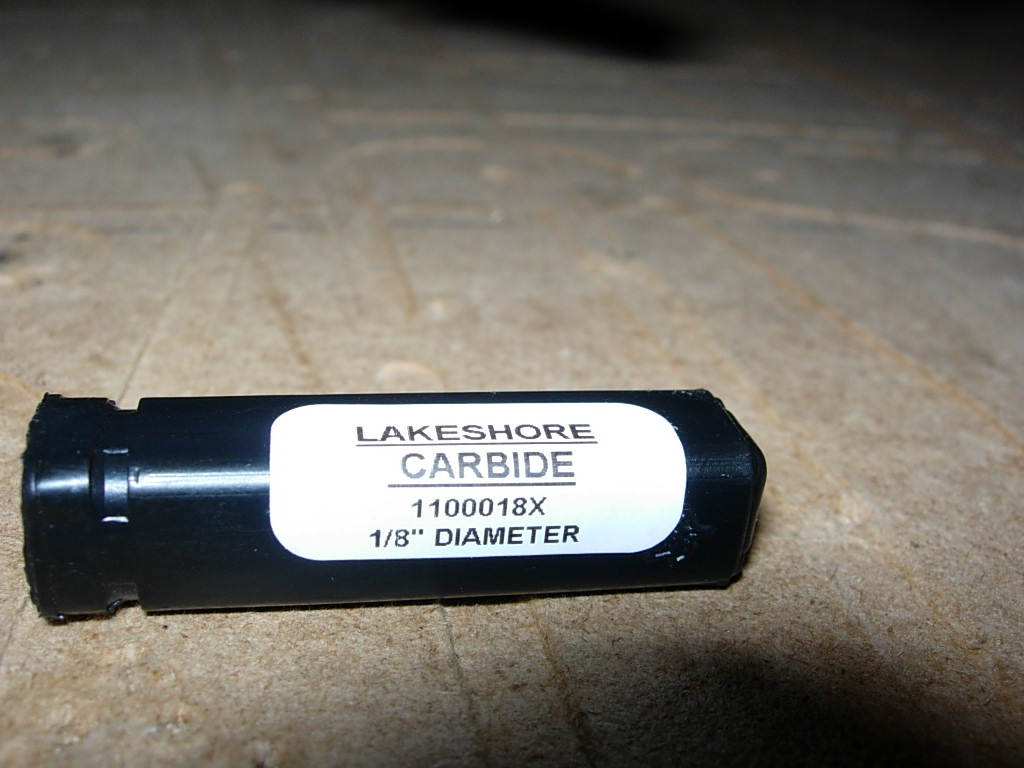
I am using a 1/8" carbide endmill. 25ipm @11500rpm, 2 pass cutting.
Werner pointed me to these USA made bits from Lakeshore Carbide, they work great and cost less than Onsrud or other brands.
The Trico mister is for lube and cooling, it works ok but creates a fog. Trico does make other units that work better....I am using this because it's what I have.
I plan to build a fogless coolant mister there is lots info available online.
Wayne
Edited 1 time(s). Last edit at 11/24/2013 12:24PM by Rad Racer.
|
Re: RadRacer builds a "BerryBot3D" November 24, 2013 02:56PM |
Registered: 10 years ago Posts: 36 |
|
Re: RadRacer builds a "BerryBot3D" November 26, 2013 01:08PM |
Registered: 10 years ago Posts: 106 |
|
Re: RadRacer builds a "BerryBot3D" November 26, 2013 08:07PM |
Registered: 10 years ago Posts: 51 |
ddseeker,
Although I do not have any details, I believe Werner has plans to provide design info and/or kits.....so followers can also build there very own BerryBot.
Angus
I appreciate the kind comment.
The shop is a work in progress....after 3yrs of work it is nearly complete. I built a few of the machines (laser, CNC router, dust collector) much of the other equipment was purchased via auctions or craigslist. Extremely high quality, US made equipment, for pennys on a dollar
Wayne
|
Re: RadRacer builds a "BerryBot3D" November 27, 2013 09:26PM |
Registered: 10 years ago Posts: 51 |
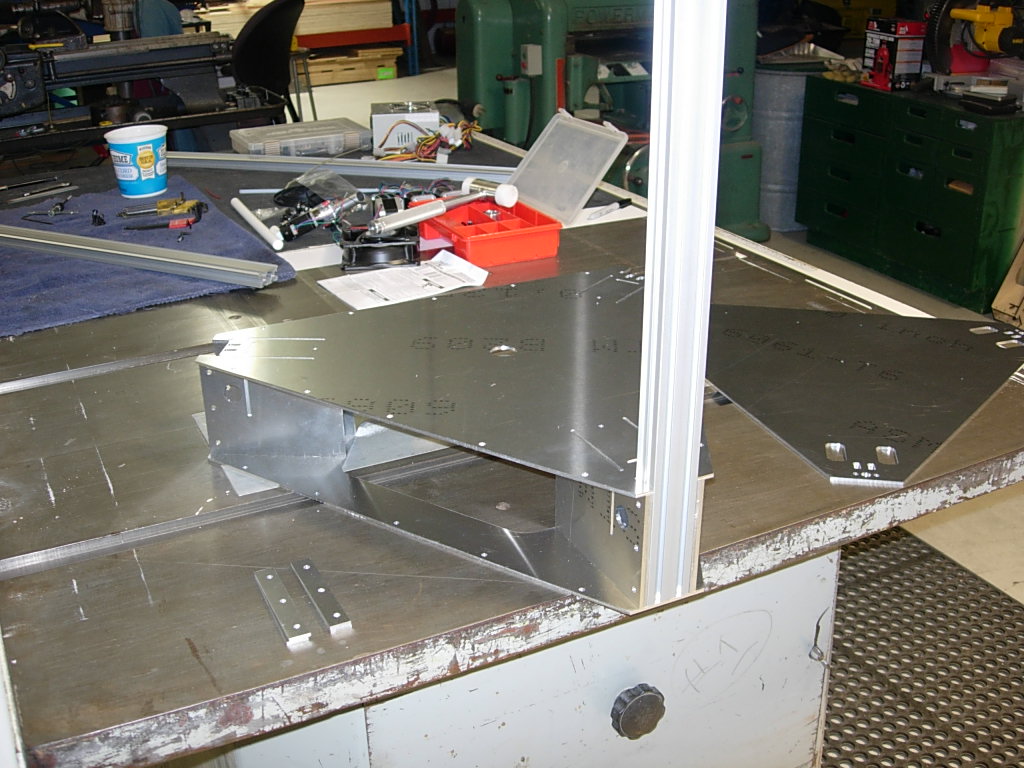
Made some progress in the last couple of days.....the base is welded, motors and slide rails installed.
My plan is to anodize the printer once all the parts are complete, so I also started to prep/clean the aluminum.
My plan is to anodize the printer once all the parts are complete, so I also started to prep/clean the aluminum.
|
Re: RadRacer builds a "BerryBot3D" November 28, 2013 02:57AM |
Registered: 10 years ago Posts: 1,381 |
@ Rad Racer
If it fits your budget, I would love to see the major components anodized gold with blue anodized fittings.
That's what I do on production equipment, looks cool!
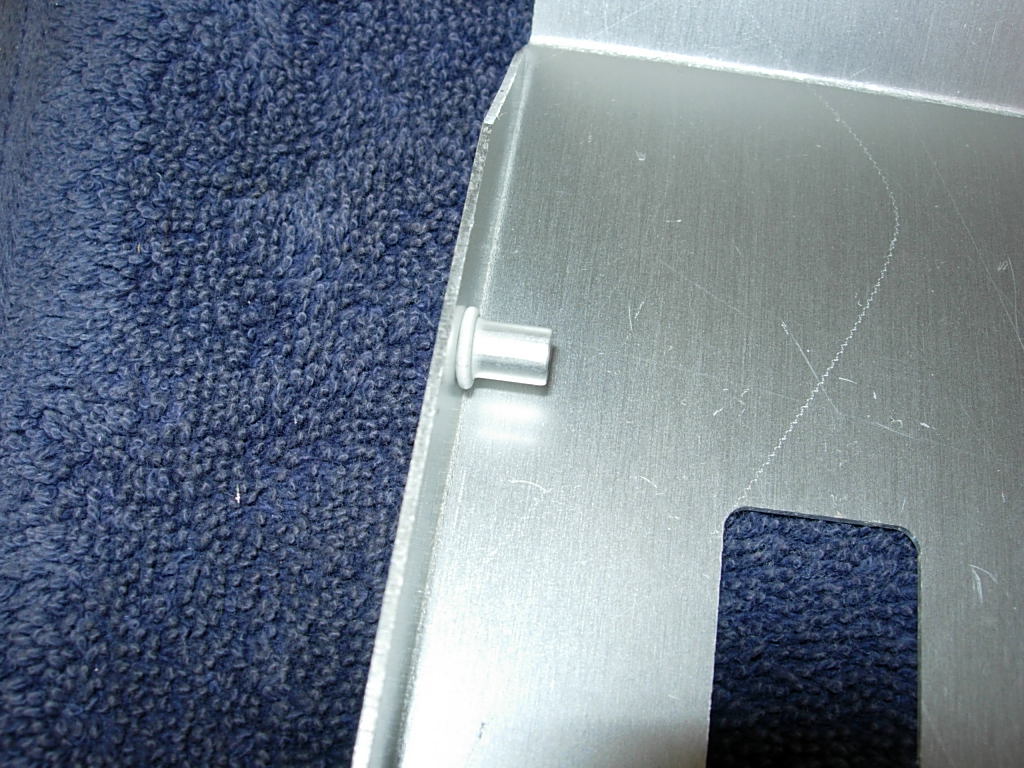
Be sure to plug threaded holes, and the like with plastic slugs.
Take a look at racing engines for color schemes.
Love the direction that you are taking! +1
A2
If it fits your budget, I would love to see the major components anodized gold with blue anodized fittings.
That's what I do on production equipment, looks cool!
Be sure to plug threaded holes, and the like with plastic slugs.
Take a look at racing engines for color schemes.
Love the direction that you are taking! +1
A2
|
Re: RadRacer builds a "BerryBot3D" November 30, 2013 07:55PM |
Registered: 10 years ago Posts: 51 |
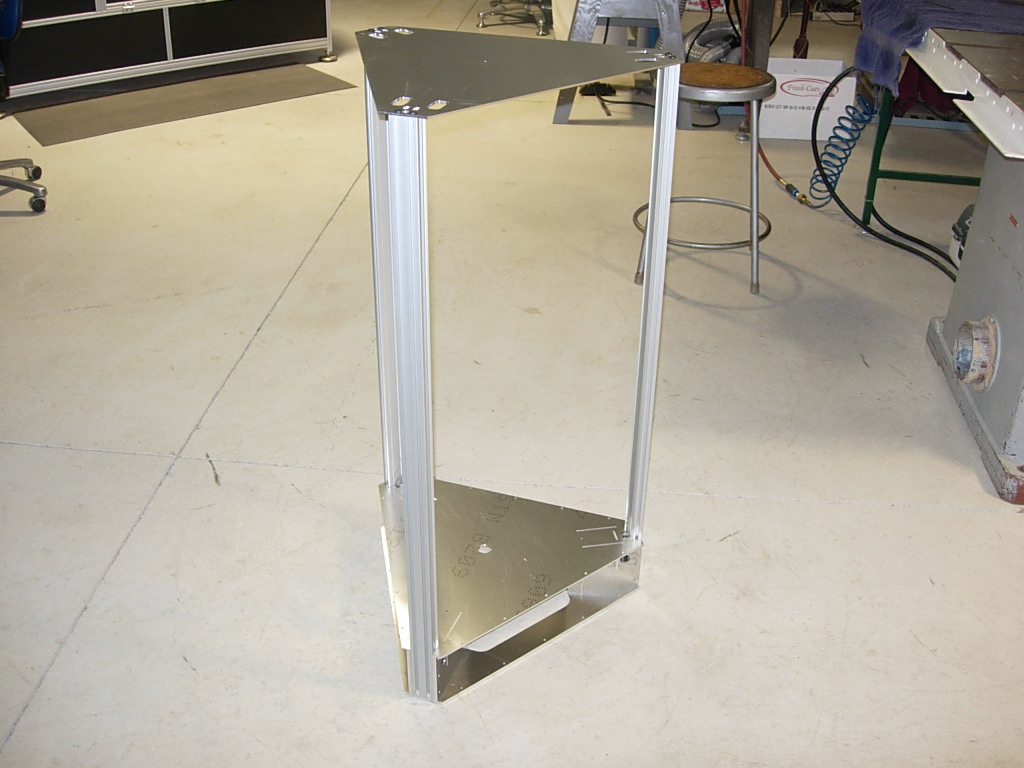
Made a few more parts today.....the assembly continues.
Tapping holes with a drill works great....it sure speeds up a time consuming process
Tapping holes with a drill works great....it sure speeds up a time consuming process
Attachments:
open | download - DSCN5303.JPG (201.3 KB)
open | download - DSCN5304.JPG (177.8 KB)
open | download - DSCN5305.JPG (171.8 KB)
open | download - DSCN5306.JPG (182.5 KB)
open | download - DSCN5307.JPG (184.3 KB)
open | download - DSCN5308.JPG (194.3 KB)
open | download - DSCN5309.JPG (175.9 KB)
open | download - DSCN5303.JPG (201.3 KB)
open | download - DSCN5304.JPG (177.8 KB)
open | download - DSCN5305.JPG (171.8 KB)
open | download - DSCN5306.JPG (182.5 KB)
open | download - DSCN5307.JPG (184.3 KB)
open | download - DSCN5308.JPG (194.3 KB)
open | download - DSCN5309.JPG (175.9 KB)
|
Re: RadRacer builds a "BerryBot3D" November 30, 2013 07:59PM |
Registered: 10 years ago Posts: 51 |
|
Re: RadRacer builds a "BerryBot3D" December 01, 2013 04:06PM |
Registered: 10 years ago Posts: 51 |
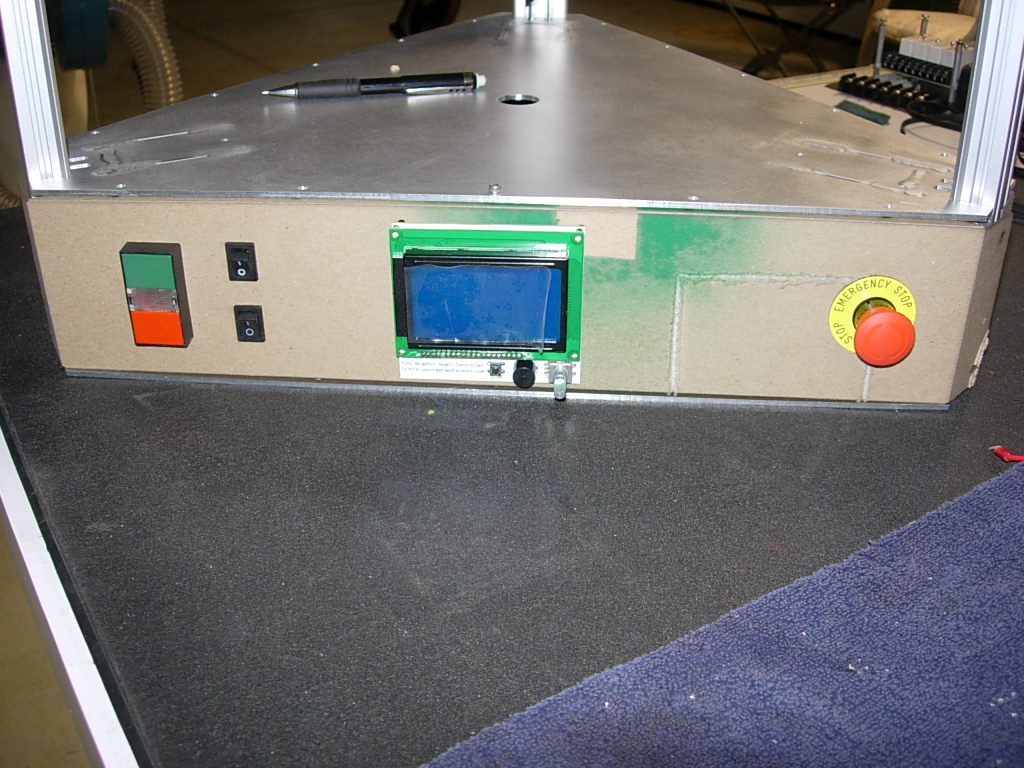
I mocked up the side panels using poster board.
This not only assures the panels will fit but gives you a chance to try the control locations before you commit to metal.
This not only assures the panels will fit but gives you a chance to try the control locations before you commit to metal.
|
Re: RadRacer builds a "BerryBot3D" December 01, 2013 07:17PM |
Registered: 10 years ago Posts: 51 |
Finished the side panels they fit perfect
|
Re: RadRacer builds a "BerryBot3D" December 01, 2013 08:09PM |
Registered: 10 years ago Posts: 1,381 |
|
Re: RadRacer builds a "BerryBot3D" December 02, 2013 08:21AM |
Registered: 10 years ago Posts: 51 |
With CNC cut components much of the alignment is built-in, shims can be used to tweak any positional errors. To verify platen planarity I will mount a dial indicator to the head assembly. I believe the firmware (Marlin, Spriter, etc...) has calibration algorithms that can also be used...I have not looked into this yet so I am not sure how or if this can be used to align the machine.
|
Re: RadRacer builds a "BerryBot3D" December 02, 2013 09:39AM |
Registered: 10 years ago Posts: 106 |
Great progress pictures!
Regarding the side panels, I was thinking to use flat panels and mounting with angled brackets to avoid having to form panels. I was wondering if the side panels actually were a major part of the bases structural integrity or simply more of just face plates. Understanding they add to the rigidity of the base, but without them do you think you would lose stability?
Regarding the side panels, I was thinking to use flat panels and mounting with angled brackets to avoid having to form panels. I was wondering if the side panels actually were a major part of the bases structural integrity or simply more of just face plates. Understanding they add to the rigidity of the base, but without them do you think you would lose stability?
|
Re: RadRacer builds a "BerryBot3D" December 02, 2013 09:54AM |
Registered: 10 years ago Posts: 1,381 |
You have a lot time and energy invested in your printer (work of industrial art).
I would like to see how accurate your machine can print, but you may have other goals in mind.
So disregard my suggestion, but maybe some one reading your thread might find this interesting.
Regardless of how accurate you have fabricated the components, the assembly will not be ideal, especially with the projection error
(dimensional inaccuracy increase the further you move away from the platen).
At present I'm unsure of a technique for calibrating the upper reaches of the print envelope that the average person can utilize at home,
I'm still thinking about it. But here is a technique to calibrate (tram) the lower portion of the print envelope.
Tramming is the squareness of your mill head to the table.
[www.cnccookbook.com]
Idea to tram the lower portion of the print envelope:
Cut off the gear box to a Briggs Stratton engine or a motorcycle cylinder/jug.
Utilize the cylinder as a precision cylindrical square.
How to:
Place the cylinder head side down onto the platen.
Sweep the lower section of the cylindrical bore with a dial test indicator.
Then move to the top of the bore and sweep the bore.
Make adjustments to your supper structure as required.
Edited 1 time(s). Last edit at 12/02/2013 09:55AM by A2.
I would like to see how accurate your machine can print, but you may have other goals in mind.
So disregard my suggestion, but maybe some one reading your thread might find this interesting.
Regardless of how accurate you have fabricated the components, the assembly will not be ideal, especially with the projection error
(dimensional inaccuracy increase the further you move away from the platen).
At present I'm unsure of a technique for calibrating the upper reaches of the print envelope that the average person can utilize at home,
I'm still thinking about it. But here is a technique to calibrate (tram) the lower portion of the print envelope.
Tramming is the squareness of your mill head to the table.
[www.cnccookbook.com]
Idea to tram the lower portion of the print envelope:
Cut off the gear box to a Briggs Stratton engine or a motorcycle cylinder/jug.
Utilize the cylinder as a precision cylindrical square.
How to:
Place the cylinder head side down onto the platen.
Sweep the lower section of the cylindrical bore with a dial test indicator.
Then move to the top of the bore and sweep the bore.
Make adjustments to your supper structure as required.


Edited 1 time(s). Last edit at 12/02/2013 09:55AM by A2.
|
Re: RadRacer builds a "BerryBot3D" December 02, 2013 12:35PM |
Registered: 11 years ago Posts: 205 |
I have one of these in 9"x9"x9". I bought it off Ebay for $60, I never looked at the prices for these things before. $60 fit my budget, I am guessing I got a really good deal! Interestingly the hand scraped 24" x 24" cast iron surface plate I got at a scrap yard is really flat too. When I set the granite block on it the block slid on air before stopping, then was difficult to pick up because you had to break the vacuum.
I have often mentioned here before that if you build a machine like this you ought to own a dial indicator. It is the basic setup tool for machinery.
Edited 1 time(s). Last edit at 12/02/2013 12:38PM by garyhlucas.
I have often mentioned here before that if you build a machine like this you ought to own a dial indicator. It is the basic setup tool for machinery.
Edited 1 time(s). Last edit at 12/02/2013 12:38PM by garyhlucas.
|
Re: RadRacer builds a "BerryBot3D" December 02, 2013 09:16PM |
Registered: 10 years ago Posts: 51 |
ddseeker - I recommend adding formed side panels if possible they add noticeable rigidity to the structure.
You can always visit your local HVAC company I am sure they will have a break big enough for this job.....although it might cost you a case of beer
A2 - I appreciate the tramming advise. I trammed CNC router by chucking up a dial indicator and sweeping it on the spill board making the necessary adjustments to the spindle mount.
Seems like a similar approach may work for the lower part of the print envelop.
Gary - Agree a dial indicator is one of the more useful tools. Here's a photo of some of my favorite tools.
Edited 1 time(s). Last edit at 12/02/2013 09:20PM by Rad Racer.
|
Re: RadRacer builds a "BerryBot3D" December 02, 2013 09:44PM |
Registered: 10 years ago Posts: 51 |
Speaking of tools....for most projects I find myself building (or buying) tools for specific tasks. (Actually building tools can be just as rewarding as building machines )
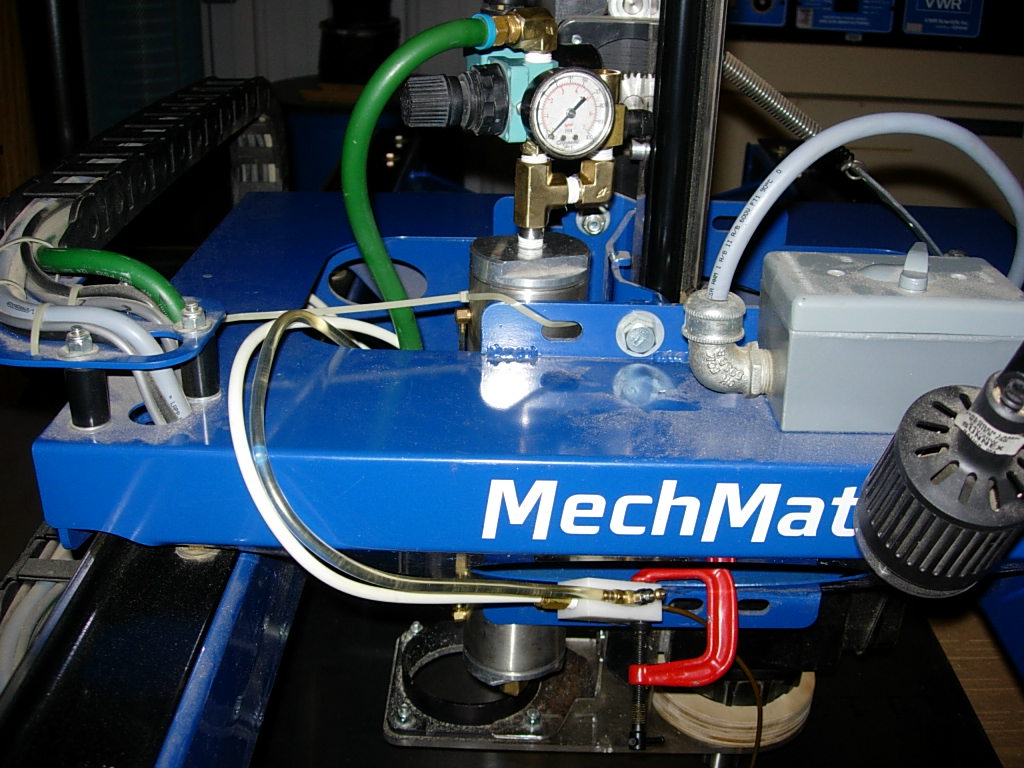
For this 3D project I needed a better coolant/lube system to cut aluminum, my original system created a fog or vapor that looked really unhealthy. A few quick goggle searches and I stumbled on a older fogless design that looked promising. A little digging in the junk box yielded the required plumbing parts, a small block of delrin and a bit of millwork and the mixer was complete. It works really good......no more mist, life is good.
I also made a press for dimple squeezing....although the press is not good to 20 tons, it does work surprisingly well for just being made of wood.
)For this 3D project I needed a better coolant/lube system to cut aluminum, my original system created a fog or vapor that looked really unhealthy. A few quick goggle searches and I stumbled on a older fogless design that looked promising. A little digging in the junk box yielded the required plumbing parts, a small block of delrin and a bit of millwork and the mixer was complete. It works really good......no more mist, life is good.
I also made a press for dimple squeezing....although the press is not good to 20 tons, it does work surprisingly well for just being made of wood.
|
Re: RadRacer builds a "BerryBot3D" December 10, 2013 10:25PM |
Registered: 11 years ago Posts: 381 |
I had to say, great work buddy. I am quite impressed with the attention to detail. Keep up the good work..
--------------| For Everything |--------------------------
Check it out here:
[reprapsquad.wordpress.com].
---------| For Everything Prototype Related |------
Now featuring comp case mods:
[RepRapLab.wordpress.com]
--------------| Find us at Twitter|------------------------
@REPRAPSQUAD (RS Main)
[mobile.twitter.com]
@REPRAPSQUADHQ (ProtoLab)
[mobile.twitter.com]
|
Re: RadRacer builds a "BerryBot3D" December 15, 2013 04:39PM |
Registered: 10 years ago Posts: 51 |
Thanks RS, glad you like the build.
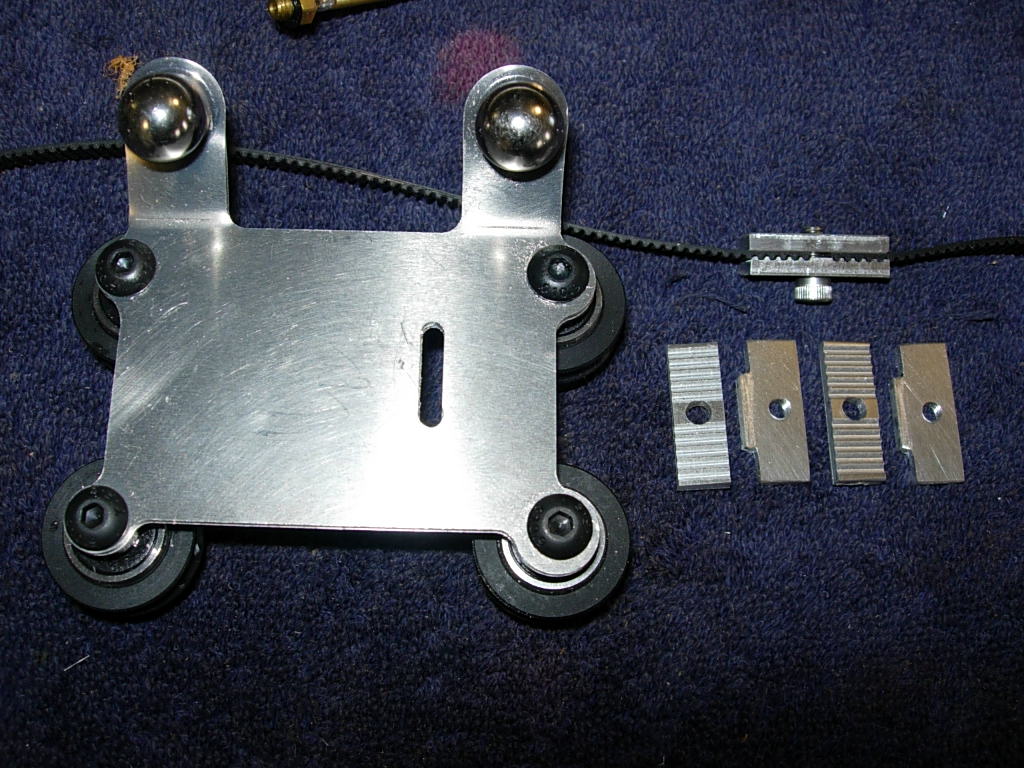
After spending a few days with the electronics, I am back at the build. This morning I installed the home-built mister it works good, really happy with the cut results.
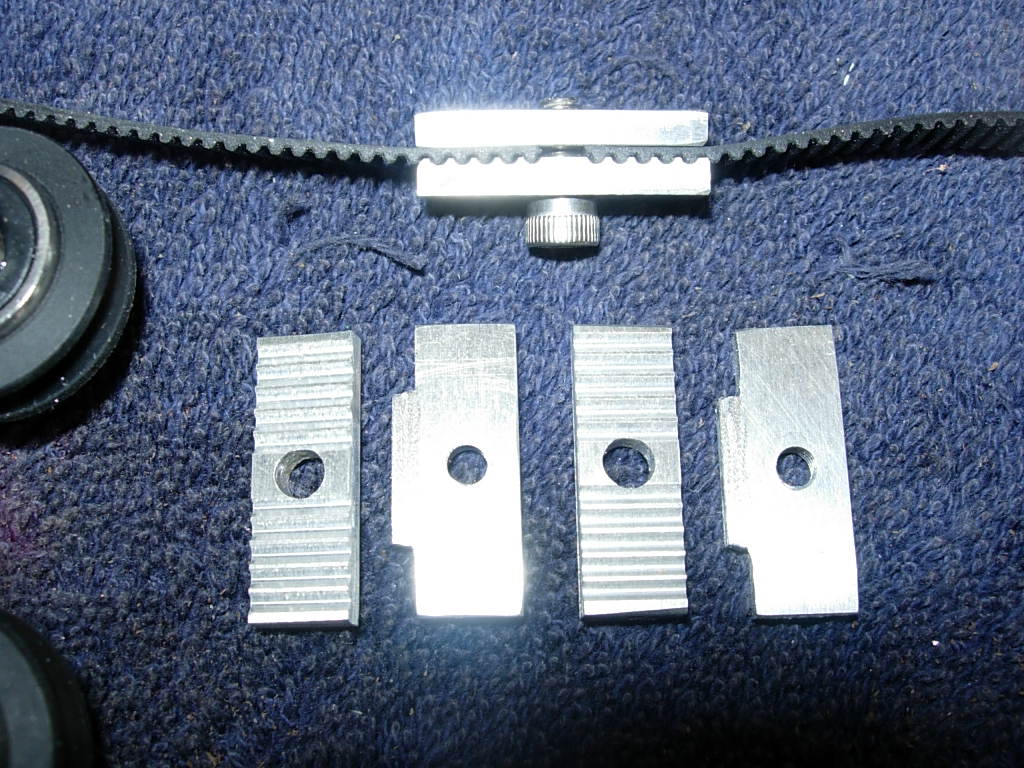
To test the mister I cutout the belt clamps. The clamp grooves were made with a 1/16" ball endmill, the rest was cut the an 1/8" endmill....the belt fits nice
After spending a few days with the electronics, I am back at the build. This morning I installed the home-built mister it works good, really happy with the cut results.
To test the mister I cutout the belt clamps. The clamp grooves were made with a 1/16" ball endmill, the rest was cut the an 1/8" endmill....the belt fits nice
|
Re: RadRacer builds a "BerryBot3D" December 27, 2013 02:21PM |
Registered: 10 years ago Posts: 51 |
|
Re: RadRacer builds a "BerryBot3D" December 27, 2013 02:25PM |
Registered: 10 years ago Posts: 51 |
|
Re: RadRacer builds a "BerryBot3D" December 28, 2013 04:07PM |
Registered: 10 years ago Posts: 106 |
|
Re: RadRacer builds a "BerryBot3D" January 01, 2014 09:26AM |
Registered: 10 years ago Posts: 51 |
Nearing the finish line, should be able to print today.....the first day of the new year
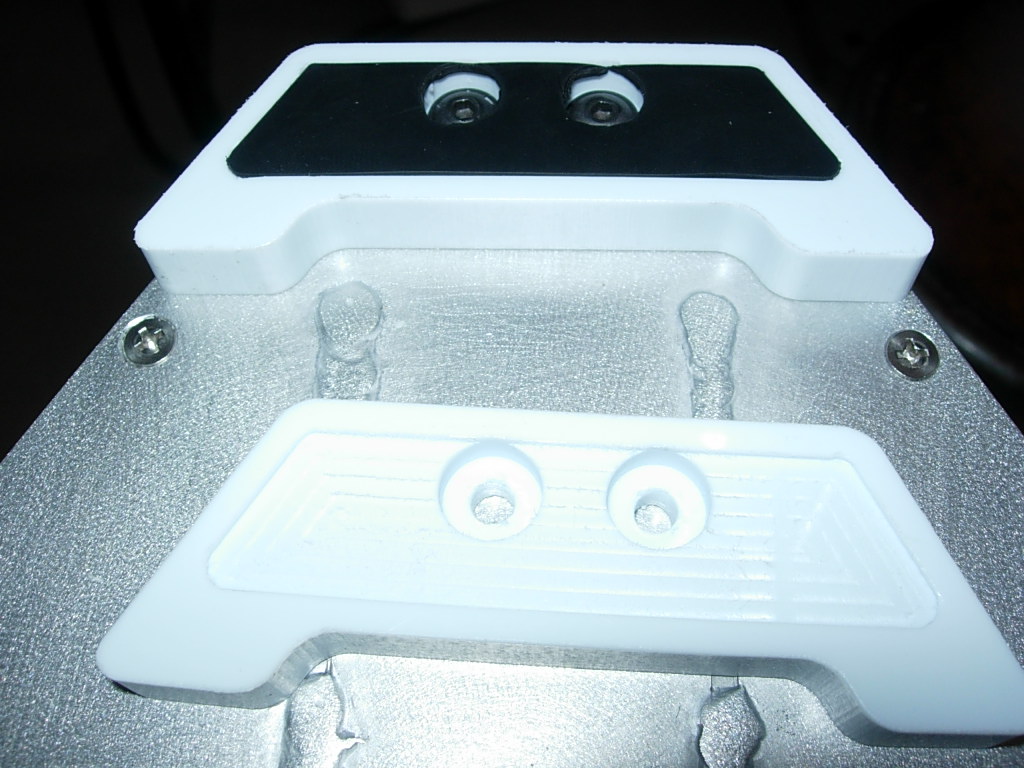
Yes, I am making a platen heater like Warner's. These photos show the machined insulator....I tested the spiral pattern in some MDF before making the actual part. Although testing cut files takes extra time....it sure saves on scrap. The Ni-chrome wire was wound using a lathe.
I also machined the end effector parts I will post photos as the hot end is assembled.
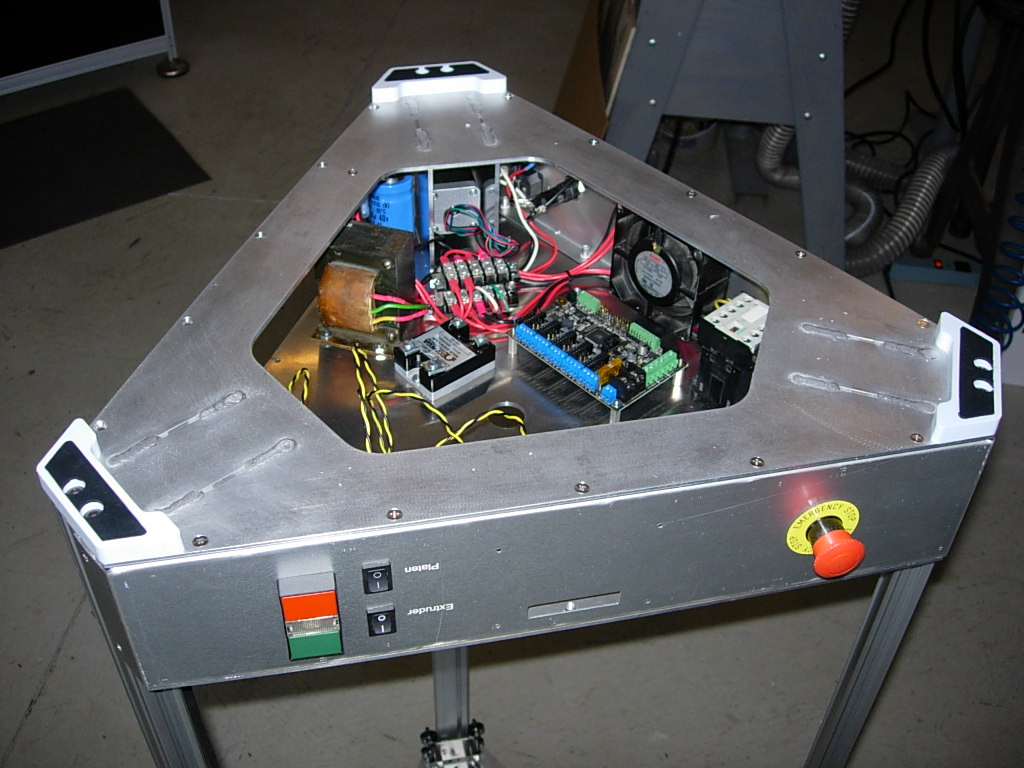
I can post a schematic of the wiring if there is interest. I use a soft-start, self latching, relay system for the main system power in all my machines. It's probably a little overkill for the printer but I like the fact that main power is automatically cut if there are any glitches in the incoming supply (blackouts, brownouts, spikes, etc...) This assures the machine is off and the controller, heaters and motors don't come up in some wonky state while unattended.
Happy New Year!
Wayne
Yes, I am making a platen heater like Warner's. These photos show the machined insulator....I tested the spiral pattern in some MDF before making the actual part. Although testing cut files takes extra time....it sure saves on scrap. The Ni-chrome wire was wound using a lathe.
I also machined the end effector parts I will post photos as the hot end is assembled.
I can post a schematic of the wiring if there is interest. I use a soft-start, self latching, relay system for the main system power in all my machines. It's probably a little overkill for the printer but I like the fact that main power is automatically cut if there are any glitches in the incoming supply (blackouts, brownouts, spikes, etc...) This assures the machine is off and the controller, heaters and motors don't come up in some wonky state while unattended.
Happy New Year!
Wayne

Sorry, only registered users may post in this forum.